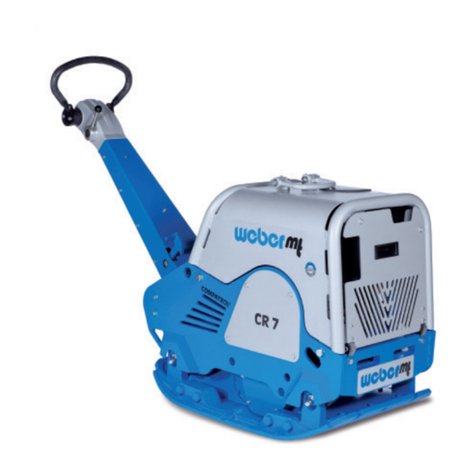
Power Fist 9033598 User manual

V4.1 9033598
Please read and understand all instructions before use. Retain this manual for
future reference.
User Manual
212cc Single
Plate Compactor

9033598 212cc Single Plate Compactor V4.1
2 For technical questions call 1-800-665-8685
SPECIFICATIONS
Engine type
Ducar DH212
Max. speed rating
3,600 RPM
Idle speed rating
1,500 RPM
Horsepower
7 HP
Vibration frequency
5,500 VPM
Travel speed
65 ft/min.
Compaction force
3,950 lb
Compaction depth
20 in.
Compaction area/hour
6,706 sq. ft
Compacting plate dimensions
21-1/2 x 17.7 in.
Spark plug
F72C
Spark plug gap
0.028 ˜ 0.03 in.
Air filter
Paper and foam
Oil type
SAE 10W-30
Oil capacity
0.63 L
Fuel type
Regular unleaded gasoline
Fuel capacity
3.8 L
Overall dimensions
37.85 x 17.8 x 41.37 in.
Weight
198 lb
Material
Steel and rubber
Finish
Powder coated
212cc Single
Plate Compactor

V4.1 212cc Single Plate Compactor 9033598
Visit www.princessauto.com for more information 3
INTRODUCTION
Compact granular soils, crushed aggregate, sand, asphalt and other materials
with this plate compactor. It features a powerful 212cc gas engine and powder-
coated steel construction and includes paving pad and 4 in wheel kit.
SAFETY
WARNING! Read and understand all instructions before using this tool. The
operator must follow basic precautions to reduce the risk of personal injury
and/or damage to the equipment.
Keep this manual for safety warnings, precautions, operating or inspection and
maintenance instructions.
HAZARD DEFINITIONS
Please familiarize yourself with the hazard notices found in this manual. A notice
is an alert that there is a possibility of property damage, injury or death if certain
instructions are not followed.
DANGER! This notice indicates an immediate and specific hazard that will
result in severe personal injury or death if the proper precautions
are not taken.
WARNING! This notice indicates a specific hazard or unsafe practice that
could result in severe personal injury or death if the proper
precautions are not taken.
CAUTION! This notice indicates a potentially hazardous situation that may result
in minor or moderate injury if proper practices are not taken.
NOTICE! This notice indicates that a specific hazard or unsafe practice will
result in equipment or property damage, but not personal injury.
WORK AREA
1. Operate in a safe work environment. Keep your work area clean, well-lit
and free of distractions. Place lights so you are not working in a shadow.
2. Keep anyone not wearing the appropriate safety equipment away from the
work area.

9033598 212cc Single Plate Compactor V4.1
4 For technical questions call 1-800-665-8685
3. Store unused tools properly in a safe and dry location to prevent rust or
damage. Lock tools away and keep out of the reach of children.
PERSONAL SAFETY
WARNING! Wear personal protective equipment approved by the Canadian
Standards Association (CSA) or American National Standards Institute (ANSI).
PERSONAL PROTECTIVE EQUIPMENT
1. Always wear impact safety goggles that provide front and side protection
for the eyes. Eye protection equipment should comply with CSA Z94.3-07
or ANSI Z87.1 standards based on the type of work performed.
2. Wear the appropriate type of full-face shield in addition to safety googles,
as the work can create chips, abrasive or particulate matter.
3. Wear gloves that provide protection based on the work materials or to
reduce the effects of tool vibration.
4. Wear protective clothing designed for the work environment and tool.
5. Non-skid footwear is recommended to maintain footing and balance in the
work environment.
PERSONAL PRECAUTIONS
Control the tool, personal movement and the work environment to avoid
personal injury or damage to tool.
1. Do not operate any tool when tired or under the influence of drugs, alcohol
or medications.
2. Avoid wearing clothes or jewelry that can become entangled with the
moving parts of a tool. Keep long hair covered or bound.
3. Do not overreach when operating a tool. Proper footing and balance
enables better control in unexpected situations.
4. Support the workpiece or clamp it to a stable platform. Holding the
workpiece by hand or against your body may lead to personal injury.
5. Securely hold this tool using both hands. Using a tool with only one hand
can result in loss of control.

V4.1 212cc Single Plate Compactor 9033598
Visit www.princessauto.com for more information 5
SPECIFIC SAFETY PRECAUTIONS
WARNING! DO NOT let comfort or familiarity with product (gained from
repeated use) replace strict adherence to the tool safety rules. If you use
this tool unsafely or incorrectly, you can suffer serious personal injury.
1. Use the correct tool for the job. This tool was designed for a specific function.
Do not modify or alter this tool or use it for an unintended purpose.
2. Do not use the tool if any parts are damage broken or misplaced. Repair or
replace the parts.
UNPACKING
WARNING! Do not operate the tool if any part is missing. Replace the
missing part before operating. Failure to do so could result in a malfunction
and personal injury.
Remove the parts and accessories from the packaging and inspect for damage.
Make sure that all items in the parts list are included.
OPERATION
Numbered references in parenthesis (#1) refer to the included Parts List.
Dashed numbers in parenthesis (Fig. 1-1) refer to a specific point in an
illustration or image.
Before using the tool, read and understand the safety and operating instructions
in the owner’s manual.
Check the following before each use:
• Oil level in engine
• Fuel level
• Condition of air cleaner
• Tightness of external fasteners
• Condition of fuel lines
• All bolts, nuts and belts, tightening as needed
• General condition of the plate compactor
• Cleanliness of the compactor and its components

9033598 212cc Single Plate Compactor V4.1
6 For technical questions call 1-800-665-8685
The compactor does not operate optimally on clay or moist soil. Moist soils
may require compaction to be performed twice.
Travel speed may slow down on soils that contain clay, and there may be cases
where the vibrator/compactor plate does not leave the surface easily due to the
composition of the soil.
To correct this problem, accomplish the
following, turn off the compactor and check the
vibrator plate to see if clay or other materials
have been lodged in the mechanism. If so, clean
with water and remove the material.
HANDLE ADJUSTMENT
To adjust the handle, accomplish the following
(Fig. 1):
1. Loosen the knob handles (Fig. 1-1) found
on each side of the upper handle (Fig. 1-2).
2. Swing the upper handle until it points
straight outwards from the lower handle (Fig. 1-3).
3. Securely tighten both the knob handles.
STARTING THE ENGINE
1. Open the fuel valve by moving the lever to the right (Fig. 2).
a. If the engine is cold, move the choke lever to the “close” position
(Fig. 3-1). If the engine is hot, move the choke lever to the “open”
position (Fig. 3-2).
Fig. 1
Fig. 2
Fig. 3

V4.1 212cc Single Plate Compactor 9033598
Visit www.princessauto.com for more information 7
2. Turn the on/off switch to the “on” position
(Fig. 4-1).
3. Pull the starter rope (Fig. 5).
a. If the oil level in the engine is low, the
engine will not start. If it doesn’t start,
add oil to the engine. Some engines are
equipped with an oil alert light that will
illuminate when the starter rope is
pulled.
4. Open the choke as the engine warms up
(Fig. 3-2).
USING THE TOOL
1. Open the throttle to operate.
a. Whenever high-speed operation (over
3,600 RPM) is not required, slow the
engine by moving the speed control
lever to a low position to save fuel and wear.
2. Firmly grasp the plate compactor’s handle bar with one hand and then
quickly turn the throttle lever to high speed. The engine, at this point,
should be around 2,300 RPM and will therefore engage the centrifugal
clutch.
a. Always move the throttle quickly. Increasing the engine speed slowly
will cause the clutch to slip.
3. Firmly grasp the plate compactor’s handle bar with both hands as it begins
to move forward.
4. Walk behind the tool, watching for any large objects for foreign matter that
might cause damage to the compactor or shoot out and cause bodily
harm.
a. If objects are in the travel path, slow the engine (stopping compactor
travel) and remove the object before proceeding.
Fig. 4
Fig. 5

9033598 212cc Single Plate Compactor V4.1
8 For technical questions call 1-800-665-8685
STOPPING THE ENGINE
1. Slow the engine to idle by turning the accelerator level fully
counterclockwise.
2. Turn the on/off switch to the “off” position (Fig. 4-2).
3. Close the fuel valve.
PAVING PAD
This compactor comes equipped with a paving
pad. When using this compactor on gravel or
granular surfaces, remove the paving pad
before operating.
To install the paving pad, accomplish the
following:
1. Attach the pad to the bottom plate at the
back using the 4 M8*30 bolts and the 2
short trim strips (Fig. 6-1).
2. Use the 4 M8*30 bolts and the single
short trim strip to attach the pad to the
bottom plate at the front (Fig. 7-1).
To remove the paving pad, accomplish the
following:
1. Loosen all the nuts and bolts and remove the trim strips.
2. Pull off the paving pad.
3. Store in a dry, level and well-ventilated area out of the reach of children
until next use.
Fig. 6
Fig. 7

V4.1 212cc Single Plate Compactor 9033598
Visit www.princessauto.com for more information 9
WHEEL KIT
This compactor comes equipped with a 4 in.
wheel kit. To install the paving pad, accomplish
the following:
1. Place the wheel kit behind the compactor
(Fig. 8).
2. Angle the compactor at 20° and direct the hook of the wheel kit to
the middle of the bottom plate (Fig. 9).
3. Place the hook of the wheel kit into the middle hole. Push the wheel under
the bottom plate (Fig. 10).
4. Press the plate compactor’s handle to raise the bottom plate so the wheel
kit moves forward (Fig. 11).
CARE & MAINTENANCE
WARNING! Check that the plate compactor engine is turned off and cooled
before attempting any maintenance, cleaning or inspection.
1. Maintain the tool with care. A tool in good condition is efficient, easier to
control and will have fewer problems.
2. Inspect the tool components periodically. Repair or replace damaged or
worn components. Only use identical replacement parts when servicing.
3. Follow instructions for lubricating and changing accessories.
4. Only use accessories intended for use with this tool.
Fig. 8
Fig. 9
Fig. 10
Fig. 11

9033598 212cc Single Plate Compactor V4.1
10 For technical questions call 1-800-665-8685
5. Keep the tool handles clean, dry and free from oil/grease at all times.
6. Regularly clean out the area around the spark plug.
7. Regularly apply a thin coat of rust preventative oil to all metal parts.
8. Maintain the tool’s labels and name plates. These carry important information.
If unreadable or missing, contact Princess Auto Ltd. for replacements.
WARNING! Only qualified service personnel should repair the tool. An
improperly repaired tool may present a hazard to the user and/or others.
CLEANING
Clean the tool using a dry cloth. Do not clean with water as this can cause rust
damage.
WARNING! Do not attempt to clean tool immediately after use or any other
time the engine is heated.
MAINTENANCE SCHEDULE
CHANGING THE V-BELT
1. Turn off the engine.
2. Remove the belt cover (#26).
3. Loosen but do not remove the four nuts (#40) that hold the engine (#01) to
the engine support plate (#32).
4. Using a nut (#33) and bolt (#34), slide the engine towards the driver pulley
(#13 in Vibratory Housing Assembly) until the belt (#39) can be removed.
5. Remove the old belts and then install new ones.
Maintenance
Interval
Check for loose or missing screws
Every 8 hours (every day)
Check for damaged parts Every 8 hours (every day)
Check throttle cable assembly bolts
Every 8 hours (every day)
Vibrator oil check
Every 100 hours
Vibrator oil replacement
Every 300 hours
V-belt check
Every 200 hours

V4.1 212cc Single Plate Compactor 9033598
Visit www.princessauto.com for more information 11
6. Check the alignment of the two pulleys (side by side in the same
level/surface).
7. Using the nut and bolt, slide engine away from driver pulley until the belt is
properly tensioned.
8. Re-tighten the four nuts that hold the engine to the engine support plates.
9. Install the belt cover with a hexagon bolt (#23), spring washer (#24), flat
washer (#25).
LUBRICATION
Inspect and lubricate the tool when required. Only use light oil to lubricate the
tool. Other lubricants may not be suitable and could damage the tool or cause a
malfunction during use.
1. Remove the spark plug and pour one tablespoon of engine oil into the
cylinder through the spark plug hole.
2. Replace the spark plug, but leave the spark plug cap disconnected.
3. Pull the starter handle to distribute oil to the cylinder.
4. Pull the recoil starter until you feel resistance.
a. This is when the piston is on the compression stroke where the intake
and exhaust valves are closed.
b. Keeping the intake and exhaust valves closed will prevent moisture
from entering the combustion chamber, protecting against rust.
CHANGING THE VIBRATOR OIL
1. Run the machine for approximately two
minutes to allow the oil to warm-up.
2. Remove the oil drainage bolt from the
vibrator housing assembly (Fig. 12).
3. Place a container to receive waste oil below
the oil drainage port, tilt the equipment
body forward and pour out the waste oil
from the oil drainage port.
4. Lower the equipment body back to the ground.
Fig. 12

9033598 212cc Single Plate Compactor V4.1
12 For technical questions call 1-800-665-8685
5. Add about 200 ml (0.05gal) of new engine oil through the oil drainage port.
Use a funnel to avoid spills.
6. Screw the Install and lock Oil drainage bolt.
STORAGE
When not in use for an extended period, which is defined as more than 20 days,
accomplish the following:
• Store in a dry, level and well-ventilated area that is away from any ignition
sources, such as water heaters, clothes dryers and furnaces
• Store out of the reach of children
• Cover the tool
• Apply a thin coat of lubricant to the steel parts to avoid rust. Remove the
lubricant before using the tool again
• Fill the tank with gasoline that has been treated with a fuel stabilizer
additive
REMOVAL FROM STORAGE
Before starting the engine, keep in mind that untreated gasoline will deteriorate
quickly. If the tool has been sitting for longer than a month, if the treated
gasoline has been sitting longer than the fuel stabilizer’s recommended time
period, or if the engine does not start, drain the tank and fill with fresh fuel.
DISPOSAL
Recycle a tool damaged beyond repair at the appropriate facility.
Contact your local municipality for a list of disposal facilities or by-laws for
electronic devices, batteries, oil or other toxic liquids.
IMPORTANT! DO NOT pollute the environment by allowing uncontrolled
discharge of waste oil.

V4.1 212cc Single Plate Compactor 9033598
Visit www.princessauto.com for more information 13
TROUBLESHOOTING
Visit a Princess Auto Ltd. location for a solution if the tool does not function
properly or parts are missing. If unable to do so, have a qualified technician
service the tool.
Problem(s)
Possible Cause(s)
Suggested Solution(s)
Motor will not
start
1. Switch
2. Fuel
3. Oil level
4. Spark plug
5. Carburateur
1. Check ON/OFF switch to
ensure tool is switched on
2. Check fuel supply
3. If a motor is fitted, check the
crankcase oil level, as an oil
sensor device is fitted to the
moto, which prevents
starting and stopping when
the oil level is low
4. Ensure spark plug ignition
lead is connected
5. Check carburateur jet and
bowl to ensure they’re clean
Motor stops 1. Fuel
2. Fuel cock
3. Air filter
1. Check fuel supply
2. Ensure fuel cock is turned on
3. Check condition of air filter
Motor lacks
power
1. Air filter
2. Spark plug
1. Check condition of air filter
2. Check condition of spark
plug
Insufficient
vibration
1. Belt
2. Motor speed
1. Check for slipping or missing
belt
2. Check that motor’s governed
speed is 3,500 r/min.
Machine is not
moving freely
1. Plate underside
1. Check underside of plate for
material buildup

9033598 212cc Single Plate Compactor V4.1
14 For technical questions call 1-800-665-8685
PARTS BREAKDOWN
PLATE COMPACTOR
#
DESCRIPTION
1
Engine
3
Clutch assembly
11
Lower handle
13
Upper handle
14
Throttle line assembly
18
Handle damper
26
Belt cover
31
Bottom plate
32
Engine support plate
35
Vibrator unit
39
Belt

V4.1 212cc Single Plate Compactor 9033598
Visit www.princessauto.com for more information 15
BASE PLATE
#
DESCRIPTION
QTY
SPEC
8
Enlarged flat gasket
6
12*35
19
Flat gasket
2
Ø 12
27
Locked nut
6
M12
28
Shock absorber
4
50*60
29
Spring gasket
4
Ø 12
30
Nut
4
M12
31
Bottom plate
1
540*450

9033598 212cc Single Plate Compactor V4.1
16 For technical questions call 1-800-665-8685
ENGINE BASE PLATE
#
DESCRIPTION
QTY
SPEC
17
Flat cross bolt
4
M8*25
18
Handle damper
2
35*15
19
Locked nut
8
M8
20 External hexagon
bolt
2 M8*35
21 Handle lower
damper
2 35*35
22
Flat gasket
8
Ø 8
23 External hexagon
bolt
2 M8*20
24
Spring gasket
2
Ø 8
25
Medium flat gasket
2
8*24
26
Belt cover
1
240*190
32 Engine support
plate
1 490*425
33
Nut
2
M8
34 External hexagon
bolt
2 M8*40
35
Exciter
1
04-01
36
Flat gasket
6
Ø 16
37
Spring gasket
6
Ø 16
38
Inner hexagon bolt
6
M16*40

V4.1 212cc Single Plate Compactor 9033598
Visit www.princessauto.com for more information 17
ENGINE FRAME
#
DESCRIPTION
QTY
SPEC
1
Engine frame
1
Metal
2
Flat gasket
4
0.4 in.
3
Spring gasket
4
0.4 in.
4
External hexagon bolt
2
M10*30

9033598 212cc Single Plate Compactor V4.1
18 For technical questions call 1-800-665-8685
VIBRATOR HOUSING ASSEMBLY
#
DESCRIPTION
QTY
SPEC
V01
Case cover (shut off)
1
04-03
V02
O-ring
1
110*3.1
V03
Bearing
2
6309
V04
Vibrating case
1
04-01
V05
Eccentric shaft
1
04-04
V06
Key
1
8*30
V07
Inner hexagon bolt
12
M6*20
V08
Flat gasket
12
Ø 6
V09
Copper gasket
1
Ø 14
V10
Oil drainage bolt
1
M14*1.5
V11
Case cover (pulley)
1
04-02
V12
Oil seal
1
35*52*7
V13
Pulley
1
04-06
V14
Spring gasket
1
10*35
V15
Enlarged flat gasket
1
10*35
V16
Inner hexagon bolt
1
M10*25

V4.1 212cc Single Plate Compactor 9033598
Visit www.princessauto.com for more information 19
CLUTCH AND BELT
#
DESCRIPTION
QTY
SPEC
1
Engine
1
DH212
2
Key
1
5*40
3
Clutch assembly
1
128*20
4
Conical flat gasket
1
8 x 30 x 6
5
Spring gasket
1
Ø 8
6
External hexagon bolt
1
M8*30
19
Locked nut
8
M8
22
Flat gasket
8
Ø 8
39
Belt
2
A-737
40
External hexagon bolt
4
M8*45
41
Enlarged flat gasket
4
8*30

9033598 212cc Single Plate Compactor V4.1
20 For technical questions call 1-800-665-8685
HANDLE
#
DESCRIPTION
QTY
SPEC
7
External hexagon bolt
2
M12*70
8
Enlarged flat gasket
6
12*35
9
Handle glue sheath
2
25*14*43
10
Flat gasket
2
Ø 12
11
Lower handle
1
350*365
12
Locked pin assembly
2
12*35
13
Upper handle
1
410*365
14
Throttle line assembly
1
0.9m
15
Locked nut
2
M10
16
Flange bolt
2
M10*35
27
Locked nut
6
M12
Table of contents
Languages:
Popular Garbage Disposal manuals by other brands
InSinkErator
InSinkErator Badger 1 Installation care and use guide

Meiko
Meiko AZP 80 operating instructions
InSinkErator
InSinkErator Evolution Compact owner's manual

Electrolux
Electrolux EGO23000X Instruction and installation manual
ophardt
ophardt ingo-slide 15 Instructions for use
EcoFast
EcoFast FWD 380 instruction manual

KitchenAid
KitchenAid KCDB250G - Food Waste Disposer installation instructions
disperator
disperator EXCELLENT 550A-GKF Series user manual
Safco
Safco KaZaam 9761 Assembly instructions

Viking
Viking Food Waste Disposer Use & installation guide
Kuezen
Kuezen DSA-1104 manual

Electrolux
Electrolux WDU4100 Instruction book
