www.rollashade.com Rev: 03.25.2021 Page 2 of 2© Copyright 2021 Roll-A-Shade Inc., All rights reserved. - Contractor #916075
Warning: Failure to use this device may cause injury or death
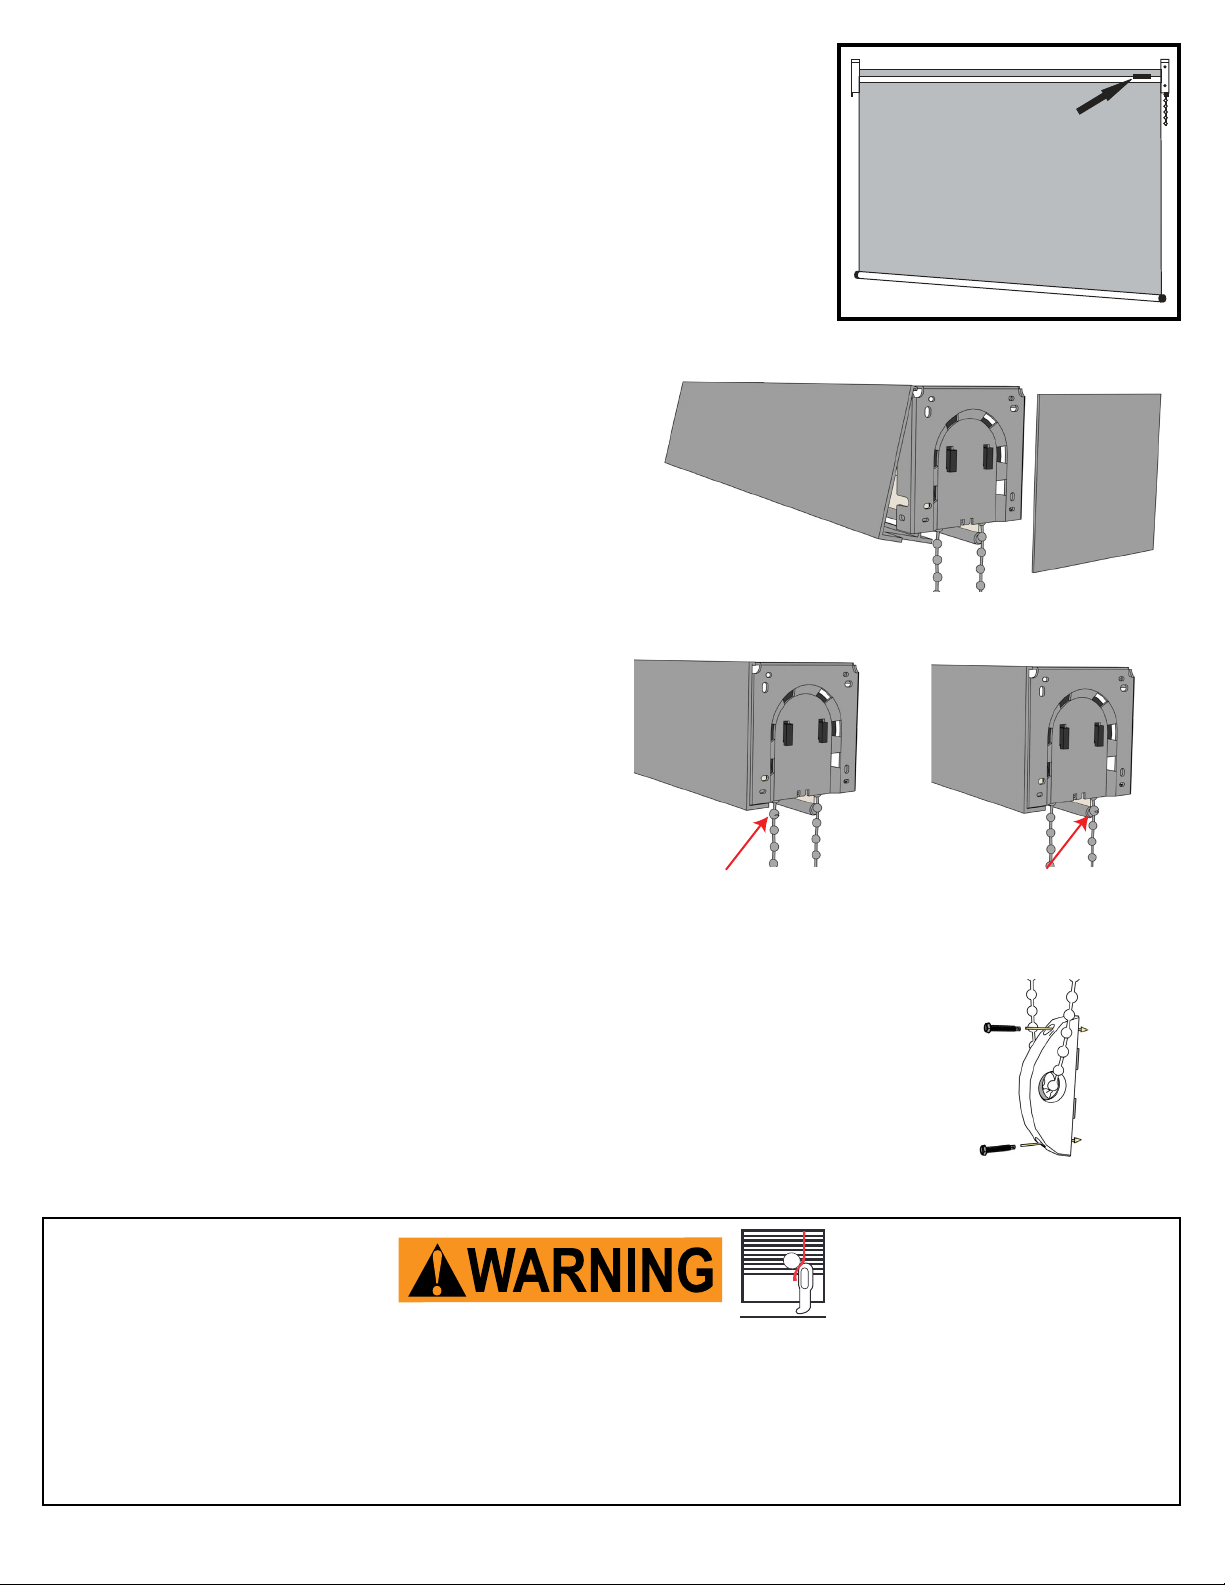
6. Install the Chain Anchor
The chain anchor is a plastic piece that is attached to the chain to secure it from possible accidents.
Position the chain anchor on the window frame so that the chain anchor and chain do not interfere with
raising or lowering the shade. The chain anchor should be installed without stretching or pulling down
on the chain. Leave a little play through the chain anchor to allow the chain to pass freely. Do not twist or
cross the bead chain. Secure the anchor with Phillips screws in both upper and lower holes.
3. Shade Adjustment (If Necessary)
4. Installing the Fascia
5. Installing Metal Stop Balls to Bead Chain
Roll shade up and down to confirm bottom rail is level and material rolls up straight on center
tube. If the bottom rail is not level, lower shade until metal tube is visible. Add layers of masking
tape to the metal tube to the end that is too low until bottom of rail is straight. If the material
tracks to one side, lower shade until metal tube is visible. Add layers of masking tape to the
metal tube to the end that is opposite the direction of tracking, until shade rolls up straight.
Hook fascia to the top of the bracket and gently press fascia down
to snap into bracket
Pull the rear chain to lower the shade to appropriately 1/4” above
sill and attach connector or stop ball to upper most bead on front
chain closest to the clutch. By attaching this connector or stop ball
you will set how far the shade will lower. Pull the front chain and
raise the shade so the bottom rail is 5” below the shade and attach a
connector or stop ball on the back chain at upper most bead.
Bottom Stop
Bracket Cover
(optional)
Top Stop
Masking Tape
Window Blind Cord Can STRANGLE Your Child
• Children can climb furniture to reach cords
• Move cribs and other furniture away.
• Keep all cords out of children’s reach.
• Attach tension device to wall or floor.
• Fasteners provided with the tension device may not be appropriate for all mounting surfaces.
• Use appropriate anchors for the mounting surface conditions.


