II. Safety instructions
1. Don’t touch the hot surface by hand during adjustment and normal operation because of high
temperature.
2. Far away from the products easy to burn or burst.
3. Don’t look at the bulbs directly with eyes.
4. Don’t use the item without glass and stand.
5. Replace any cracked protective shield.
6. The bulbs couldn’t exceed the rated power.
7. The distance between the item and the objects must be more than 1M.
8. If the external flexible cable or cord of this luminaire is damaged, it shall be exclusively replaced by the
manufacturer or his service agent or a similar qualified person in order to avoid a hazard.
9. This lamp is suitable for external use: only when used correctly. This lamp can not be used on building
sites, engineering workshops and similar applications.
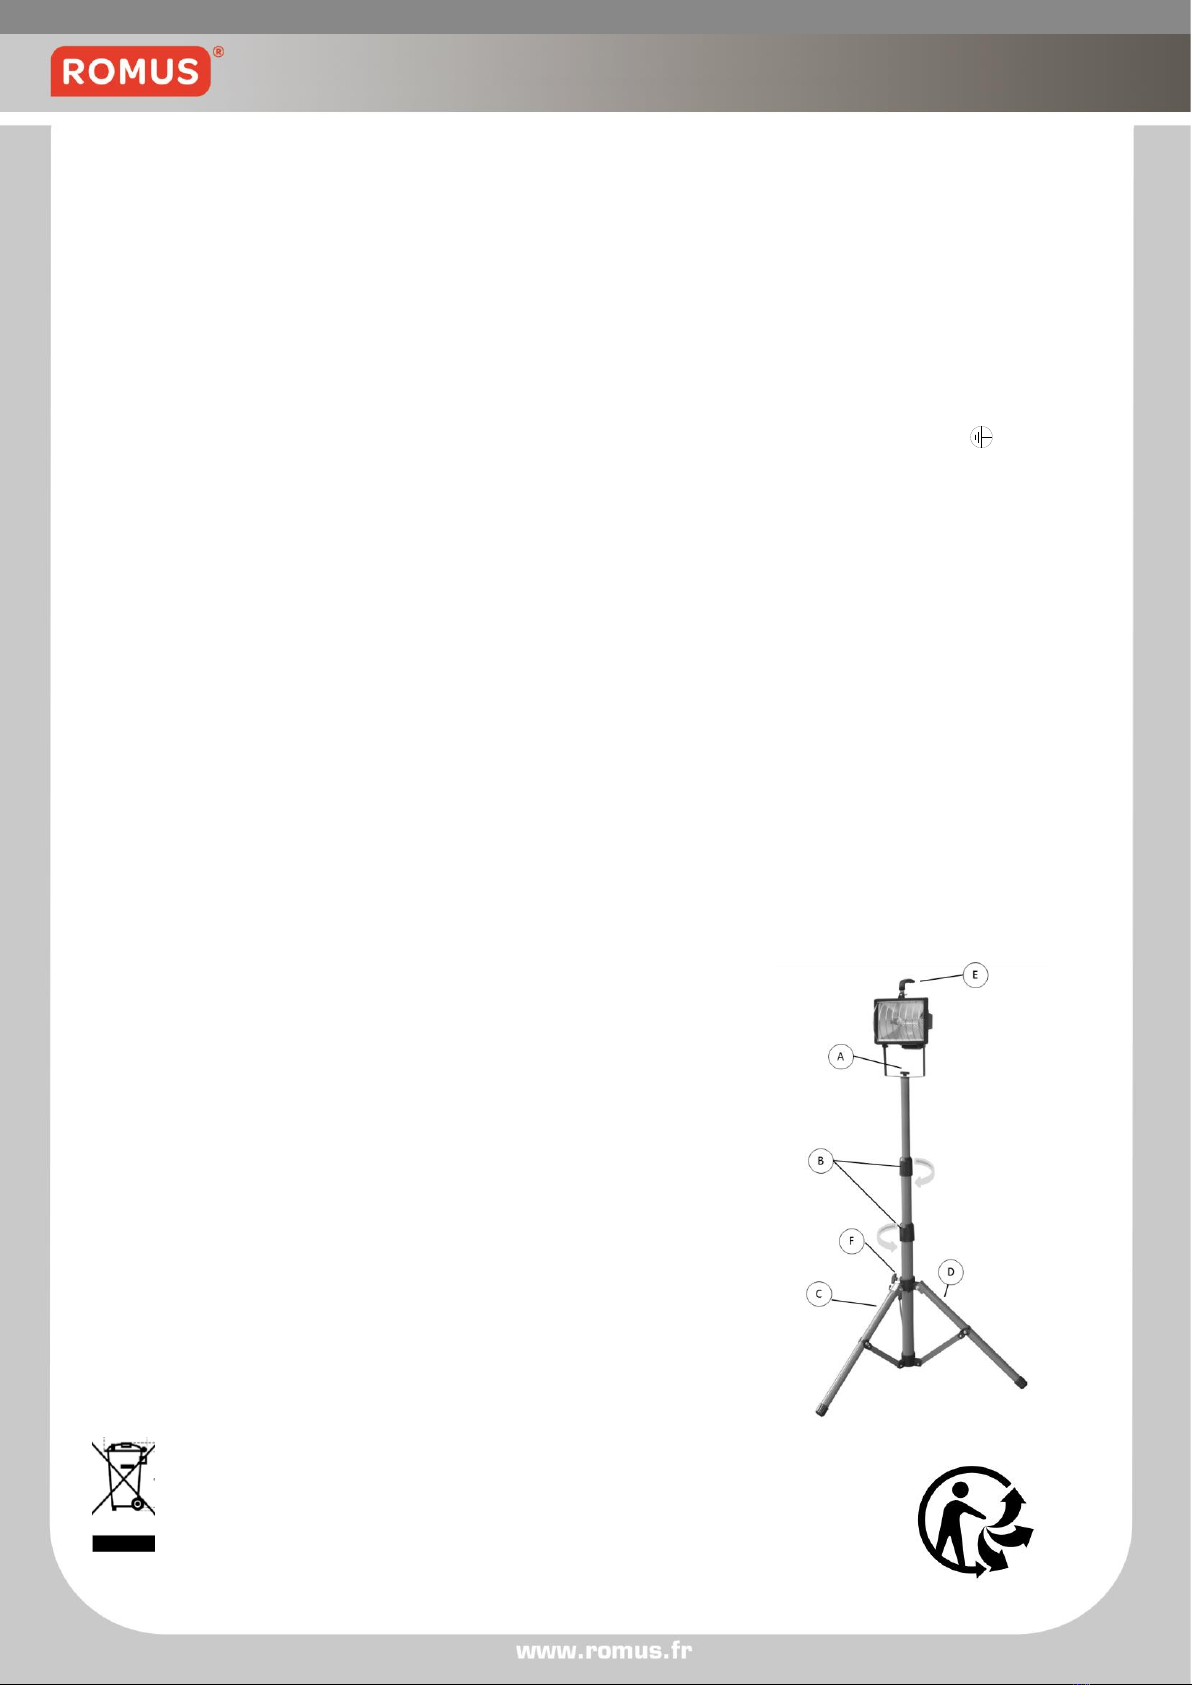
III. Assembly
The tripod stand is supplied assembled. To attach this halogen lamp you must erect the stand.
Loosen the screw F, open the legs fully,then re-tighten the screw F.
(CAUTION:MUST EXTEND THE LEGS FULLY AS DIAGRAM 2 BEFORE USE THE LAMP.)
To alter the stand height twist the locks(B)anti-clockwise to release, slide the tubes to desired height and
tighten the twist locks clockwise(see Diagram3)
Unscrew the center knob(A). Position the center hole on this halogen lamp bracket over the top of the stand.
Re-insert the center screw knob(A). This halogen lamp can be swivelled, if required, by loosening the center
screw knob(A), rotating this halogen lamp to the desired angle, and re-tightening the center screw knob(A). The
stand has an integral cable tidy(D) for safe storage of the main cable when not in use.
To adjust this halogen lamp angle, loosen the screws located on either side of the bracket, unit the desired
angel is achieved, then re-tighten.
Check this halogen lamp is secure and that the stand is stable and has a firm footing. Ensure cable is not
catching on any sharp object and that the mains plug connection is adequately protected against rain or
moisture. Your halogen lamp is now ready for use .