manuals.online logo
Brands
  1. Home
  2. •
  3. Brands
  4. •
  5. Roper
  6. •
  7. Refrigerator
  8. •
  9. Roper RT25BK User manual

Roper RT25BK User manual

\
cl .
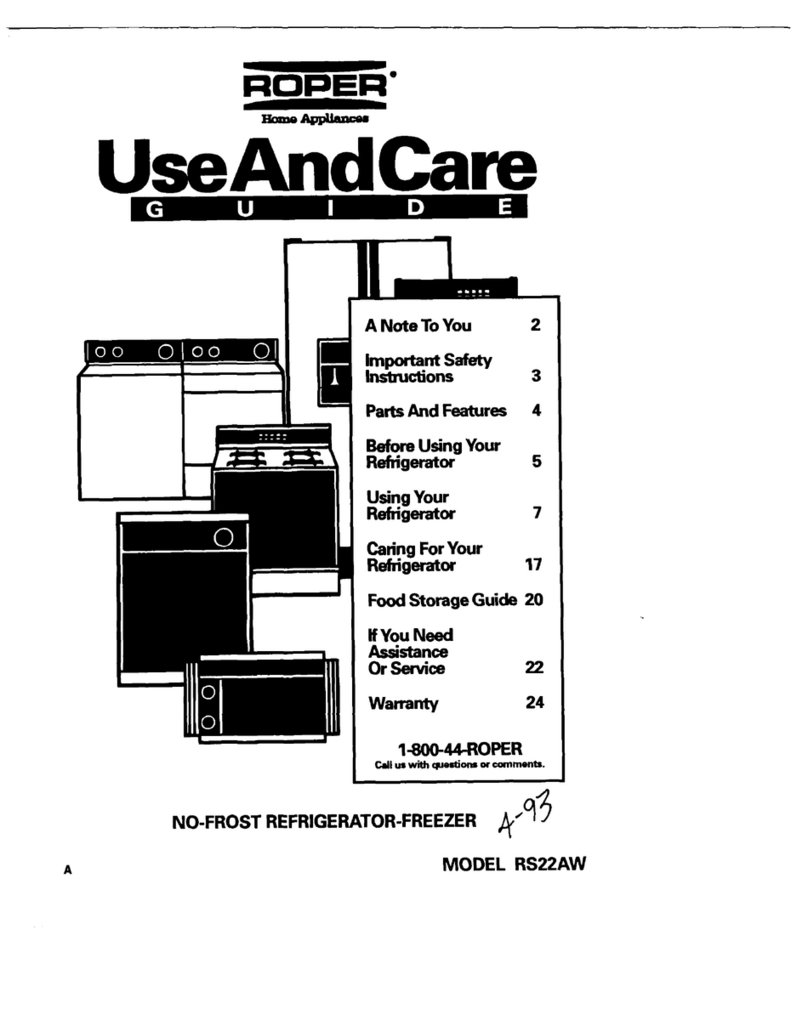
Thank you for choosing a
RoperAppliance.
Tbis Use and Care Guide will help you
operate and maintain your new, quality-
built
Roperrefrigerator-freezer. Keep
this Useand CareGuide in a safe
place
for
future reference.
Complete and mail the
Product Registration Card.
This card enters your warranty into our
warranty system that ensures efficient
claim processing, can be used as aproof
of purchase for insurance claims and
helps Roper to contact you immediately
in the unlikely event of a product-safety
recall.
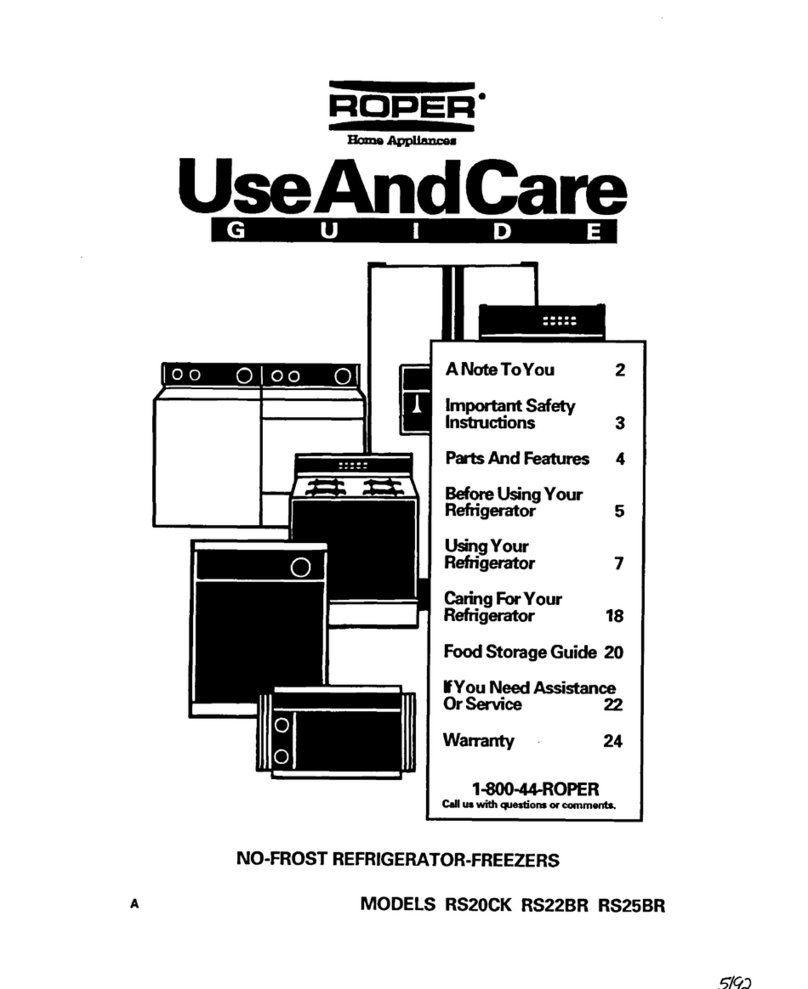
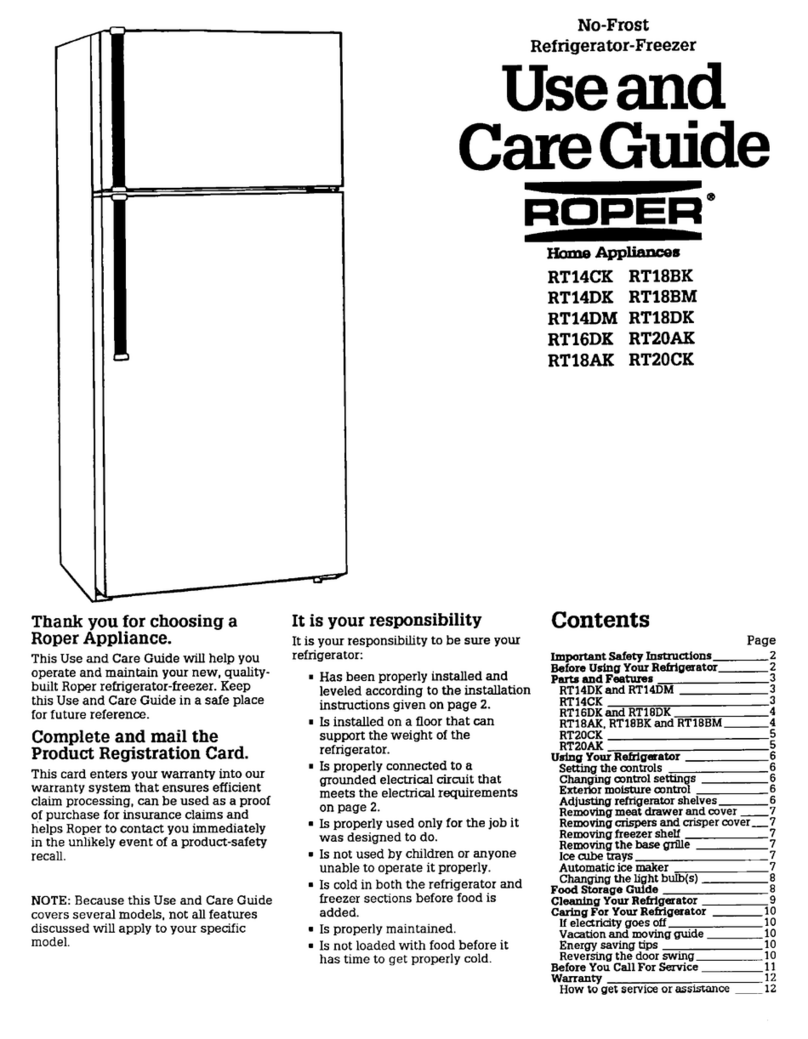
No-Frost
Refrigerator-Freezer
Useand
CareGuide
:
ti”
Home Appliances
RT25BK
You areresponsible for
It is your responsibility to be sure your
refrigerator:
n
Hasbeen properly installed and
leveled according to the installation
instructions given on page 2.
6 Is installed on afloor that can
support the weight of the
refrigerator.
mIs properly connected to a
grounded electrical circuit that
meets the electrical requirements
on page 2.
. Is properly used only for the job it
was designed to do.
n
Is not used by children or anyone
unable to operate it properly.
. Is cold in both the refrigerator and
freezer sections before food is
added
. Is properly maintained.
Contents
Page
xmporrant safety Instnlctiona
~e~~h~Y~Refkigerat.or f
Using Your R&geratir :
Setting the controls
Chan@ngwntml settings t
Extenor moisture amtrol
Adjusting refrigerator shelves E
Removing the freezer shelf
Removingfreezer door shelves z
Removingcrispers and crisper cover -5
Removing meat drawer and mver
Changing the light bulbs --f
Removingthe basegrille
Reversingthe door swing :
Icecubetraya
Optionalautomaticicemaker f
Food Storage Guide
Cleaning Your Refrigerator
Caring For Your Refrigerator
If electridty goes off
Vacation
and moving guide
Normal operating sounds
Energy saving tips
~dorforYu Call For seroica 1:
How to get service or assistance - ::
Important Safety Instructions
To reduce the risk of fire, electrical shock. or injury when using your refrigerator. follow basic
1.Readall operating instructions
before using your refrigerator.
2.Child entrapment and suffocations
are not problems of the past. Junked
or abandoned refrigerators are still
dangerous ... even if they will “just
sit in the garage for a few days.”
If you are getting rid of your old
refrigerator, do it safely. Pleaseread
the enclosed safety booklet from the
Assodation of HomeAppliance
Manufacturers. Help prevent
accidents.
3.Never allow children to operate,
play with, or crawl inside the
refrigerator.
. SAVETHESEINSTRUCTIONS
n
4.Never clean refrigerator parts with
flammable fluids. The fumes can
cxeateafire hazard or explosion.
l FOR YOUR SAFETY.
DONOT STOREORUSEGASOLINE
OROTHERFLAMMABLEVAPORS
AND LIQUIDSIN THE VICtNfTT OF
THISORANY OTHERAPPLIANCE.
THE FUMESCAN CREATEA FIRE
HAZARD OREXPLOSION.
Before Using Your Refrigerator
A. Removelabels
Removethe tape and any inside labels
before using the refrigerator. To remove
any remaining glue:
6 Rub briskly with thumb to make a
ball, then remove.
OR
6 Soakareawith liquid hand
dishwashing detergent before
removing glue asdescribed above.
Donot use sharp instruments, rubbing
alcohoLflammable fluids or abrasive
cleaners. These can damagethe
material. See“Important Safety
Instructions” above.
NOTE: Donot remove the Tech Sheet
located on the bottom of the refrigerator.
B.Cleanit
Clean your refrigerator before using it.
Seecleaning instmztions on page 8.
C.Plug it in
Recommended Grounding Method
A 115Volt, 50Hz.,AC only, 15or 20
amperefused and properly grounded
electrical supply is required.
It
is
recommended that a separate circuit
serving only this appliance be provided.
Useareceptacle which cannot be turned
off with a switch or pull chain. Donot
use an extension cord.
SeeElectrical Requirements and
Grounding Instructions Sheetin
literature package for complete details.
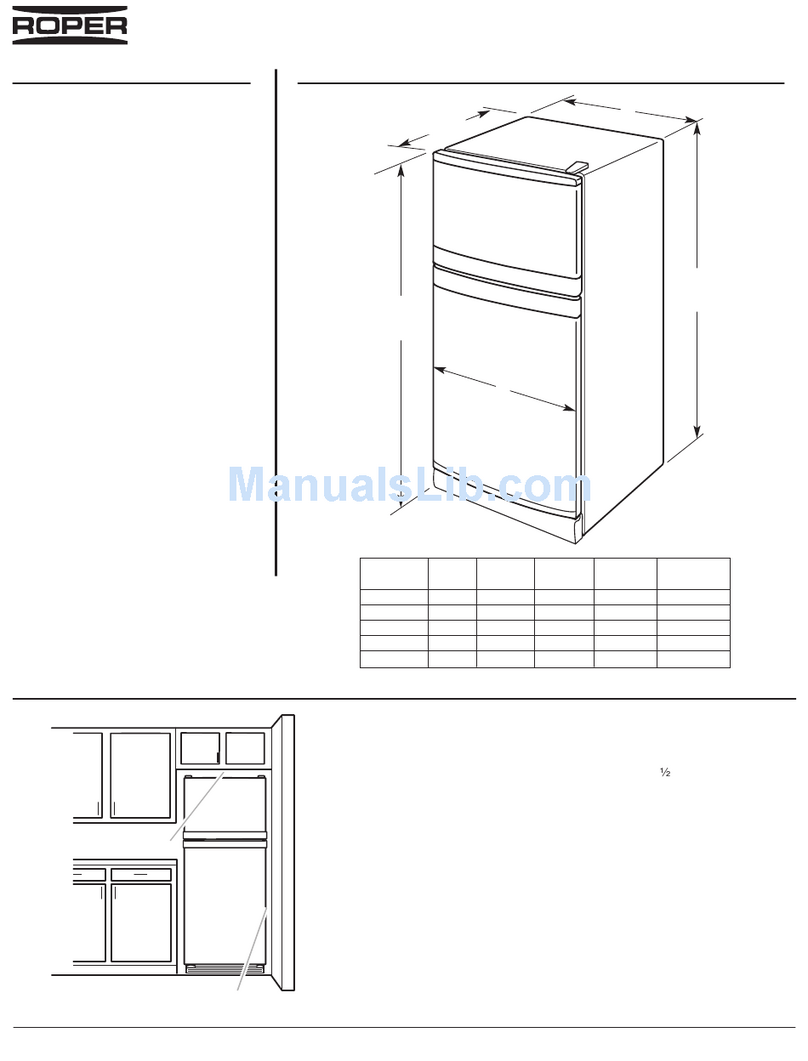
Install the refrigerator according to the
D.Install properly
dimensions shown below.
Leave extra spacealong the hinge-side
wall to allow the door to be opened
wider.
Donot install the refrigerator:
n
next to an oven, radiator or other
heat source;
6 out in the weather or direct
sunlight;
n
in an areawhere the room
temperature will fall below 55°F
(13’C).
Wow l/2 inch (125 an) spa- on each side
of the refrlg~atar for easeof
E.
Level refrigerator
Make sure the refrigerator is level for
efficient operation.
left to lower
usesuewdriver
1.Removebase grille. (Seepage 6.)
2.To raise front. turn screw in
direction shown.
3.To lower front, turn screw in
direction shown.
4. Replacebase griRe.(Seepage 6.)
Page2
Parts and Features
-_
IF=
=-----we.
>
Removable
door fihalvw
BasegriIIe
Page3
Using Your Refrigerator
-
Setting the controls Changing control settings
Controls for the refrigerator and freezer
are in the refrigerator. When the
refrigerator is plugged in for the first
time:
3.Let the refrigerator and freezer
compartments get cold for several
hours before adding food
4. When the refrigerator keeps milk or
juice as cold asyou like and the
freezer compartment keeps ice
creamfrm, the settings are correct
for your household.
1.Adjust the Refrigerator Control
according to the settings listed in
the chart below.
1.Setthe Refrigerator Control to 4.
2.
Setthe heezer Control to C.
2.
Wait
24hours or more before
making additional adjustments to
the Refrigerator Control or
adjusting the FreezerControl
Reezer‘control
Condition
Refrigerator section
TOO WARM
Checkif
. Dooris opened often.
. Large amount of food added.
n
Too-warm room temperature.
Setcontrol setting
Refrigerator
Freezer i
Freezer section
TOO WARM
Both sections
TOO WARM
. Dooris opened often.
. Large amount of food added.
. Too-cold room temperature
(freezercan’t cycle often enough).
m Dooris opened often.
n
Large amount of food added.
n
Too-warm or too-cold room
temperatures.
Refrigerator 4
Freezer A
ReMgerator 2
Freezer A
Refrigerator section
TOO COLD m Controls not set correctly. Refrigerator
Freezer :
Ice is not made
fast enough . Heavy ice usage.
. Very cold room temperature
(freezercan’t cvcle often enouohl.
Refrigerator 6
Freezer C
Page4
Exterior moisture control Removingthe freezershelf Removing crispers and
The Szterior Moisture Control operates
electric heaters around the door
openings. These heaters help keep
moisture from forming on the outside of
the refrigerator.
1.Use the OFF setting when humidity
is low.
2.Usethe ON setting if moisture
forms on the outside of the
refrigerator.
~$I.j;;e~g refrigerator
Shelvescan be adjusted to match the
way you use your refrigerator.
To remove shelfi
1.Removefood from shelf.
2.Tilt up at front.
3.Lift up at back
4. Pull shelf straight out.
To
replace
shelf:
1.Guide the rear hooks into the slots
in the shelf supports.
2. Tilt up front of shelf until hooks
drop into slots.
3.Lower front of shelf into position.
To remove shelf:
1.Lift front slightly.
2.Lift back off supports.
3. Replacein reverse order.
t;ey;eFg freezerdoor
The freezer door shelves can be removed
for easier cleaning.
To
remove shelves:
1.Graspshelf at both ends.
2.Lift up and pull out.
To replace shelves:
1.Insert shelf hooks into guides on
both sides of door liner.
crisper cover
To remove crisper:
1.Slide out to the stop.
2.Lift the front.
3.Slide out the rest of the way.
4. Replacein reverse order.
To remove cover:
1.Push up glass insert from bottom,
then lift out with two hands.
2.Lift front of cover frame.
3.Pull cover frame up and out.
4.Removemetal cover support.
To
replace
cover:
1.Replacemetal cover support on
wall supports in front section of
cabinet.
2.Fit back of cover frame into notch
supports on walls of refrigerator,
then lower into place.
3.Slide back of glass insert into place,
then lower front.
Removing meat drawer and
cover
2.Push down to lock into place.
To remove meat drawer:
1.Slide out to the stop.
2.Lift the front.
3.Slide out the rest of the way.
4. Replacein reverse order.
To remove cover:
1.Tilt front of cover up, lift at back
and pull straight out.
2.Replacein reverse order.
Page5
Changing the light bulbs Removingthe basegrille
ElectrlcalshockHaxard
Unplug the Mgerator 01discon-
nect the main electric power supply
to the refrigerator before changing a
bulb.Failumtoclouoamldresu.ltin
elecrrical shock or injury.
To change refxigerator light:
1.Disconnect refrigerator from power
supply.
2.Reachbehind control console to
fmd bulbs.
3.Removebulb and replace with a
40-watt appliance bulb.
4. Reconnectpower supply.
To change freezer light:
1.Disconnect refrigerator from power
supply.
2.Push in sides of light shield until it
snaps free.
3.Replacebulb with a 25-watt
appliance bulb.
4. Snaplight shield into place.
5.Reconnectpower supply.
NOTE:Not all commercial appliance
bulbs will fit your refrigerator. Besure to
replace a bulb with one of the samesize
and shape.
M
To remove grille:
1.Open freezer door.
2. PuIl grille out
3.Do not remove Tech Sheet
fastened behind grille.
To replace grille:
1.Line up grille support tabs with
metal clips.
2. Push firmly to snap into place.
3. Closethe door.
Seecleaning instructions for defrost pan
and condenser coils on page 6.
Reversingthe door swing
You can change the hinges on your
refrigerator so the doors open the other
way. Referto the instruction sheet
included with your refrigerator.
Ice cubetrays
Removeice by slightly twisting the tray
with both hands.
NOTE:The longer ice cubes are stored,
the smaller they get. Slow evaporation is
causedby the movement of cold air.
Optional automatic ice maker
If you have the automatic ice maker
accessory(Part No. ECKMF-90)or if you
plan to add it later, there are afew
things you will want to know:
.
.
.
.
.
.
.
.
.
.
.
Connect the ice maker to the water
supply before tumlng it on.
The ON/OFFlever is a wire signal
arm. Lower signal arm to makeice.
Raisesignal arm to turn off the ice
maker.
Freezermust be cold enough for the
ice maker to work. This may take
eight hours or more before the
correct temperature is reached
“First” ice may be discolored or off-
flavored because ofnew plumbing
connections. Throw away first few
batches of ice.
Change ice cube size with the dial
or lever on the side of the ice maker.
Ice crescents are normally attached
at the comer. They break apart
easily.
Normal
sounds include water
tuning when the ice maker is
working and the thud of ice asit
falls into the bin.
If ice is not being madefast enough
and more ice is needed, turn the
Refrigerator Control to a higher
number. Wait 24hours, and if this
doesnot increase the ice supply,
turn the Freezer Control to C.
Raisethe signal arm before you
remove the ice bin. When you
replace the bin, push it in all the
way. Then lower the arm to the ON
position.
Cubesleft in the bin for long
periods of time may develop an off-
flavor, like stale water. Throw old
cubes away. Ice maker will make
new ice. Cubes may also become
smaller if stored for a long time.
Goodwater quality is important for
good ice quality. It is not recom-
mended that you connect the ice
maker to a softened water supply. If
a softened water supply cannot be
avoided, it is important to maintain
the water softener soit operates
properly. Water softener chemicals,
such assalt from a malfunctioning
softener, can damage the ice maker
mold and lead to poor ice quality.
Page6
Food Storage Guide
Storing
fresh food
Foodplaced in the refrigerator should be
wrapped or stored in air and moisture
proof material This prevents food odor
and taste transfer throughout the
refrigerator. For dated products, check
codedate to ensure freshness.
Vegetables
For
leafy vegetables: remove store
wrapping and trim or tear off bruised
and discolored areas.Wash in cold water
,mmddrain Placein plastic bag or plastic
container and store in crisper.
For
vegetables with skimx store in
(crisper,plastic bags or plastic container.
Fruit
Wash,let dry and store in refrigerator
:inplastic bags or crisper. Donot wash
Iorhull berries until they are ready to
‘use.Sort and keep berries in their store
Icontainerin a crisper, or store in a
Ilooselyclosed paper bag on a
refrigerator shelf.
lStorewithout washing in the original
1”cn on interior shelf.
Milk
‘Wipemilk cartons. For best storage,
:place
milk on interior shelf.
Butter or margarine
:Keepopened butter in covered dish or
:butter compartment. When storing an
~aztrasupply, wrap in freezer packaging
(andfreeze.
Cheese
3ore in the original wrapping until you
‘ire ready to use it. Once opened, rewrap
,tightly in plastic wrap or aluminum foi.L
Meat
Most
meat can be stored in original
wrapping aslong as it is air and moisture
proof. Rewrap if necessary. Seethe
following chart for storage times.
mZoFge~yat
TYPE ?ziiE.sy
chicken ....................... lto2
Ground beef ...............
lto2
Steaksand roasts .......
3to5
Cured meats...............
7to
10
Bacon..........................
5to7
Cold cuts .....................
3to5
Variety meats............. lto2
l
If meat is to be stored longer than the
times given, follow the directions for
freezing.
NOTE: Fresh tih and shellfish should be
used the sameday as purchased.
Leftovers
Cover leftovers with plastic wrap or
aluminum foil Plastic containers with
tight lids mn also be used.
Storing frozen food
The freezer section is designed for
storage of commercially frozen food and
for freezing food at home. Forfurther
information about preparing food for
freezing or food storage times, contact
your local Cooperative Extension Service
or check afreezer guide or cookbook.
Packaging
The secret of successful freezing is in
the packaging. The way you closeand
seal the package must not allow air or
moisture in or out. Packaging done in
any other way could causefood odor and
taste transfer throughout the refrigerator
and
drying of frozen food
Rigid plastic containers with tight fitting
lids, straight-sided canningffreezing jars,
heavy-duty aluminum foil, plastic-coated
paper and nonpermeable plastic wraps
(madefrom a saran film) are recom-
mended. Follow package or container
instructions for proper freezing methods.
Do not use: bread wrappers, non-rigid
plastic containers, containers without
tight-fitting lids, waxed paper, waz-
coatedfreezer wrap or thin, semi-
permeable wrap. The use ofthese
wrappings could causefood odor and
taste transfer and drying of frozen food-
Reezing
Donot expect your freezer to quick-
freeze any large quantity offood Put no
more unfrozen food into the freezer than
will freeze within 24
hours. (No more
than 2 to 3
pounds of food per cubic foot
of freezer space.)Leave enough space
for air to circulate around packages.Be
careful to leave enough room at the front
so the door can close tightly. Storage
times will vary according to the quality
of the food, type of packaging or wrap
used (air and moisture proof), and
storage temperature which should be
0°F(-17.9”C).
Page7
Cleaning Your Refrigerator
Both the refrigerator and freezer sections
defrost automatically. To help prevent
odors, wipe up spills immediately. Clean
both sections once amonth.
1.Turn Refrigerator Control to OFF
and unplug power cord
2.Take out all removable parts and
clean according to the following
Clk?CtiOM.
PectricalShockandProductDamageKazard
. Unplug power supply axd or disaxine!ct power supply
at
the fuse
or circuit
breaker box before cleaning your refrigerator. Failure to do socould result in
electrical shock.
. DoNot use shaxp inmumenu, window sprays, scouring cleaners or flam-
mable fluids on your refrigerator. These can scratch or damage the material.
PART
Removable parts
(shelves, crisper, etc.)
Outside
Inside walls
(allow the freezer wslls to warm up
socloth won’t stick)
WHAT TOUSE
Spongeor cloth; mild detergent
and warm water.
Sponge,soft cloth or paper towel;
mild detergent and warm water:
appliance wax (or good auto paste
wax).
Sponge,soft cloth or paper towel;
mild detergent and warm water
OR
2tablespoons (26g) baking
sodato 1quart (0.95L) warm
water.
HOWTOCLEAN
n
Wash,rinse and dry thoroughly.
I Wash,rinse and d.tythoroughly.
I Twice a yeartlpply appliance wax or
good auto paste wax to painted metal
surfaceswith a clean, soft cloth. Waxing
painted, metal surfacesprovides rust
protection.
n
Do Not use wax on plastic parts.
m Wash,rinse and dry thoroughly.
Door liners and gasketa
Sponge,soft cloth or paper towel;
mild detergent and warm water.
l
Wash, rinse and dry thoroughly.
PlaStiW
(covers and panels) Soft,clean sponge or soft cloth;
mild detergent and warm water. I Wash,rinse and dry thoroughly.
Defrost pan
Condenser wils
Spongeor soft cloth; mild
detergent and warm water.
Vacuum cleaner with brush
attachment.
n
Removebase grille. (Seepage 6.)
. Lift defrost pan over wire brace (remove
=Y ape).
. Wash,rinse and dry thoroughly.
. Replacedefrost pan with notched wmer
to the rear. Pushpan in all the way.
. Check that defrost pan tubing is pointing
into pan.
m Replacebase grille. (Seepage 6.)
. Removebase grille. (Seepage 6.)
. Vacuum coils at least every other month.
. Replacebase grille. (Seepage 6.)
Floor under refrigerator Floor cleaners.
n
Move refrigerator out away from wall.
. Clean the floor.
. Move refrigerator back into place.
9 Check levelness of refrigerator.
Page8
Caring FOXYour Refrigerator
If electricity goesoff
1.Call the power company.
Ask how long power will be off.
2.KeepheezercIosedifservfwfsto
be intempted 24 hours or less.
This will help food stay frozen.
3.IfsewicebtobeinterNpted
longer than 24 hom-s,do this:
Removeall frozen food and store in
afrozen food locker.
OR
Place2 lbs. (0.9 kg) of dry ice in
freezer for every cubic foot of
freezer space.This wilI keep foods
frozen for 2 to 4 days.
Personal Injury Hazard
Wear gloves to protect your hands
fromdryicebu.rns.Failuretodoso
wuld result in dry ice bums.
OR
If dry ice or afood locker is not
available, use or can perishable
food at once.
NOTE: A fuIl freezer stays cold longer
than a partly filled one.A freezer fulI of
meat stays cold longer than afreezer full
of baked goods.
Food containing ice crystals may be
safely refrozen, but the quality and
flavor of the food may be affected
Userefrozen food quickly. If the
condition of the food is poor, or you
feel it is unsafe to eat, dispose of it
immediately.
Vacation and moving guide
Short vacations
(less thau 4 weeks)
9 Useup perishable foods.
9 Freezeother food items.
l
If you have an automatic ice maker,
liftsignalarmtotumofftheice
maker, shut off ice maker water
supply and empty ice bin.
Long vacations
(more than 4 weeks)
n
If you have an automatic ice maker,
shut off ice maker water supply at
least a day before you leave. When
the last load of ice drops, lift signal
armtotumofftheicemakerand
empty the ice bin
9 RemovealI food.
n
Turn Refrigerator Control to OFF.
. Unplug refrigerator.
. Clean, rinse and dry the interior.
. Keeprefrigerator and freezer doom
slightly open by taping wood or
rubber blocks at the top of each
door.This allows air to enter the
refrigerator and freezer sections
and prevents odors and mold from
building up inside while you’re
away.
Personal xllju.y Hazard
Do Not allow children to climb on,
play near or crawl inside the
refrigerator when the doom are
blocked open. They may become
injured or trapped.
. To restart refrigerator when you
return, seepage 4 for resetting
controls.
Moving
. If you have an automatic ice maker,
shut off ice maker water supply at
least a day before you move. When
the last load of ice drops, lift signal
arm to turn off the ice maker and
empty the ice bin. Disconnect ice
makerwater supply line.
9 Removeall food.
9 Packfrozen foods in dry ice.
. Turn Refrigerator Control to OFF.
. Unplug refrigerator.
9 Clean, rinse and dry the interior.
mTake out all removable parts.
. Wrapremovable parts in paper and
tape them all together. Storeinside
refrigerator.
9 Raiseleveling legs.
. Tape the doom shut.
9 Tape the electric cord to the cabinet
exterior.
9 When you reach your new home,
replace the removable parts and
follow steps beginning on page 2.
Normal operating sounds
You can expect to hear the following
sounds when your refrigerator is
operating:
9 Slight hum or eoft hiss as the
refrigeratofs fan motor movesair.
9 Clicking or
snappingsoundsoccur
when the refrigerator starts and
stops running. The defrost timer
also clicks when the defrost cycle
starts and stops.
n
Water sounds occur aswater
gurgles through tubing for afew
minutes after refrigerator stops
running. You may also hear defrost
water running into the defrost-
water pan.
9 Operating sounds from the high-
efficiency compressorand motor. It
may run longer than your older
refrigerator.
Energy saving tips
9 Check the door gaskets for a tight
seal. Level the refrigerator to be
sure of a good seal
. Clean dust and lint from the
condenser coils every other month.
9 Open the doors asseldom as
possible. Decide what you need
before you open the door.Remove
everything you need at onetime.
Organize and label food soyou will
not have to searchfor items you
want. Closedoor immediately after
you removefood items.
. Storefood in the refrigerator and
freezer sothat air movement is not
blocked.
. Setthe refrigerator and freezer
temperatures so that the drinks
remain cold enough for your
family’s taste and ice cream
remains firm. DoNot set
temperatures colder than they
need to be.
9 Setthe Exterior Moisture Control to
the OFFposition unless moisture
forms on the outside of the
refrigerator.
. DoNot install your refrigerator
next to your range, water heater,
furnace, radiator, other heat sources
or in direct sunlight.
Page9
Before You Call For Service
If you are having an operating problem, check the chart to seewhat the causemight be before you call for aSSiSmm33.
OPERATING PROBLEM
Refrigerator will not IUIL
Rattling, jingling noise or
unfamiliar sounds.
CHECKIF WHAT TO DO
n
Power cord is plugged into a live m Firmly plug power cord into electrical
circuit with proper voltage. outlet. Checkcircuit voltage at fuse/
circuit breaker box.
n
Refrigerator Control is turned on.
n
SetRefrigerator Control to a
numbered setting.
. A household fuse has blown or circuit
n
Replacefuse with a time-delay fuse
breaker has tripped. Also check if a of the correct capacity. Resetcircuit
time-delay fuse has been used. breaker.
n
Anything is on top of or behind the
n
Removeobjects from the top or
from
refrigerator when the refrigerator ls behind the refrigerator.
operating.
n
These are “normal” operating sounds:
n
Readthe *Normal operating sounds”
humming from fans, clicking from on page 9.
thermostat or defrost cycle, or defrost
water draining into the defrost pen.
Automatic ice maker
n
Freezer compartment has bad enough = Allow freezer to get cold enough.
will not work
time to get cold. It may require over-
(optional accessoryon this model) night to reach the proper temperature.
n
Signal arm is in the down (ON) I Put signal arm in the down (ON)
position. position.
. Water valve is turned to open position
n
Turn water valve to open position.
and water is reaching the ice maker.
Waterinthedefrostpan.
n
Weather is hot and muggy.
n
Hot and muggy weather can cause
water to collect in the drain pan.
Sincewater levels may reach half-full
in the pan, be sure to level the
refrigerator sothe pan does not
overflow.
Lights do not work.
. A household fuse has blown or circuit
breaker has tripped.
. Power cord is plugged into a live
circuit with proper voltage.
l
Bulb is burned out.
n
Replacefuse with a time-delay fuse
of the correct capacity. Resetcircuit
breaker.
n
Firmly plug power cord into electrical
outlet. Checkcircuit voltage at fuse/
circuit breaker box.
n
Replacebulb with an appliance bulb.
Follow instructions on page 6.
Motor rllus too long. m Condenser is free oflint and dust.
n
Removedust and lint from the
condenser coils with a vacuum
cleaner.
n
Weather or roomis hot or muggy.
n
If the temperature outside or inside
your home is warm, motor-running
noises arenormal
n
Door has been opened frequently or a
n
Decide which food items you need
large amount of food has been added before opening the refrigerator or
to the refrigerator or freezer freezer section Motor noise is also
compartment. normal when large amounts of food
are added to the refrigeratorkfreexer
compartments.
Remember-your new refrigerator
may be larger than your old
refrigerator. It may have more space
to cool which requires a longer-
running motor.
Page10
THISPAGE
Page11
LIMITED WARRANTY
C”
Home Appliances
LENGTH OF WARRANTY
PRODUCTSCOVERED WHAT WE WILL PAY FOR
(From date of
purchase)
FTlLLONEYEAR All RoperAppliances Replacement parts and repair labor to correct defects in
WARRANTY materials or workmanship.
FuLLFlvEYEAR Refrigerators Replacement parts and repair labor for the sealedrefrigeration
WARRANTY
Freezers system (compressor,evaporator, condenser, drier or connecting
Air Conditioners tubing) which we find to be defective in materials or
Dehumidifiers workmanship.
r.AmmTm 2ND-!mI YEAR Microwave Ovens Repair or replacement of magnetron tube which we find to be
WARRANTY
defective in materials or workmanship.
LlMITED 2ND-5THYEAR
Automatic Washers Repair or replacement of any part ofthe gear caseassembly
WARRANTY
which we find to be defective in materials or workmanship.
WHAT WEWILL NOTPAYFOR
A SERVICECALLSTO:
1. Correct the installation of your appliance.
2. Instruct you bow to use your appliance.
3. Replacehouse fuses or correct house wiring or plumbing.
4. Replaceowner accessiblelight bulbs.
B. Repairswhen appliance is used in other than normal, single-family household use.
C. Pickup and delivery. Your appliance is designed to be repaired in the home.
D. Damageto appliance causedby accident, misuse, fire, flood, acts of Cod, or use of product not approved by us.
E. Any labor costs during the limited warranties.
F. Repairs to parts or systems causedby unauthorized modifications made to the appliance.
This Roperappliance is warranted by Whirlpool Corporation. Under no circumstances shah it be liable under this warranty for
incidental or consequential damagesand all implied warranties are limited to the sametime periods stated in the express
warranties for RoperBrand Appliances. Somestates do not allow the exclusion or limitation of incidental or consequential damages
or limitations of how long an implied warranty may last, sothe above limitations or exclusions may not apply to you.
This warranty gives you specific legal rights, and you may also have other rights which vary from state to state.
Outside the United States,a different warranty may apply. For details, please contact your franchised Roper distributor or military
exchange.
HOWTOGETSERVICEORASSISTANCE
If you need service, first seethe “Before You CabFor Service” section of this book. If you stih need service after checking this
section, additional help can be found if you:
. Contact your selling dealer for the authorized servicer in your area:
OR
n
Pbone 1-806~44-ROPER(l-800447-6737) between 8:00 a.m. and 4:30 p.m. Eastern Tune, Monday through Friday:
n
For further information, write to: Consu.mzRelations Dept, RoperBrand Appliances, 2000MB3 North, Benton Harbor, MI 49022:
l
When requesting assistance, pleaseprovide the model and serial numbers, date of purchase, and a complete description of the
problem. The model and serial numbers are located on a label on the inside, left wah of the refrigerator compartment. (See
fjhrstration on page 3.)
If you are not satisfied with the service received, contact the Major Appliance Consumer Action Panel(MACAP). MACAP is a group
of independent consumer experts that voices consumer views at the highest levels of the major appliance industry.
Contact MACAP only when the dealer, authorized servicer or RoperBrand Appliance warrantor have failed to resolve your problem:
Major Appliance ConsumerAction Panel
20North WackerDrive
Chicago,IL60606
MACAP Will in turn inform us of your action.
Part No.2152553
01992 Whirlpool Corporation (8Registered Trademark of Whirlpool Corporation Printed in U.S.A.

Other Roper Refrigerator manuals

Roper RT18HD User manual

Roper

Roper RT18HD User manual

Roper 1-34850/4390527 User manual

Roper

Roper 1-34850/4390527 User manual

Roper RS22AW User manual

Roper

Roper RS22AW User manual

Roper RT18DKXFW01 User manual

Roper

Roper RT18DKXFW01 User manual

Roper RT18DK User manual

Roper

Roper RT18DK User manual

Roper RS25AFXRD01 User manual

Roper

Roper RS25AFXRD01 User manual

Roper RT14DK User manual

Roper

Roper RT14DK User manual

Roper RS22AQXMQ00 User manual

Roper

Roper RS22AQXMQ00 User manual

Roper RT12FC User manual

Roper

Roper RT12FC User manual

Roper ROPER RT18DKXFN03 User manual

Roper

Roper ROPER RT18DKXFN03 User manual

Roper Roper RT20DKXDN00 User manual

Roper

Roper Roper RT20DKXDN00 User manual

Roper RBZICK User manual

Roper

Roper RBZICK User manual

Roper TOP-MOUNT REFRIGERATOR User manual

Roper

Roper TOP-MOUNT REFRIGERATOR User manual

Roper RT18DK User manual

Roper

Roper RT18DK User manual

Roper Roper RS20AKXDN00 User manual

Roper

Roper Roper RS20AKXDN00 User manual

Roper RT16VK User manual

Roper

Roper RT16VK User manual

Roper Roper RT16DKXDN03 User manual

Roper

Roper Roper RT16DKXDN03 User manual

Roper RT14BKXSQ User instructions

Roper

Roper RT14BKXSQ User instructions

Roper Roper RT14BKXFN02 User manual

Roper

Roper Roper RT14BKXFN02 User manual

Roper YRT18VKXJW00 User manual

Roper

Roper YRT18VKXJW00 User manual

Roper RT12DC User manual

Roper

Roper RT12DC User manual

Roper Roper RT14BKXFN00 User manual

Roper

Roper Roper RT14BKXFN00 User manual

Roper RT14DKXSQ01 User manual

Roper

Roper RT14DKXSQ01 User manual

Roper RT14BKXSQ Assembly instructions

Roper

Roper RT14BKXSQ Assembly instructions

Popular Refrigerator manuals by other brands

Beko QC75F Installation, operation & food storage instructions

Beko

Beko QC75F Installation, operation & food storage instructions

AEG SKB618F1DS user manual

AEG

AEG SKB618F1DS user manual

Brandt BVC8661NA instruction manual

Brandt

Brandt BVC8661NA instruction manual

Miele KFN 9855 iDE Operating and installation instructions

Miele

Miele KFN 9855 iDE Operating and installation instructions

Amica EKS16181 instruction manual

Amica

Amica EKS16181 instruction manual

Grundig GTMI 14120 user manual

Grundig

Grundig GTMI 14120 user manual

Gorenje NRS9182BX Instructions for use

Gorenje

Gorenje NRS9182BX Instructions for use

Hotpoint HTS17HBS Dimensions and installation information

Hotpoint

Hotpoint HTS17HBS Dimensions and installation information

Electrolux IK1345SR user manual

Electrolux

Electrolux IK1345SR user manual

Zanussi Electrolux ZLF 60 W Instruction booklet

Zanussi Electrolux

Zanussi Electrolux ZLF 60 W Instruction booklet

Smeg FA255B manual

Smeg

Smeg FA255B manual

Ocean OCM 402 TNF X A++ Instruction booklet

Ocean

Ocean OCM 402 TNF X A++ Instruction booklet

Delfield MDBPT1-SH Specifications

Delfield

Delfield MDBPT1-SH Specifications

Interlevin MB35 user manual

Interlevin

Interlevin MB35 user manual

Bosch B21CT80SNS Operating and installation instructions

Bosch

Bosch B21CT80SNS Operating and installation instructions

LG GN-B722HLCL owner's manual

LG

LG GN-B722HLCL owner's manual

Saba CB2526NFW manual

Saba

Saba CB2526NFW manual

LG GC-L197WFS user guide

LG

LG GC-L197WFS user guide

manuals.online logo
manuals.online logoBrands
  • About & Mission
  • Contact us
  • Privacy Policy
  • Terms and Conditions

Copyright 2025 Manuals.Online. All Rights Reserved.