3
1INTRODUCTION.....................................................................................................................4
1.1 SAFETY INSTRUCTIONS................................................................................................4
1.1.1
LOSSES NOT COVERED BY WARRANTY
.....................................................................4
1.1.2 TIGHTENING BOLTS AND ENSURING THEIR TIGHTNESS...................................4
2WARNINGS AND OBSERVATIONS.......................................................................................5
3TECHNICAL DETAILS THAT MUST BE ACCOUNTED FOR WHEN STARTING TO USE
THE DEVICE...........................................................................................................................6
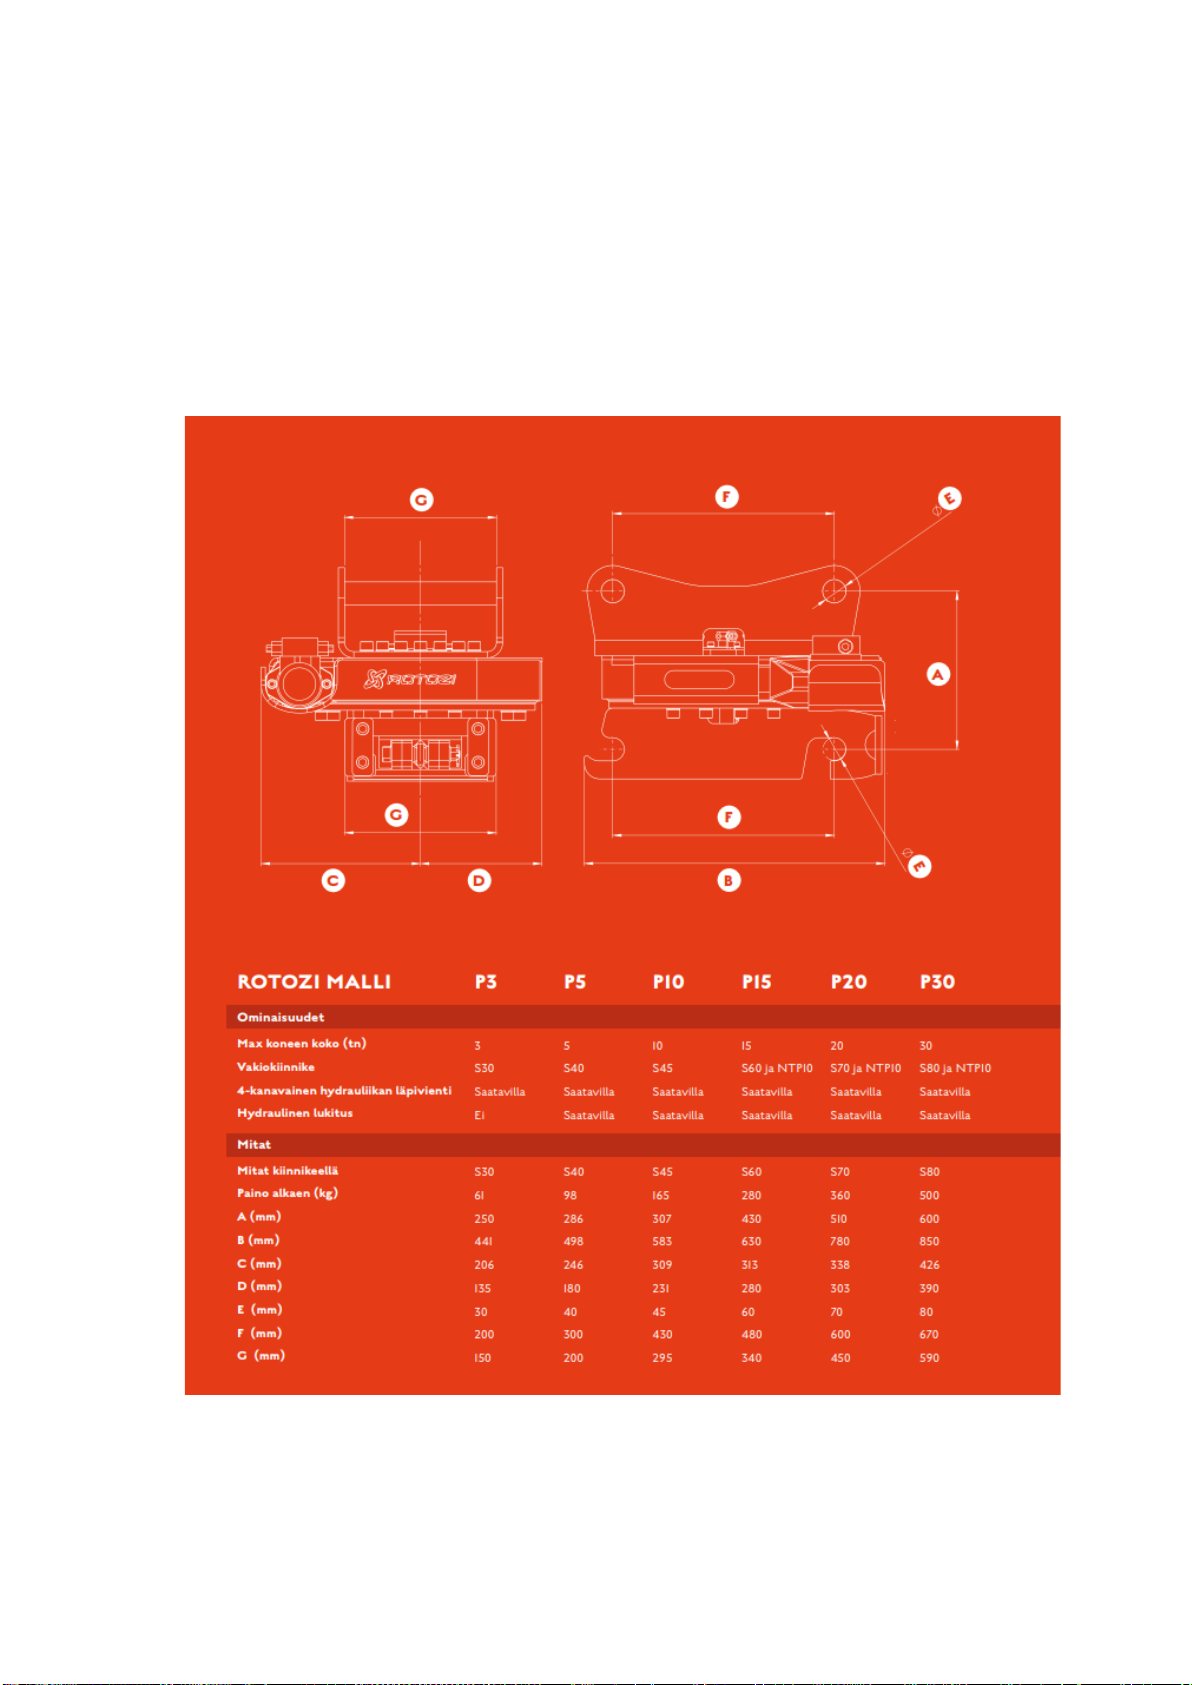
3.1
DIMENSIONS
.....................................................................................................................6
3.2
BUCKET ROTATOR INSTALLATION (check the following)
.......................................................7
3.3
MOUNTING THE CONNECTOR ON THE ROTOZI ROTATOR.
................................................8
3.4
ATTACHING A TOOL TO THE ROTATOR (buckets, forklift spikes, etc.)
.....................................9
3.4.1 Manual locking...........................................................................................................9
3.4.2 Hydraulic locking........................................................................................................9
3.5
REMOVING THE TOOL FROM THE ROTATOR
...................................................................10
3.5.1 Manual locking.........................................................................................................10
3.5.2 Hydraulic locking......................................................................................................10
3.6
REMOVING THE BUCKET ROTATOR CONNECTOR
...........................................................11
3.7
INSTALLATION OF HYDRAULICS ON THE ROTATOR
.........................................................12
3.8 INSTALLING THE HYDRAULIC LOCKING ....................................................................13
3.9 CENTRAL LUBRICATION..............................................................................................15
3.10 LUBRICATION INSTRUCTIONS:...................................................................................15
4USING THE ROTATOR WITH THE MACHINE.....................................................................16
4.1 MAINTENANCE..............................................................................................................16
4.2 WARNINGS AROUND THE AREA WHERE THE MACHINE IS USED...........................17
5WARRANTY..........................................................................................................................18