manuals.online logo
Brands
  1. Home
  2. •
  3. Brands
  4. •
  5. Hyundai
  6. •
  7. Excavator
  8. •
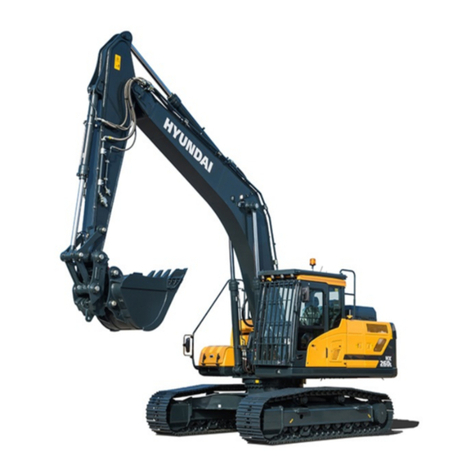
  9. Hyundai R35Z-7 User manual

Hyundai R35Z-7 User manual

OPERATION MANUAL
HYUNDAI
EXCAVATOR
R35Z-7
http://marengine.com/r35Z-7-excavator
CONTENTS
Foreword
---------------------------------------------------------
0-1
Before servicing this machine
--------------------------
0-2
EC regulation approved
-----------------------------------
0-3
Table to enter S/No and distribution
----------------------
0-4
Safety labels
----------------------------------------------------
0-5
Guide(Direction, S/No, Symbol)
-----------------------
0-11
1. SAFETY HINTS
1. Before operating the machine
--------------------
1-1
2. During operating the machine
--------------------
1-6
3. During maintenance
----------------------------------
1-13
4. Parking
-----------------------------------------------------
1-16
2. SPECIFICATIONS
1. Major components
------------------------------------
2-1
2. Specifications
--------------------------------------------
2-2
3. Working range
-------------------------------------------
2-3
4. Weight
------------------------------------------------------
2-4
5. Lifting capacities
----------------------------------------
2-5
6. Bucket selection guide
-------------------------------
2-7
7. Undercarriage
-------------------------------------------
2-8
8. Specification for major components
-----------
2-9
9. Recommended oils
-----------------------------------
2-12
3. CONTROL DEVICES
1. Cab devices
----------------------------------------------
3-1
2. Cluster
------------------------------------------------------
3-3
3. Switches
---------------------------------------------------
3-7
4. Levers and pedals
-------------------------------------
3-10
5. Air conditioner and heater
--------------------------
3-13
6. Others
-------------------------------------------------------
3-15
4. OPERATION
1. Suggestion for new machine
---------------------
4-1
2. Check before starting the engine
---------------
4-2
3. Starting and stop the engine
----------------------
4-3
4. Operation of the working device
-----------------
4-7
5. T
raveling of the machine
----------------------------
4-8
6. Efficient working method
-------------------------------
4-11
7. Operation in the special work sites
-------------
4-15
8. Normal operation of excavator
-------------------
4-17
9. Attachment lowering
-----------------------------------
4-18
10. Storage
-----------------------------------------------------
4-19
11. RCV lever operating pattern
----------------------
4-21
5. TRANSPORTATION
1. Preparation for transportation
--------------------
5-1
2. Dimension and weight
-------------------------------
5-2
3. Loading the machine
---------------------------------
5-4
4. Fixing the machine
------------------------------------
5-6
5. Loading and unloading by crane
-------------------
5-7
6. MAINTENANCE
1. Instruction
-------------------------------------------------
6-1
2. Tightening torque
--------------------------------------
6-5
3. Fuel, coolant and lubricants
-----------------------
6-8
4. Maintenance check list
------------------------------
6-10
5. Maintenance chart
------------------------------------
6-15
6. Service instruction
-------------------------------------
6-17
7. Electrical system
---------------------------------------
6-34
8. Air conditioner and heater
--------------------------
6-37
7. TROUBLESHOOTING GUIDE
1. Engine
------------------------------------------------------
7-1
2. Electrical system
---------------------------------------
7-2
3 Others
--------------------------------------------------------
7-3
8. HYDRAULIC BREAKER
1. Selecting hydraulic breaker
------------------------
8-1
2. Circuit configuration
-----------------------------------
8-2
3. Maintenance
---------------------------------------------
8-3
4. Precaution when operating the breaker
------
8-4
5. Quick clamp
----------------------------------------------
8-6
0-1
This manual contains a number of instructions and safety recommendations regarding driving,
handling, lubrication, maintenance, inspection and adjustment of the excavator.
The manual is to promote safety maintenance and enhance machine performance.
Keep this manual handy and have all personnel read it periodically.
If you sell the machine, be sure to give this manual to the new owners.
This machine complies with EC directive "89/392/EEC".
1. Read and understand this manual before operating the machine.
This operator's manual may contain attachments and optional equipment that are not available in
your area. Please consult your local Hyundai distributor for those items you require.
Improper operation and maintenance of this machine can be hazardous and could result in serious
injury or death.
Some actions involved in operation and maintenance of the machine can cause a serious accident,
if they are not done in a manner described in this manual.
The procedures and precautions given in this manual apply only to intended uses of the machine.
If you use your machine for any unintended uses that are not specifically prohibited, you must be
sure that it is safe for you and others. In no event should you or others engage in prohibited uses of
actions as described in this manual.
2. Inspect the jobsite and follow the safety recommendations in the safety hints section before
operating the machine.
3. Use genuine Hyundai spare parts for the replacement of parts.
We expressly point out that Hyundai will not accept any responsibility for defects resulting from non-
genuine parts or non workmanlike repair.
In such cases Hyundai cannot assume liability for any damage.
Continuing improvements in the design of this machine can lead to changes in detail which may not
be reflected in this manual. Consult Hyundai or your Hyundai distributor for the latest available
information for your machine or for questions regarding information in this manual.
FOREWORD
0-2
It is the responsibility of the owner and all service and maintenance personnel to avoid accidents and
serious injury by keeping this machine properly maintained.
It also is the responsibility of the owner and all service and maintenance personnel to avoid accidents
and serious injury while servicing the machine.
No one should service or attempt to repair this machine without proper training and supervision.
All service and maintenance personnel should be thoroughly familiar with the procedures and
precautions contained in this manual.
All personnel also must be aware of any federal, state, provincial or local laws or regulations covering
the use and service of construction equipment.
The procedures in this manual do not supersede any requirements imposed by federal, state,
provincial or local laws.
Hyundai can not anticipate every possible circumstance or environment in which this machine may be
used and serviced.
All personnel must remain alert to potential hazards.
Work within your level of training and skill.
Ask your supervisor if you are uncertain about a particular task. Do not try to do too much too fast.
Use your common sense.
BEFORE SERVICING THIS MACHINE
0-3
Â
Noise level (EN474-1 ANNEX4.10 and 2000/14/EC) are as followings.
LWA : 94
dB
(EU only)
LPA : 75
dB
Â
The value of vibrations transmitted by the operator's seat are lower than standard value of (EN474-1
ANNEX 4.3.1.3)
E
EC REGULATION APPROVED
4-7
Confirm the operation of control lever and
working device.
Left control lever controls arm and swing.
Right control lever controls boom and bucket.
When you release the control lever, control
lever returns to neutral position automatically.
When operating swing, consider the swing
distance by inertia.
Left control lever
1 Arm roll-out
2 Arm roll-in
3 Swing right
4 Swing left
4. OPERATION OF WORKING DEVICE
Right control lever
5 Boom lower
6 Boom raise
7 Bucket roll-out
8 Bucket roll-in
Dozer control lever
9 Dozer blade up
10 Dozer blade down
ö
1)
2)
3)
ö
ö
ö
ö
6
5
8
7
9
10
32
14
58
76
10
9
1112
13 14
2
1
3
4
R35Z74OP06A
R35Z74OP07
R35Z74OP08
Boom swing pedal
11 Boom swing right
12 Boom swing left
Option control pedal
13, 14 Refer to optional attachment
ö
ö
11
12
R35Z74OP15
5-6
Lower down the working device on the loading
plate of trailer.
Keep the safety lever on the LOCK position.
Turn OFF all the switches and remove the key.
1)
2)
3)
4. FIXING THE MACHINE
Secure all locks.
5)
Place timber underneath of the track and fix firmly
with wire rope to prevent the machine from
moving forward, backward, right or left.
6)
Starting switch
Safety lever
Service door
Engine hood
Tool box
Cabin
R35Z75TA12
R35Z75TA10
Chain
R35Z75TA11
5-7
Check the weight, length, width and height of the
machine referring to the chapter 2, specification
when you are going to hoist the machine.
Use long wire rope and stay to keep the distance
with the machine as it should avoid touching with
the machine.
Put a rubber plate contact with wire rope and
machine to prevent damage.
Place crane on the proper place.
Install the wire rope and stay like the illustration.
Make sure wire rope is proper size.
Place the safety lever to LOCK position to
prevent the machine moving when hoisting the
machine.
The wrong hoisting method or installation of
wire rope can cause damage to the machine.
Do not load abruptly.
Keep area clear of personnel.
5. LOADING AND UNLOADING BY CRANE
Wire rope
Stay
Boom
Dozer blade
Wire rope
Stay
1)
2)
3)
4)
5)
R35Z75TA13
6-31
REPLACEMENT OF BUCKET
When knocking the pin in with a hammer,
metal particles may fly and cause serious
injury, particularly if they get into your eyes.
When carrying out this operation, always
wear goggles, helmet, gloves, and other
protective equipment.
When the bucket is removed, place it in a
stable condition.
When performing joint work, make sure
signals to each other and work carefully for
safety's sake.
Lower the bucket on the ground as the picture
shown in the right.
Lock the safety lever to the LOCK position and
stop the engine.
Remove the stopper bolts(1) and nuts(2), then
remove pins(3, 4) and remove the bucket.
When removing the pins, place the bucket so
that it is in light contact with the ground.
If the bucket is lowered strongly to the
ground, the resistance will be increased and it
will be difficult to remove the pins.
After remove the pins, make sure that they do
not become contaminated with sand or mud
and that the seals of bushing on both sides
do not become damaged.
Align the arm with holes(A) and the link with
holes(B), then coat with grease and install
pins(3, 4)
When installing the bucket, the O-rings are
easily damaged, so fit the O-rings on the
boss of the bucket as shown in the picture.
After knocking the pin, move the O-ring down
to the regular groove.
Install the stopper bolt(1) and nuts(2) for each
pin, then grease the pin.
3
4
1
2
2
1
O-ring Nut
Bolt
Bucket Arm Bush
ö
ö
(1)
(2)
(3)
ö
ö
ö
(4)
ö
(5)
25)
R5576MA70
R5576MA71
R5576MA42
R35Z76MA24
6-32
REPLACEMENT OF BUCKET TOOTH
Loosen the bolts and nuts.
Remove dust and mud from surface of bucket by
using knife.
Fit news tooth to bucket.
Fasten bolts and nuts.
Personal injury can result from bucket falling.
Block the bucket before changing tooth tips or
side cutters.
Nut
Bolt
(1)
(2)
(3)
(4)
26)
R35Z76MA25
6-37
CLEAN AND REPLACE OF THE HEATER
FILTER
Always stop the engine before servicing.
Remove the screw(1) and heater cover(2) on the
right side of cabin.
Remove the heater filter(3).
Clean the filter using a pressurized air(Below
2
kgf/cm2
, 28
psi
).
When using pressurized air, be sure to wear
safety glasses.
Inspect the filter after cleaning. If it is damaged
or badly contaminated, use a new filter.
8. AIR CONDITIONER AND HEATER
1)
ö
(1)
(2)
(4)
(5)
1
2
3
Outside
Inside
Pressurized air
2
kgf/cm2
below
R35Z76MA27
13036MI34
When using the air conditioner for a long time,
open the window once every one hour.
Be careful not to overcool the cab.
The cab is properly cooled if the operator feels
cool when entering there from outside(About 5ÁC
lower than the outside temperature).
When cooling, change air occasionally.
CHECK DURING SEASON
Ask the service center for replenishment of
refrigerant or other maintenance service so that
the cooling performance is not damaged.
CHECK DURING OFF-SEASON
Operate the air conditioner 2 or 3 times a month
(Each for a few minutes) to avoid loss of oil film in
the compressor.
(1)
(2)
(3)
(4)
3)
4)
PRECAUTIONS FOR USING AIR CONDITIONER
2)
7-1
This guide is not intended to cover every conditions, however many of the more common possibilities
are listed.
Trouble Service Remark
Add the oil to the specified level.
Replace the oil filter cartridge.
Check oil leakage from the pipe or the joint.
Replace the monitor.
Supply the coolant and check leakage.
Adjust fan belt tension.
Wash out inside of cooling system.
Clean or repair the radiator fin.
Check the thermostat.
Tighten the radiator cap firmly or replace the
packing of it.
Replace the monitor.
Add fuel.
Repair where air is leaking into fuel system.
Check the injection pump or the nozzle.
Check the valve clearance.
Check engine compression pressure.
Adjust to specified oil quantity.
Replace with specified fuel.
Clean or replace the air cleaner element.
Check the nozzle.
Check engine compression pressure.
Clean or replace the turbocharger.
Check the nozzle.
Check with specified fuel.
Check over-heating
Replace the muffler.
Adjust valve clearance.
Â
Â
Â
Â
Â
Â
Â
Â
Â
Â
Â
Â
Â
Â
Â
Â
Â
Â
Â
Â
Â
Â
Â
Â
Â
Â
Â
The engine oil pressure lamp
lights ON when engine speed is
raised after completion of warm
up.
The engine does not start when
the starting motor is turned over.
Exhaust gas is white or blue.
TTROUBLESHOOTING GUIDE
1. ENGINE
Steam is emitted from the top
part of the radiator(The pressure
valve).
Coolant level warning lamp lights
ON.
Exhaust gas occasionally turns
black.
Combustion noise occasionally
changes to breathing sound.
Unusual combustion noise or
mechanical noise.
7-2
2. ELECTRICAL SYSTEM
Trouble Service Remark
Check for loose terminals and open-circuit wiring.
Adjust belt tension.
Check the alternator.
Check and repair wiring.
Check the alternator.
Check and repair the wiring.
Charge the battery.
Check the starting motor.
Check the safety relay.
Charge the battery.
Check the safety relay.
Charge the battery.
Check the starting motor.
Check and repair the wiring.
Charge the battery.
Check the monitor.
Check the caution lamp.
Check the monitor.
Check and repair the wiring.
Â
Â
Â
Â
Â
Â
Â
Â
Â
Â
Â
Â
Â
Â
Â
Â
Â
Â
Â
Lamp does not glow brightly even
when engine runs at high speed.
Lamp flickers while engine runs.
Battery charging lamp does not
go out even when engine runs at
high speed.
Unusual noise is emitted from the
alternator.
Starting motor does not turn when
starting switch is turned START.
The pinion of the starting motor
keeps going in and out.
Starting motor turns the engine
sluggishly.
The starting motor disengages
before the engine starts up.
The engine oil pressure lamp
does not light up when engine is
stationary(When the starting
switch is in ON position.)
Battery charging lamp does not
light up when the engine is
stationary.
(When the starting switch is in ON
position.)
7-3
3. OTHERS
Trouble Service Remark
Adjust tension of track.
Add oil to specified level.
Clean the hydraulic tank strainer.
Clean the oil cooler.
Adjust fan belt tension.
Add oil to specified level.
Â
Â
Â
Â
Â
Â
Â
Track slip out of place.
Excessive wear of the sprocket.
Bucket either rises slowly or not at
all.
Slow speed of travel, swing,
boom, arm and bucket.
Unusual noise emitted from pump.
Excessive oil temperature rise of
hydraulic oil.
8-2
2. CIRCUIT CONFIGURATION
As for breaker oil pressure line, use extra spool of main control valve.
Set proper breaker pressure on load relief valve.
The pressure of the ROBEX35Z-7 system is 230
kgf/cm2
(3270
psi
).
The accumulator should be used to the breaker charging and return line.
If the accumulator is not used, it will be damage as the input wave is delivered.
Keep the pressure pulsation of pump below 60
kgf/cm2
(850
psi
) by installing the accumulator.
Do not connect the breaker return line to the main control, but connect to the return line front of the
cooler.
Do not connect the breaker return line to drain lines, such as of swing motor, travel motor or pump,
otherwise they should be damaged.
One of spool of the main control valve should be connected to the tank.
Select the size of pipe laying considering the back pressure.
Shimless tube should be used for the piping. The hose and seal should be used Hyundai genuine
parts.
Weld the bracket for pipe clamp to prevent damage caused by vibration.
1)
2)
3)
4)
ö
5)
6)
7)
8)
9)
10)
9-1
INDEX
A
After engine start
----------------------------------------------
4-5
Air cleaner filter
-----------------------------------------------
6-23
Air conditioner & heater
----------------------------------
3-13
Air conditioner filter
-----------------------------------------
6-37
Attachment lowering
---------------------------------------
4-18
B
Battery
-----------------------------------------------------------
6-34
Before starting engine
--------------------------------------
4-2
Boom lowering
-----------------------------------------------
4-18
Bucket replacement
----------------------------------------
6-31
Bucket selection guide
--------------------------------------
2-7
Bucket tooth replacement
-------------------------------
6-32
C
Cab device
-------------------------------------------------------
3-1
Cassette & radio
---------------------------------------------
3-17
Changing machine control pattern
------------------
4-21
Cigar lighter
----------------------------------------------------
3-15
Coolant
----------------------------------------------------------
6-19
Cooling fan
-----------------------------------------------------
6-23
D
Dozer control
----------------------------------------------------
4-7
E
Emergency exit
-------------------------------------------------
0-7
Engine oil filter
------------------------------------------------
6-17
Engine oil level
-----------------------------------------------
6-17
Engine starting & stop
--------------------------------------
4-3
Engine starting by booster
------------------------------
6-35
Engine stop
------------------------------------------------------
4-6
F
Fan belt
----------------------------------------------------------
6-22
Fuel filter
--------------------------------------------------------
6-25
Fuel leakage
--------------------------------------------------
6-25
Fuel system bleeding
--------------------------------------
6-26
Fuel tank
--------------------------------------------------------
6-24
Fuse box
--------------------------------------------------------
3-17
H
Hydraulic breaker
-----------------------------------------------
8-1
Hydraulic oil changing
--------------------------------------
6-26
Hydraulic oil filling
--------------------------------------------
6-26
Hydraulic oil level
---------------------------------------------
6-26
L
Levers & pedals
-----------------------------------------------
3-10
Lifting capacities
------------------------------------------------
2-5
Lubricant specification
-------------------------------
2-12, 6-9
M
Maintenance check list
-------------------------------------
6-10
Major component
-----------------------------------------------
2-1
Monitor panel
----------------------------------------------------
3-3
Mounting and dismounting
--------------------------------
1-12
N
New machine operation
-------------------------------------
4-1
O
Oil cooler
--------------------------------------------------------
6-22
Operating pattern
--------------------------------------------
4-21
P
Pedals
------------------------------------------------------------
3-10
Periodical replacement parts
-------------------------------
6-4
Pilot line filter
---------------------------------------------------
6-28
R
Radiator flushing
----------------------------------------------
6-19
Radio
--------------------------------------------------------------
3-17
RCV lever lubricate
------------------------------------------
6-29
Recommended oils
----------------------------------
2-12, 6-9
Relieving pressure
---------------------------------------------
6-3
Return filter
------------------------------------------------------
6-27
S
Safety hints
-------------------------------------------------------
1-1
Safety labels
-----------------------------------------------------
0-5
Safety parts
------------------------------------------------------
6-4
Seat
---------------------------------------------------------------
3-16
Seat belt
---------------------------------------------------------
3-16
9-2
Service meter
---------------------------------------------------
3-4
Specification for major component
---------------------
2-9
Specification
----------------------------------------------------
2-2
Start switch
------------------------------------------------------
3-7
Storage
----------------------------------------------------------
4-19
Suction strainer
----------------------------------------------
6-27
Swing bearing grease
-------------------------------------
6-28
Switch panel
----------------------------------------------------
3-7
Switches
----------------------------------------------------------
3-7
T
Torques-major component
--------------------------------
6-7
Torques-fastener
----------------------------------------------
6-5
Towing machine
----------------------------------------------
4-10
Track adjustment
--------------------------------------------
6-30
Track shoe
-------------------------------------------------------
2-8
Transportation
--------------------------------------------------
5-1
Travel reduction gear oil
----------------------------------
6-29
Travelling machine
--------------------------------------------
4-8
Troubleshooting guide
---------------------------------------
7-1
U
Undercarriage
--------------------------------------------------
2-8
W
Warming up operation
--------------------------------------
4-5
Warning lamps
-------------------------------------------------
3-5
Water separator
----------------------------------------------
6-24
Weight
--------------------------------------------------------------
2-4
Working device operation
----------------------------------
4-7
Working method
---------------------------------------------
4-11
Working range
--------------------------------------------------
2-3
Tech Library http://engine.od.ua
Diesel Engines
ABS
Agco-Sisu
Akasaka
Baudouin
BMW
Bukh
Caterpillar
CHN 25/34
Cummins
Daihatsu
Detroit
Deutz
Doosan-Daewoo
Fiat
Ford
GE
Grenaa
Guascor
Hanshin
Hatz
Hino
Honda
Hyundai
Isotta
Isuzu
Iveco
John-Deere
Kelvin
Kioti
Komatsu
Kubota
Liebherr
Lister
Lombardini
MAK
MAN B&W
Mercedes
Mercruiser
Mirrlees BS
Mitsubishi
MTU
MWM
Niigata
Paxman
Perkins
Pielstick
Rolls / Bergen
Ruggerini
Ruston
Scania
Shibaura
Sisu-Valmet
SKL
Smit-Bolnes
Sole
Stork
VM-Motori
Volvo
Volvo Penta
Westerbeke
Wichmann
Yanmar
Machinery
ABG
Airman
Akerman
Ammann
Astra
Atlas Copco
Atlas Weyha.
Atlet
Bell
Bendi
Bigjoe
Bobcat
Bomag
BT
Carelift
Case
Caterpillar
Cesab
Challenger
Champion
Claas
Clark
Combilift
Crown
Daewoo-Doosan
Demag
Deutz-Fahr
Dressta
Machinery
Drott
Dynapack
Extec
Faun
Fendt
Fiat
Fiatallis
Flexicoil
Furukawa
Gehl
Genie
Grove-gmk
Halla
Hamm
Hangcha
Hanix
Hanomag
Hartl
Haulpack
Hiab
Hidromek
Hino truck
Hitachi
Hyster
Hyundai
IHI
Ingersoll-rand
JCB
JLG
John-Deere
Jungheinrich
Kalmar
Kato
Kioti
Kleeman
Kobelco
Komatsu
Kramer
Kubota
Lamborghini
Landini
Liebherr
Linde
Link-belt
Manitou
Massey-Ferg.
Mccormick
MDI-Yutani
Mitsubishi
Moxy
Mustang
Neusson
New-Holland
Nichiyu
Nissan
OK
OM-Pimespo
others-tech
Pel-Job
PH-mining
Poclain
Powerscreen
Same
Samsung
Sandvik
Scania
Schaefer
Schramm
Sennebogen
Shangli
Shibaura
Steiger
Steinbock
Steyr
Still
Sumitomo
Super-pac
Tadano
Takeuchi
TCM
Terex
Toyota
Valpadana
Venieri
Versatile
Vogele
Volvo
Weidemann
Wirtgen
Yale
YAM
Yanmar

Other manuals for R35Z-7

1

Other Hyundai Excavator manuals

Hyundai HX330 L User manual

Hyundai

Hyundai HX330 L User manual

Hyundai R480LC-9S User manual

Hyundai

Hyundai R480LC-9S User manual

Hyundai HX480 L User manual

Hyundai

Hyundai HX480 L User manual

Hyundai Robex 250LC-9 User manual

Hyundai

Hyundai Robex 250LC-9 User manual

Hyundai Robex 320LC-9 User manual

Hyundai

Hyundai Robex 320LC-9 User manual

Hyundai Rolex 360LC-7A User manual

Hyundai

Hyundai Rolex 360LC-7A User manual

Hyundai HX145 LCR User manual

Hyundai

Hyundai HX145 LCR User manual

Hyundai HX140A-L User manual

Hyundai

Hyundai HX140A-L User manual

Hyundai Robex R145CR-9 User manual

Hyundai

Hyundai Robex R145CR-9 User manual

Hyundai R160LC-9 User manual

Hyundai

Hyundai R160LC-9 User manual

Hyundai Robex 330LC-9A User manual

Hyundai

Hyundai Robex 330LC-9A User manual

Hyundai HX130 LCR User manual

Hyundai

Hyundai HX130 LCR User manual

Hyundai HX220 L User manual

Hyundai

Hyundai HX220 L User manual

Hyundai Robex 380LC-9SH User manual

Hyundai

Hyundai Robex 380LC-9SH User manual

Hyundai Robex 160LC-9 User manual

Hyundai

Hyundai Robex 160LC-9 User manual

Hyundai Robex 80CR-9 User manual

Hyundai

Hyundai Robex 80CR-9 User manual

Hyundai HX160A L User manual

Hyundai

Hyundai HX160A L User manual

Hyundai Robex 160LC-9S User manual

Hyundai

Hyundai Robex 160LC-9S User manual

Hyundai Robex 260LC-9A User manual

Hyundai

Hyundai Robex 260LC-9A User manual

Hyundai Robex 140LC-9S User manual

Hyundai

Hyundai Robex 140LC-9S User manual

Hyundai Robex 290LC-9MH User manual

Hyundai

Hyundai Robex 290LC-9MH User manual

Hyundai HX140 LT3 User manual

Hyundai

Hyundai HX140 LT3 User manual

Hyundai HX330A L User manual

Hyundai

Hyundai HX330A L User manual

Hyundai R 160 LC-3 User manual

Hyundai

Hyundai R 160 LC-3 User manual

Popular Excavator manuals by other brands

Case CX460 Service manual

Case

Case CX460 Service manual

SANY SY195C9 Shop Manual

SANY

SANY SY195C9 Shop Manual

jcb JS70 Service manual

jcb

jcb JS70 Service manual

Wacker Neuson 803 Dualpower Operator's manual

Wacker Neuson

Wacker Neuson 803 Dualpower Operator's manual

CASE CONSTRUCTION CX26C Operator's manual

CASE CONSTRUCTION

CASE CONSTRUCTION CX26C Operator's manual

New Holland E215C EVO Operator's manual

New Holland

New Holland E215C EVO Operator's manual

Hitachi ZAXIS 130-6N Operator's manual

Hitachi

Hitachi ZAXIS 130-6N Operator's manual

Komatsu ecot3 PC228US-8 Shop Manual

Komatsu

Komatsu ecot3 PC228US-8 Shop Manual

Doosan DX300LC-5 Shop Manual

Doosan

Doosan DX300LC-5 Shop Manual

Komatsu PC220-8 brochure

Komatsu

Komatsu PC220-8 brochure

jcb 15c-1 Operator's manual

jcb

jcb 15c-1 Operator's manual

Yanmar ViO38-6 USER OPERATION AND MAINTENANCE MANUAL

Yanmar

Yanmar ViO38-6 USER OPERATION AND MAINTENANCE MANUAL
CASE CONSTRUCTION 845B VHP manual

CASE CONSTRUCTION

CASE CONSTRUCTION 845B VHP manual

Hitachi EX1900-5 Operator's manual

Hitachi

Hitachi EX1900-5 Operator's manual

Daewoo Solar 340LC-V Shop Manual

Daewoo

Daewoo Solar 340LC-V Shop Manual

NPK Genesis GHG 16 Safety & operator manual
NPK

NPK Genesis GHG 16 Safety & operator manual

Gradall XL3100V Operators safety manual

Gradall

Gradall XL3100V Operators safety manual

mecalac 12 MXT Handbook

mecalac

mecalac 12 MXT Handbook

manuals.online logo
manuals.online logoBrands
  • About & Mission
  • Contact us
  • Privacy Policy
  • Terms and Conditions

Copyright 2025 Manuals.Online. All Rights Reserved.