HEAVY-DUTY PISTON HAND PUMP OWNER’S MANUAL HEAVY-DUTY PISTON HAND PUMP OWNER’S MANUAL
4. Use the right tool for the job. Do not attempt to force small equipment to do the work of
larger industrial equipment. There are certain applications for which this equipment was
designed. It will do the job better and more safely at the capacity for which it was intended.
Do not modify this equipment, and do not use this equipment for a purpose for which it was
not intended.
5. Check for damaged parts. Before using this product, carefully check that it will operate
properly and perform its intended function. Check for damaged parts and any other condi-
tions that may affect the operation of this product. Replace damaged or worn parts immedi-
ately.
6. Do not overreach. Keep proper footing and balance at all times to prevent tripping, falling,
back injury, etc.
7. DO NOT use the equipment when tired or under the influence of drugs, alcohol, or
medication. A moment of inattention while operating this equipment may result in serious
personal injury.
8. Industrial applications must follow OSHA requirements.
SPECIFIC OPERATION WARNINGS
To ensure safe and efficient operation, it is essential to read and follow each of these warnings
and precautions.
• Improper use or installation of this product can cause serious bodily injury or death.
• Do not smoke near pump or use pump near an open flame when pumping flammable fluids.
Fire could result.
• A filter should be used on pump outlet to ensure that no foreign material is transferred to fuel
tank.
•
Use fuel-resistant thread sealant or sealant tape on all threaded joints to protect against leakage.
•
Storage tank or barrel should be anchored to prevent tipping in both the full and empty conditions.
• To minimize static electricity build-up, keep nozzle in contact with container being filled.
INSTALLATION
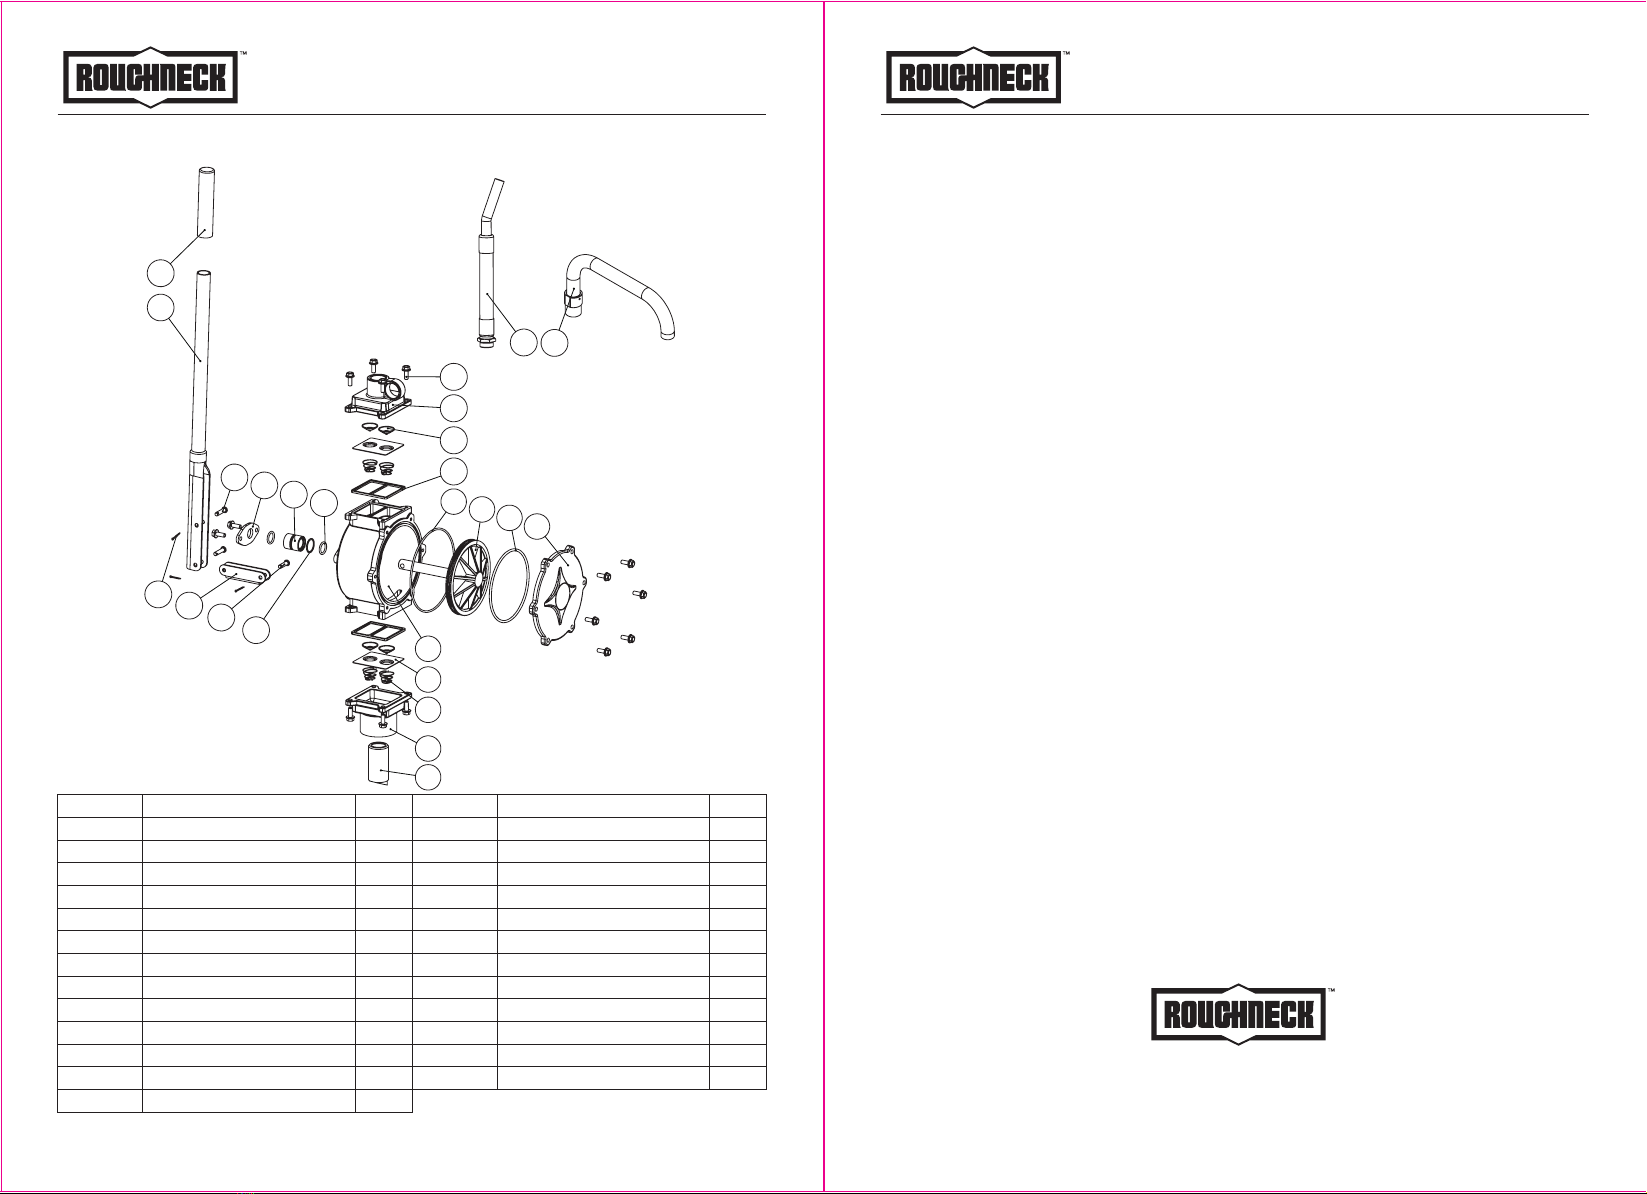
Use the following procedures to install the hand fuel pump on a tank with a 2in. bung.
Install suction pipe
1. Remove the two protective plugs from the pump inlet and outlet ports.
2. Wrap the threaded end of the suction pipe with 3 to 4 turns of Teflon tape.
3. Install the suction pipe into the inlet cover and tighten firmly with a pipe wrench.
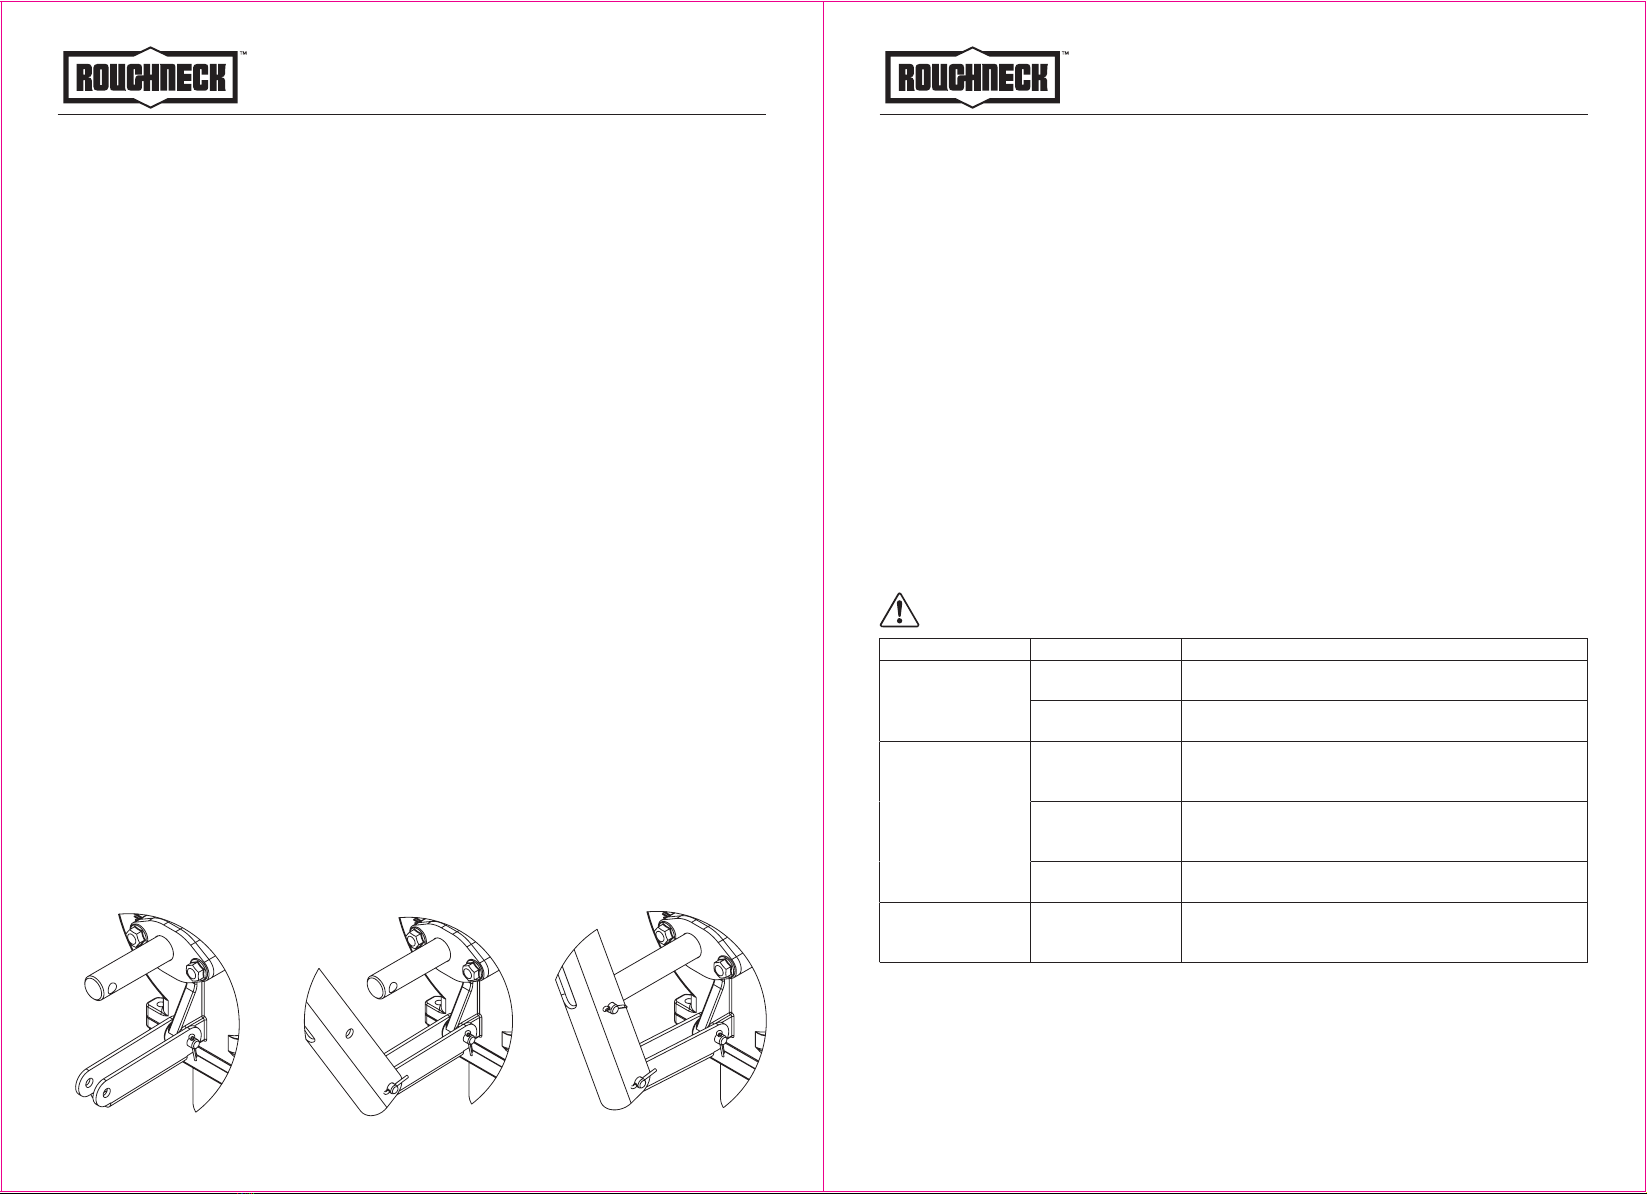
Install handle
1. To install the links on the pump, insert a long clevis pin through the link ends and the pump’s
link holes. Secure with a small cotter pin. (Figure 1)
2. Attach the free ends of the links to the bottom, outer surfaces of the handle. Insert a long
clevis pin through the holes on both links and the lowest hole on the handle. Secure with a
small cotter pin. (Figure 2)
3. Insert a screwdriver in the piston shaft of the pump and pull the piston out. Install the shaft
on the handle at either piston hole by placing a short clevis pin through the handle and the
piston shaft end and securing with the hitch clip pin.
2 of 4
Install pump on tank
1. Before installing the pump, clean the tank interior of all dirt and foreign material.
2. Lubricate the threads of the inlet cover with Teflon tape or a thread-sealing compound
approved for use with petroleum fuels.
3. Extend the adjustable suction pipe to its full length and carefully insert it into tank opening.
The suction pipe will adjust to the length needed and rest on the bottom of tank.
NOTE: The suction pipe supplied has a variable length of 22 to 40 inches. If additional
length is needed, order the 15-inch Suction Pipe Extension Kit.
4. Thread the inlet fitting of the pump onto the tank and turn the pump to tighten snugly.
NOTE: To prevent the buildup of pressure and possible fuel leakage through the nozzle,
make sure the tank is vented.
Install hose and nozzle assembly
Apply 3 to 4 wraps of Teflon tape to the threaded end of the hose and hand-tighten into the
outlet cover until snug.
OPERATION INSTRUCTIONS
To Dispense Fluid
1. Remove the nozzle from its holder and insert into the receiving tank of the equipment or
vehicle.
2. To operate pump, manually move the handle in a push/pull motion.
3. After dispensing the desired amount of fluid, drain the hose and nozzle, place the nozzle in its
holder and return the handle to its upright storage position.
TROUBLE SHOOTING
WARNING: Relieve pressure before you check or service any system equipment.
MAINTAINANCE
Transportation
When the pump is in transit, do not expose the pump to direct sunlight and avoid rain, falling,
corrosive substances, etc.
Storage
①. Store the pump in a dry place with good ventilation. Do not expose it to excessive heat,
humidity or sunlight. Never let it touch any corrosive substances.
②. Store it out of the reach of children.
3 of 4
Figure 1 Figure 2 Figure 3
Problem Possible Cause Corrective Action
Fluid leaks around shaft
seal
1. Bearing settled 1. Tighten two screws on the retainer and torque to approximately 20lb.
in. (or hand tighten then another half turn until leak stops)
2. Seals worn 2. Remove the two screws on the retainer and remove the retainer and
bearing. Remove bearing, replace O-ring.
Low flow rate 1. Suction pipe leak 1. Remove the pump from the tank. Inspect the spacer and suction pipe
to ensure they are not worn or damaged. Replace as necessary and
install the suction pipe and pump again using installation instructions
2. Piston ring worn 2. Remove the piston cover and inspect the piston ring. Scoring and
severe scuffing on the liner indicates wear. If necessary, install an
overhaul kit
3. Piston cracked 3. Remove the piston cover and inspect the piston. Install an Overhaul
Kit, if necessary.
Pump seized Debris in piston Disassemble and clean the piston. Check for debris lodged in the piston
ring. Debris or welding slag contaminants in the tank. Replace the
piston ring. If appropriate, flush the tank of all contaminants.