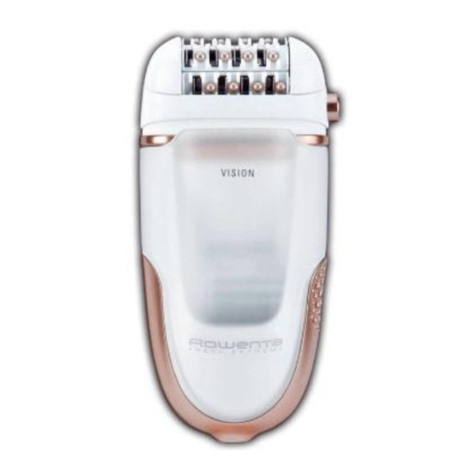
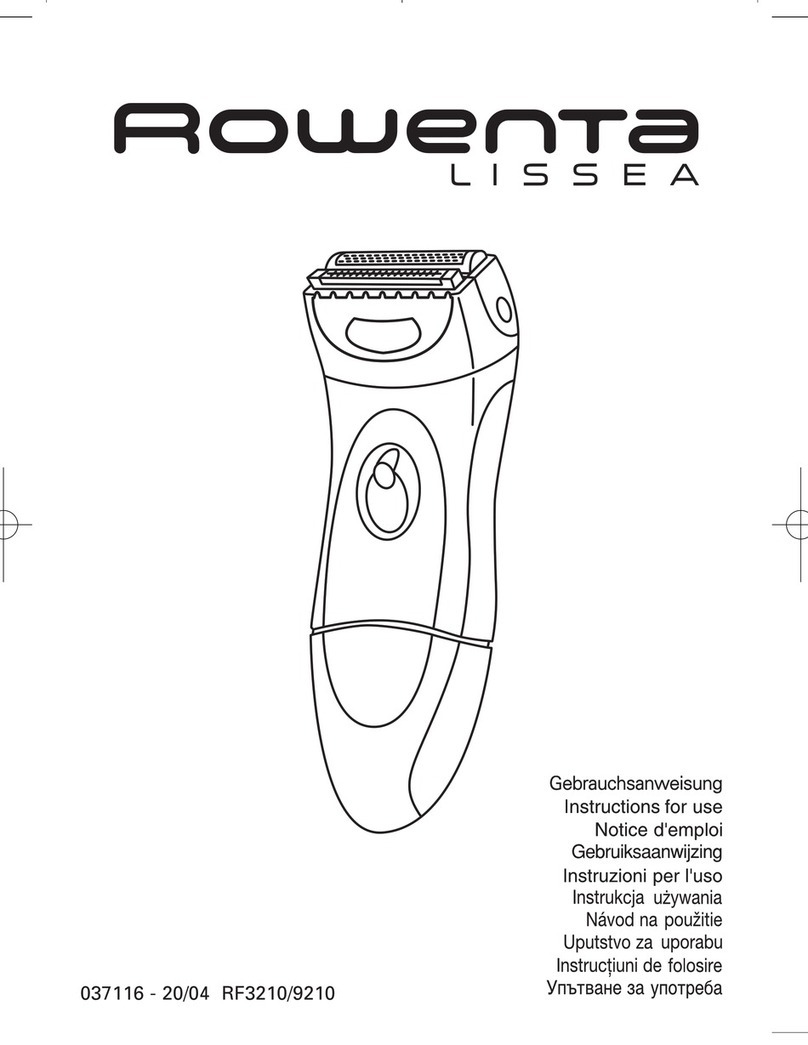
Rowenta EP8444E0 User manual

www.rowenta.com
1800119299 - 23/10

10
11
7
1
4
3
22
23
12
13
14
20
6
5
21
a
b
17
18
16
19
17
15
9
8
2

1
A lire attentivement avant emploi...
1-DESCRIPTIO DE VOTRE APPAREIL
• Fonction Vision : Pour une épilation nette et sans retouche, votre appareil est équipé du
système Vision. Ce système, en diffusant un halo ultra lumineux sur la peau, permet de rendre
plus visibles tous les poils, même les plus fins, les plus courts ou les plus clairs.
• Fonction tête pivotante : Pour votre confort, votre appareil est équipé d’une tête pivo-
tante. Celle-ci permet de mieux épouser le contour des zones à épiler pour plus d’effica-
cité (jambes, aisselles, maillot).
• Fonction flux d’air : Fresh Extreme est équipé d’une turbine haute vitesse qui projette un
souffle d’air sur la peau et la rafraichit. Cela contribue à réduire la douleur liée à l’épilation.
2-SÉCURITÉ
• Pour votre sécurité, cet appareil est conforme aux normes et réglementations applica-
bles (Directives Basse Tension, Compatibilité Electromagnétique, Environnement...).
• Vérifiez que la tension de votre installation électrique correspond à celle de votre appa-
reil. Toute erreur de branchement peut causer des dommages irréversibles non couverts
par la garantie.
• L'installation de l'appareil et son utilisation doit toutefois être conforme aux normes en
vigueur dans votre pays.
• Cet appareil n’est pas prévu pour être utilisé par des personnes (y compris les enfants)
dont les capacités physiques, sensorielles ou mentales sont réduites, ou des personnes
dénuées d’expérience ou de connaissance, sauf si elles ont pu bénéficier, par l’intermé-
diaire d’une personne responsable de leur sécurité, d’une surveillance ou d’instructions
préalables concernant l’utilisation de l’appareil. Il convient de surveiller les enfants pour
s’assurer qu’ils ne jouent pas avec l’appareil.
• 'utilisez pas votre appareil et contactez un Centre Service Agréé si : votre appareil est
tombé, s'il ne fonctionne pas normalement.
• L'appareil doit être débranché : avant le nettoyage et l'entretien, en cas d'anomalie de
fonctionnement, dès que vous avez terminé de l'utiliser.
• e pas utiliser si le cordon est endommagé.
• e pas immerger ni passer sous l’eau l’appareil, même pour le nettoyage.
• e pas tenir avec les mains humides.
• e pas débrancher en tirant sur le cordon, mais en tirant par la prise.
FR
1-Tête pivotante
2-Tête d’épilation
3-Pinces
4-Billes de massage
5-Tête exfoliation (selon modèle)
6-2 rouleaux exfoliants
7-Bouton d’éjection de la tête amovible
8-Capuchon
9-Interrupteur 2 vitesses et arrêt
10-Brossette de nettoyage
11-Bloc d’alimentation
12-Accessoire aisselles (selon modèle)
13-Accessoire maillot (selon modèle)
14-Tête de rasage (selon modèle)
15-Micro grille
16-Tondeuse
17-Boutons d’éjection
18-Bloc lames
19-Capot de protection
20-Lubrifiant pour tête bikini
21-Tête Bikini (selon modèle)
a. Tête de coupe avec lame céramique
b. 3 peignes amovibles (3-6-9 mm)
22 - Vision
23 - Fonction flux d’air
2
• e pas utiliser de prolongateur électrique.
• e pas nettoyer avec des produits abrasifs ou corrosifs.
• e pas utiliser par température inférieure à 0 °C et supérieure à 35 °C.
• Lorsque l’appareil est en marche, il ne doit pas rentrer en contact avec les cils, les
cheveux, les vêtements, ou tout autre objet, afin d’éviter tout risque de blessure ou de
blocage de l’appareil.
• ’utilisez pas l’épilateur :
- sur le visage
- sur une peau blessée
- sur les zones à risques (varices, grains de beauté, marques de naissance)
- si vous souffrez d’affections cutanées (eczéma, inflammations, acné).
En cas d'usage sur la zone bikini, cet appareil est à utiliser uniquement pour le contour externe.
e pas utiliser sur les zones les plus intimes (lèvres pubiennes).
Pour des raisons d’hygiène, nous vous recommandons de ne pas prêter votre appareil
même dans votre environnement proche.
GARAN IE Votre appareil est destiné à un usage domestique seulement. Il ne peut être
utilisé à des fins professionnelles. La garantie devient nulle et invalide en cas d'utilisation
incorrecte.
3-PRÉPARATIO DE LA PEAU
Votre peau doit être propre et sèche.
• 'appliquez ni crème, ni produit hydratant avant l'épilation.
• Si votre méthode d'épilation était le rasoir : lors des premières séances d'épilation, votre
peau pourra vous paraître plus sensible, car les poils ont été rendus plus épais et plus
durs par le rasage. Cette sensation s'atténuera grâce à votre épilateur : les poils repous-
seront avec moins de vigueur et deviendront plus fins.
• Votre épilateur sera beaucoup plus efficace et facile à utiliser si vous vous en servez
régulièrement.
Nous vous conseillons de vous épiler dès la repousse.
4-MISE SOUS TE SIO 5-MISE HORS TE SIO
6-GOMMAGE (selon modèle)
Le gommage va vous permettre de limiter la repousse des poils sous cutanés, dans le
cadre d'une pratique régulière.
ous vous conseillons vivement d’utiliser la Tête Exfoliation 2 jours après l’épilation pour
éviter d’agresser votre peau.
• e pas utiliser simultanément un gel ou une crème gommante.
1
2
1
2

3
• e jamais procéder au gommage sur les zones sensibles
(aisselles / maillot / visage).
- Après le gommage, nous vous recommandons de passer un gant
humide pour évacuer les peaux mortes.
- Bien sécher la peau après.
• Mode opératoire
- Oter la tête d’épilation en appuyant sur le bouton d’éjection.
- Cliper la Tête Exfoliation sur l’appareil.
- Sélectionnez la vitesse 1.
- Procéder au gommage selon un mouvement lent de va et vient.
Lors d’une première utilisation de la fonction exfoliation ou si votre peau
est fragile, nous vous recommandons :
1. d’humidifier votre peau préalablement au peeling, à l’aide d’un coton ou
d’un gant
. de procéder, avec l’appareil, à des mouvements lents, en douceur
3. de ne pas passer plus de fois au même endroit.
• Remplacement du rouleau exfoliant
- Oter la Tête Exfoliation de l’appareil en appuyant sur le bouton d’éjection.
- A l’aide de l’extrémité plastique (a) de la brossette décliper le rouleau en procédant de la
façon suivante :
1. Retourner la Tête Exfoliation et la maintenir en positionnant le pouce et l’index sur les
extrémités latérales.
2. Tourner le rouleau afin de placer la fente du rouleau en position centrale.
3. Insérer l’extrémité plastique de la brossette dans la fente, en poussant afin d’éjecter le
rouleau.
4. Placer le nouveau rouleau en emboîtant les ailettes (b) du support exfoliant dans la
fente du rouleau et pousser jusqu’au clic !
a
b
CLIC!

7-EPILATIO DES JAMBES
- Pour une épilation optimale, nous vous recommandons d’incliner
légèrement votre épilateur vers votre peau, dans le sens de l’épila-
tion, comme indiqué sur le schéma.
- Sélectionnez la vitesse 1 ou 2.
L’interrupteur doit toujours rester visible pendant
l’utilisation.
- Epilez-vous à rebrousse-poils, lentement, sans
appuyer.
8-EPILATIO DES ZO ES SE SIBLES
ous vous conseillons d'utiliser l'accessoire "zones sensibles"
lorsque vous épilez les aisselles et la zone contour du maillot.
Cet accessoire a été mis au point pour réduire le nombre de pinces
actives, pour une épilation tout en douceur.
- Pour une épilation optimale, nous vous recommandons d’incliner
légèrement votre épilateur vers votre peau, dans le sens de l’épila-
tion, comme indiqué sur le schéma.
• Préparation de la zone à épiler :
- Couper les poils trop longs, supérieurs à 1 cm.
- Sécher parfaitement la zone pour retirer toutes traces de déodorant ou de transpiration.
1) Epilation des aisselles :
- Emboîter l'accessoire aisselles (12) sur la tête d'épilation jusqu'au clic.
- Sélectionnez la vitesse 1.
D’abord de bas en haut ... puis de haut en bas.
Impératif :
a) Garder le bras levé et tendu pendant toute
l’épilation.
b) Tendre la peau, pour plus de facilité.
2) Epilation de la zone contour du maillot :
- Emboîter l'accessoire maillot (13) sur la tête
d'épilation jusqu'au clic.
- Sélectionnez la vitesse 1.
Impératif : bien tendre la peau.
Epilez-vous à rebrousse poils, lentement sans appuyer.
4
CLIC!

5
B - Avec la tête de rasage (selon modèle) :
• Mode opératoire
- Oter la tête d'épilation en appuyant sur le bouton d'éjection.
- Emboîter la tête de rasage (14) sur l'appareil. - Sélectionner la vitesse 2.
- Après utilisation arrêtez
l'appareil.
- Oter la tête de rasage en
appuyant sur le bouton
d'éjection.
9-COUPER ET ÉGALISER LES POILS SUR LA ZO E
MAILLOT (selon modèle)
Mettez la tête bikini en place (21). Votre tête bikini est équipée de 3 peignes qui relèvent
les poils longs pour qu’ils puissent être coupés par la lame.
Sélectionnez le peigne avant de mettre l’appareil en route.
IMPOR AN
Pour une première utilisation nous vous conseillons d’utiliser le peigne correspondant
à une hauteur de coupe maximum.
- Si vous souhaitez une longueur de poils d’environ 9 mm, utilisez le peigne le plus grand.
- Si vous souhaitez une longueur de poils d’environ 3 mm, utilisez le peigne le plus petit.
- Si vous souhaitez une longueur de poils d’environ 6 mm, utilisez le peigne de taille
intermédiaire.
Mettez le peigne en place en le glissant dans les rainures (a), puis
sélectionnez la vitesse 2.
Tenez l’appareil perpendiculairement, de façon à voir la marque de
votre appareil, et déplacez-le lentement à rebrousse-poil.
IMPORTA T
En cas d’irritation vous pouvez appliquer un peu de talc après
utilisation.
• Pour dessiner un contour net de la zone du maillot
Si vous souhaitez couper vos poils au plus près de la peau vous
utiliserez la tête bikini sans le peigne :
Arrêtez l’appareil en appuyant sur 0 et débranchez-le.
Retirez le peigne (b).
Mettez ensuite l’appareil en marche en sélectionnant la vitesse 1 ou 2.
Tenez l’appareil perpendiculairement et déplacez-le lentement à
rebrousse-poil.
IMPOR AN
Pour une meilleure efficacité, tendez la peau avec l’autre main pour faire ressortir les
poils. Vous obtiendrez ainsi un rasage précis et peu irritant.
a
b

6
10-E TRETIE DE L’APPAREIL
• Nettoyage de la tête d’épilation
1. Débrancher l’appareil.
2. Appuyer sur le bouton d’éjection de la tête et ôter la tête d’épilation.
3. Passer la tête d’épilation sous l’eau froide du robinet en faisant tourner manuellement
la tête pendant 5 à 10 secondes.
4. Secouer vivement la tête d’épilation puis
la sécher à l’aide d’une serviette avant de
la replacer sur l’appareil.
Vous pouvez également utiliser la brossette
de nettoyage fournie.
• Nettoyage de la tête de rasage (selon modèle)
- Arrêtez et débranchez l’appareil.
- Retirez le capot de protection (19).
Pour cela : tenez fermement l’épilateur et placez vos doigts sur les
zones de préhension (17) de la tête de rasage puis tirez vers le haut.
Vous dégagez ainsi le capot de protection (19) du bloc lames (18).
- Eliminez soigneusement tous les poils en soufflant sur et sous la
micro-grille (15).
N’utilisez jamais la brossette pour nettoyer la micro-grille (15).
- Vous pouvez également passer le capot de protection (19) et le bloc
lame (18) sous un filet d’eau froide pour parfaitement éliminer tous
les poils. Secouez vivement les pièces puis séchez-les à l’aide d’une
serviette sans appuyer sur la micro grille avant de les assembler.
- Remettez en place le capot de protection (19) sur le bloc lame (18).
Un clic se fait entendre.
A EN ION ! N’APPUYEZ PAS SUR LA MICRO-GRILLE LORS DE SA REMISE EN PLACE.
Eviter d’appliquer de l’alcool sur le corps de l’appareil pour ne pas dégrader ses couleurs.
Ne pas utiliser d’outil métallique ou tranchant.
1
2
1. 2. 3.
4.

7
• Nettoyage de la tête de coupe (selon modèle)
Arrêtez et débranchez l’appareil.
Appuyez sur le bouton d’éjection de la tête et ôtez la tête bikini.
Enlevez le peigne et ôtez les poils de la tête de coupe à l’aide de la
brossette.
Passez la tête de coupe sous l’eau froide du robinet pendant 5 à 10
secondes.
Secouez vivement la tête de coupe puis séchez-la à l’aide d’une ser-
viette.
IMPOR AN Nettoyez systématiquement la tête de coupe de l’appareil après
chaque utilisation. L’appareil ne doit pas être immergé. Il ne peut pas être utilisé sous la
douche, ni dans le bain.
• Nettoyage de l’accessoire
Zones Sensibles
• Nettoyage de la ête Exfoliation
ous vous recommandons de changer le rouleau exfoliant toutes
les 3 séances de gommage ou lorsque celui-ci est usé.
e pas nettoyer le rouleau sous l’eau.
11-LUBRIFICATIO (selon modèle)
Pour que votre appareil reste efficace, il est indispensable d’huiler
régulièrement les lames de coupe (et particulièrement après le lavage
sous l’eau) avec le lubrifiant fourni, ou à défaut, avec une huile type
machine à coudre.
Arrêtez et débranchez l’appareil.
ettoyez la tête de coupe à l’aide de la brossette.
Lubrifiez les lames : une seule goutte suffit.
Faites fonctionner la tondeuse quelques secondes.
ettoyez les surplus d’huile à l’aide d’un chiffon.
!

8
IMPOR AN Eviter d’appliquer de l’alcool sur le corps de l’appareil pour ne pas dégrader
ses couleurs.
12-SOI S DE LA PEAU
Les petits points rouges qui apparaissent après l’épilation prouvent que vos poils
ont bien été arrachés ; ils disparaîtront rapidemment. Pour cette raison, épilez-vous
de préférence le soir.
Appliquez si besoin, une crème apaisante après épilation.
13-PARTICIPO S À LA PROTECTIO
DE L’E VIRO EME T !
Votre appareil contient de nombreux matériaux valorisables ou recyclables.
Confiez celui-ci dans un point de collecte ou à défaut dans un centre service
agréé pour que son traitement soit effectué.

9
tPlease read carefully before use...
1-DESCRIPTIO OF YOUR APPLIA CE
• Vision function: The Vision system installed in your device gives perfect epilation results first
time. By diffusing an ultraluminous halo on the skin, this system makes all your hair – even the
finest, shortest and fairest hairs – easier to see.
• Pivoting head function: For comfort of use, your appliance is fitted with a pivoting head that
adapts to every contour of the areas to be shaved (legs, armpits, bikini line) for a smooth,
efficient result.
• Pain-relieving function: Fresh Extreme is equipped with a high-speed turbine which blows air
onto the skin and cools it. This helps to reduce the pain caused by epilation.
2-SAFETY
• For your safety, this appliance complies with the applicable standards and regulations (Low
Voltage Directive, Electromagnetic Compatibility, Environmental...).
• Check that the voltage of your electricity supply matches the voltage of your appliance. Any error
when connecting the appliance can cause irreparable harm, not covered by the guarantee.
• The installation of the appliance and its use must however comply with the standards in force in
your country.
• ever use if the appliance (depilator or adaptor) is damaged or in the event of any damage
caused by dropping the appliance (invisible damage may be dangerous).
• This appliance is not intended for use by persons (including children) with reduced physical,
sensory or mental capabilities, or lack of experience and knowledge, unless they have been given
supervision or instruction concerning use of the appliance by a person responsible for their safety.
Children should be supervised to ensure that they do not play with the appliance.
• Stop using your appliance and contact an Authorised Service Centre if:
- your appliance has fallen,
- it does not work correctly.
• The appliance must be unplugged:
- before cleaning and maintenance procedures.
- if it is not working correctly.
- as soon as you have finished using it.
- if you leave the room, even momentarily.
• Do not use if the cord is damaged.
• Do not immerse or put under running water the appliance, even for cleaning purposes.
• Do not hold with damp hands.
E
1-Pivoting head
2-Depilator head
3-Tweezers
4-Massaging beads
5-Exfoliator head
(according to model)
6-2 exfoliating bands
7-Release button for removable head
8-Cap
9-2-speed and stop switch
10-Cleaning brush
11-Adaptor
12-Armpit accessory
(according to model)
13-
Bikini/line accessory (according to model)
14-Shaving head
(according to model)
15-Micro grid
16-Clipper
17-Release buttons
18-Blade unit
19-Protective hood
20-Lubricant for bikini head
21-Bikini trimmer head
(according to model)
a-Trimmer head with ceramic blade
b-Interchangeable combs (3, 6, 9 mm)
22 -
Vision
23 -
Pain-relieving function

10
• Do not unplug by pulling on the cord, rather pull out by the plug.
• Do not use an electrical extension lead.
• Do not clean with abrasive or corrosive products.
• Do not use at temperatures below 0°C and above 35°C.
• When the depilator is in use, it must not come into contact with eyelashes, hair, clothes or
any other objects, in order to avoid any danger of injury or blockage.
• Do not use the depilator:
- on your face
- on broken, burnt or sore skin
- on sensitive areas (varicose veins, moles, birthmarks, warts…)
- if you suffer from skin complaints, (eczema, inflam-mations, acne…).
If using on the bikini line, only use this appliance for the external area. Do not use it for more
intimate zones (pubic lips).
For hygiene reasons, it is advised that you do not allow anyone else to use your appliance.
GUARAN EEYour appliance is designed for use in the home only. It should not be used for
professional purposes. Any commercial use, inappropriate use or failure to comply with the
instructions, the manufacturer accepts no responsibility and the guarantee will not apply. The
guarantee becomes null and void in the case of improper usage.
3-PREPARATIO OF THE SKI
Your skin must be clean and dry.
• Do not apply either cream or hydrating milk before depilation.
• If you previously used a razor for depilation:
- the first few times you use the depilator, your skin may feel more sensitive, as shaving
has made your hair thicker and stronger. This sensation will lessen the more you use your
depilator: the hair will grow back less quickly and become thinner.
• Your depilator will be much more effective and easier to use if you use it regularly.
We advise you to use your depilator as soon as your hair starts to grow back.
4-SWITCH O 5-SWITCH OFF
6-PEELI G (according to model)
Peeling will enable you to limits growth of subcutaneous hair if practised regularly.
We strongly recommend that you use the Exfoliator Head 2 days before
using your epilator to avoid irritating your skin.
• And not to use a peeling gel or cream at the same time.
• ever carry out peeling on sensitive areas (armpits / bikini line / face).
• After peeling, we advise you to wipe over the area with a moist flannel
to remove any dead skin. Dry the skin thoroughly afterwards.
1
2
1
2

• Method:
- Press the release button to remove the epilator head.
- Clip the Exfoliator Head to the epilator.
- Select speed 1.
- Start exfoliating with a slow, gentle up and down movement.
When using the Micro-Peeling function for the first time or if your skin is very
delicate, we recommend:
1. skin is wet before peeling, use cotton wool or a flannel to do this
2. making slow and gentle rotating movements when using the appliance
3. not to use the appliance more than twice on the same area.
• Replacing the exfoliating band
- Press the release button to remove the Exfoliator Head from the epilator.
- Using the plastic end of the cleaning brush unclip the band as follows:
1. Turn the Exfoliator Head over and hold it in place by gripping the edges between your
thumb and forefinger.
2. Turn the band so that its groove comes round to the central position.
3. Insert the end of the cleaning brush in the groove and push to eject the band.
4. Insert the new band by slotting the fins (b) of the exfoliator unit in the groove of the
band and pushing until it clicks!
7-LEG HAIR REMOVAL
For optimum epilation, we recommend that you tilt the epilator
slightly towards your skin in the direction of epilation, as shown in
the diagram.
- Select speed 1 or 2.
- The switch must always remain visible during
use.
- Shave against the lie of the hair, slowly and
without pressing, with the shaver perpendicular
to your skin.
11
a
b
CLIC!

8-HAIR REMOVAL FROM SE SITIVE AREAS
We recommend that you use the "sensitive areas" accessory when
removing hair in the armpits and around the bikini line.
This accessory has been designed to reduce the number of active
tweezers, for a more gentle hair removal.
For optimum epilation, we recommend that you tilt the epilator
slightly towards your skin in the direction of epilation, as shown in
the diagram.
• Preparing the area where you want to remove hair:
- If the hairs are long trim to approximately 1cm.
- Dry the area thoroughly to ensure any trace of deodorant or perspiration are removed.
1) Armpit epilation:
- Fit the armpit accessory (12) onto the epilator head and push in until you hear a click.
- Select speed 1.
First from bottom to top...
... Then from top to bottom.
Important:
a) Keep your arm raised and stretched throughout
the hair removal process.
b) Stretch the skin to make it easier.
2) Bikini line epilation:
- Fit the bikini line accessory (13) onto the epila-
tor head and push in until you hear a click.
- Select speed 1.
Important:
Make sure the skin is stretched properly.
Shave against the lie of the hair, slowly and without pressing, with the shaver perpendi-
cular to your skin.
B-With the shaver head (according to model):
• Operating instructions:
- Remove the epilator head by
pressing the ejection button.
- Fit the shaver head (14)
onto the appliance.
- Set the switch to position 2.
- After use, stop the appliance.
- Remove the shaver head by
pressing the ejection button.
12
CLIC!

13
9-TRIM A D EVE OUT HAIR I THE BIKI I AREA
(according to model)
Put the bikini line trimmer head in place (21). Your bikini line trimmer head is equipped
with 3 combs to lift long hairs for cutting by the blade.
Choose the desired comb before switching the appliance on.
IMPOR AN
For your first use, we advise you to use the comb for the longest cutting length.
- If you want a hair length of approximately 9 mm, use the largest comb.
- If you want a hair length of approximately 3 mm, use the smallest comb.
- If you want a hair length of approximately 6 mm, use the medium-sized comb.
Slide the comb into the two grooves on the trimmer head (a), then
set the switch to 2.
Hold the appliance upright so that you can see the appliance name,
and move it slowly against the hair.
IMPOR AN
If your skin becomes irritated, apply some talc after use.
• For a neat bikini outline
If you want a closer shave, use the bikini line trimmer head without
the comb:
Stop the appliance by pressing 0 and unplug it.
Push to remove the comb (b).
Then switch on the machine by selecting speed 1 or 2.
Hold the appliance upright and move it slowly against the hair.
IMPOR AN For greater effectiveness, pull hair outward with the other hand to make it
stand out. his will give you a more precise shave with little irritation.
10-CLEA I G THE APPLIA CE
• Cleaning the epilator head
1. Unplug the epilator.
2. Press the release button on the head and remove the epilator head.
3. Rinse the epilator head under cold running water by turning it for 5 to 10 seconds.
a
b
1
2
1. 2. 3.

14
4. Shake the epilator head vigorously and
dry it with a towel before fitting it to the
epilator again.
You can also use the small cleaning brush
supplied.
• Cleaning the shaving head (according to model)
- Stop and unplug the device.
- Remove the protective hood (19).
To do so: press the release buttons and pull upwards. You will
remove the protective hood (19) from the blade block (18).
- Carefully remove the hairs by blowing on and around the micro grid (15)
Never use the small brush for cleaning the micro grid (15).
You can also run the protective hood (19) and the blade block (18)
under running cold water to remove all the hair. Shake the parts well
and then dry them using a towel without pressing down on the
micro grid before reassembling them.
- Put the protective hood (19) back on the blade block (18).
You will hear a click.
DO NO PRESS ON HE MICRO GRID WHEN PU ING I BACK IN O PLACE.
Do not apply alcohol to the body of the appliance in order to avoid damaging its colours.
Do not use a metal or sharp tool.
• Clean the trimmer head (according to model)
Stop the appliance and unplug it.
Press the release button to remove the epilator head.
Remove the comb and clean hair from the trimmer head with the
brush.
Rinse the trimmer head under cold tap water for 5 or 10 seconds.
Shake the trimmer head vigorously and dry it with a towel.
IMPOR AN Systematically clean the appliance’s trimmer head after each use.
he appliance must not be submerged in water. It must not be used in the shower or bath.
• Cleaning sensitive
areas accessory
4.

15
• Cleaning the Exfoliator Head
We recommend that you change the exfoliating band after three
sessions of exfoliation or when it is worn out.
Do not clean the band under running water.
11-LUBRICATIO (according to model)
To keep your appliance working effectively, the blades should be oiled
regularly (notably after washing in water) using the lubricant supplied
or, if you have none, with the type of oil used for sewing machines.
Stop the appliance and unplug it.
Clean the trimmer head with the brush.
Lubricate the blades : one drop is enough.
Run the trimmer for a few seconds.
Clean the excess oil off with a cloth.
IMPOR AN
Avoid applying alcohol to the body of the appliance so as not to fade its colours.
12-SKI CARE
Small red spots may appear. hey will disappear quickly.
For this reason it is preferable to use your depilator in the evening.
If necessary, apply calming cream after depilation.
13-E VIRO EME T PROTECTIO FIRST!
Your appliance contains valuable materials which can be recovered
or recycled.
Leave it at a local civic waste collection point.
!

16
Vor Gebrauch bitte aufmerksam durchlesen.
1-BESCHREIBU G
• Funktion Vision: Ihr Gerät ist für ein perfektes Enthaarungs-Ergebnis in einem einzigen
Durchgang mit dem System Vision ausgestattet. Dieses System leuchtet den zu behandeln-
den Hautbereich mit extra hellem Licht aus, was auch die dünnsten, kürzesten und hellsten
Haare sichtbar macht.
• Funktion Schwenkkopf: och mehr Komfort! Ihr Gerät ist mit einem Schwenkkopf aus-
gestattet. Die Rasur erfolgt damit auf noch effizientere und angenehmere Weise. (Beine,
Achselhöhlen, Bikinizone)
• Anti-Schmerz-Funktion: Fresh Extreme ist mit einer Hochgeschwindigkeits-Turbine aus-
gestattet, die die Haut mit einem kühlenden Luftstrahl erfrischt, was den durch die
Epilation hervorgerufenen Schmerz lindert.
2-ZU IHRER SICHERHEIT
• Lesen Sie die Gebrauchsanleitung sorgfältig vor der ersten Inbetriebnahme ihres Gerätes
durch. Eine unsachgemäße Bedienung entbindet den Hersteller von jeglicher Haftung. Um
Ihre Sicherheit zu gewährleisten, entspricht dieses Gerätes den gültigen ormen und
Bestimmungen ( iederspannung, elektromagnetische Verträglichkeit, Umwelt...).
• Überprüfen Sie, dass die Betriebsspannung Ihres Geräts mit der Spannung Ihrer
Elektroinstallation übereinstimmt. Ein fehlerhafter Anschluss kann irreparable Schäden
hervorrufen, die nicht von der Garantie abgedeckt sind.
• Die Installation des Geräts muss den in Ihrem Land gültigen ormen entsprechen.
• Dieses Gerät darf nicht von Personen (inbegriffen Kindern) mit eingeschränkten körperli-
chen, sensorischen oder geistigen Fähigkeiten benutzt werden. Das Gleiche gilt für
Personen, die keine Erfahrung mit dem Gerät besitzen oder sich mit ihm nicht auskennen,
außer wenn sie von einer für ihre Sicherheit verantwortlichen Person beaufsichtigt wer-
den oder von dieser mit dem Gebrauch des Gerätes vertraut gemacht wurden. Kinder
müssen beaufsichtigt werden, damit sie nicht mit dem Gerät spielen.
• Benutzen Sie das Gerät nicht und treten Sie mit einem zugelassenen
Kundendienstcenter in Kontakt, wenn: das Gerät zu Boden gefallen ist und nicht richtig
funktioniert.
• Das Gerät muss ausgesteckt werden: vor Reinigung und Wartung, bei Funktionsstörungen
zum wechseln der Zubehöhrteile und sofort nach dem Gebrauch. Lassen Sie das Kabel nie-
mals herunter hängen, oder in die ähe von, oder in Berührung mit einer Wärmequelle
oder einer scharfen Kante kommen.
DE
1-Schwenkkopf
2-Epilierkopf
3-Pinzetten
4-Massagekugeln
5-Exfolierkopf (je nach modell)
6-Exfolierbänder
7-Lassen Sie den Knopf für den abnehmbaren Kopf los
8-Deckel
9-Schalter für 2 Geschwindigkeiten und Stop
10-Reinigungsbürstchen
11-Adapter
12-Achselhöhlen-Zubehörteil (je nach modell)
13-Bikini-Zubehörteil (je nach modell)
14-Rasierkopf (je nach modell)
15-Mikrogitter
16-Clipper
17-Auswurf-Knöpfe
18-Blatteinheit
19-Schutzhaube
20-Schmiermittel für den Bikini-Aufsatz
21-Bikini-Scherkopf (je nach modell)
a-Scherkopf mit Keramikblatt
b-austauschbare Kämme (3, 6, 9 mm)
22-Vision
23-Anti-Schmerz-Funktion

17
• Wenn das Stromkabel beschädigt ist, darf das Gerät nicht benutzt werden.
• icht ins Wasser tauchen und nicht unter fließendes Wasser halten, auch nicht zur Reinigung.
• Stecken Sie das Gerät nicht durch Ziehen am Stromkabel aus, sondern ziehen Sie den
Stecker aus der Steckdose.
• Benutzen Sie kein Verlängerungskabel.
• Reinigen Sie das Gerät nicht mit scheuernden oder ätzenden Produkten.
• Betreiben Sie das Gerät nicht bei Temperaturen unter 0 °C oder über 35 °C. Legen Sie
das Gerät nicht ab solange es eingeschaltet ist. Verwenden Sie nur original Zubehör.
Das Gerät nie unbeaufsichtigt betreiben.
• VERWE DE SIE DAS EPILIERGERÄT ICHT:
- im Gesicht
- auf verletzter, verbrannter oder gereizter Haut
- auf Risikozonen (Krampfadem, Leberflecken, Warzen oder Muttermalen…).
- bei dermatologischen Problemen (Ekzemen, Hautenzündungen, Akne…).
• Beim Gebrauch dieses Geräts in der Bikinizone darf dieses nur im äußeren Bereich
eingesetzt werden. icht im Intimbereich (Schamlippen) einsetzen.
• Aus Gründen der Hygiene sollten Sie Ihr Gerät nicht an andere Personen verleihen, auch
nicht in Ihrem unmittelbaren Umfeld. Das Gerät darf nur in Verbindung mit dem im
Lieferumfang enthaltenem etzteil betrieben werden. Das etzteil darf nicht zu anderen
Zwecken verwendet werden.
Das eingeschaltete Gerät darf nicht mit Wimpern, Kopfhaar, Kleidern oder mit sonstigen
Gegenständen in Berührung kommen, da sonst Verletzungsgefahr besteht oder der
Betrieb des Gerätes beeinträchtigt werden könnte.
GARAN IE
Jeder Eingriff, außer der im Haushalt üblichen Reinigung und Pflege durch den Kunden,
muss durch den Kundendienst erfolgen. Dieses Gerät ist ausschließlich für den
Hausgebrauch bestimmt. Es darf nicht für gewerbliche Zwecke eingesetzt werden.
Bei unsachgemäßer Benutzung erlischt die Garantie.
3-VORBEREITU G DER HAUT
• Ihre Haut muß sauber und trocken sein.
• Vor der Epilation weder eine Creme noch eine Feuchtigkeitsmilch auftragen.
• Falls Sie die Beine vorher mit dem Rasierer enthaart haben:
- Die Haut kann am Anfang noch sehr empfindlich sein, da die Härchen durch die Rasur
dicker und starrer geworden sind. Dieser Zustand verbessert sich durch Benutzung Ihres
Epiliergeräts.
• Ihr Epiliergerät ist um so wirksamer und leichter in der Anwendung, je regelmäßiger Sie
es benutzen, da die Härchen mit der Zeit immer feiner werden.
Wir empfehlen Ihnen, sobald die Härchen nachwachsen, gleich die nächste Enthaarung
vorzunehmen.
4-A SCHLIEßE 5-AUSSTECKE
1
2
1
2

18
6-PEELI G (je nach modell)
Durch das Peeling: Wachsen die Härchen bei regelmäßiger Anwendung weniger schnell nach.
Es wird dringend dazu geraten, zur Schonung der Haut zwischen der
Epilation und dem Einsatz des Peelingkopfs 2 Tage vergehen zu lassen.
• Verwenden Sie nie gleichzeitig ein Peelinggel bzw. eine Peelingcreme.
• Das Peeling niemals an empfindlichen Stellen (Achseln, Bikinizone,
Gesicht) anwenden.
• Wir empfehlen Ihnen, die abgestorbenen Hautzellen nach dem Peeling mit
einem feuchten Waschlappen abzuwaschen. Trocknen Sie die Haut anschließend gründlich.
• Vorgehensweise
- Drücken Sie auf den Entriegelungsknopf und nehmen Sie den Epilierkopf ab.
- Klipsen Sie den Mikropeelingaufsatz auf das Gerät.
- Stellen Sie die Geschwindigkeitsstufe 1 ein.
- Führen Sie das Peeling mit langsamen Hin- und Herbewegungen aus.
Bei der erstmaligen Anwendung der Peeling-Funktion ist es bei empfindlicher Haut ratsam:
1. Die Haut vor dem Peeling mit einem Wattebausch oder einem Waschandschuh
anzufeuchten.
2. Die langsame und sanfte Geschwindigkeitsstufe einzustellen.
3. Anwendung nicht öfter als zwei Mal an derselben Stelle zu wiederholen.
• Auswechseln der Peelingrolle:
- Drücken Sie auf den Entriegelungsknopf und nehmen Sie den Mikropeelingaufsatz vom
Gerät ab.
- Entklipsen Sie die Peelingrolle unter Zuhilfenahme des Plastikgriffs (a) der Bürste auf
folgend Weise:
1. Drehen Sie den Mikropeelingaufsatz und drücken Sie dabei mit Daumen und
Zeigefinger auf die Seitenteile, um ihn festzuhalten.
2. Drehen Sie die Rolle, so dass sich der Schlitz der Rolle in der Mitte befindet.
3. Führen Sie den Plastikgriff der Bürste in den Schlitz ein und drücken Sie die Rolle heraus.
4. Legen Sie die neue Rolle ein. Führen Sie dazu die Halterippen (b) des Rollenträgers in
den Schlitz der Rolle ein und drücken Sie sie fest nach unten, bis sie hörbar einrastet !
a
b
CLIC!
This manual suits for next models
23
Table of contents
Languages:
Other Rowenta Electric Shaver manuals

Rowenta
Rowenta RF3330 User manual

Rowenta
Rowenta EP7212 User manual

Rowenta
Rowenta LISSEA 037116 - 20/04 RF3210/9210 User manual

Rowenta
Rowenta LISSEA 030014 - 4/03 SH325/335 User manual

Rowenta
Rowenta RF7360 User manual

Rowenta
Rowenta 1 Series User manual

Rowenta
Rowenta SOFT EXTREME EP7530E0 User manual

Rowenta
Rowenta STYLIS TN2800F4 User manual

Rowenta
Rowenta LISSEA 030013 - 4/03 SH315/345 User manual

Rowenta
Rowenta RF3330 User manual