HYDROFOIL ASSEMBLING INSTRUCTIONS
In order to assemble your new WH-Flight
Hydrofoil correctly please follow this
instructions:
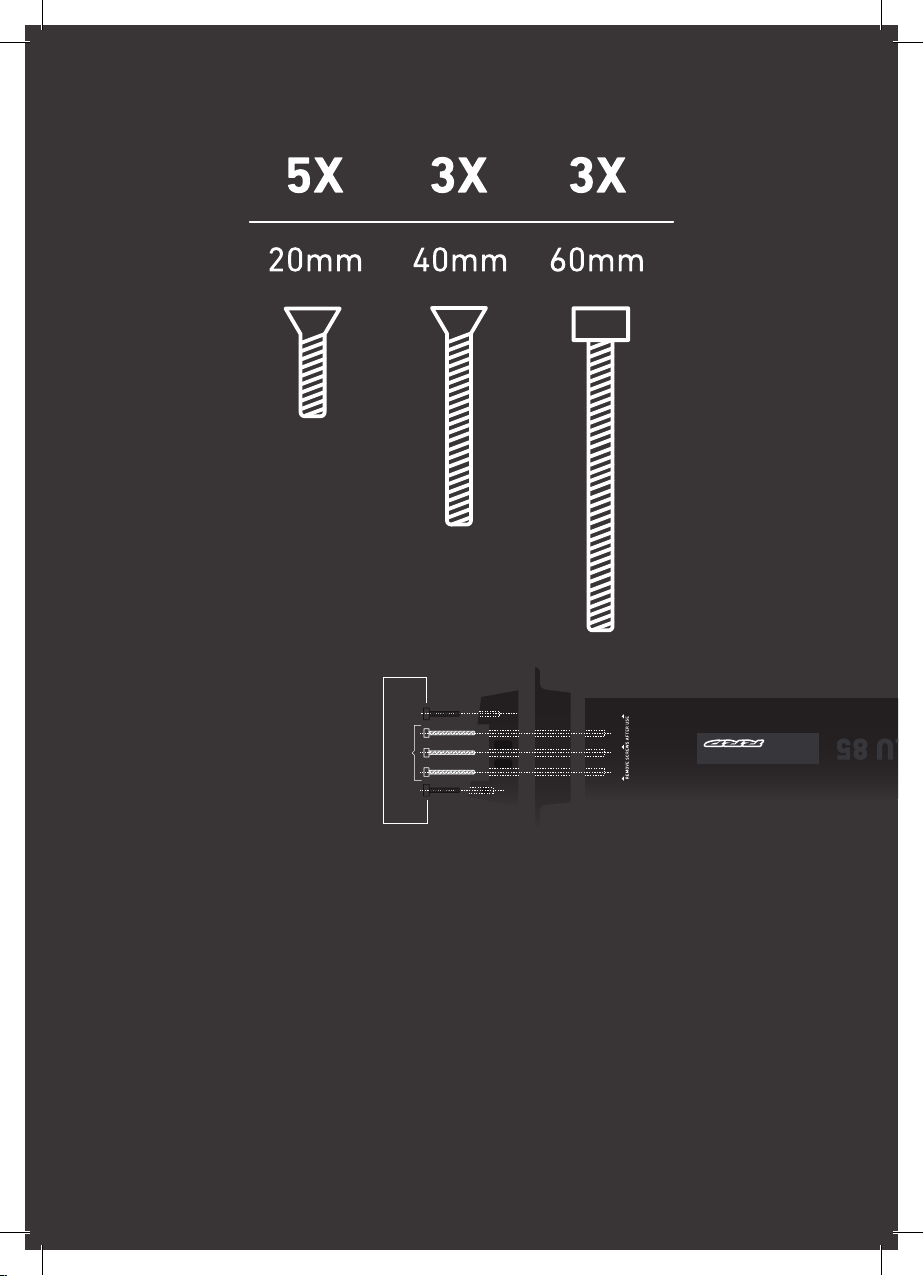
1) Join the mast to the plate. Then tighten
the 3 X 60mm screws to secure the TuttleBox
head to the plate and make sure that the
screws are tightened properly.
2) Assemble the rear Wing with the 2x 20mm
screws to the 2x fuselage holes. Make sure
the fuselage rear wing screw holes are clean
and free from sand or any debris that might
cause friction and bad assembling fit. Fix the
rear wing tightly to the fuselage making sure
that the screws are properly aligned and they
screw properly to the 2x fuselage stainless
screw holes. Do not force the screws into
the metal insert in the very beginning of the
screwing process. Doing so might damage
the thread of the metal insert and cause a
bad alignement of the rear wing angle to the
fuselage. A wrongly assembled rear wing onto
the fuselage will cause a wrong lift force on
to the hydrofoil and a wrong hydrofoil trim on
the water. This might lead to a malfunctioning
of the hydrofoil and damage the threaded
screw holes.
3) Take the front Wing with the 3x 20mm and
place it onto the fuselage. Align the front wing
with the 3x fuselage holes. Make sure the
fuselage front wing screw holes are clean and
free from sand or any debris that might cause
friction and bad assembling fit. Fix the front
wing tightly to the fuselage making sure
that the screws are properly aligned and they
screw properly to the 3x fuselage stainless
screw holes. Do not force the screws into
the metal insert in the very beginning of the
screwing process. Doing so might damage
the thread of the metal insert and cause a
bad alignement of the front wing angle to
the fuselage. A wrongly assembled front
wing onto the fuselage will cause a wrong
lift force on to the hydrofoil and a wrong
hydrofoil trim on the water. This might lead to
a malfunctioning of the hydrofoil and damage
the threaded screw holes.
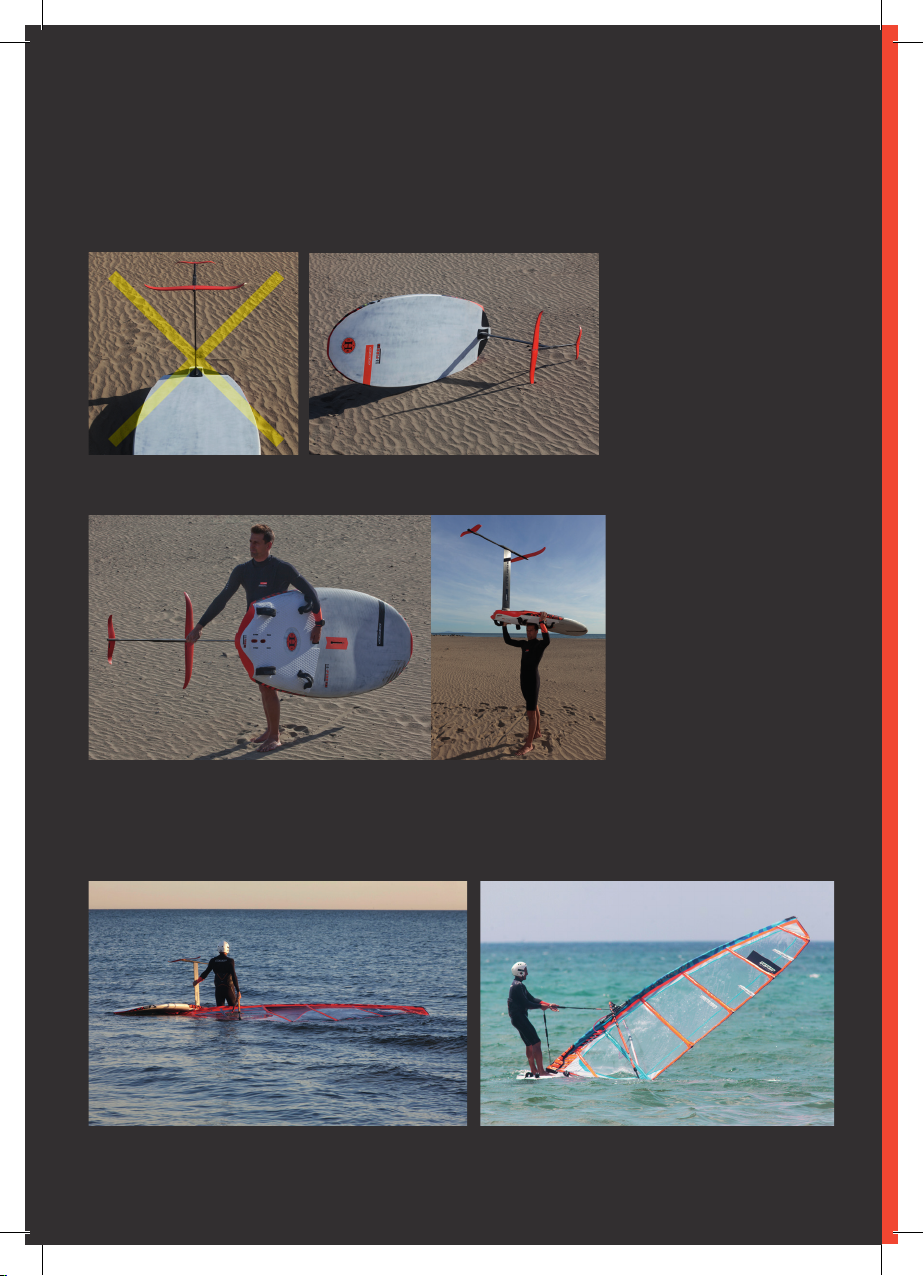
4) Place your foilboard on top of its board bag
with the hull facing upwards and insert the
1a
1b
2
3