manuals.online logo
Brands
  1. Home
  2. •
  3. Brands
  4. •
  5. Rubineta
  6. •
  7. Plumbing Product
  8. •
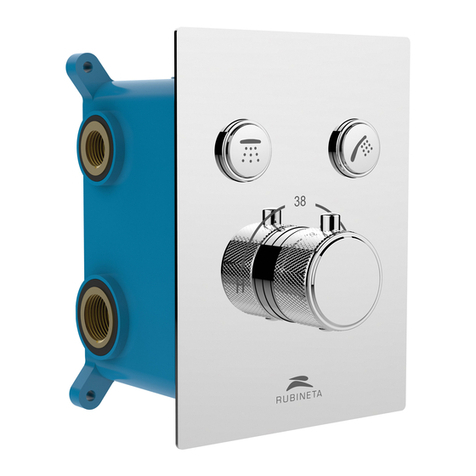
  9. Rubineta Kubo 2Consealed Plastic Series User manual

Rubineta Kubo 2Consealed Plastic Series User manual

I.
II.
III.
V.
IV.
VI.
VII.
VIII.
IX.
CONCEALED
FAUCET
UAB „Rubineta“
Savanorių pr. 180, LT-03154 Vilnius
www.rubineta.com
COMPANY WITH
QUALITY SYSTEM
CERTIFIED BY DNV
= ISO 9001 =
Provide the height of the in wall pipe
and the mixer body. The depth of the in
wall box should be not less than 53.5mm.
The in wall box should be under the
wall after installation.
Выберите высоту для установки блока,
глубина ниши для установки блока
должна быть не меньше 53,5 мм.
Лицевая часть блока должна быть
установлена не глубже плоскости
стены.
Provide the dimension of the in
wall box for drilling. Fixed the in
wall box by exploded screw.
Сделайте отверстие по размеру
для установки блока. Укрепите
блок болтами.
Connect the hot, cold and outlet pipe. Open
water switch to check if each joint is tight,
no leakage and no crack. After using proper
pull and push, the wall could be covered
with tile.
Соедините трубы горячей и холодной
воды с изливами. После установки
проверьте включатель, соединения,
трещины или течь. После проверки
можно клеить плитку и производить
установку круглой панели.
Close water switch, remove the plastic cover
of the in wall box.
Выключите подачу воды (общий кран
подачи воды в дом или квартиру) и
снимите с блока защитную пластиковую
панель.
Install the decorative plate.
Установите круглую панель.
Установите переключатель и рукоятку.
Install the handle.
Install shower head and hand shower.
Установите потолочную и ручную лейку.
Install the body. After finished installation,
open water switch to check if each joint is
tight and no leakage.
Установите блок в нишу и после
установки откройте краны подачи воды.
Потом проверьте все соединения.
Remove diverter handle pole, fix the
adjuster cover. The adjusted cover can be
adjusted according to the height of the
wall (Max. height 12.5mm). The biggest
surface should be the same level as the tile.
Снимите все ручки переключения,
отрегулируйте фартук на уровне плитки.
После установки настроить корпус можно
отрегулировав его по высоте в стене
(отрегулируйте максимальную глубину
установки корпуса, которая составляет
12,5 мм).
Shower head
1000~1200 mm
I.
II.
III.
V.
IV.
VI.
Provide the height of the in wall pipe
and the mixer body. The depth of the in
wall box should be not less than 53.5mm.
The in wall box should be under the
wall after installation.
Provide the dimension of the in
wall box for drilling. Fixed the in
wall box by exploded screw.
Connect the hot, cold and outlet pipe. Open
water switch to check if each joint is tight,
no leakage and no crack. After using proper
pull and push, the wall could be covered
with tile.
Close water switch, remove the plastic cover
of the in wall box.
Install the body. After f inished installation,
open water switch to check if each joint is
tight and no leakage.
Remove diverter handle pole, fix the
adjuster cover. The adjusted cover can be
adjusted according to the height of the
wall (Max. height 12.5mm). The biggest
surface should be the same level as the tile.
VII.
VIII.
IX.
Install the decorative plate.
Install the handle.
Install shower head.
Выберите высоту для
установки блока, глубина
ниши для установки блока
должна быть не меньше 53,5
мм. Лицевая часть блока
должна быть установлена не
глубже плоскости стены.
Сделайте отверстие по размеру
для установки блока. Укрепите
блок болтами.
Соедините трубы горячей и холодной
воды с изливами. После установки
проверьте включатель, соединения,
трещины или течь. После проверки
можно клеить плитку и производить
установку круглой панели.
Выключите подачу воды (общий кран
подачи воды в дом или квартиру) и
снимите с блока защитную пластиковую
панель.
Установите блок в нишу и после
установки откройте краны подачи воды.
Потом проверьте все соединения.
Снимите все ручки переключения,
отрегулируйте фартук на уровне плитки.
После установки настроить корпус можно
отрегулировав его по высоте в стене
(отрегулируйте максимальную глубину
установки корпуса, которая составляет
12,5 мм).
Установите круглую панель.
Установите переключатель и рукоятку.
Установите потолочную лейку.

Other Rubineta Plumbing Product manuals

Rubineta Kubo Consealed Plastic Series User manual

Rubineta

Rubineta Kubo Consealed Plastic Series User manual

Rubineta Thermo-2F User manual

Rubineta

Rubineta Thermo-2F User manual

Popular Plumbing Product manuals by other brands

Luxart Velero VE341 installation manual

Luxart

Luxart Velero VE341 installation manual

Akw Onyx Installation and user care instructions

Akw

Akw Onyx Installation and user care instructions

American Standard Single Hole Bar/Pantry Faucet with Swing Spout 7191... installation instructions

American Standard

American Standard Single Hole Bar/Pantry Faucet with Swing Spout 7191... installation instructions

Viega Advantix base unit Instructions for use

Viega

Viega Advantix base unit Instructions for use

Gessi ORIGINI 66090 manual

Gessi

Gessi ORIGINI 66090 manual

Kohler K-158 installation guide

Kohler

Kohler K-158 installation guide

TLV QuickTrap FS3 instruction manual

TLV

TLV QuickTrap FS3 instruction manual

Signature Hardware FERGUSON CORNER SHOWER TRAY installation instructions

Signature Hardware

Signature Hardware FERGUSON CORNER SHOWER TRAY installation instructions

Kalia GRAFIK BF1292 Installation instructions / warranty

Kalia

Kalia GRAFIK BF1292 Installation instructions / warranty

Sanela SLUN 80P Instructions for use

Sanela

Sanela SLUN 80P Instructions for use

Kohler K-9530 Installation and care guide

Kohler

Kohler K-9530 Installation and care guide

ProFlo PFWSCM1M108 installation instructions

ProFlo

ProFlo PFWSCM1M108 installation instructions

Conglom QT014 Installation and repair manual

Conglom

Conglom QT014 Installation and repair manual

URIMAT ceramic compact Installation instruction

URIMAT

URIMAT ceramic compact Installation instruction

BWT Protector mini HWS C/R Series Installation and operating instructions

BWT

BWT Protector mini HWS C/R Series Installation and operating instructions

Grohe SMARTCONTROL MIXER 29 146 manual

Grohe

Grohe SMARTCONTROL MIXER 29 146 manual

Goddess Makarska 2 instruction manual

Goddess

Goddess Makarska 2 instruction manual

Viega ProPress XL instructions

Viega

Viega ProPress XL instructions

manuals.online logo
manuals.online logoBrands
  • About & Mission
  • Contact us
  • Privacy Policy
  • Terms and Conditions

Copyright 2025 Manuals.Online. All Rights Reserved.