Introduction of key functions Interface function introduction
USB
This interface is used to debug and upgrade the
monitor's own system , 3D-LUT load.
3.5mm Earphone jack
The interface is used for headphone sound monitoring
Important tips
※Please make sure the accessories
matched with the equipment and
acknowledged by the maker.
※Do not repair the product by yourself,
provided this product has any quality
issue, please refer to our authorized
after service center.
※Upgrade this equipment system, please
upgrade through official after-sales
service network.
Multifunctional knob button
This knob is mainly used for the selection and
confirmation of the main menu options of the system.
Press the key to get the menu of lmage adjustment.
Turn the knob to adjust the image parameter.
F1 F2 Shortcut key
F1(Waveform) F2(Aspect Marker)
F1\F2 is the system default shortcut key.
Press key(SOURCE),switch among selecting
input signal formats.
SOURCE(input signal source switchkey)
Press the LOCK button continuously for 3 seconds
to achieve the key locking function.
In menu mode, the LOCK key can be used as a
quick return key.
LOCK (Lock up buttons and knobs)
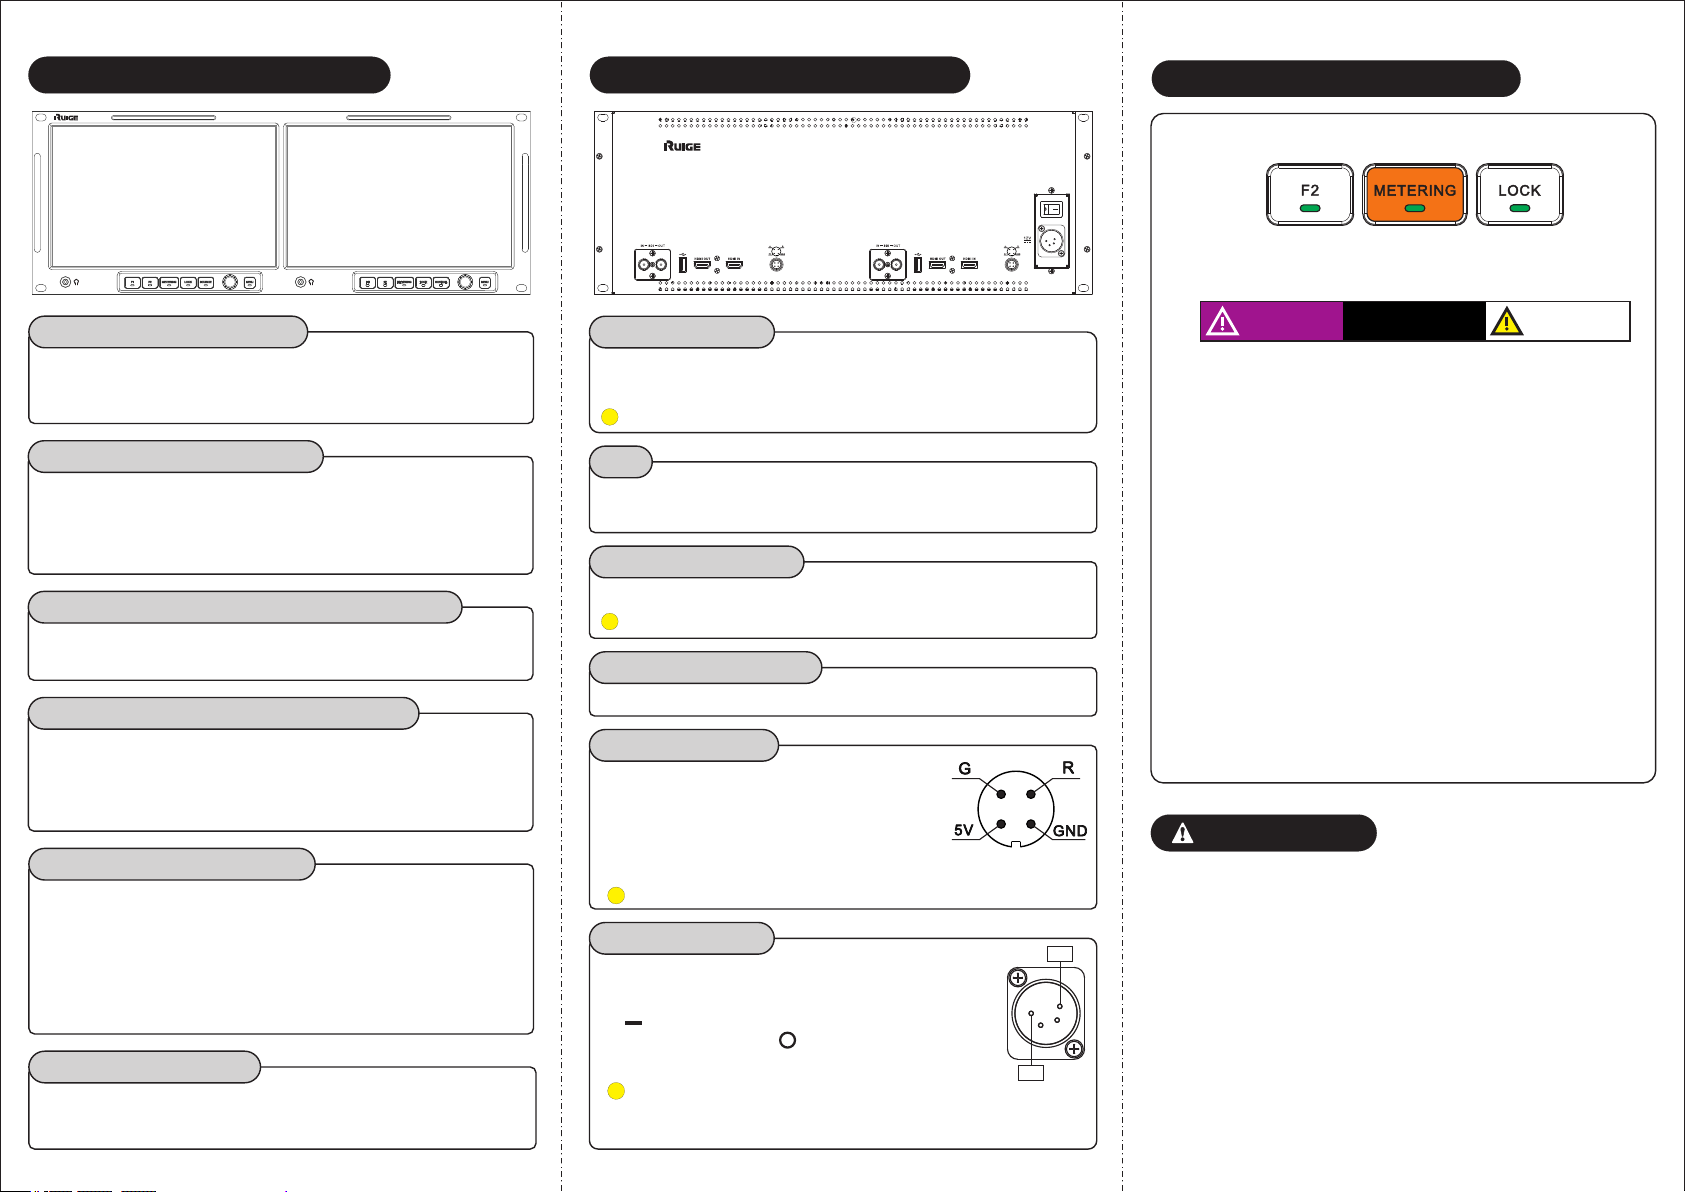
METERING(metering key)
When pressing the metering light function key , the
screen prompts "underexposure", "normal exposure"
and"overexposure" ,turn the multi-function knob to
customize the upper and lower warning limits , and
press the knob to switch between the upper and
lower limits.
When pressing the metering light function key twice
the screen prompts "Underexposure", "Normal
exposure", and "Overexposure".
In the image, the display below the lower limit set
value is "purple", which means the image is under-
-exposed . and the exceeding the upper limit set
value displays as "white", which means the image
is overexposed, and the picture between the upper/
lower limit set displays as "black", which represents
the video is safe area;
Mode 1: The safe area of the video image is in
black and completely blanked out, allowing you to
focus more on the underexposure/overexposure
part of the picture, prompting you to adjust the ligh
-ting of the scene in time to ensure the filming effect.
Mode 2: The original image of the safe area of the
video image is displayed semi-transparently, so
that you can clearly locate the specific position of
the exceeding part in the video .
Intelligent brightness control
Under Exposure
Normal Exposure
Over Exposure
MENU (main menu key)
Press key(MENU)to get zhe main menu.
Press to press to confirm/return after option
selected.
HDMI 2.0 IN/OUT
This interface is used for input of HDMI 2.0 signal.
HDMI adapter(Optional).
3G-SDI IN/OUT
This interface is used for input and output of 3G-SDI
signals.
SDI signal interface is optional for TL1010HD-2.
TALLY Definition
This interface is used for triggering
red-green TALLY signals.
Aviation plug adapter:XS9-4 φ12.5.
G:low level trigger green tally
always on.
R:low level trigger red tally always on.
DC Power input
This interface is used for the DC power
input. When the rocker switch is set to
" ", the monitor is powered on, and
when it is set to " ", the power is dis-
-connected.
When connecting by yourself, pay attention to
the positive and negative polarity of the power
supply.
4+
1-


