manuals.online logo
Brands
  1. Home
  2. •
  3. Brands
  4. •
  5. Ryobi
  6. •
  7. Chainsaw
  8. •
  9. Ryobi RCS2040G User manual

Ryobi RCS2040G User manual

Important! It is essential you read the instructions in this manual before starting
any operation with this machine.
2000W ELECTRIC CHAINSAW
OPERATOR'S MANUAL
RCS2040G
5
Fig. 1
Fig. 5
Fig. 11
Fig. 16 Fig. 17 Fig. 18 Fig. 19 Fig. 20 Fig. 21
Fig. 12 Fig. 13 Fig. 14 Fig. 15
Fig. 6 Fig. 7 Fig. 8 Fig. 9 Fig. 10
Fig. 2 Fig. 3 Fig. 4
21
31
32
34
33 35
37
36
36
38 37
39
40
22
23
4 3 2
12
111098
7
1
6
13
16
14
15 17 18
20
19
24
25
26
27
28
29
30
26
25
50mm
50mm
RCS2040G
2
English
OPERATING INSTRUCTIONS
Dear Customer:
Thank you for buying a Ryobi power tool. Each Ryobi
power tool is carefully tested and subjected to strict quality
controls by Ryobi quality assurance. Nevertheless, the
service life of a power tool depends to a great extent
on you. Please observe the information contained in
these instructions and enclosed documentation. The more
carefully you treat your Ryobi power tool, the longer it will
provide dependable service.
GENERAL POWER TOOL SAFETY WARNINGS
WARNING
Reading the operating instructions will reduce the
risk of injury.
WARNING
Read all safety warnings and instructions.
Failure to follow the warnings and instructions
may result in electric shock, fire and /or serious
injury.
Save all warnings and instructions for future
reference.
WORK AREA SAFETY
a) Keep work area clean and well lit. Cluttered or dark
areas invite accidents.
b) Do not operate power tools in explosive
atmospheres, such as in the presence of flammable
liquids, gases or dust. Power tools create sparks
which may ignite flammable liquids or fumes.
c) Keep children and bystanders away while
operating a power tool. Distractions can cause you
to lose control.
ELECTRICAL SAFETY
a) Power tool plugs must match the outlet. Never
modify the plug in any way. Do not use any adapter
plugs with earthed (grounded) power tools.
Unmodified plugs and matching outlets will reduce
risk of electric shock.
b) Avoid body contact with earthed or grounded
surfaces, such as pipes, radiators, ranges and
refrigerators. There is an increased risk of electric
shock if your body is earthed or grounded.
c) Do not expose power tools to rain or wet
conditions. Water entering a power tool will increase
the risk of electric shock.
d) Do not abuse the cord. Never use the cord for
carrying, pulling or unplugging the power tool.
Keep cord away from heat, oil, sharp edges or
moving parts. Damaged or entangled cords increase
the risk of electric shock.
e) When operating a power tool outdoors, use an
extension cord suitable for outdoor use. Use of
a cord suitable for outdoor use reduces the risk of
electric shock.
f) If operating a power tool in a damp location is
unavoidable, use a residual current device (RCD)
protected supply with a tripping current of 30mA
or less. Use of an RCD reduces the risk of electric
shock.
NOTE: The term “residual current device (RCD)” may
be replaced by the term “ground fault circuit interrupter
(GFCI)” or “earth leakage circuit breaker (ELCB)”.
PERSONAL SAFETY
a) Stay alert, watch what you are doing and use
common sense when operating a power tool. Do
not use a power tool while you are tired or under
the influence of drugs, alcohol or any medication.
A moment of inattention while operating power tools
may result in serious personal injury.
b) Use personal protective equipment. Always wear
eye protection. Protective equipment such as dust
mask, nonskid safety shoes, hard hat, or hearing
protection used for appropriate conditions will reduce
personal injuries. Ryobi advise the use of chainsaw
clothing complying to class 1 (use for chainsaws).
c) Prevent unintentional starting. Ensure the switch
is in the off-position before connecting to power
source, picking up or carrying the tool. Carrying
power tools with your finger on the switch or
energising power tools that have the switch on invites
accidents.
d) Remove any adjusting key or wrench before
turning the power tool on. A wrench or a key left
attached to a rotating part of the power tool may
result in personal injury.
e) Do not overreach. Keep proper footing and
balance at all times. This enables better control of
the power tool in unexpected situations.
f) Dress properly. Do not wear loose clothing or
jewellery. Keep your hair, clothing and gloves away
from moving parts. Loose clothes, jewellery or long
hair can be caught in moving parts.
POWER TOOL USE AND CARE
a) Do not force the power tool. Use the correct power
tool for your application. The correct power tool will
do the job better and safer at the rate for which it was
3
English
designed.
b) Do not use the power tool if the switch does not
turn it on and off. Any power tool that cannot be
controlled with the switch is dangerous and must be
repaired.
c) Disconnect the plug from the power source before
making any adjustments, changing accessories,
or storing power tools. Such preventive safety
measures reduce the risk of starting the power tool
accidentally.
d) Store idle power tools out of the reach of children
and do not allow persons unfamiliar with the
power tool or these instructions to operate the
power tool. Power tools are dangerous in the hands
of untrained users.
e) Maintain power tools. Check for misalignment or
binding of moving parts, breakage of parts and
any other condition that may affect the power
tool’s operation. If damaged, have the power tool
repaired before use. Many accidents are caused by
poorly maintained power tools.
f) Keep cutting tools sharp and clean. Properly
maintained cutting tools with sharp cutting edges are
less likely to bind and are easier to control.
g) Use the power tool, accessories and tool bits etc.
In accordance with these instructions, taking into
account the working conditions and the work to
be performed. Use of the power tool for operations
different from those intended could result in a
hazardous situation.
SERVICE
Have your power tool serviced by a qualified repair
person using only identical replacement parts. This
will ensure that the safety of the power tool is maintained.
OTHER GENERAL WARNINGS
n Know your power tool. Read owners manual
carefully. Learn its applications and limitations as well
as the specific potential hazards related to this tool.
n Use the right tool. Do not force a small tool or
attachment to do the job of a heavy duty tool. Do not
use a tool for purposes not intended.
n Protect your lungs. Wear a dust mask if operation is
dusty.
n Do not operate in poor lighting. Use the unit only in
daylight or good artificial light.
n Disconnect the plug immediately from the power
source if the mains or extension lead is damaged
or severed.
n Stay alert and exercise control. Watch what you are
doing and use common sense. Do not operate the
tool when you are tired. Do not rush operation of the
tool.
n Check for damaged parts. Before use of the tool,
guards and all other parts should be carefully
checked to determine that it will operate properly and
perform its intended function. Check for alignment of
moving parts, binding of moving parts, breakage of
parts, mounting and any other conditions that may
affect its operation. A guard or any other part that is
damaged should be properly repaired or replaced by
an authorised service centre.
n Do not use tool if switch does not turn it on and off.
Have defective switches replaced by an authorised
service centre.
n Do not operate this tool while under the influence
of drugs, alcohol or any medication.
n The appliance is not intended for use by young or
infirm persons.
n Young children should be supervised to ensure
that they do not play with the tool.
n The use of an earth-leakage circuit breaker
of residual current device, the tripping current
of 30mA or less, in conjunction with this tool is
recommended.
n Maintain the chainsaw with care. Keep the power
cord clear of the chain at all times. Never carry the
saw by the cord or pull on the cord to disconnect it
from the socket.
n Chain tension. Make sure that the chain tension is
correct, as specified in these instructions. Incorrect
tension may cause the chain to disengage from the
guide bar, which is extremely dangerous.
n Extension cord. When an extension cord is used
make sure:
(a) That pins on the plug of the extension cord are
the same in number, size and shape as those of
the plug on the saw.
(b) That extension cord is properly wired and in good
electrical condition.
(c) That the wire size is large enough for the AC
ampere rating of the chain saw.
SPECIAL SAFETY INSTRUCTIONS
n Keep all parts of the body away from the chain
when operating. Before you start, make sure the
chain is not contacting anything. A moment of
inattention while operating chainsaws may cause
serious injury.
n Always hold the chainsaw with your right hand
4
English
on the rear handle and your left hand on the front
handle. Holding the chainsaw with a reversed hand
configuration increases the risk of personal injury and
should never be done.
n Wear safety glasses and hearing protection.
Further protective equipment for head, hands,
legs and feet is recommended. Adequate protective
clothing will reduce personal injury by flying debris or
accidental contact with the chain.
n Do not operate a chainsaw while up in a tree.
Operation of a chainsaw while up in a tree may result
in personal injury.
n Always keep proper footing and operate the
chainsaw only when standing on fixed, secure and
level surfaces. Slippery or unstable surfaces such as
ladders may cause a loss of balance or control.
n Hold the power tool by insulated gripping
surfaces only, because the chain may contact
hidden wiring or its own cord. Chains contacting
a "live" wire may make exposed metal parts of the
power tool "live" and could give the operator an
electric shock.
n When cutting a limb that is under tension be alert
for spring back. When the tension in the wood fibers
are released the spring loaded limb may strike the
operator and/or the chainsaw.
n Use extreme caution when cutting brush and
saplings. Slender materials may catch on the chain
and be whipped toward you or pull you off balance.
n Carry the chainsaw by the front handle, away
from your body. When transporting or storing the
chainsaw always fit the guide bar cover. Proper
handing of the chainsaw will reduce the likelihood of
accidental contact with the moving chain.
n Follow instructions for lubricating, chain
tensioning and changing accessories. An
improperly tensioned or lubricated chain increases
the c h a n c e o f kickback an d c a n p o s s i bly
break.
n Keep handles dry, clean, and free from oil and
grease. Greasy, oily handles are slippery and can
cause loss of control.
n Cut wood only. Do not use chainsaw for purposes
not intended. Do not attempt to cut plastic,
masonry or steel. Use of the chainsaw for operations
other than intended may result in a hazardous
situation.
CAUSES AND OPERATOR PREVENTION OF KICKBACK
a) Kickback may occur when the nose or tip of the
guide bar touches an object, or when the wood
closes in and pinches the chain in the cut.
b) Tip contact in some cases may cause a sudden
reverse reaction, kicking the guide bar up and
back towards the operator.
c) Pinching the chain along the top of the bar
may push the bar rapidly back towards the
operator.
d) Either of these reactions may cause you to
lose control of the saw which could result in
serious injury. Do not rely exclusively upon
the safety devices built into your saw. As a
chainsaw user, you should take several steps
to keep your cutting jobs free from accident or
injury.
e) Kickback is the result of tool misuse and or
incorrect operating procedures or conditions and
can be avoided by taking proper precautions as
given below:
n Maintain a firm grip with both hands on the
saw with thumbs and fingers encircling the
handles. Position your body and arms to allow
you to resist kickback force. Kickback forces
can be controlled by the operator, if proper
precautions are taken. Do not let go of the
chainsaw.
n Do not overreach and do not cut above
shoulder height. This helps prevent
unintended tip contact and enables better
control of the chainsaw in unexpected
situations.
n Only use replacement bars and chains
specified by the manufacturer. Incorrect
replacement bars and chains may cause
chain breakage and/or kickback.
n Follow the manufacturers sharpening and
maintenance instructions for the chain.
Decreasing the depth gauge height can lead
to increases in kickback.
SPECIAL USE
n The chainsaw is designed for cutting through tree
trunks, branches, squared timber and similar objects
and for felling and delimbing trees.
n The user bears sole responsibility for damage caused
by improper use.
n Generally accepted accident prevention regulations
and the enclosed safety information must be
observed.
English

5
EnglishEnglish
SYMBOLS
Some of the following symbols may be used on this tool. Please study them and learn their meaning for safe operation
of this product.
SYMBOL NAME EXPLANATION
V Volts Voltage
Hz Hertz Frequency (cycles per second)
W Watt Power
Alternating Current Type of current
Safety Alert Precautions that involve your safety .
Class II tool Tool in which protection against electric shock rely on double
insulation or reinforced insulation.
Wet conditions alert Do not expose to rain or use in damp locations.
Read the operator’s
manual
To reduce the risk of injury, user must read and understand the
"operator’s manual before using this product.”
Electric shock
precaution
Remove plug from the mains immediately if cable is damaged or
cut.
Eye protection Always wear safety goggles or safety glasses when operating this
product.
Ear protection Always wear safety ear protectors when operating this product.
Sound power level Guaranteed sound power level is 107dB.
Safety Alert :Kickback
danger DANGER! Beware of Kickback.
Two hands operation Always use two hands to operate the machine, don’t use it with
one hand.
107
6
English
SYMBOLS
The following signal words and meanings are intended to explain the levels of risk associated with this product.
SYMBOL SIGNAL MEANING
Indicates an imminently hazardous situation, which, if not avoided, will result
in death or serious injury.
Indicates a potentially hazardous situation, which, if not avoided, could result
in death or serious injury.
Indicates a potentially hazardous situation, which, if not avoided, may result
in minor or moderate injury.
(Without Safety Alert Symbol) Indicates a situation that may result in property
damage.
DANGER
WARNING
CAUTION
CAUTION
SERVICE
Servicing requires extreme care and knowledge
and should be performed only by a qualified service
technician. For service we suggest you return the product
to your nearest AUTHORISED SERVICE CENTRE for
repair. When servicing, use only identical replacement
parts.
WARNING:
To avoid serious personal injury, do not attempt to
use this product until you read thoroughly and
understand completely the operator's manual.
Save this operator's manual and review frequently
for safe operation and instructing others who may
use this product.
WARNING:
Observe all normal safety precautions related to
avoiding electrical shock.
SAVE THESE INSTRUCTIONS
7
English
DESCRIPTION
Fig. 1
1. Chain Brake
2. Front Handle
3. Oil Tank Cap
4. Safety Lock-off Button
5. Rear Handle
6. Live Tool Indicator
7. Switch Trigger
8. Oil Tank Sight Gauge
9. Chain Tension Adjust Knob
10. Sprocket Cover
11. Sprocket Cover Adjust Knob
12. Bar
13. Chain
Fig. 2
14. Lock-Off Button
15. Bumper Spike
16. Chain Cover
Fig. 3
17. Sprocket
18. Chain Tension Bolt
19. Bar Guide
20. Oil Outlet
Fig. 5
21. Bar Groove
22. Chain Drive Links
23. Cutter
Fig. 9
24. Felling direction
25. Danger Zone
26. Escape route
Fig.10
27. Direction of fall
28. Notch
29. Felling back cut
30. Hinge
Fig.11
31. Limb cut
32. Keep work off ground leave support limbs until log
is cut
Fig.12
33. Log supported along the entire length
34. Cut from top (overbuck) avoid cutting earth
Fig.13
35. Log supported one end
36. 1st cut from bottom (underbuck) (1/3 diameter) to
avoid splintering
37. 2nd cut from top (overbuck) (2/3 diameter) to meet
1st cut (to avoid pinching)
Fig.14
38. Log supported both ends
36. 1st cut underbuck (1/3 diameter) to avoid splintering
37. 2nd cut overbuck (2/3 diameter) to meet 1st cut (to
avoid pinching)
Fig.15
39. Bucking a log
40. Stand on uphill side when cutting because log may
roll
8
EnglishEnglish
TECHNICAL DATA
Unit RCS2040G
Rated voltage V~ / Hz 220~240/50
Power rating W 2000
Rated no-load speed M/S 13
Cutting length mm 400
Chain break S < 0.15
Chain stop S < 0.15
Chain oil tank capacity ml 200
Weight (without cable) kg 5.2
Emission sound pressure level LpA dB(A) 95
Uncertainty KpA dB(A) 3
Sound power level LWA dB(A) 104
Uncertainty KWA dB(A) 3
Guaranteed sound power level LWA(G) dB(A) 107
Vibration total value ah (no load work mode) m/s25.7
Uncertainly K m/s21.5
Chain & Bar information
Manufacturer Chain Chain bar
Carlton N1C-BL-56E SK B 16-10W-N156-MHC
Oregon 91PJ056X 160SDEA041
Note: Carlton Chain must be fitted with Carlton bar; Oregon Chain must be fitted with Oregon bar.
9
English
SPECIAL PRODUCT FEATURES
n Special safety wrap-spring chain brake. In case of a
kickback or if the trigger is released, the chainsaw
comes to a standstill within 1/10 of a second.
n Sawing chain with safety driving links to reduce the
risk of kickback.
n Large chain brake near the front handle. In cases of
kickback the chain brake is pushed forward by the
back of the operator’s hand which trips the wrap-
spring chain brake.
n Lock off switch to protect against unintentional start
of the chainsaw.
n Live tool indicator to indicate a good connection with
power.
COMMISSIONING
Assembling the bar and chain
Remove the mains plug out of the socket.
Wear protective gloves.
n Unscrew the sprocket cover adjust knob and remove
the sprocket cover. (Fig. 1)
n The chain should face in the direction of chain
rotation. If they face backwards, turn the loop over.
(Fig. 4)
n Place the chain drive links into the bar groove. (Fig.
5)
n Position the chain so there is a loop at the back of
the bar.
n Hold the chain in position on the bar and place
the loop around the sprocket and make sure it is
correctly mounted. (Fig. 6)
Note: The chain is correctly tensioned if the cutter
can be lifted 3 to 4mm from the resting position.
n Turn the chain tensioning bolt clockwise until the
chain is correctly tensioned. While the bolt is being
tightened, the bar must then be pushed upwards,
check chain tension again, do not tension the chain
too tightly. (Fig. 7)
n Replace the sprocket cover on top and tighten gently
with the sprocket cover adjust knob.
Running in
Before cutting with a new chain, allow it to run freely
for 2~3 minutes.
WARNING:
After the run-in time, check the chain tension
and retighten the chain if necessary.
Chain lubricating oil
The chainsaws are delivered without oil in the tank.
Prior to initial operation of the machine, the oil tank
must be filled with chain and bar oil.
Ryobi chainsaw adhesive oil is biologically degradable
and permits chainsaw operation at temperatures as low
as -15°C.
The oil tank cap is removed to fill the oil. When filling the
oil, ensure that no dirt gets into the oil tank. The oil level
can be monitored at the oil sight gauge. One filling of the
oil tank (capacity 0.2L) is sufficient for 25~40 minutes of
chainsaw operation.
Checking chain lubrication
To prevent excessive wear, the chain and bar must
be evenly lubricated during operation. Lubrication is
automatic. Never work without chain lubrication. If the
chain runs dry, the entire cutting apparatus will quickly
become severely damaged. It is therefore important to
check both chain and bar lubrication and the oil gauge
before every use. Never use the saw when the oil level is
below the "Minimum" mark.
n Minimum - When only approx. 5 mm of oil is visible at
the lower rim of the oil gauge, you must top up with
oil.
n Maximum - Top up with oil until the window is full.
WARNING:
Never work without chain and bar lubrication.
To check the automatic chain lubrication system is
working, hold the chain saw with the cutter (and chain
running) at a safe distance of about approx. 20cm over
a light colored base, e.g. a spread-out newspaper). If
increasingly large oil marks appear on the light colored
base, the chain lubrication is working correctly.
Chain Brake
The integrated chain brake brings the chain to a standstill
within 1/10 of a second if the chain brake is moved either:
-- Manually to its front position, or during work with the
back of the operator’s hand (due to kickback) , or if
-- The chainsaw is switched off by releasing the trigger.
If the quick brake of the chainsaw is tripped through
actuation of the Chain Brake near the front handle, do
not allow the chainsaw motor to run in this position for
unnecessarily long periods. Push the chain brake back to
its initial position.
WARNING:
Before operating the chainsaw, always check
that the chain brake is in perfect working order
(by actuating the hand protection and releasing
the trigger). Have the machine repaired if
braking time is lengthened.
10
English
COMMISSIONING
Mains connection
WARNING:
Before plugging in, check to see that the rated
mains voltage and mains frequency, as stated on
the rating label, match your power supply.
WARNING:
Prior to starting work, check the mains
connection cable and extension cable for
damage. Only use mains connection cables and
extension cables in perfect condition.
WARNING:
The electrical system to which the chainsaw
is connected should be equipped with a
differential current safety switch (with a
max. of 30mA release current)
The chainsaw power cord is intentionally short to prevent it
from coming into contact with the running chain.
This product is designed with a cord retainer that prevents
the extension cord from being pulled loose while using.
n Form a loop with the end of the extension cord.
n Insert loop portion of extension cord through opening
in the bottom of the rear handle and place over cord
retainer.
n Slowly pull loop against cord retainer until the slack is
removed.
n Plug product into extension cord.
BEFORE OPERATION
In order to prevent kickback, please follow these
safety instructions:
n Never cut with the tip of the chain bar. Always keep a
close eye on the tip of the chain bar.
n Be careful when continuing cuts you are already
working on.
n Always start cuts with the chainsaw already running.
n Make sure the chain is always properly sharpened.
n Never cut through more than one branch at a time.
When lopping off branches, be careful not to touch
any other branches.
n When cross-cutting, pay attention to trunks standing
very close to each other. If possible use a sawing
trestle.
Transporting the chainsaw
Before transporting the chainsaw, always remove the plug
from the power socket and slide the chain cover over the
bar and chain. If several cuts are to be performed with the
chainsaw, the saw must be switched off between cuts.
Chain guard (Fig. 2)
The chain cover must be clipped onto the chain and bar
as soon as the sawing work has been completed and
whenever the machine has to be transported.
OPERATION
WARNING:
Wear eye, ear and body clothing protection
while using your saw. Ensure the oil tank is
full before use.
n Releasing the chain brake:
To be able to use the chain saw again, the chain
must be unlocked. Pull the chain brake back
towards the back of the chain saw until it locks into
place. The chain will now move when it is switched
on.
n Holding the chain saw (Fig. 8)
Always grip both handles with the thumbs and
fingers encircling the handles. Ensure that your
left hand is holding the handle so that thumb is
underneath.
n Using the chain saw:
Always be sure of your footing and hold the
chainsaw firmly with both hands while the motor is
running.
n Felling a tree (Fig. 9)
When bucking and felling operations are being
performed by two or more persons at the same time,
the felling operation should be separated from the
bucking operation by a distance of at least twice
the height of the tree being felled. Trees should
not be felled in a manner that would endanger any
person, strike any utility line or cause any property
damage. If the tree does make contact with any
utility line, the utility company should be notified
immediately.
The chainsaw operator should keep on the uphill
side of the terrain as the tree is likely to roll or slide
downhill after it is felled.
An escape path should be planned and cleared as
necessary before cuts are started. The escape path
should extend back and diagonally to the rear of the
expected line of fall as illustrated in Fig. 9.
n Before felling is started, consider the natural lean of
the tree, the location of larger branches and the wind
direction to judge which may the tree will fall.
English

11
English

n Remove dirt, stones, loose bark, nails, stapes and
wire from the tree.
n Notching undercut (A notch cut in a tree to direct the
fall ) (Fig.10)
Make the notch 1/3 the diameter of the tree,
perpendicular to the direction of fall. Make the lower
horizontal notching cut first, this will help to avoid
pinching of either the chain or the bar when the
second notch is being made.
n Felling back cut (the final cut in a tree felling
operation, made on the opposite side of the tree from
the notching undercut ) (Fig.10)
Make the felling back cut at least 50mm higher than
the horizontal notching cut. Keep the felling back
cut parallel to the horizontal notching cut. Make the
felling back cut so enough wood is left to act as a
hinge. The hinge keeps the tree from twisting and
falling in the wrong direction. Do not cut through the
hinge. As the felling cut gets close to the hinge, the
tree should begin to fall. If there is any chance that
the tree may not fall in the desired direction or it may
rock back and bind the saw chain, stop cutting before
the felling back cut is complete and use wedges of
wood, plastic or aluminum to open the cut and drop
the tree along the desired line off fall. When the tree
begins to fall remove the chain saw from the cut, stop
the motor, put the chain saw down, and then use the
retreat path planned. Be alert for overhead limbs
falling and watch your footing.
n Limbing a tree (Fig.11)
Limbing is removing the branches from a fallen tree.
When limbing, leave larger lower limbs to support the
log off the ground. Remove the small limbs in one
cut. Branches under tension should be cut from the
bottom up, to avoid binding the chain saw.
n Bucking a log (The process of cross cutting a felled
tree or log into lengths) (Fig.12-15) Bucking is cutting
a log into lengths. It is important to make sure your
footing is firm and your weight is evenly distributed
on both feet. When possible the log should be raised
and supported by the use of limbs or logs.
Follow the simple direction for easy cutting:
a) When the log is supported along the entire length,
it is cut from the top (overbuck). (Fig.12)
b) When the log is supported on one end, cut 1/3 of
the diameter from the underside (underbuck). Then
make the finished cut by overbucking to meeting
the first cut. (Fig.13)
c) When the log is supported on both ends, cut 1/3 of
that diameter from the top (overbuck). Then make
the finished cut by underbucking the lower 2/3 to
meet the first cut. (Fig.14)
d) When bucking on a slope always stand on the
uphill side of the log. When cutting through, to
maintain complete control, release the cutting
pressure near the end of the cut without relaxing
your grip on the chainsaw handles. (Fig.15)
Do not let the chain contact the ground. After completing
the cut, wait for the chain to stop before you move the
chainsaw. Always stop the motor before moving from tree
to tree.
MAINTENANCE
(Fig. 16-21)
Chain Sharpening
When the chain penetrates into wood with difficultly, it
needs sharpening as follows:
n Put the chain under tension.
n Fasten the bar in a vice so that the chain can slide.
n Fasten the file to the file holder and place it on cutter
at a 35° angle.
n File with forward strokes only until all the worn out
part of the cutting edge is taken away.
n Count the number of strokes given to the cutter taken
as a reference basis and file away for the same
number of strokes on all other cutters.
n If after sharpening a few times, the depth gauge
protrudes from the template, you must reset its level
using a flat file.
n Finally, round off the depth gauge.
NOTE: We advise you to have the deep or important
sharpening carried out by a service agent who is
equipped with an electric sharpener.
Guide bar maintenance
n When you have finished working, clean out the
groove and the oil passages, with a scraping hook.
n Periodically trim the sides of the bar rails using a flat
file.
n If not done in the long run, the feathered edges might
break away and damage the bar.
n If one rail is higher than the other one, it is necessary
to make it even with a flat file and then smooth them
with a file or fine grain abrasive paper.
Oil tank maintenance
To prevent dirt getting inside the tank, clean the oil tank
cap before opening. Check the contents of the oil tank
during sawing work by checking the oil gauge. Close the
oil tank cap tightly and wipe away any spills .
English
12
English
ACCESSORIES OR REPAIR PART
Use only genuine Ryobi accessories or repair parts.
If you need any accessories, check with your dealer. The
main accessories (Chain & Bar) are as below:
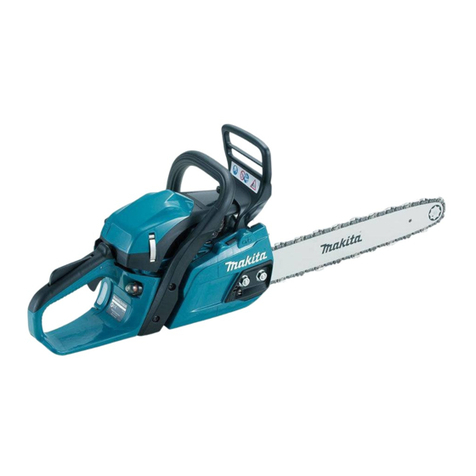
Model Chain & Bar
RCS2040G
Carlton Chain N1C-BL-56E SK B
Bar 16-10W-N156-MHC
Oregon Chain 91PJ056X
Bar 160SDEA041
DISPOSAL
Power tools and accessories contain large
amount of valuable resources and plastics that
can be recycled.
Waste electrical products should not be disposed
of together with household waste. Please recycle where
facilities exist. Check with your local authority or retailer for
recycling advice.
English

13
TECHTRONIC INDUSTRIES (AUSTRALIA) PTY. LTD.
Level 1, 660 Doncaster Road,
Doncaster, Victoria 3108,
Australia
Tel: 1300 361 505 Fax: 1800 807 993
www.ryobi.com.au
TECHTRONIC INDUSTRIES N.Z. LIMITED
Auckland: 27 Clemow Drive, Mt Wellington, N.Z.
Tel: (09) 573 0230 Free Call: 0800 279 624 Fax: (09) 573 0231
Contact during normal business hours.
www.ryobi.co.nz
Subject to the guarantee condition below, this Ryobi
tool (hereinafter called “the product”) is guaranteed by
TECHTRONIC INDUSTRIES AUSTRALIA PTY
LIMITED (hereinafter called “the Company”) to be free
from defects in material or workmanship for a period
of 24 months from the date of original purchase
covering both parts and labour. Under the terms of
this guarantee, the repair or replacement of any part
shall be the opinion of the Company or its authorised
service centre. Should service become necessary
during the warranty period, the owner should contact
the customer service HELPLINE 1300 361 505 or
contact the retailer from whom the product was
purchased.
In order to obtain guarantee service, the owner must
present the sales docket and Guarantee Certificate to
confirm date of purchase. This product is sold by the
dealer or service centre as principal and the dealer
has no authority from the Company’s behalf except as
herein contained or herein referred to.
Guarantee Conditions
This guarantee only applies provided that the product
has been used in accordance with the manufacturer’s
recommendations under normal use and reasonable
care (in the opinion of the Company) and such
guarantee does not cover damage, malfunction or
failure resulting from misuse, neglect, abuse, or used
for a purpose for which it was not designed or is not
suited and no repairs, alterations or modifications
have been attempted by other than an authorised
service centre. This guarantee will not apply if the tool
is damaged by accident or if repairs arise from normal
wear and tear. The Company accepts no additional
liability pursuant to this guarantee for the costs of
travelling or transportation of the product or parts to
and from the service dealer or service centre - such
costs are not included in this guarantee.
Certain legislation, including the Trade Practices Act,
1974 (as amended) and other state and territorial laws
give rights to the buyer and impose liability on the
seller in certain circumstances. Nothing herein shall
have the effect of excluding, restricting or modifying
any condition, guarantee, right or liability imposed, to
the extent only that such exclusion, restriction or
modification would render any term herein void.

Other Ryobi Chainsaw manuals

Ryobi CCW180LBC User manual

Ryobi

Ryobi CCW180LBC User manual

Ryobi RCS2340 User manual

Ryobi

Ryobi RCS2340 User manual

Ryobi RCS36B35HI User manual

Ryobi

Ryobi RCS36B35HI User manual

Ryobi RCS4640C User manual

Ryobi

Ryobi RCS4640C User manual

Ryobi RCS3845 User manual

Ryobi

Ryobi RCS3845 User manual

Ryobi RY40503 User manual

Ryobi

Ryobi RY40503 User manual

Ryobi OCS1830BL User manual

Ryobi

Ryobi OCS1830BL User manual

Ryobi RCS36X3550HI User manual

Ryobi

Ryobi RCS36X3550HI User manual

Ryobi RCS5133CB User manual

Ryobi

Ryobi RCS5133CB User manual

Ryobi RCS-3540C User manual

Ryobi

Ryobi RCS-3540C User manual

Ryobi HLCS01 User manual

Ryobi

Ryobi HLCS01 User manual

Ryobi P2507 User manual

Ryobi

Ryobi P2507 User manual

Ryobi RCS1935B User manual

Ryobi

Ryobi RCS1935B User manual

Ryobi OCS1830 User manual

Ryobi

Ryobi OCS1830 User manual

Ryobi RCS5133C User manual

Ryobi

Ryobi RCS5133C User manual

Ryobi OPP1820 User manual

Ryobi

Ryobi OPP1820 User manual

Ryobi RY36CSX30B User manual

Ryobi

Ryobi RY36CSX30B User manual

Ryobi RCS1825BL4 User manual

Ryobi

Ryobi RCS1825BL4 User manual

Ryobi RCS1830Li25 User manual

Ryobi

Ryobi RCS1830Li25 User manual

Ryobi RCS1940 User manual

Ryobi

Ryobi RCS1940 User manual

Ryobi RY43006 User manual

Ryobi

Ryobi RY43006 User manual

Ryobi RCS1835 User manual

Ryobi

Ryobi RCS1835 User manual

Ryobi RCS3535B User manual

Ryobi

Ryobi RCS3535B User manual

Ryobi RCS5145N User manual

Ryobi

Ryobi RCS5145N User manual

Popular Chainsaw manuals by other brands

Echo CS-8000 TYPE1-E instruction manual

Echo

Echo CS-8000 TYPE1-E instruction manual

Stiga SP 386 Operator's manual

Stiga

Stiga SP 386 Operator's manual

Craftsman 358.341190 Operator's manual

Craftsman

Craftsman 358.341190 Operator's manual

SNOWJOE SUNJOE SWK698E Operator's manual

SNOWJOE

SNOWJOE SUNJOE SWK698E Operator's manual

Clinton 323A Instruction manual and parts list

Clinton

Clinton 323A Instruction manual and parts list

GreenWorks CS82210 Operator's manual

GreenWorks

GreenWorks CS82210 Operator's manual

GreenWorks CS40B00 Operator's manual

GreenWorks

GreenWorks CS40B00 Operator's manual

Hitachi CS 30Y Handling instructions

Hitachi

Hitachi CS 30Y Handling instructions

McCulloch CS 35 Operator's manual

McCulloch

McCulloch CS 35 Operator's manual

Hitachi CS 33EDT instruction manual

Hitachi

Hitachi CS 33EDT instruction manual

RedMax GZ400 Owner's/operator's manual

RedMax

RedMax GZ400 Owner's/operator's manual

Husqvarna 61 Operator's manual

Husqvarna

Husqvarna 61 Operator's manual

Benchmark 5241-100 quick start guide

Benchmark

Benchmark 5241-100 quick start guide

Husqvarna 335XPT California Operator's manual

Husqvarna

Husqvarna 335XPT California Operator's manual

Scheppach CSH46 Translation of the original instruction manual

Scheppach

Scheppach CSH46 Translation of the original instruction manual

VERTO 52G584 instruction manual

VERTO

VERTO 52G584 instruction manual

Stihl MSA 120 C instruction manual

Stihl

Stihl MSA 120 C instruction manual

AGP CS11 Original instructions

AGP

AGP CS11 Original instructions

manuals.online logo
manuals.online logoBrands
  • About & Mission
  • Contact us
  • Privacy Policy
  • Terms and Conditions

Copyright 2025 Manuals.Online. All Rights Reserved.