Ryobi RCPP900-D Operation manual

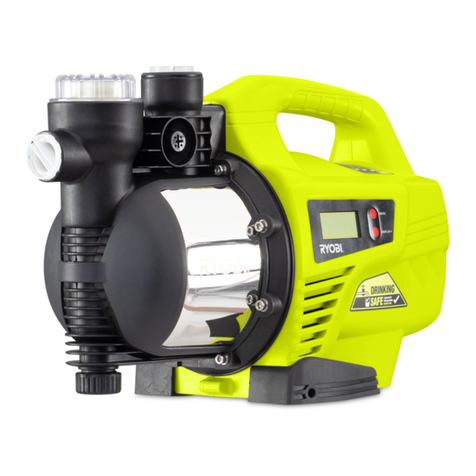
RCPP900-D
CONSTANT PRESSURE PUMP
MENU
DISPLAY/+

Important!
It is essential that you read the instructions in this manual before assembling,
operating and maintaining the product.
Subject to technical modification.

DESCRIPTION
1. 25mm Water inlet
2. Pre-Filter
3. 25mm Water outlet
4. Drain plug
5. Pump Head
6. LCD Display screen
7. Carry Handle
8. 900W Induction motor with thermal overload
9. Spanner
2
3
6
8
7
1
5
4
9
Components List

DESCRIPTION
MENU
OFF DISPLAY/+
MENU
DISPLAY/+
MENU
DISPLAY/+
MENU
DISPLAY/+
MENU
DISPLAY/+
MENU
DISPLAY/+
MENU
DISPLAY/+
MENU
DISPLAY/+
LCD DISPLAY
Flow Rate
Timer
Leakage Error
Timer ON Setting
Pump Head
No Flow Error
Current Time Setting
3.6 m3/h
39m15m
Err Err
12:00
TIME NOW
12:00
TIME ON

PUMP INSTALLATION
Timer OFF Setting
DESCRIPTION
MENU
12:00 DISPLAY/+
TIME OFF
Fig. 4
Fig. 6
Fig. 5
Fig. 3
Fig. 2Fig. 1

DESCRIPTION
Fig. 10
Fig. 8
Fig. 9
Fig. 7

GENERAL SAFETY WARNINGS
RESIDUAL RISKS
■Read all safety warnings and all instructions.
Failure to follow the warnings and instructions
may result in electric shock, fire and/or serious
injury. Save all warnings and instructions for future
reference.
■Know your product. Read operator’s manual
carefully. Learn its applications and limitations, as
well as the specific potential hazards related to the
product. Following the rule will reduce the risk of
electric shock, fire, or serious injury.
■Do not let familiarity gained from frequent use
of tools allow you to become complacent and
ignore tool safety principals. A careless action
can cause severe injury within a fraction of a
second.
■Follow appliance manufacturer’s’ instructions
regarding operation and power. Use of the
appliance different from those intended could result
in a hazardous situation.
■Use the correct product for the application.
■Do not allow children to operate the product or
play with the product as a toy. Close attention is
necessary when used near children.
■To reduce the risk of personal injury and electric
shock, the product should not be played with or
placed where small children can reach it.
■The product is intended for household use only.
■Use the product only for its intended use as
described in this manual.
■If the product is not working properly, has been
dropped, damaged, left outdoors or dropped
into water, return it to your nearest service
centre.
■Only use attachments and accessories specified
by the manufacturer.
■Do not put any objects in ventilation openings.
Do not use the product with any opening blocked.
Keep openings free of dust, lint, hair and anything
that may reduce air flow.
■Stay alert, watch what you are doing and use
common sense when operating the product. Do
not use while you are tired or under the influence
of drugs, alcohol or medication. A moment of
inattention may result in serious personal injury.
■Do not place product near any heat sources
such as radiators, heat registers, stoves, or
other products (including amplifiers) that
produce heat.
■Do not place the product near fire or heat; it may
explode.
■Do not place the product in closed bookcases
or racks without proper ventilation. Allow a
minimum distance of 5cm from any foreign object.
■Risk of uncontrolled situations when used in
ambient temperatures below 0°C (32°F) or above
40 °C (104°F).
■Keep the product dry, clean and free from oil and
grease. Always use a clean cloth when cleaning.
■Keep handles and grasping surfaces dry, clean
and free from oil and grease. Slippery handles
and grasping surfaces do not allow for safe handling
and control of the tool in unexpected situations.
■Do not overreach. Keep proper footing and
balance at all times. This enables better control of
the product in unexpected situations.
■W h e n s e r v i c ing t h e p r odu c t , u s e onl y
manufacturer’s replacement parts, accessories
and attachments. Follow instructions in the
Maintenan ce section of t he manual . Use of
unauthorised parts or failure to follow maintenance
instructions may create a risk of shock or injury.
■Save these instructions. Refer to them frequently
and use them to instruct others who may use this
tool. If you loan someone this tool, loan them these
instructions also
■Do not let the pump run dr
constant pressure pump safety
y.
■Do not r e move ho s e while pump is s t ill
operating.
■Do not allow the product to run unattended.
■Do not lift the pump by the hoses.
■
■
Periodically inspect the pump, hoses and intake
filter. Ensure hoses and intake filter are free from
mud, sand and debris. Remove the battery before
inspecting.
WARNING
This appliance is not intended for use by person
(including children) with reduced physical, sensory
or mental capabilities, or lack of experience and
knowledge, unless they have been given supervision or
instruction concerning use of the appliance by a person
responsible for their safety.
Children should be supervised to ensure that they do
not play with the appliance.
WARNING
1
This product is intended for pumping water in
a Home Domestic application. Do not use it for
corrosive, abrasive, explosive or dangerous liquids.
Fluids other than water will damage the water pump
and/or create a fire hazard. Failure to follow all
instructions listed below may result in electric shock,
If the replacement of the supply cord is necessary,
this has to be done by the manufacturer or his
agent in order to avoid a safety hazard; The pump is
to be supplied through a residual current device
(RCD) having a rated residual operating current not
exceeding 30mA
warnings.
This product is designed for use with
drinking (potable) water in compliance to
Australian Standards.
AS/NZS 4020:2018

■Ensure the water pump is disconnected from mains
power when installing.
■Do not install or operate the water pump in an
explosive environment or near flammable material.
■Do not operate the water pump without liquid.
■Do not run the water pump dry.
2
WARNING
WARNING
The water pump together with associated pipework
operate under pressure. Do not disconnect water
pump or pipework until internal pressure has been
released. Failure to do this could result in personal
injury and damage to property.
■Avoid inserting hands into the inlets/outlets of the
water pump while it is connected to power.
■Before using the water pump, always inspect it
visually. Do not use the pump if it is cracked and/or
damaged.
■The water pump has a built-in thermal protection
overload switch. The water pump stops if an
overload occurs. The motor restarts automatically
after it has cooled down.
■The pump must not be used when people are in the
water.
■Never work or perform maintenance on the pump
without first making sureit has been disconnected
from the mains power.
■Pollution of the liquid could occur due to leakage of
lubricants.
Important: Avoid inserting hands into the mouth of
the pump if it is connected to the mains. The electrical
connection must always be made in a dry area. Make
sure that electrical connections are protected from
inundations.
Protect the plug and the power cable from heat, oil or
sharp edges.
MAINTENANCE
CLEANING THE PUMP HOUSING
Use a damp cloth to wipe down the pump housing.
Allow to dry thoroughly before storing in a dry location
that is protected from bad weather conditions.
CLEANING THE PRE-FILTER
The pump is fitted with a pre-filter which will need
cleaning at regular intervals or replacing if necessary.
It is recommended to clean the non-return valve at the
1. Remove the pre-filter using the supplied filter wrench
to loosen the screw by turning in an anti-clockwise
direction.
2. Unscrew the non-return valve from the bottom of the
pre-filter.
3. Tap the filter and non-return valve on a flat surface
gently. For stubborn dirt, simply rinse with water.
NOTE: Do not use abrasive cleaning agents to clean
1. Once clean re-assemble the pre-filter and non-return
valve.
2. Screw the pre-filter onto the pump and tighten with
the supplied filter wrench.
INTENDED USE
SYMBOLS DEFINITION ON THE PRODUCT
LCD OPERATION
The constant pressure pump is intended to be used
only by adults who have read and understood the
instructions and warnings in this manual, and can be
considered responsible for their actions.
The product is intended for drawing water for domestic
use, water from wells, increase pressure for pipelines
sinks, water basins etc.
1.
2.
3.
4.
5.
Before conducting any maintenance, please ensure
the unit is unplugged from the mains power.
If the unit is not unplugged from the mains, there is
a risk of the pump operating suddenly.
LCD will display "OFF" when plugged in.
When the pump is in operation the LCD screen will
display "water flow rate and water tap symbol".
Press "Menu" to turn the pump on and toggle
through timer settings and to turn the pump off.
When the pump is in operation press "Display/+" to
toggle between "FLOW RATE" and "PUMP HEAD".
To set the pump head height when the pump is in
operation press "Display/+" to toggle to pump head.
Once pump head is displayed press and hold
"Menu" button to enter pump head settings.
To adjust the pump head height press "Display/+" to

3
WARNING
The product should be installed and maintained by
personnel who are familiar with instruction manual
and have professional qualification certificate;
installation and operation must conform to local
laws and practical standard; install pipeline properly
according to instruction manual and anti-freezing
measures are taken to pipeline.
BEFORE INSTALLATION
Installation precautions of inlet water pipes (Fig. 1, 2)
1.
2.
3.
4.
5.
Examine screw plug for water drainage (Fig. 5)
Dry running function:
Automatic function:
Leak protection function:
CLOCK/TIMER SETTINGS:
6.
Installation precautions of outlet water pipes (Fig. 3)
Diameter of outlet water pipes should be at least the
same as that of water outlet to minimize pressure,
Choice of installation location (Fig. 4)
When installing pumps, inlet pipelines should be
as short as possible and elbows should be as few
as possible. Pumps should be placed in the well-
ventilated environment. Pumps may be installed
outdoor, but they must be covered to prevent rain
damage and frost.
MAINTENANCE MANUAL
When there is no water detected by the pump it will
enter dry run protection. This consists of 3 cycles of
100 sec "ON" and 5 sec "OFF". If no water is
detected after 20 seconds on the final cycle the LCD
screen will display a flashing "ERR" and " "
symbol. To reset pump, disconnect from main power
supply and reconnect.
The pump will stop when the water flow stops. When
there is water flow the pump will start automatically,
this is determined by a drop in pressure in the pump
head.
When there is low water pressure for a long period
of time the pump will enter into a pressure check
mode. The pump will start and stop up to 6 times
within a 2 minute period. The pump will stop after 1
hour in this mode and will display a flashing "ERR"
on the LCD screen.
To enter clock settings press and hold "Menu"
button for 5 seconds.
CLOCK SETTINGS
Display screen will flash hour first.
Press "Display/+" button to change the hour, then
press "Menu" to change to minutes use "Display/+"
to set minutes.
After setting minutes press "Menu" again to set
AUTO ON TIME and AUTO OFF TIME repeat the
same methods as
setting clock
.
Do not use a soft rubber hose as it may collapse
during the operation of the electric pump.
Bottom valve must be vertical and 30cm above
bottom to avoid debris being picked up.
All water pipe joints must be sealed with minimal
elbow connections for best performance.
Monitor water level decline when using, and bottom
valve should remain submerged.
Ensure that the water inlet pipe matches the electric
pump inlet pipe diameter.
For additional protection it is recommended to install
in line filters.
Before use ensure that the screw plug for water
drainage has been installed correctly.
Set inlet water pipes (Fig. 6)
Water pumps are connected with circuits:
Steel wire hose or corrugated pipe (2);
Removable connection nut (3);
Water inlet (4);
Correct operations are as follows: Connect (3) to (2)
(Fig. 6) prior to connecting (3) to (4) (Fig. 6). Ensure
that all connections are sealed correctly.
Set outlet water pipes (Fig. 7)
Installation of outlet water pipes is shown as Fig.7,
the same as installation of water inlet pipes; pay
attention to sealing of pipelines.
Pump operation
1. Fill the suction hose with water. Unscrew the filter
cap (2), then fill the body of the water pump
slowly (2-3 liters) until the water comes out through
the water inlet (1). (Fig. 8)
2. Connect the suction hose to the water inlet (1).
(Fig. 9)
3. Connect the discharge pipe with the water outlet
(3)
The pump will start when the switch is turned on.
Clean strainer mesh (Fig. 9)
To maintain optimum water flow performance, users
should clean strainer mesh components regularly
according to water quality. The method to clean is
as follows:
Strainer mesh is rotated as the direction of arrow in
Fig.10 to separate strainer mesh; clean strainer
mesh respectively with clean water; assemble
strainer mesh and install them properly for use.
If there is any risks of damage due to frost or
freezing, or electric pumps may not be used for
a long time, please open screw plug for water
drainage to discharge water. When pumps are
needed to restart, open pump cover, filled with
water and tighten cover before restart.
Tips:
adjust head height. Once the parameter is set press
and hold "Menu" to return back to normal operation.

4
1. In summer or when temperature is high,
ensure pump is well ventilated.
2. If electric pump overheats or malfunctions,
please turn off power immediately.
50Hz
SPECIFICATIONS
Input Voltage
Frequency
Weight
Pump Dimensions
Operation Noise Level
Inlet/Outlet Size
Max. Head
240V
10.4kg
Rated Power 900W
L:470xW:215xHx305
80dB
25.4mm
43m
Min. Head 2m
Max. Water Flow 3,600L/hr
Max. Working Temp 35ºC
Min. Working Temp 0ºC
Max. Particle Size 0.5mm
Cable Length 1.5mm
IPXX Rating IPX4

COMMON FAILURES AND TREATMENT
Failures Causes Measures
No water output
from pump
Water pump is not filled with water
Turn off pump and refill pump chamber with
water
Water level lowers bottom valve Adjust water inlet pipeline to submerge bottom
valve
Leakage of suction pipes Examine joints sealing of all suction pipes
Deficiency in
pressure
Inlet water pipes are too long or have too many
elbows.
Pipe diameter is incorrect please refer to
installation instructions page 3
Debris blocks entrance of pipelines,
strainer mesh or pump chamber
Clean pipelines, bottom valve or pump
chamber and remove foreign debris
Pump vibration Pump is not secured correctly Secure pump

Techtronic Industries Australia Pty Ltd
31 Gilby Road, Mount Waverley, VIC 3149
Melbourne, Australia
TechtronicIndustries N.Z. Limited
Unit C
70 Business Parade South
Highbrook
Auckland 2013
New Zealand
Imported by:
Table of contents
Other Ryobi Water Pump manuals

Ryobi
Ryobi P750 User manual

Ryobi
Ryobi RY18SPA User manual

Ryobi
Ryobi ONE+ R18SUP10 User manual

Ryobi
Ryobi RSSS750 Operation manual

Ryobi
Ryobi RY31DP18 User manual

Ryobi
Ryobi A113UWP User manual

Ryobi
Ryobi R18TP User manual

Ryobi
Ryobi RPTP196 User manual

Ryobi
Ryobi RTP900 Operation manual

Ryobi
Ryobi R18TP User manual
Popular Water Pump manuals by other brands

GORMAN-RUPP
GORMAN-RUPP OM-05450-04 Installation, operation and maintenance manual

BUSCH
BUSCH RH 0003 B instruction manual

SFA
SFA SANICONDENS Best Operating & installation manual

Intex
Intex 620PC owner's manual

Xylem
Xylem rule LoPro 4708856181 instruction manual

Masalta
Masalta MSP Series instruction manual