S.E.A. Paragliders FireStarter Manual
1
S.E.A.Paragliders
Fire Starter
Pilot manual
v.2, 21.08.2019
A warning
Paragliding, like any other aviation sport, is an activity associated with increased danger for life
and health. It is strongly recommended that you take training in a proven paragliding school, as
well as choose the equipment and flight conditions appropriate to your level of training.
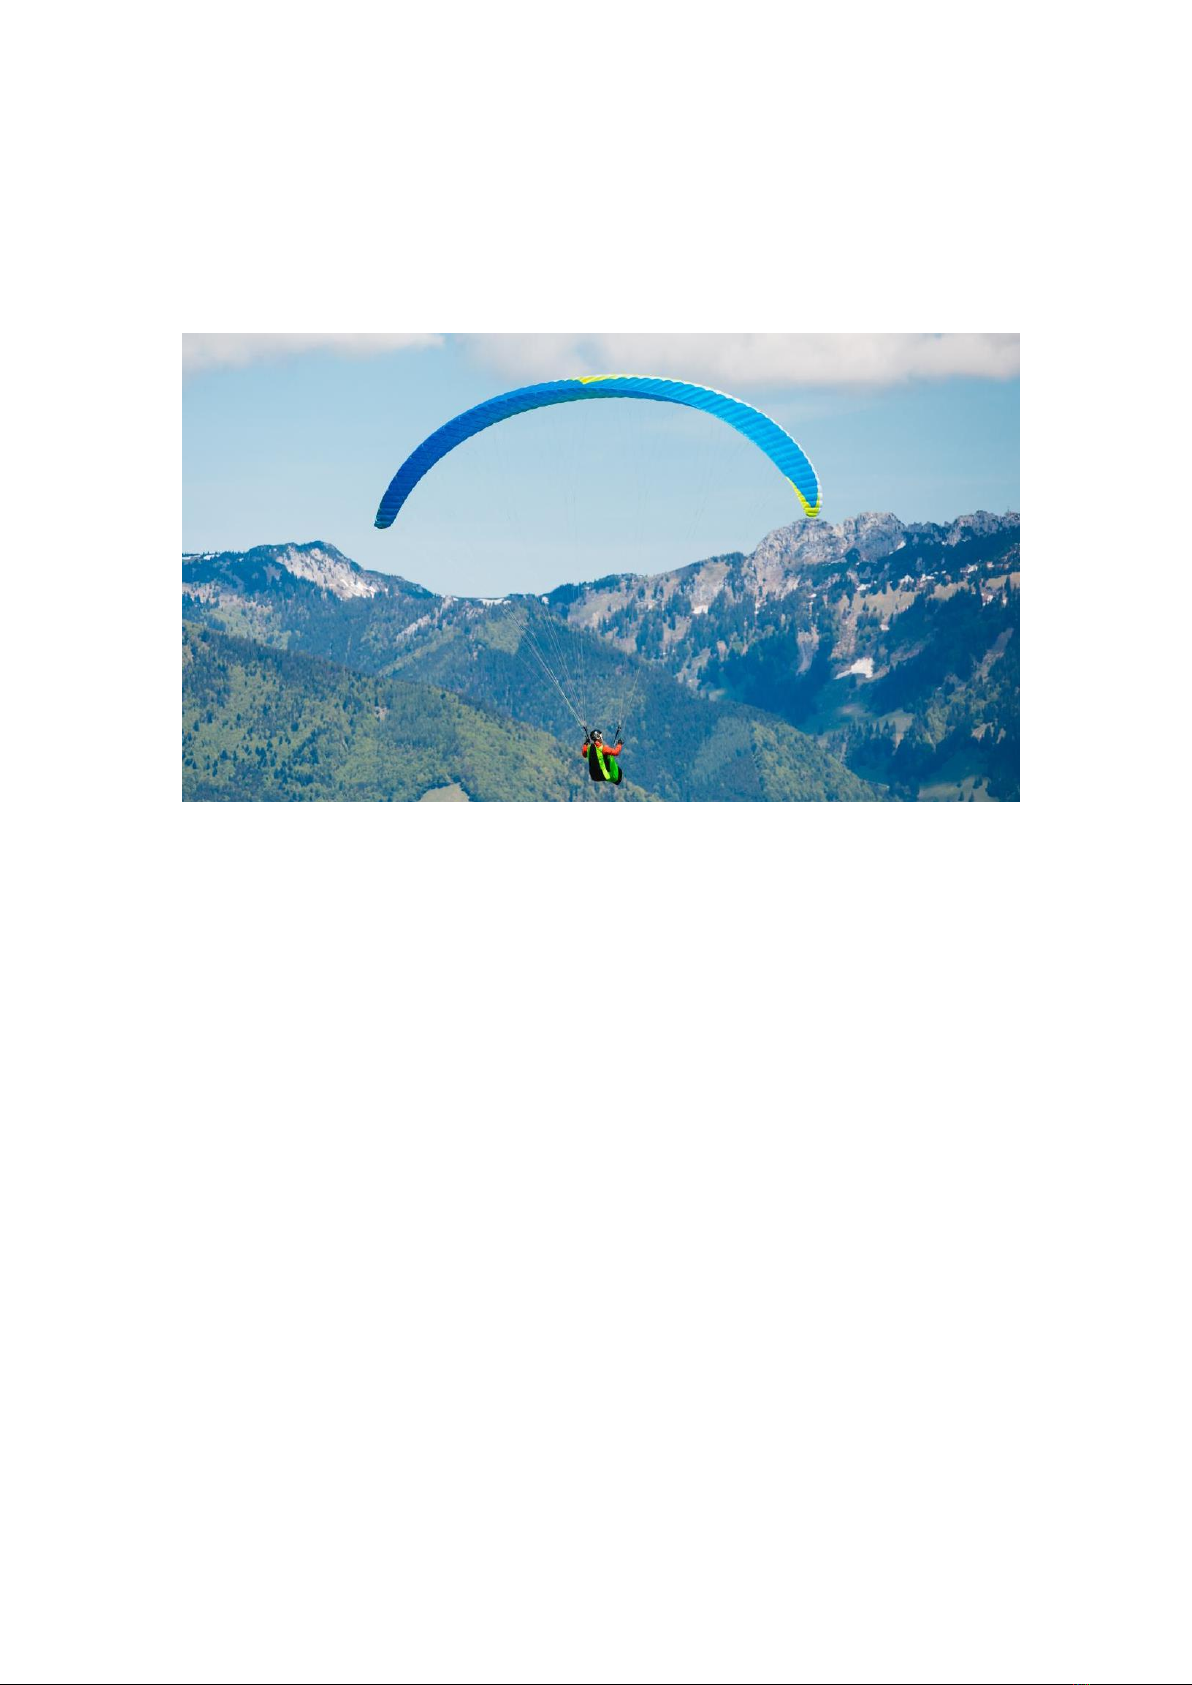
Paraglider FireStarter is liteweight paraglider for XC flights. FireStarter –perfect choice for the
first step to EN C paraglider class. FireStarter has a very easy and safe behavior for its class
wing. It also has excellent handling in the thermals - it easily keeps the turn radius in the core
and at the same time quickly responds to the pilot's control actions without sharpness. Due to the
new generation wing airfoil with high aerodynamic performances FireStarter received excellent
pitch stability.
FireStarter is paraglider EN C class, intended for suitable qualification pilots. These pilots must
be competent enough. FireStarter is not a training wing for unexperienced pilots.
The FireStarter is for solo pilot use only. It has no possibility to connect for more than one
harness.
Paragliding is a particularly nature-friendly sport. This makes it all the more important that we as paraglider pilots
behave in a responsible way towards both the environment and the people sharing it with us. Please also make sure
to comply with legislation regarding protected areas, privately owned property or hunting arenas –this ensures the
least possible friction in relation to other users of the great outdoors, to the benefit of both yourself and the sport as a
whole.
2
1. Preflight preparation
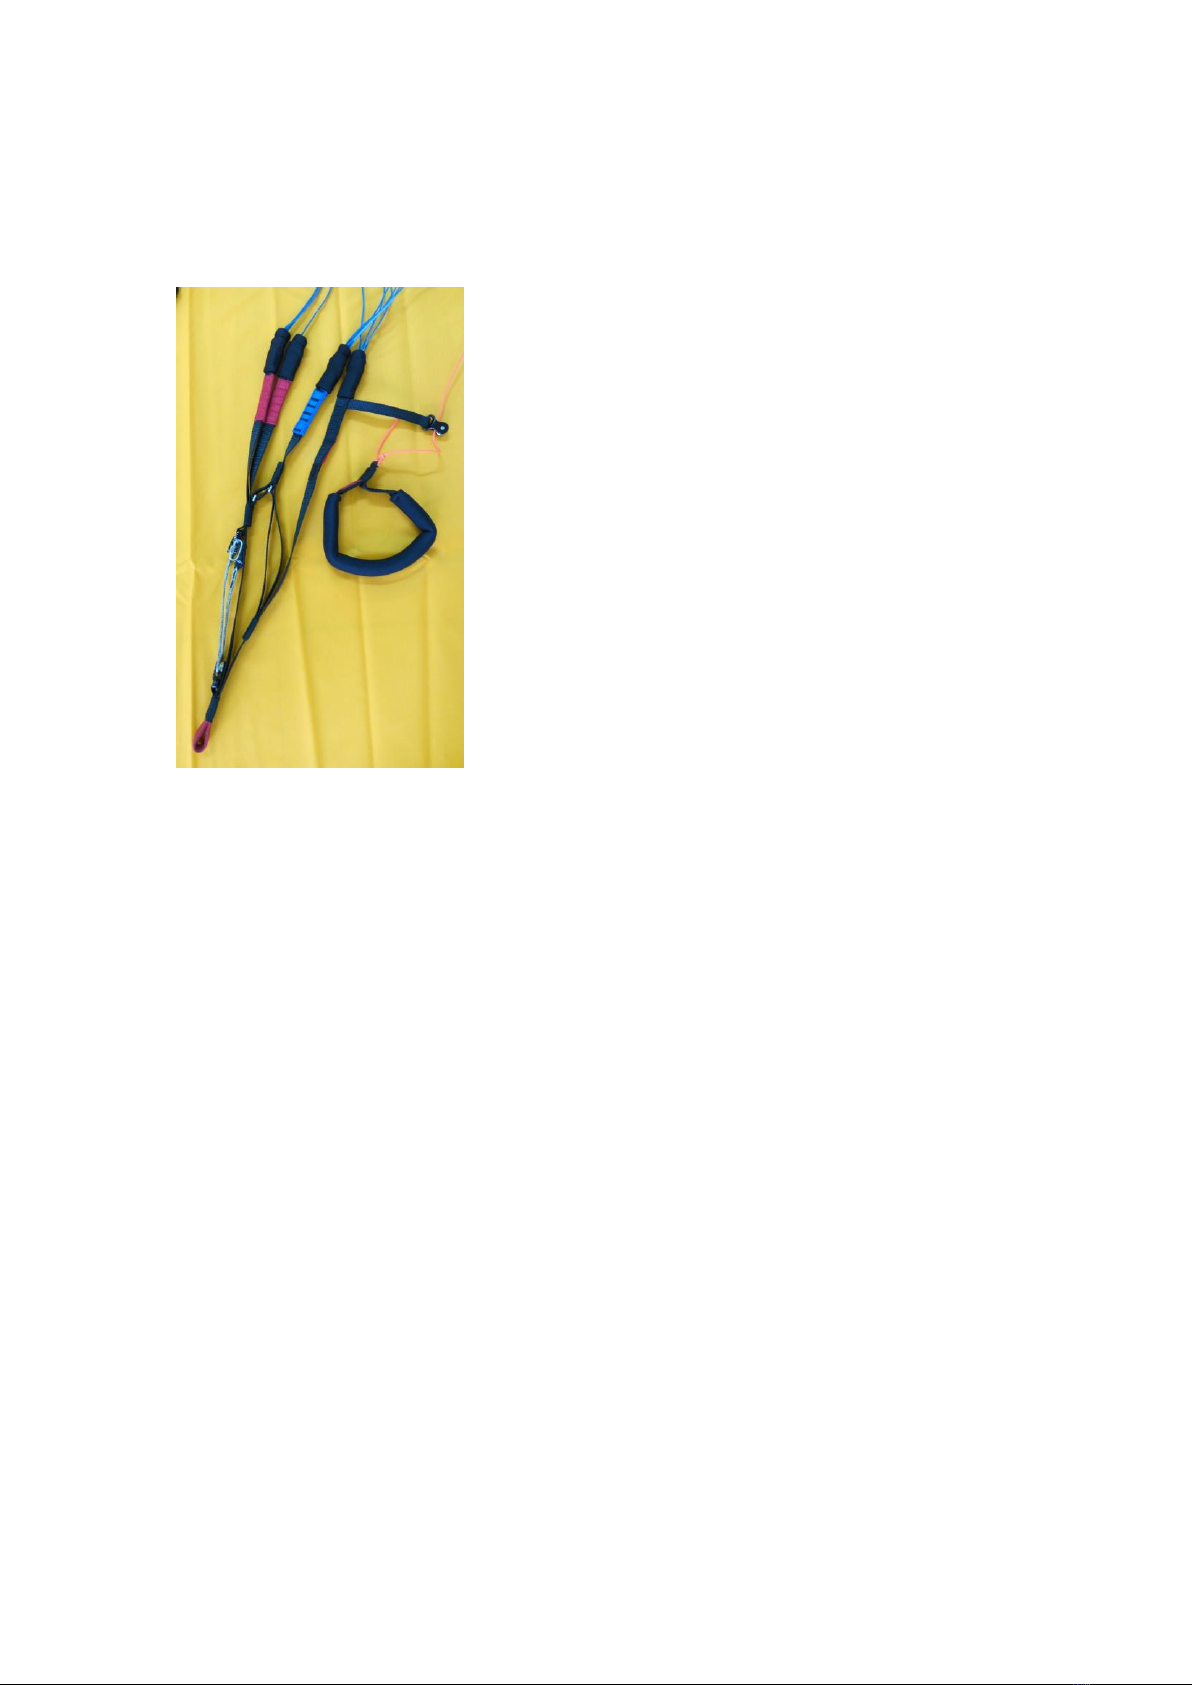
Risers
Risers are designed to connect the lines system of the paraglider with the pilot harness.
Paraglider FireStarter is equipped with risers with speed system and has no trimmers.
Lines are attached to the risers using soft links - strong connecting elements made of the
dyneema, which are fixed in the ring by a knot-hammer.
It is necessary to regularly check the correctness of installing and securing soft links under
protective covers on risers.
Speed system
Speed system are designed to increase the speed range of the paraglider by reducing the angle of
the wing.
The maximum increase in speed is achieved with fully activated speed system.
It is recommended to work with it strictly symmetrically.
It is important that the speed system is connected correctly, and the length checked, to ensure
smooth operation in flight.
The lines of speed system should be run up through the eyelets and pulleys on the harness to
connect with the pulley system on the front of the risers. If in any doubt, please ask your school
or the harness dealer/manufacturer.
Harnesses
The manufacturer recommends to use the harness with a height of the main carabiners of at least
42 cm and a distance between them of 42-45 cm.
Length of the brake
The wing is delivered with the optimum length of the brakes.
If you need to adjust the length of the brake in accordance with the settings of your suspension
system or with your own equipment, we strongly recommend that you do this by changing the
length of the brake no more than 2 cm at a time.
In free flight, with the brakes left, the trailing edge of the wing must not be deflected.
IMPORTANT! Loose or incorrect brake knots can cause serious accidents through loss of the
steering of the glider!
Adjustments
As all products S.E.A. Paragliders the FireStarter is manufactured with highest quality and
precision. The line lengths of each glider are carefully checked before dispatch.
Any change to the configuration of the wing will invalidate certification!
The only change allowed is to the length of the lower brake line. This should only be done by an
experienced person.

3
2. Flying FireStarter
Check before takeoff
Lay the wing of the "horseshoe" - the wing center should be further from the pilot than the tips.
Before each take-off, we recommend to do the following check:
- The lines are untied, there are no damages or knots;
- all surfaces of the wing do not have strong scuffing and damage;
- risers are untangled, soft links on them are fixed in working position;
- carabiners is OK, securely locked and stand in the correct position in the main loops of the
harness;
- the harness are OK;
- the rescue parachute is connected, correctly fixed in the harness;
- the parachute lock pin is installed correctly;
- the helmet is locked;
- the buckles of the harness are fastened and tightened to a comfortable position;
- the air intakes of the wing are open, the arc of the wing is directed against the wind;
- brakes are taken correctly;
- wind strength and weather conditions are safe;
- the airspace ahead is free.
Takeoff
To take off the "alpine" start, you need to pull the straps of A-risers and put the wing in a
position vertically above the pilot.
As soon as the wing reaches this position, make sure that the space before the start is free and
begin an dynamic run to the point of take-off.
For the "reverse" start, turn your face to the wing and lift it in this position. To compensate for
the draft of the wing during the ascent, it is necessary to deflect the hull backwards.
In a strong wind you need to be ready to take a few quick steps to the wing. When the wing is
overhead, run vigorously to take-off.
Landing
For a safe landing, select a suitable spot of sufficient size without obstacles on or near it, and
also assess the direction and strength of the wind.
When landing, it is necessary to withstand the direction of flight against the wind.
In advance, take the necessary position in the harness system.
On the final approach before touching it is recommended to keep the brakes released. If there is
some turbulence, for safety reasons, you can keep a slight pull on the brakes for better control of
the wing.
Avoid unnecessary retarding of the wing, as this can lead to excessive acceleration and landing
with a dangerous vertical speed.
At an altitude of about 1 meter, progressively and smoothly tighten the brakes to make a flare.
When landing in a strong wind, it is necessary, after touching, to douse the dome as quickly as
possible - by fast and large pulling of the brakes or straps of the B-Risers. Be ready to run in
direction to the wing.
At the landing, do not allow the paraglider to overtake you and hit the ground with the leading
edge. This leads to a sharp increase of air pressure in the canopy and may cause damage to it.

4
Normal flight
Brakes are released and speed sysem is not activated. In this mode, the FireStarter has the best
glide angle in the calm air.
To obtain a minimum sink rate pull the brakes in 10 –15 cm.
Accelerated flight
When flying into strong wind and/or in a sinking air zone you can improve the glide angle of
your glider by activating speed system.
For acceleration, if is necessary , you need to activate the speed system by pushing speed bar
connected to the speed system on the risers.
The paraglider is less stable when flying accelerated. Consequently, the possibility of a collapse
is higher.
It is important to always remember that possible collapses in this mode of flight can occur more
dynamically than on trim speed flight.
Pilot should practice in this manouver gradually with enough hight over the ground, and be
careful using the speed system in turbulence.
Smart Progress has no trimmer system.
Maneuvering
For turning smoothly, begin to pull one brake, while simultaneously shift the weight of the body
in the suspension to the same side of the turn. The wing will smoothly enter the turn. When it
reaches the required turning radius, you can control this radius and the rate of descent by
changing the weight shifting and / or slight pulling of the external brake.
Maximum symmetric control travel at maximum weight in flight is about 70 cm.
Active piloting
For safe flights in turbulent air, it is strongly recommended to training actively in piloting.
The essence of this is the continuous maintenance of a constant load on the brakes and risers of
the paraglider.
Under the influence of a sufficiently strong turbulence when the pilot is inactive, the paraglider
swings in pitch and roll, which can lead to some collapses.
If the wing surges forward, brake it by pulling the brake until it returns from the position in front,
almost over the pilot's head. Operate the brakes with sufficient speed, but smoothly, considering
the inertia of the wing. Do not allow the oscillations to increase.
If the wing throws back on the pitch, start releasing the brakes. And when the wing returns to the
vertical, you must restore the previous tension to the brakes to prevent a dive forward.
In this way, a sufficiently experienced pilot can avoid collapses even in very turbulent air.
Nevertheless, it is important to remember that there is the potential for turbulence, which the
pilot can not deal with, so the most important safety is a wise assessment of his piloting skills
and given weather conditions.

5
Non-standard flight situation
In very strong turbulence the collapses of the canopy of various sizes is possible.
Asymmetric collapses
Pilot should maintain direction of flight by weight shifting from a collapsed side and smooth
pulling of the brake opposite to the deflation. This action should not be too big to cause a stall,
otherwise it could lead to an uncontrolled sequence of dangerous regimes.
In case the deflation come not out, pump the collapsed side of the wing with smooth and deep
enough pulling of brake.
Let the glider maintain its airspeed for the faster re-opening.
Symmetrical collapses
Symmetrical frontal collapse usually re-open by itself even without any pilot actions.
Pilot can accelerate the re-opening by one or two quick pumping the brakes. Be careful while
doing this and do not allow excessive braking of the wing, which very quickly (in the event of a
pilot error) can lead to a stall of the wing.
Stall
Failure can occur when collapse are too large and sloppy when too sharp maneuvering, as well as
some unfavorable factors - wetting the wing, a critical change in the geometry of the line system.
In a deep stall, the wing can be filled, but it does not have a horizontal speed and very quickly
decreases.
To exit the stall immediately raise your hands with the brakes up to the released position of the
control lines. If the paraglider continues to be in stall, take the straps of the A-risers and push
them forward and slightly downwards.
Never try to fly on a wet paraglider! You can take off only on a completely dry wing!
If your paraglider is wet during flight (for example, when exiting from a powerful cloud), push
the accelerator and try to avoid controlling the brakes until the wing completely dries out in the
maximum possible straight flight.
Cravats
A tie can arise when a part of the wing is entangled in the slings of a paraglider. This happens
with inaccurate prelaunch preparation or as a result of a strong collapse in turbulence.
When a tie occurs, the most important action is keeping the flight direction of the paraglider.
Otherwise, autorotation can occur very quickly - a powerful spontaneous rotation of the
paraglider with huge vertical and horizontal velocities.
To open the tie, pull the stabilizer line. It may take a lot of pulling this line.
Also for the disclosure of a tie, you can perform a full or asymmetrical collapse. This technique
is very effective, but may require sufficient altitude over the terrain for exit and high skill of the
pilot.
Control without brakes
In the event that normal paraglider control by means of brakes is not possible (for example, if
one control line is broken) piloting by pulling the C-riser is possible.
It is necessary to remember that the required amount of apply is much less than when controlling
the brakes, so you have to pull the C-risers carefully, to avoid stalls or spins.

6
Methods for rapid descent
Try to avoid these maneuvers whenever possible. Carefully assess the weather conditions before
take-off. If there is a probability of deterioration of weather conditions, choose a landing pad and
approaches to it in advance.
"Big ears"
To accomplish this maneuver, take the most external lines of A-risers (which go to the outer
edges of the wing) and pull them until the wing tips are folded.
To increase the horizontal and vertical speeds in this mode, you can activate a accelerator, but
only AFTER folding the ears.
During this maneuver, it is strictly recommended not to make deep spirals, as this negatively
affects the strength and geometry of the line system.
To exit, simply release the held lines and fill the wing yourself. It is possible to accelerate the
opening with the help of a not very intensive pumping of the wing by the brakes.
Deep spiral
Before performing a deep spiral, make sure that there is sufficient margin of elevation above the
ground. To enter the spiral, shift the weight in the harness to one side and gently tighten the
brake on the same side until the wing starts to rotate.
When the wing increases the bank angle and accelerates to a certain reduction, hold the brake in
this position. The rate of descent can be controlled by weight shifting in the harness and small
action of the external (from the rotation) brake.
To exit from a deep spiral simply smoothly release the internal (working) brake and the
paraglider will start its own exit. For a smoother exit, it may sometimes be necessary to apply a
slight brake to the wing to compensate for small wing movements in the pitch before final exit
into a normal straight flight. FireStarter in normal flight conditions has no tendency to remain in
the spiral on its own.
It should always to remember that the greater the rate of descent in the spiral dive, the more time
it can take to exit into a normal flight.
Never attempt an abrupt escape from a deep spiral - this can lead to very dangerous abnormal
flight situations.
A WARNING. Prolonged overloads during a deep spiral dive can lead to deterioration of the
pilot's well-being and even loss of consciousness. Constantly monitor your condition in this
maneuver, and at the first signs of deterioration of well-being, begin to exit of this maneuver. It
is strongly recommended not to perform deep spirals for a long time at a speed of more than 11
m / s. Pilot should training to do spiral dive in a safe conditions - with a large margin of height
above the water and under the supervision of an experienced instructor.
Too frequent using of deep spirals with high rates of descent can cause premature violation of
the geometry of the line system and the canopy of the wing with the subsequent deterioration of
flight characteristics up to dangerous ones.
B-stall
To perform this maneuver, symmetrically tighten the B-risers before mechanically restricting of
risers achieved.
The canopy of the paraglider will be deformed along the span, lose the horizontal speed and
increase the speed of descent. The decrease can reach values of 7-8 m / s.
Never do not release the risers until the moment when the wing does not stabilize vertically
above the pilot! In the opposite case, a wing can be dive forward below the pilot with subsequent
dangerous flight situations!
To exit the B-stall quickly and symmetrically release the straps of the B-riser. The wing will
come out by itself to a normal flight with a slight pitch movement.
We at S.E.A. Paragliders strongly recommend to avoid using B-stall due to liteweight design of
the FireStarter.

7
Aerobatics
Paraglider FireStarter is intended primarily for soaring and cross country flights, so it is strongly
advised not to perform acrobatic maneuvers in order to avoid getting into dangerous flight
situations.
Towing
FireStarter paraglider allows you to fly with the use of various types of winches. Before flying,
make sure that your equipment meets the safety requirements for towing.
Always remember that during towing paraglider can react differently to pilot control actions.
When towing, it is necessary to control the wing with less brake effects than normal flight to
avoid dangerous flight situations.
Motorized flight
We at S.E.A. Paragliders strongly recommend do not use the FireStarter for paramotor flying.
3. Care, storage and repair
General rules
- put the wing in a bag or backpack as carefully as possible;
- do not pack the wing with foreign objects and debris inside;
- gently fold up the nose stiffeners of the paraglider, avoiding their crease, use the method of
"lathering" or cover-contraceptina when laying;
- do not leave the paraglider in the sun for a long time;
- do not leave equipment in a closed car under the sun;
- do not drag the wing on the surface of the earth;
- avoid contact of the paraglider with hot objects and open fire;
- avoid wetting the paraglider;
- do not walk in the shoes on the canopy and the lines of the paraglider;
- do not start in a strong wind before the complete unleashing of possible nodes on the lines;
- do not put heavy objects on the packed wing and do not sit on it;
- in case of contamination - never wash the wing using chemicals, only wipe it with a slightly
wet soft sponge;
- do not store the paraglider in a wet, not ventilated room;
- after getting soaked in sea water, immediately rinse the wing outside and inside in plenty of
fresh water (for example, in a car wash), only then dry it in the shade in the wind;
Wing inspection and repair
The manufacturer strongly recommends to check the paraglider before each take-off - canopy,
lines, installation of soft links, risers.
It is recommended to make a qualified check of the paraglider every 100 hours of flight or a
year.
In case of glider damage small holes in surfaces and ribs (which are not bigger than 2 cm and not
affect the seams) can be repaired by sticky ripstop.
Damaged lines can be replaced by repair kit from manufacturer. Strongly recommended to do
check inflation test after lines replacement.
For more complex repair ask the manufacturer. Your glider consists of many high-quality long-
life components. When replacing parts (fabric, lines, risers..), only original parts may be used.
Wing recycling
At the end of service life the paraglider must be disposed properly. Please, send it back to
manufacturer for correct disposal.
8
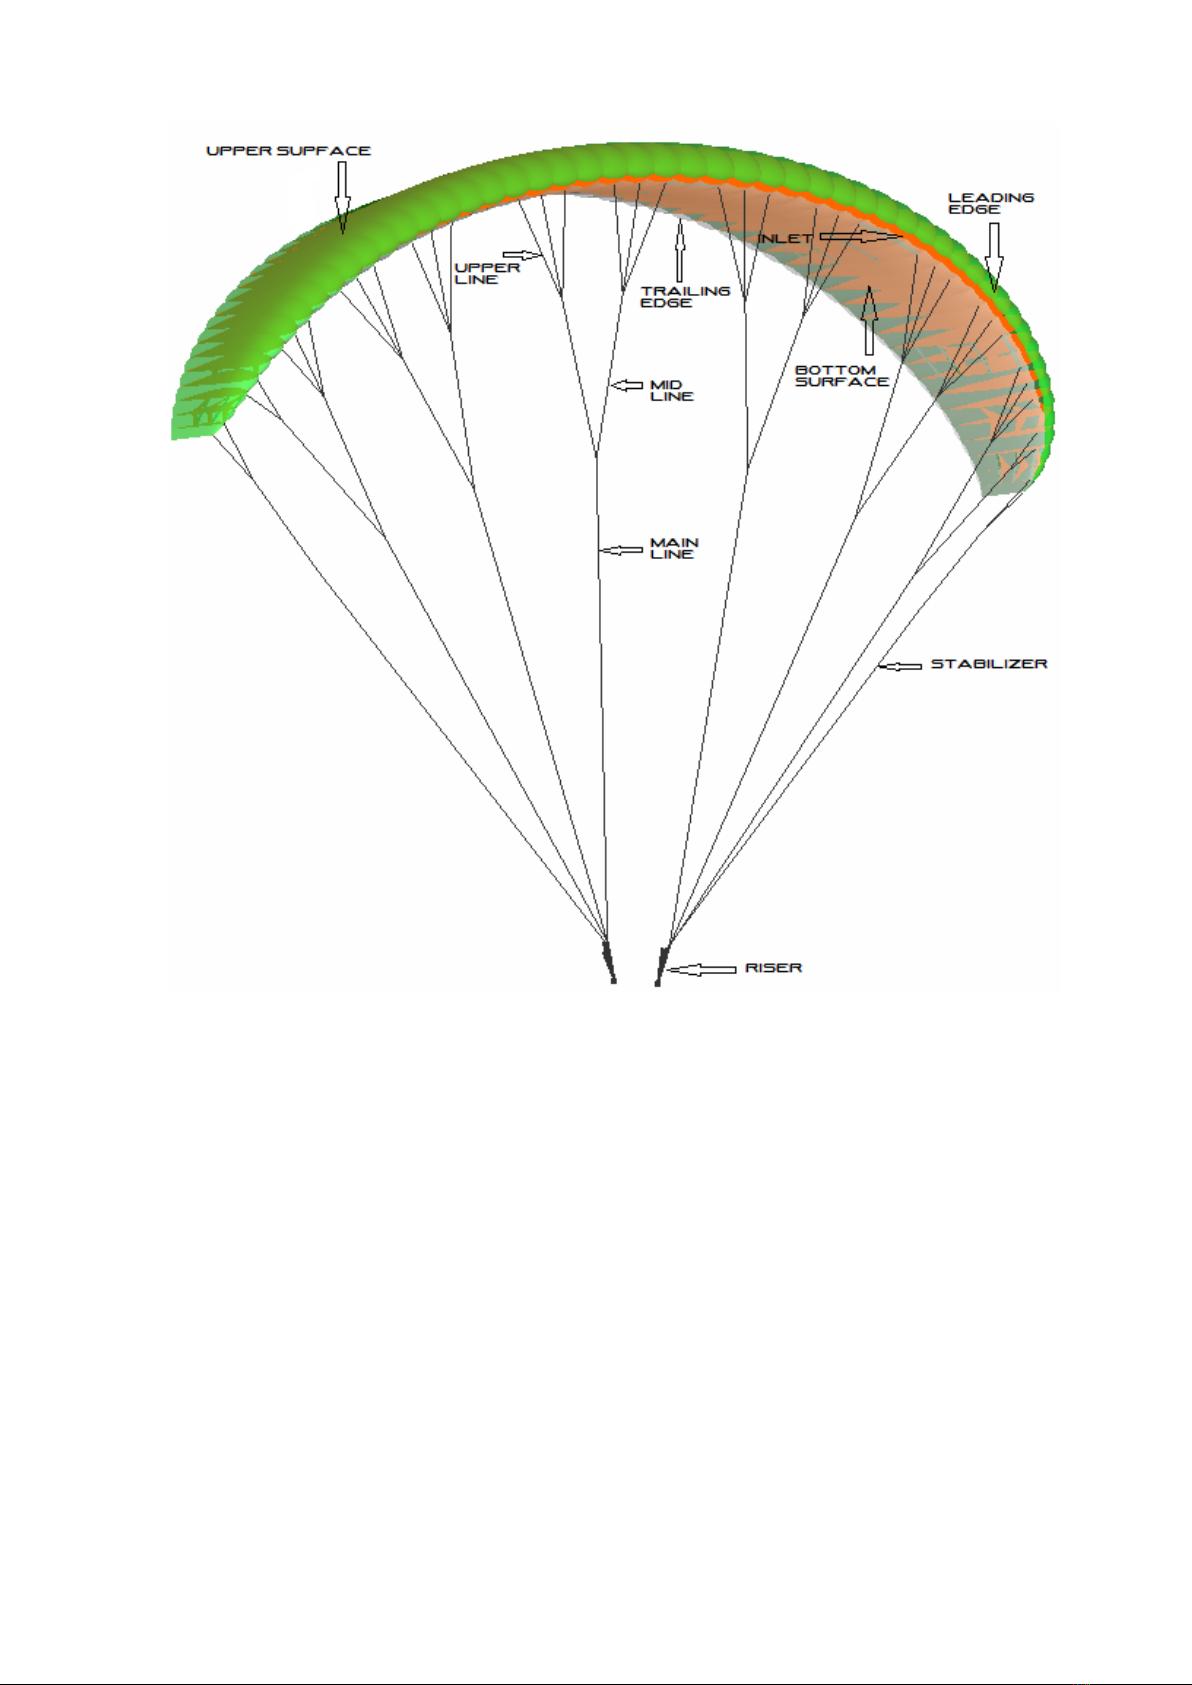
4. General view of the paraglider

9
5. Technical data
Fire Starter
Class
Liteweight Performance paraglider
Main-use
Cross Country, Vol-biv
Size
XXS
XS
S
M
ML
L
XL
Cells number
62
Flat AR
6.6
Projected AR
4.82
Flat area, m2
20.5
21.5
23
24
25
27
29
Projected area, m2
17.07
17.87
19.12
19.95
20.8
22.48
24.1
Flat span, m
11.63
11.91
12.32
12.59
12.85
13.35
13.84
Projected span, m
9.06
9.25
9.3
9.78
9.98
10.4
10.78
Root chord, m
2.13
2.19
2.53
2.31
2.36
2.45
2.54
Tip chord, m
0.57
0.59
0.6
0.62
0.63
0.66
0.681
Line consumption, m
235
241
250
254
259
265
279
Risers number
A/A`/B/C
Number of main
lines
224
Accelerator, mm
130
150
Trims
NO
Glider weight, kg
3.3
3.2*
3.4*
3.6
3.9
4.3*
4.4
Take-off weight, kg
55-70
60-75
65-80
75-90
80 - 100
90 - 110
105 - 125

10
6. Lines diagram

11
7. Lines check table
FireStarter 25
A
B
C
Stab
Brake
1
7530
7420
7470
6630
7700
2
7490
7380
7430
6620
7530
3
7460
7350
7410
6730
7400
4
7490
7380
7440
7400
5
7410
7320
7370
7170
6
7390
7290
7340
7090
7
7340
7240
7290
7110
8
7360
7260
7310
6970
9
7240
7170
7200
6970
10
7180
7110
7140
6900
11
7080
7040
7040
6780
12
7080
7030
7040
6780
13
6990
6950
6970
14
6980
6940
6970
15
6760
6720
6800
16
6680
6650
FireStarter 24
A
B
C
Stab
Brake
1
7330
7240
7290
6450
7920
2
7290
7200
7250
6440
7760
3
7270
7180
7230
6560
7630
4
7300
7210
7260
7630
5
7240
7150
7190
7510
6
7210
7120
7160
7410
7
7170
7080
7110
7330
8
7190
7100
7130
7350
9
7080
7010
7030
7220
10
7010
6940
6970
7140
11
6910
6860
6880
7040
12
6900
6850
6880
7040
13
6820
6770
6790
14
6810
6760
6790
15
6580
6530
6620
16
6500
6470
These lengths include risers (except the brakes lines).
Compliance of the test samples' suspension lines, control lines and risers with the dimensions given in
the user's manual has been checked by the testing laboratory after the test flights.
Line lengths shall be specified when measured under a tension of 50 N, this tension being slowly and
gradually applied before taking the measurement.
Overall line lengths can differ not more than 5 mm from theoretical noted values.

12
8. List of materials
CANOPY
FABRIC CODE
SUPPLIER
UPPER SURFACE LE
UPPER SURFACE
30DMF (WR)
E3H
DOMINICO TEX. (KOREA)
PORCHER IND (FRANCE)
BOTTOM SURFACE
E3H
PORCHER IND (FRANCE)
RIBS
RIBS Unsupported
30DFM (NON-WR)
E91
DOMINICO TEX. (KOREA)
PORCHER IND (FRANCE)
DIAGONALS
30DFM (NON-WR)
DOMINICO TEX. (KOREA)
LOOPS
316010009
MOUKA (CZECH REP.)
REINFORCEMENT LOOPS
SR-170
PORCHER IND (FRANCE)
REINFORCEMENT RIBS
NYLON STICK
R.P.CHINA
THREAD
SERAFIL 60
AMAN (GERMANY)
SUSPENSION LINES
FABRIC CODE
SUPPLIER
UPPER CASCADES
DC60
LIROS GMBH (GERMANY)
UPPER CASCADES
UPPER CASCADES
UPPER CASCADES
DC100
A8000U-50
LTC45
LIROS GMBH (GERMANY)
EDELRID (GERMANY)
LIROS GMBH (GERMANY)
MIDDLE CASCADES
A8000U-130
EDELRID (GERMANY)
MIDDLE CASCADES
A8000U-90
EDELRID (GERMANY)
MIDDLE CASCADES
MIDDLE CASCADES
A8000U-70
A8000U-50
EDELRID (GERMANY)
EDELRID (GERMANY)
MAIN LINES
A8000U-230
EDELRID (GERMANY)
MAIN LINES
A8000U-190
EDELRID (GERMANY)
MAIN LINES
A8000U-130
EDELRID (GERMANY)
MAIN LINES
A8000U-90
EDELRID (GERMANY)
MAIN BRAKES
DSL-140
LIROS GMBH (GERMANY)
THREAD
SERAFIL 60
AMAN (GERMANY)
RISERS
WEBBING
366-044-015-962/01
MOUKA(CZECH REPUBLIC)
THREAD
SERAFIL 20
AMAN (GERMANY)
THREAD
SERAFIL 30
AMAN (GERMANY)
LINKS
DC500
LIROS GMBH (GERMANY)
PULLEYS
41A
CHINA
To obtain spare parts (in case of simple repair or needed parts replacement) please contact to
manufacturer or local dealer.
Sea-wings.pro

13
9. Riser diagram
Number of risers –4 (A, A`, B,C)
Riser A A` B C
Neutral length, mm 490 490 490 490
Length accelerated, mm 340 340 390 490
The difference are not more than 5mm from the noted lengths.
10. Glider data
SIZE
COLOR
Date of manufacturing
Serial number
S,E,A, Paragliders
Gvardeytsev Shironintsev str. 40D, 62
Kharkov, 61123, UKRAINE,
+38 O5O 1592776
+38 O5O 2574638
Table of contents
Other S.E.A. Paragliders Aircraft manuals


