Saber Compact Heat In-race User manual

SaberTM Heat In-race
Product Guide – Control Vision

Contents
Introduction 3
Product summary 4
Saber knows mating 4
Features list 4
How it works 5
Concept of operation 5
Hardware Description 6
Booth, camera and light 6
Cabinet 6
Heat patch 6
Setting up Saber Heat 7
Enabling Saber Heat and its functions 7
Turning on Saber Heat 7
Selecting the Heat detection group 8
Configuring the camera times 8
Configuring the drafting options 9
Configuring the heat patch reapply settings 10
Premating option 11
Advanced options 11
Pre-milking checks 12
Testing drafting operation 12
Ensuring the camera and lights are turned on 12
Milking with Saber Heat 13
Post Milking 14
Reviewing Saber Heat images 14
Using the Saber Heat page 16
Saber Heat page 16
Camera and light maintenance 19
Cleaning Saber Heat camera glass 19
Turn off Saber Heat at the end of mating season 19
Heat patch application 20
Storage 20
Preparation 20
Placement 20
Application 21
Heat patch maintenance 22
Replacement of heat patches 22
Maintenance 22
Appendix 1 23
User guide for Saber Heat image review software 23
Results 24
Saving cows of interest images 26
Searching for cows using display ID 27
Exceptions and wrong decisions 28
Notes page 30
2

Introduction
Saber™ Heat in-race is part of the Saber™ modular suite.
Saber Heat module enables you to automatically identify standing heats and
non-cyclers, and make mating easier. This module uses a camera to automatically
identify standing heats by reading the Saber Heat patches. Cows with activated or
missing Saber Heat patches are automatically drafted for further inspection and
artificial insemination (AI). This module integrates with Saber software on your smart
device directly into Saber™ Herd.
This document is intended for those that have purchased or are considering
purchasing a Saber Heat. It also serves as a reference guide for those new to
the system.
The document includes:
•A detailed description of the product in terms of features.
•Guidance on how to get the most out of the product.
3

Product summary
Saber™ Heat knows mating
It goes without saying that the mating season is a stressful time for farmers.
Identifying heats and administering mating plans is a full-time job. What’s more, your
staff need to be experienced and motivated for heat detection so that the in-calf rate
of your herd is fully maximised.
By integrating Saber Heat into your existing farming system you are set to improve
the reproductive performance of your herd, increase accuracy and simplify your farm
management during the busy mating period.
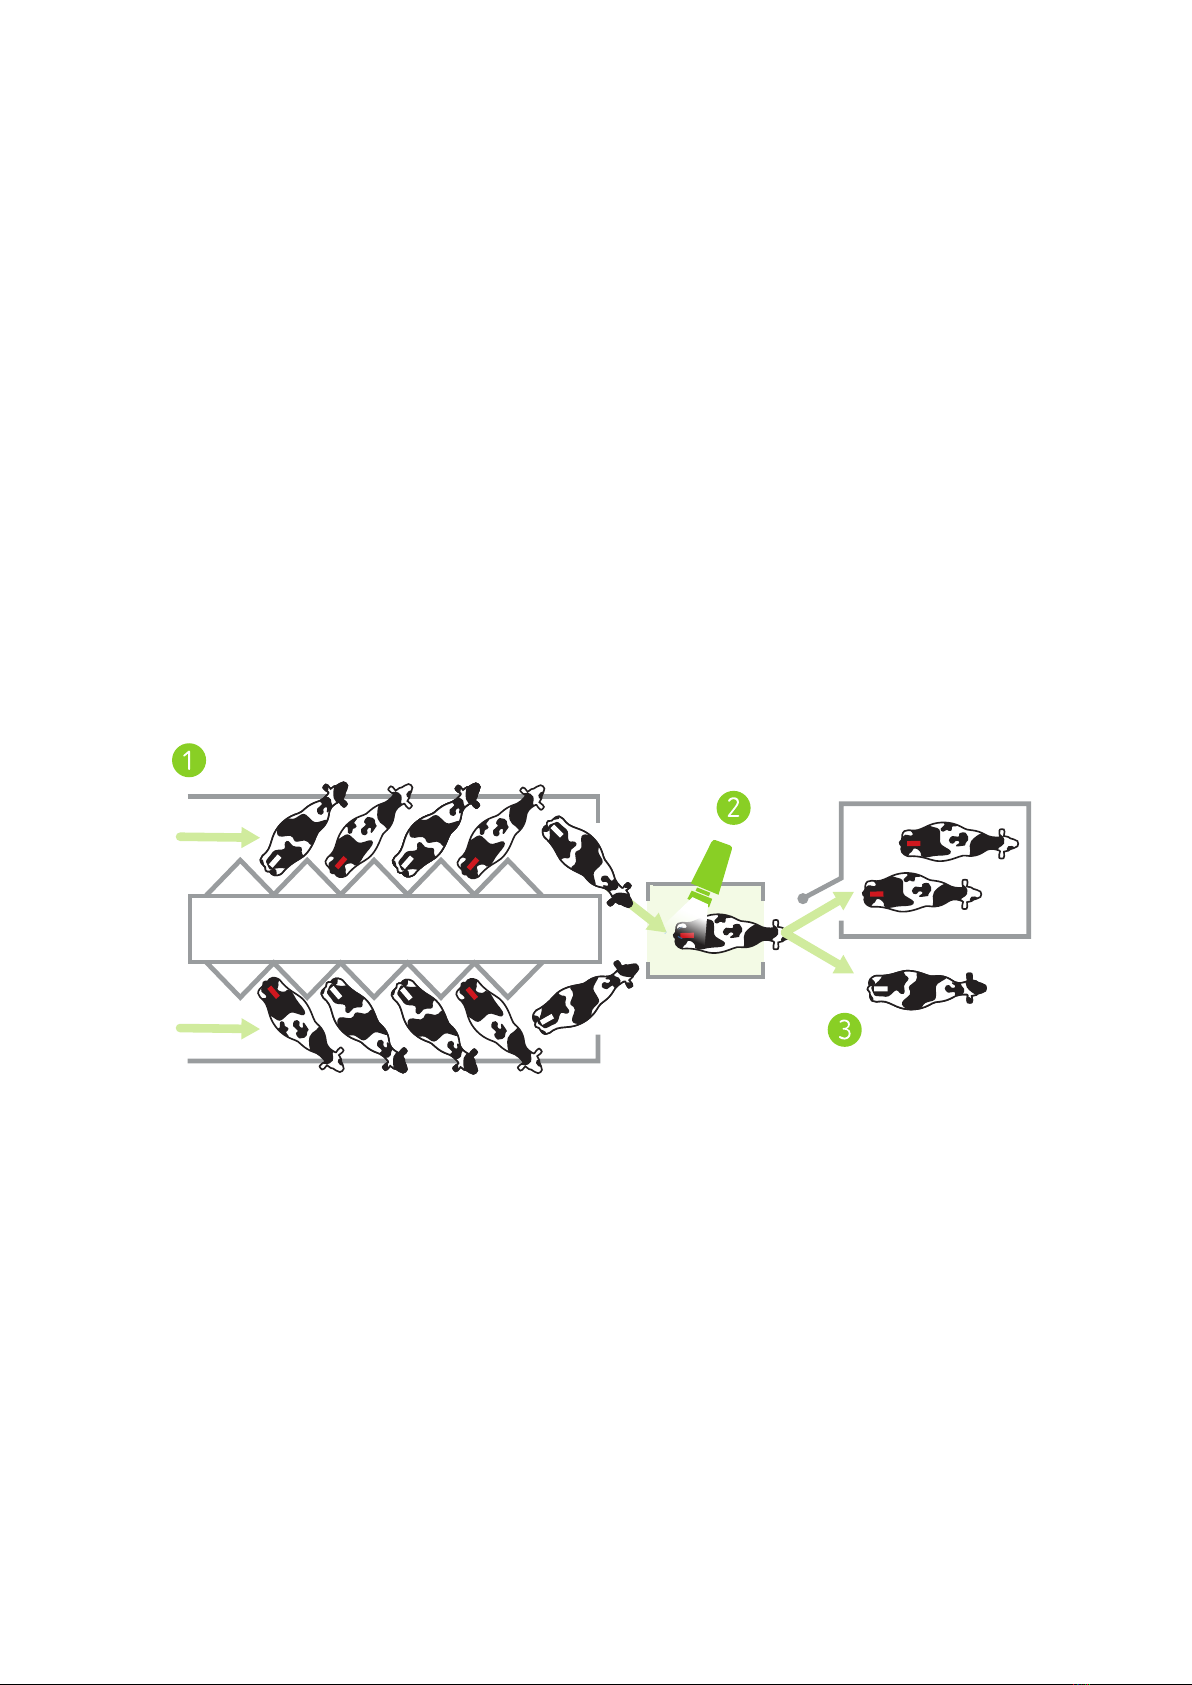
With Saber Heat a camera housed in a canopy is positioned in the race immediately
prior to the Saber draft gate, the camera automatically identifies activated, missing
and not activated heat patches and communicates directly with the Saber draft gate
to draft out cows with activated or missing heat patches. After each milking these
animals will be waiting for you to confirm their heat and administer their mating plan.
Feature list
Reduces the hassle of heat detection by:
•Automatically identifying standing heats, as indicated by an activated heat patch.
This takes the pressure off you and your staff by removing the need to view cows,
and is likely to provide greater heat detection accuracy.
•Automatically drafting cows with an activated or missing heat patch, so that the
right animals are ready for AI at the end of milking. Staff are therefore free to focus
on the business of milking.
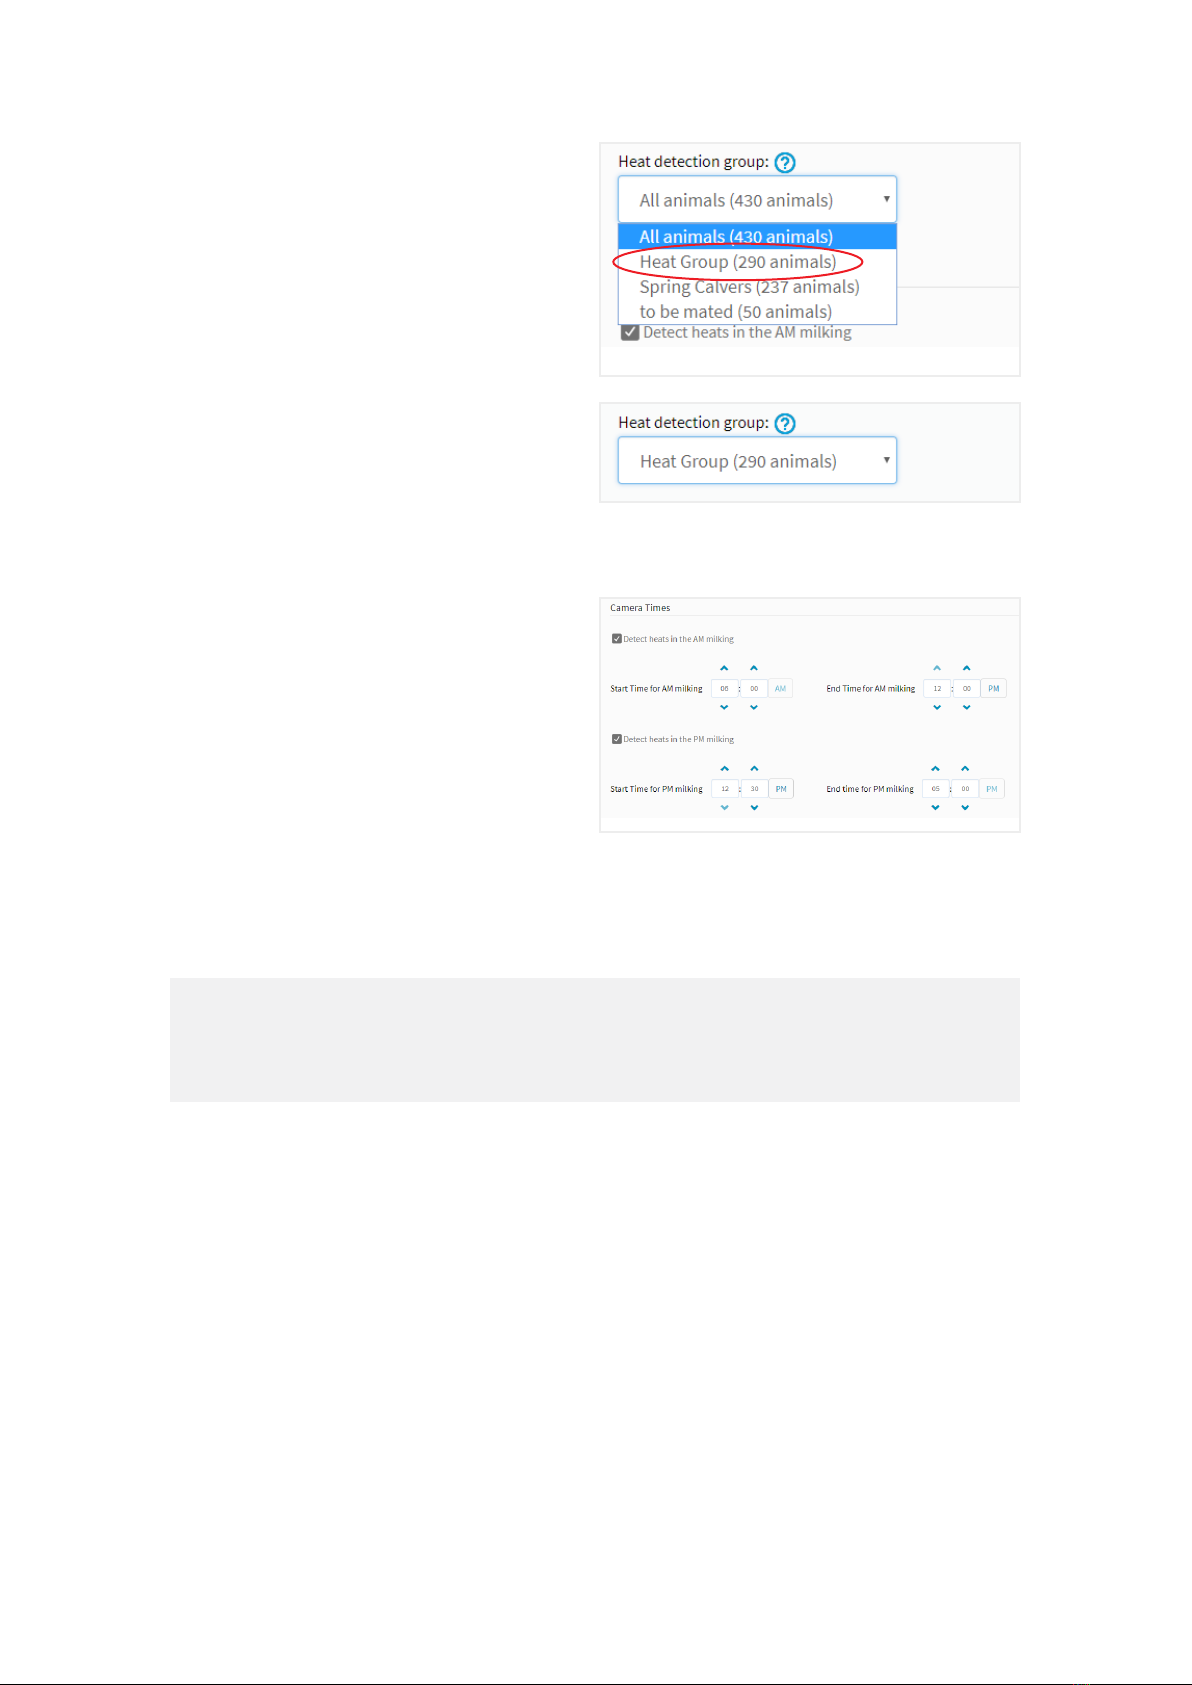
•Monitoring animals in your mating group only – meaning no time or effort is lost on
cows that you don’t wish to mate.
Enhances your mating management by:
•Capturing pre-mating heats for you automatically. This will allow easy
identification of non-cyclers, so that timely action can be taken, increasing their
chances of cycling activity and their opportunity for AB mating.
•Providing a simple suite of reports, giving farmers the power to make better, more
immediate decisions, when it matters most.
•Providing you the opportunity to extend AB (due to mating being easier). There
is also the potential to eliminate use of live bulls altogether. Extending AB and
reducing the use of bulls allows farmers to take advantage of Short Gestation
Semen, to tighten up the calving spread.
4

How it works
Concept of operation
The system is based on the application of Saber™ Heat patches to the rump of the
cow. This is activated by downwards pressure from another cow. The in-race booth
contains a camera which takes a photo of the Saber Heat patch as it passes through.
In more detail:
•A Saber Heat booth is installed before the Saber drafting gate
•As cows exit the dairy parlour they walk through the Saber Heat booth and a photo
is taken of their heat patch.
•If a Saber Heat patch is detected as activated or missing, the cow is automatically
drafted (either straight away or at your specified milking).
•After milking, reports are available with previous heat information enabling
informed decision-making on whether to put a cow up for AI.
1. Cows arrive in herringbone parlour for milking.
2. Saber Heat patches are read by the Saber Heat camera as the cows exit the dairy
parlour.
3. Cows with activated and missing Saber Heat patches are drafted at end of milking
session.
5

Hardware description
Booth, light and camera
Animals, after milking, pass through the Saber Heat booth. The booth shutters close
behind the animal, and the shutters at the front are closed. The LED light is on during
the milking and aids the camera when taking a photo. Once the photo is taken the
shutters are released. Flow after the booth is controlled by the draft gate.
Cabinet
There is one cabinet to be installed with the system.
The cabinet includes Saber Heat PC, power supply for Saber Heat PC,
camera connections to Saber Heat PC, UPS, and LED light power supply.
Heat patch
A self-adhesive heat detector. Designed for use with the Saber Heat camera.
6

Setting up SaberTM Heat
IMPORTANT NOTE:
If Saber Heat is turned on, unlinked and unknown animals with activated or
missing patches will be drafted as per the Saber Heat drafting settings.
Enabling Saber Heat and its functions
Saber Heat can be turned on and off when required. Turning on will enable all of the
Saber Heat functionality.
Turning on Saber Heat
Once you are connected to the shed
network, you can access Saber Heat
from shed.licautomation.com webpage.
Select main Menu.
From the main Menu select Settings
From the Settings Menu select Heat
detection
Select Enable heat detection
This will enable all of the Saber Heat
settings.
7

Selecting the heat detection group
Saber Heat requires a group of animals
to check for activated heat patches
when they come through the system.
The group allows you to check only those
animals due to be mated.
Create an appropriate Pick Your Own
group of animals in Saber Herd and then
select the group from the drop down list.
Configuring the camera times
Tick the milking cycles in which you want
to have the system detecting heats.
Having these boxes ticked will turn
on the camera and light between the
specified times.
Enter the Start and End times for each
milking cycle (allow yourself at least 30
minutes before and after milking for early
starts and late finishes).
Outside of these times:
•The light will be turned off.
•The camera will not take any photos.
•The booth gates will not operate.
•The remote for the drafting gate will be operational (including the button for the
Saber Heat booth gates).
•Any Saber Heat schedules will continue to work (i.e., if the camera is off in the
PM but reapply is scheduled for the PM then these drafts will work).
NOTE:
If the milking regime is set to once a day, then only the morning milking will
display.
8

Configuring the drafting options
You can select when to draft animals
that have been identified as having an
activated or missing heat patch.
Select your preferred option from the
drop down list.
Choose which direction you would like
the animals to draft.
Select Left or Right.
If you would prefer for the animals not
to draft, such as during pre-mating,
select Do not draft.
9

Configuring the heat patch reapply
settings
Enabling Reapply allows you to configure
the system to draft animals when they
are due for heat patch reapplication,
otherwise animals will be checked again
in the next milking for an activated heat
patch.
Select a direction to draft animals
that are due to have their heat patch
reapplied.
Select the days of the week and milking
session for the reapply drafts to occur.
If required, select a stand down period
from the drop down list.
This setting allows for sufficient time
between mating and reapply to ensure
that the heat patch is not retriggered if
the animal is still cycling.
The animal will be scheduled for reapply
in the next available reapply session after
this time has expired.
10

Premating options
The Premating option allows you to
check animals for a single heat and once
detected as activated or missing, or if a
heat has been recorded in the last
60 days, they will no longer be checked.
With this setting enabled, no heat patch
reapply drafts take place. At the end of
the premating period, all animals with
activated and missing heat patches will
need to have heat patches reapplied
before this option is turned off.
Advanced options
These settings are entered during your
installation and should only be altered
under advice from your Saber support
representative.
11

Pre-milking checks
Testing draft operation
Open the Saber Heat settings screen
and temporarily disable Saber Heat by
unchecking Enable heat detection and
pressing Save.
Using the remote control, manually
trigger your gate to the left and right to
ensure your gate is operational when it
comes time to draft.
Clean your photo-eyes and simulate a
cow passing through the gate by:
Covering the entry photo-eyes and
then the exit photo-eyes, then in order,
uncovering the entry photo-eyes then
exit photo-eyes. The gate will re-center.
Turn Saber Heat back on by ticking
Enable heat detection and pressing
Save.
Ensuring the camera and light are turned on
Before milking starts ensure that the camera has been turned on, the light panel being
illuminated will indicate this.
The camera should turn on automatically. If it doesn’t, check your camera time
settings are correct.
IMPORTANT NOTE:
If there is an error, fall back to manual checking and draft animals for mating
manually using the Saber Quick Draft function.
12

Milking with SaberTM Heat
Milking with Saber Heat operates as normal.
One exception is that while Saber Heat is turned on, the manual draft buttons on
the remote control become disabled. To manually draft a cow while Saber Heat is
turned on, use the EZ button to operate the Saber Heat booth shutter gates to stop
the animal before the booth, then use the Animal Recorder screen, type in the animal
number and use the draft function.
IMPORTANT NOTE:
While Saber Heat is turned on, the manual draft buttons on the remote control
become disabled.
As animals leave the parlour, if they are included in the heat group they will be drafted
as per the draft directions and frequencies configured earlier in the Saber Heat
system settings.
When Saber Heat is enabled the heat page will populate to display a list of animals
that have been identified as having either an Activated or Missing heat patch.
The page also shows the three previous
recorded heat dates.
Potential short and long returns are
highlighted orange.
•Short returns are when the cow’s
previous heat was equal to or
between 0-17 days ago.
•Normal returns are when the cow’s
previous heat was equal to or
between 18-24 days ago.
•Long returns are when the cow’s
previous heat was greater than
24 days ago.
This information can be useful in checking the accuracy of the current heat recorded.
Heat events are automatically recorded against any animal identified as having an
Activated or Missing heat patch.
13
Animal Recorder

Post milking
Now it’s time for you to decide which animals will be inseminated.
After milking, the camera should turn off automatically at a time set when first
configured.
Reviewing Saber Heat images
Reviewing your Saber Heat images after each milking will help ensure no heats are
missed.
Here’s how to review Saber Heat images:
Select the RD Client icon on your device.
Select the Heat PC (10.25.0.11)
This connection will be set up when your
heat system is installed, however if you
need to set up a new device please
contact LIC AutomationTM on
LIC Automation Ireland
+353 87 9678131 or
LIC Automation UK
+44 7795 573 846.
IMPORTANT NOTE:
Images for animals in stand-down for reapply continue to appear in the Control
Vision software. Therefore the total number of activated and missing images in
Control Vision for a milking session includes animals in stand-down and does not
represent the number of animals activated or missing for that day.
14

Go to the Results page.
Select the Milking Cycle you want to
review.
Under the Image Group tick one of
the following boxes: Activated, Not
Activated, or Missing. Make sure the
Cows of interest box is not ticked and
only tick one box at a time.
The images corresponding to the boxes ticked will appear in the thumbnails.
Check that the images are correct in correspondence to the box ticked, for example
if the Activated box is ticked only images with activated patch should be in the
thumbnails.
If the camera has made any wrong
decisions, click on that image then click
the Cow of Interest button. This will flag
the image, and those cows will appear
on the screen.
Once all the images for the selected
milking cycle have been reviewed and
any wrong decisions have been flagged,
untick the Activated, Not Activated, and
Missing boxes. This will display the cows
of interest images.
Click the Save Selection button to save
the flagged images.
A Browse for Folder window will pop-up.
Navigate to where images are stored on the external HDD and select the
Cow of Interest folder then click OK.
Create the folder if it doesn’t exist.
IMPORTANT NOTE:
For more information on how to review your images please see Appendix 1.
IMPORTANT NOTE:
While it is important to check all of the images, the most important images to
check are the Not Activated images, because if there has been an error these are
the cows that will not be drafted for mating.
15

Using the SaberTM Heat page
Saber Heat page
The Saber Heat page provides the information on why animals have been drafted
to assist your mating decisions. This page displays a list of animals that have been
identified as having either an Activated or Missing heat patch. As well as any
animals that have been identified as having an Observed heat .
The page provides the following information:
• The total number of animals drafted for inspection
• The number of animals with activated patches
• The number of animals with missing patches
• The number of animals with observed heats
The list of cows on the report can
be filtered by Activated, Missing or
Observed status by selecting the
appropriate title button.
The report also shows how many days
ago previous heats were recorded. The
quantity of previous heats displayed
depends on the number of previous
heats recorded against the animal,
and the size of screen on which the
report is viewed.
Alerts for potential short and long
returns are coloured in orange.
This information can be useful in
checking the accuracy of the current
heat recorded.
Short return
The previous heat
was equal to or
between 0 - 17
days ago.
Long return
The previous heat
was greater than 24
days ago.
After animals have been drafted out
for mating you can view the animals on
heat that will assist you in managing your
mating. You are also able to manage
the events and information collected by
Saber Heat.
16

Heat events are automatically recorded
against any animal identified as having
an Activated or Missing heat patch.
To remove a heat record from an animal,
simply press the rubbish bin button.
The heat record will be removed; the
animal will be removed from the screen,
and the totals will be updated.
A dialogue box will appear to confirm
the heat removal.
Selecting an animal will open the Heat
Event History screen for that particular
animal.
The animal’s heat events are displayed
in chronological order down the page
as well as via the heat timeline.
The animals current Heat status is
displayed in the top right of the screen.
The current Heat status can be
changed by pressing the Heat status
indicator button or by using the rubbish
bin next to the heat.
The Heat will be removed and the
status updated.
Press the Back button to return to the
Heat page.
At any stage an observed heat can
be entered against an animal from the
Heat page.
Using the keyboard, enter the animal’s
number in the search field and press
Enter or the Search button.
17

The Heat Event History screen for that
animal will be displayed.
Press the Heat status Indicator button to
add an observed heat.
A dialogue box will appear to confirm the
creation of the new heat event.
The new heat event will appear on the
Heat Timeline and at the top of the list of
heat events.
The Heat status indicator will show as
On Heat.
Press your browsers Back button to return
to the Animals on heat report.
IMPORTANT NOTE:
It is important that you remove any heat events from animals that you identify as
not having had a heat event, or else the short and long return alerts and days
since previous heat information on the Saber Heat report will be incorrect.
18

Camera and light maintenance
Cleaning Saber Heat camera glass
At the start of every mating season, rinse the outside glass surface of the camera and
light panel with clean water to loosen and remove excess dirt and debris.
•Use a non-abrasive commercial window cleaning solution to clean the glass and
surface of the light panel.
•Use a soft, clean cloth to clean the surfaces.
•When you have finished cleaning, dry all cleaning solution from glass and
surrounds.
Do not use scrapers, abrasive cleaning solutions or materials, including paper towels.
Turn off Saber Heat at the end of
mating season
It is important that during periods of non-
use the Saber Heat system is turned off
and the supplied cover is placed on the
camera.
Open the Saber Heat Settings screen
and uncheck the Enable heat detection
tick box and press Save. This will
deactivate Saber Heat until it is turned
back on again.
19

SaberTM Heat patch application
Storage
Always store heat patches upright (as indicated by the arrows) in a cool, dry
environment.
Preparation
Clean off any debris, loose hair or dust to maximise adhesion.
•Make sure the application area is as clean as possible by removing any dirt or
manure.
• Ensure the application area is dry before applying heat patches.
• If the cow has loose hair, remove this from the application area with light brushing.
Make sure to brush in the direction of the hair growth.
Do not brush too vigorously as this will release oils from the hide.
Hair clipping (to approx. 15mm) may be necessary if excessively long hair allows the
patch to move off the backbone when pressure is applied.
•Using the supplied tack cloth, remove any dust from the application area by giving
it a single wipe in the direction of the hair growth.
Placement
Ensure heat patch is correctly positioned to
enable activation.
•Heat detection patches are positioned
across the backbone of the cow where the
brisket of the mounting cow will apply the
most pressure.
•For an average sized 500kg cow, position the
front edge of the heat patch in line with the
back of the hip bones as per the illustration.
On taller, broader cows the heat patch
should be placed closer to the rear (approx.
3cm closer to the tail for every 50kg over the
500kg average).
•Avoid placing the heat patch over dips in the
backbone.
20
Apply patch here
Tail head
Pin bone
Short ribs
Hip bone
Not here
Table of contents