Setting up LCD Receiver
1. Press POWER KEY to turn power on. (indicator lit up)
2. Press CH KEY to select desired channel.
(Channel number displays on right upper corner screen)
3. Press VOLUME up/down key for desirable volume.
4. Manual Mode:
Brightness Setting -- Press Function Key once.
Screen
will display BRIGHTNESS, then press VOLUME
up/down key to adjust BRIGHTNESS.
Contrast Setting -- Press Function Key twice.
Screen will display CONTRAST, then press VOLUME
up/down key to adjust CONTRAST.
Color Setting -- Press Function Key three times.
Screen will display COLOR, then press VOLUME
up/down key to adjust COLOR.
5. Press AUTO KEY to select manual or auto channel
switching. (with auto switching selection, "auto" will
appear on the right bottom screen)
6. Auto Mode: After pressing AUTO KEY
a. Auto Channel Switching -- Press FUNCTION KEY
once, screen will display Mode 1, then press VOLUME
up/down key to select preferred auto switching sequence:
Mode 1: channel 3.4
Mode 2: channel 1.2
Mode 3: channel 1.2.3
Mode 4: channel 1.2.3.4
b. Dwell Time -- Press FUNCTION KEY twice, screen
will display TIMER 2 S, then press VOLUME up/down
key to select auto switching dwell time (TIMER 2 S:
indicates channels will switch every 2 seconds). Dwell
time can be set from 2 to 9 seconds.
c. Brightness Setting -- Press FUNCTION KEY three
times, screen will display BRIGHTNESS, then press
VOLUME up/down key to adjust BRIGHTNESS.
d. Contrast Setting -- Press FUNCTION KEY four times,
screen will display CONTRAST, then press VOLUME
up/down key to adjust CONTRAST.
e. Color Setting -- Press FUNCTION KEY five times,
screen will display COLOR, then press VOLUME
up/down key to adjust COLOR.
When setting is complete, the screen will return to original
display after five seconds. The channel/mode/timer setting
will be stored as a default setting even after the LCD
receiver is turned off and on again.
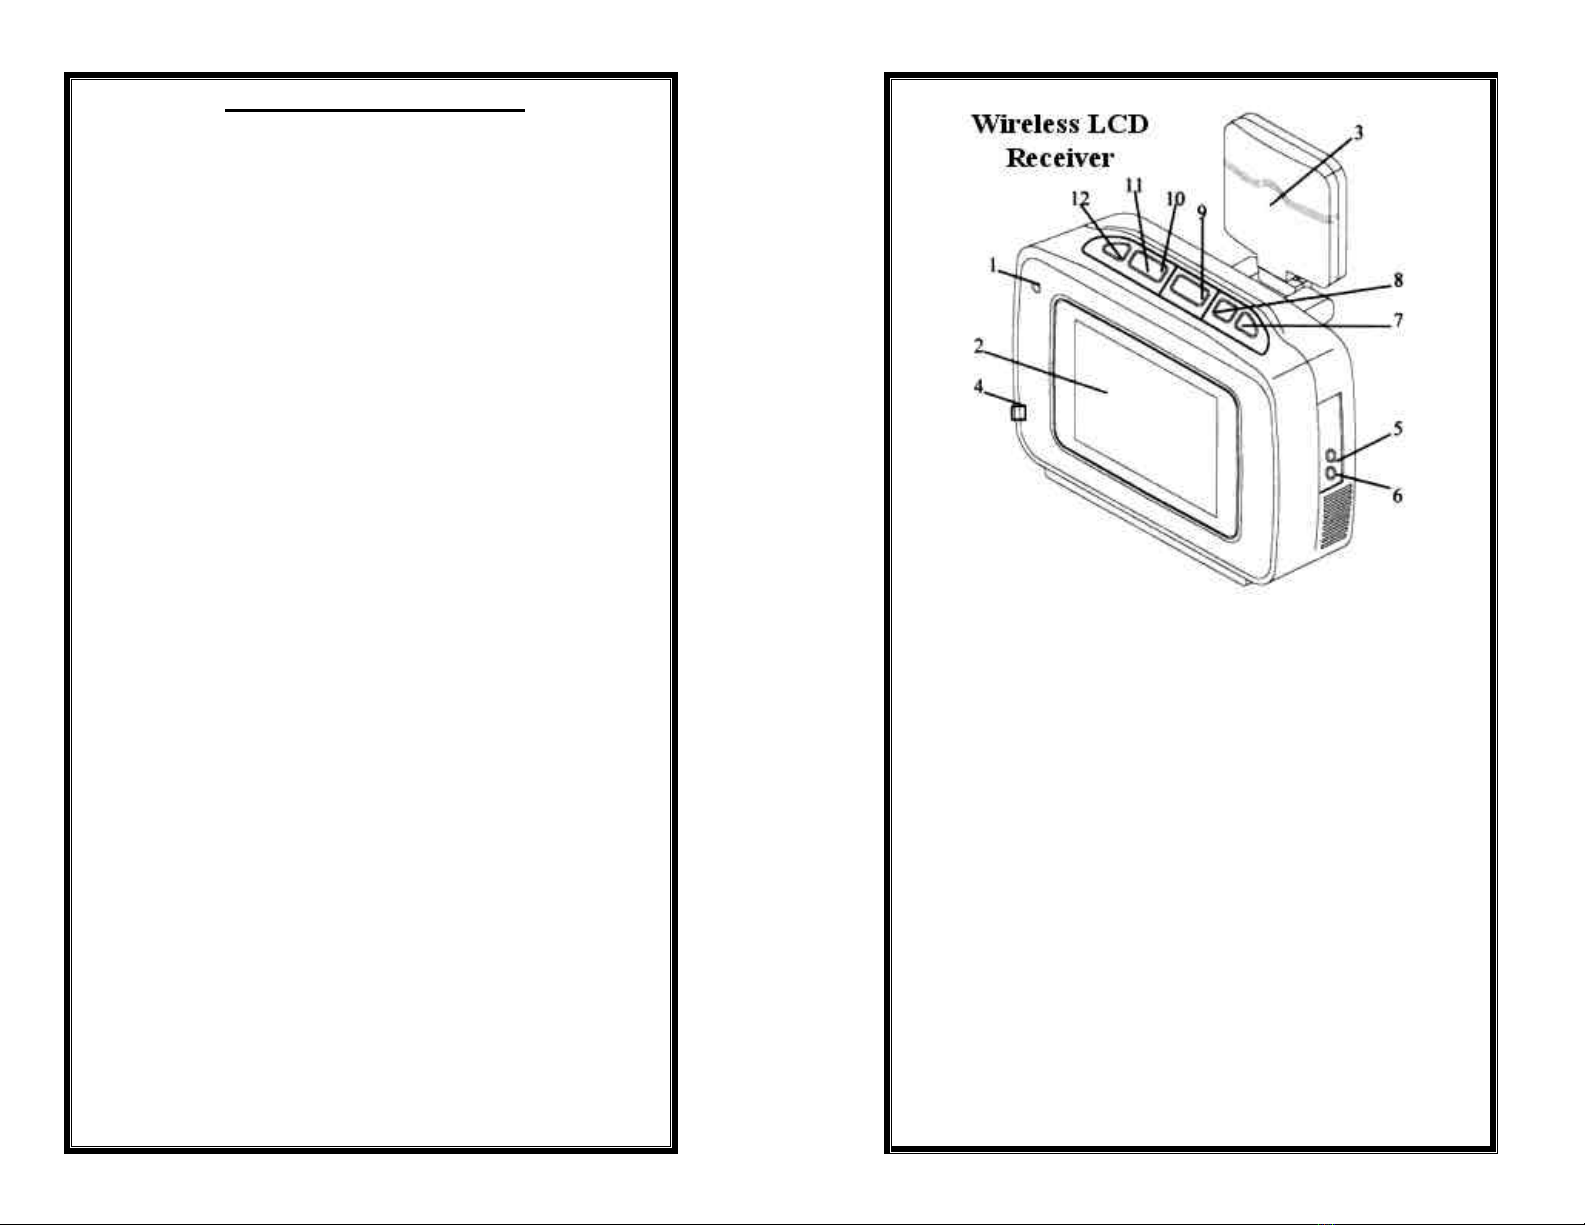
1. Standby LED Dimmed LED indicates the power source
(AC Adapter or Battery) is on stand by. Brightly lit LED
indicates the power is ON.
2. 4 inch (diagonal) screen
3. 2.4 GHz Antenna
4. DC 12V input socket
Connect with an AC/DC adapter (12V, IA)
5. A/V Input jack Input of Audio, Video signal
6. A/V Output jack Output of Audio, Video signal
7. Power ON/OFF Key
8. Mute Key Mute audio
9. ^ Key: Volume up/Function Setting
vKey: Volume down/Function Setting
When using function setting mode after pressing function key
^ : to move cursor up
v : to move cursor down
10. CH Key: To select channel number 1-4 manually.
11. Auto Key: Auto channel switching.
12. Function Key: Adjusting/Setting up auto channel
switching, dwell time, brightness, contrast, color, etc.