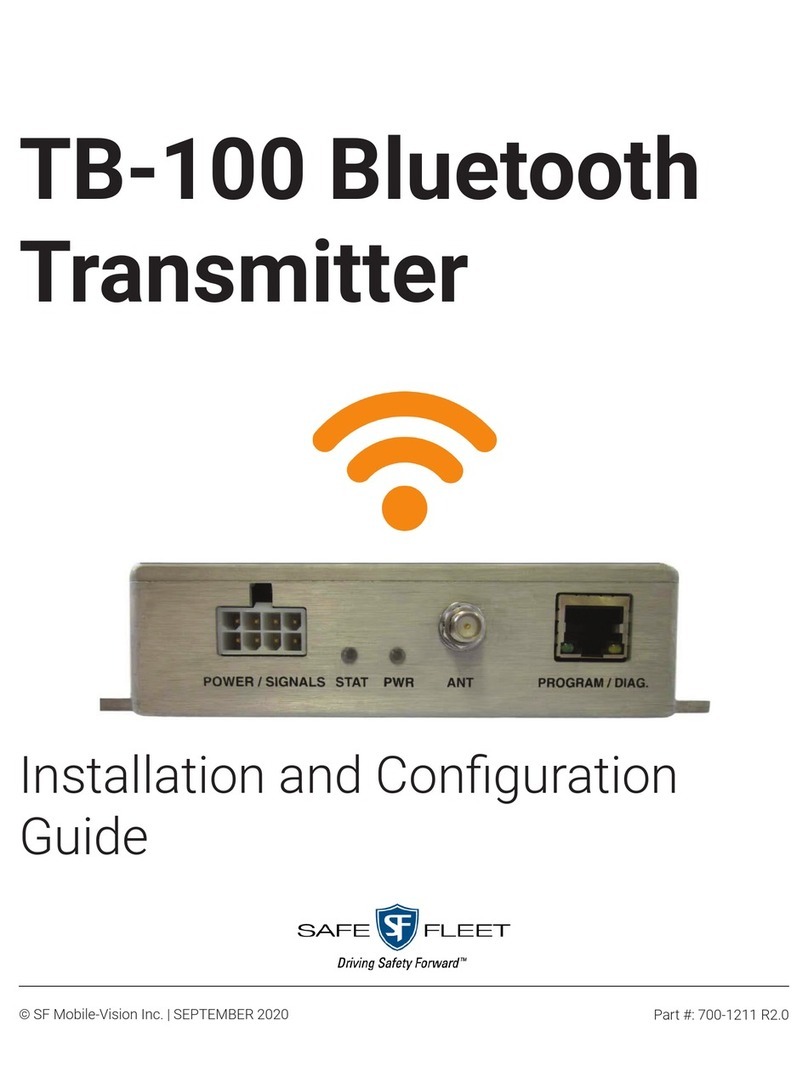
Safe Fleet TB-100 Manual

TB-100 Bluetooth Transmitter
Hardware Installation Guide
version 1.13

©Copyright 2019 by SF Mobile-Vision, 400 Commons Way, Suite F, Rockaway, NJ 07866

TB-100 Bluetooth Transmitter Hardware Installation Guide
Safe Fleet Mobile-Vision 9.26.2019 Page 1
Bluetooth Transmitter Installation Guide
The Bluetooth Transmitter is a device that can be added to new and existing Flashback
systems (including Flashback2s, Flashback3s, and FlashbackHDs) to enable bi-directional
record transmitting between Flashback system(s) and BWX-100 body worn camera(s).
Bluetooth Transmitter Kit
The Bluetooth Transmitter Kit includes:
ZAS-TM010001—Transmitter module model TB-100—Qty: 1
ZAN-001-0001—Antenna—Qty: 1
ZCA-C22021-6—Cable, antenna—Qty: 1
ZMC-TM010002—Bracket, antenna mounting—Qty: 1
HDW-90064A330—Screw, #8 x 1/2 lg, hex head, sheetmetal, drill point, steel—Qty: 4
HWD-90190A148—Screw, #6 x 1/2 lg, pan head, sheetmetal, steel—Qty: 2
ZCA-TM010001—Cable assembly, signal and power—Qty: 1
ZCA-TM010002—Cable assembly, Flashback pigtail—Qty: 1 (Flashback version only)
2 x ZCA-TM010003—Cable assembly, Fuse Holder, 2A—Qty: 1
2 x CO-159-1622—Butt Splice, 22-16 AWg—Qty: 1
If you are using this Bluetooth Transmitter with a Flashback in-car video system, see
“Flashback Version” on the next page.
If you are using this Bluetooth Transmitter with BWX-100 Body Worn cameras only, see
“Emergency Lights or Siren Activated Version” on page 10.

Flashback Version
TB-100 Bluetooth Transmitter Hardware Installation Guide
Page 2 Safe Fleet Mobile-Vision 9.26.2019
Flashback Version
Check your Flashback wiring harness for the gray Aux 2 wire. If your wiring harness
includes the gray Aux 2 wire, proceed to the next step. If your wiring harness does not
include the gray Aux 2 wire and your Aux 1 wire is already connected to another device,
you’ll need to order an FB3/FBHD Wiring Harness (W-FB-IO-C Axx), which includes the
Aux 2 wire. For assistance, contact Mobile-Vision Sales at 1-800-336-8475.
Disconnect negative lead of vehicle battery
Mount the transmitter box
Begin by selecting a location that is:
On a flat surface in the trunk or cabin
Within 4 feet of the proposed antenna location and 10 feet of the Flashback DVR
Away from possible spills.
Next, mount the transmitter box (ZAS-T M010001) to the surface using the self-tapping
screws provided.
Mount the antenna
Begin by selecting a location that is within 4 feet of the Bluetooth Transmitter:
If TB-100 is mounted in the trunk, mount the antenna on the rear deck or C pillar
If TB-100 is mounted in the center console, mount the antenna on the cage or A pillar
If TB-100 is mounted in the rear of an SUV, mount the antenna on the cage or C pillar
Next, mount the antenna (ZAN-001-0001) using the provided bracket hardware (ZMC-
TM010002).
Because the TB-100 utilizes a “line of sight” signal, it’s important to mount the antenna
as high as you can so the signal can easily pass through the vehicle’s glass.
Connect the antenna cable (ZCA-C22021-6) to the antenna (ZAN-001-0001)
Connect the other end of the antenna cable (ZCA-C22021-6) to the Bluetooth
Transmitter
Plug the Signal & Power cable (ZCA-TM010001) into the POWER/SIGNAL port on the
back of the Bluetooth Transmitter
Make the wiring connections, as pictured in the following diagram
For a list of connections, refer to the table on page 4.
3
4
5
6
7
2
1
3
8

Flashback Version
TB-100 Bluetooth Transmitter Hardware Installation Guide
Safe Fleet Mobile-Vision 9.26.2019 Page 3
Antenna
ZAN-001-0001
Antenna
mounting
bracket:
ZMC-TM010002
DVR
FB pigtail cable: ZCA-TM010002
Antenna cable: ZCA-C22021-6
To
Flashback
monitor
To grill
light, if
used
2 amp fuse
(white label)
To same ground
location
as
Flashback
To
battery
positive
Not used;
cap off
2 amp fuse
(yellow label)
PWR. Power LED.
Turns solid green
when unit has
power & vehicle
ignition is on
Bluetooth Transmitter: ZAS-TM010001
Signal &
Power cable
ZCA-TM010001
STAT. Status LED:
Solid Green: System is fully initialized; ready to receive input commands
Solid Red: Transmission output is activated due to any of the
Flashback inputs
Blinking Red: Transmission output is activated due
to an external transmission from a BWX-100 or
another Bluetooth Transmitter
Aux 2

Flashback Version
TB-100 Bluetooth Transmitter Hardware Installation Guide
Page 4 Safe Fleet Mobile-Vision 9.26.2019
Make the wiring connections (cont’d)
Wire Color Connect to…
FB REC LED Orange Orange wire on Flashback Pigtail cable
GROUND Black Same ground location as Flashback
12V BATTERY Red 2-amp fuse, then to battery positive
IGNITION White 2-amp fuse, then to white wire on Flashback Pigtail cable
TO DVR AUX 1 or AUX 2 Gray To the brown Aux 1 wire or gray Aux 2 wire
Connect the Flashback Pigtail cable (ZCA-TM010002) to the white lead on the back
of the Flashback monitor cable
Reconnect negative lead of vehicle battery
Configure the Flashback to support remote transmission.This procedure may vary
depending on whether or not your agency is using the Fleet Management feature.
If Fleet Management is on, perform this task from the server, as described in “From
DES” below. If Fleet Management is off, perform this task from the DVR, as described in
“From Flashback3 or FlashbackHD” on the next page or “From Flashback2” on page 6.
From DES:
a. Login to your DES video management software as an Admin user.
b. Open the DVR record for the Flashback that will be connected to this Bluetooth
Transmitter.
11
9
10

Flashback Version
TB-100 Bluetooth Transmitter Hardware Installation Guide
Safe Fleet Mobile-Vision 9.26.2019 Page 5
c. Click the Triggers/Display tab.
d. Select the Aux 1 Trigger or Aux 2 Trigger checkbox to indicate which Flashback
connection you used for TO DVR AUX 2 (see wiring diagram on page 3).
e. Click Save.
From Flashback3 or FlashbackHD:
a. Turn the vehicle ignition on. Once the Flashback has finished booting, proceed to
step b.
b. Make sure the door to your DVR is open and Auto mode is off. (If necessary, press
the button until the light turns off.)
c. Press . The Flashback Main Menu displays.
d. Press the or button until Recording is highlighted.
e. Press to select the Recording option. The Recording menu displays.
f. Press twice to advance to the Input option.
g. Press to select the Input option. The Input screen displays.
h. Highlight the Flashback connection you used for TO DVR AUX 2:
For Aux 1, press two times to advance to the AUX1 Trigger field.
– OR –
To Aux 2, press three times to advance to the AUX2 Trigger field.
i. Press to toggle the field value from OFF to ON.
(Continued)

Flashback Version
TB-100 Bluetooth Transmitter Hardware Installation Guide
Page 6 Safe Fleet Mobile-Vision 9.26.2019
j. Press twice to save your changes and exit this option.
From Flashback2:
a. Turn the vehicle ignition on. Once the Flashback has finished booting, proceed to
step b.
b. Make sure the door to your DVR is open and Auto mode is off. (If necessary, press
the button until the light turns off.)
c. Press . The Flashback2 Main Menu displays.
d. Press the or button until Input Setup is highlighted.
e. Press . The Input Setup screen displays.
f. Highlight the Flashback connection you used for TO DVR AUX 2:
Press six times to advance to the trigger portion of the field.
– OR –
Press eight times to advance to the trigger portion of the field.
g. Press . A blue dot displays to the left of the or field.
h. Press to toggle the field value from to .
i. Press three times to save your changes and exit this option.

Flashback Version
TB-100 Bluetooth Transmitter Hardware Installation Guide
Safe Fleet Mobile-Vision 9.26.2019 Page 7
Configure your BWX-100 device(s) in DES to support Bluetooth transmission.
a. If you have not done so already, log into your DES video management software as an
Admin user.
b. Display the BWX-100’s DVR record.
c. If there are tabs at the top of the record, click Video. Otherwise proceed to the next
step.
d. Set the Bluetooth Transmission field to Enabled.
e. Enter a unique code in the Bluetooth ID field (must be 1 - 12 characters long and
consist of a combination of numbers from 1 - 9 and/or letters from a - f). This will
ensure that your Bluetooth Transmitter only communicates with devices*that share
the same Bluetooth ID.
f. Click Save.
*May include Flashbacks, BWX-100s, and/or Bluetooth Transmitters. Just remember to assign the same Bluetooth ID to
all devices in the same group!
12
Sample DVR record with
Fleet Management ON
Sample DVR record with
Fleet Management OFF

Flashback Version
TB-100 Bluetooth Transmitter Hardware Installation Guide
Page 8 Safe Fleet Mobile-Vision 9.26.2019
Use the Bluetooth Transmitter Configuration Tool application provided by
Mobile-Vision to configure the new Bluetooth Transmitter. This involves installing
the Bluetooth Transmitter Configuration Tool on your mobile data computer,
connecting that PC to the Bluetooth Transmitter via an Ethernet cable, then logging into
the software and selecting your Bluetooth Transmitter settings. For detailed instruc-
tions, refer to the Bluetooth Transmitter Software Configuration Guide, which is availa-
ble for download at:
https://l3mvicrm.blob.core.usgovcloudapi.net/mvicrm/Manuals/Bluetooth%20Transmit
ter%20Manuals/Bluetooth%20Transmitter%20Software%20Config%20Guide%201_1%2
0CURRENT.pdf
Manually sync the BWX-100 with the Bluetooth Transmitter
a. If you have not done so already, turn the vehicle’s ignition on. Doing so will power
on the Flashback and Bluetooth Transmitter. To ensure that the Bluetooth Transmit-
ter is ready to send and receive signals, check the STAT and PWR lights on the back
of the unit. Both lights should be solid green.
b. Press and hold the BWX-100’s Select button until the LCD screen reads “BLUE SYNC
ON”, then release the button.
Wait approximately 10
seconds. Once the screen
reads “SELECT DEVICE”,
proceed to step c.
c. Press the Select button again. A device name*or serial number will display.
*If you entered a value in the Config Tool’s “Name/Unit #” field, the device name displays. If not, the serial number
displays
14
13

Flashback Version
TB-100 Bluetooth Transmitter Hardware Installation Guide
Safe Fleet Mobile-Vision 9.26.2019 Page 9
d. If the displayed device name or serial number matches the Bluetooth Transmitter,
press the Select button.
– OR –
If the displayed device name or serial number does not match the Bluetooth
Transmitter, use the arrow buttons on your BWX-100 to display the correct record,
then press Select.
Once the BWX-100 has successfully synced with the Bluetooth Transmitter, a confir-
mation message displays.
e. Repeat steps a – d for all BWX-100s you wish to sync with your Bluetooth Transmitter.
Do I have to perform the manual sync procedure at the beginning of each
recording session? That depends on your assigned vehicle and camera. If you
always use the same vehicle and the same BWX-100, you do not have to perform
this procedure again. However, officers who use different vehicles and/or differ-
ent BWX-100s on a day-to-day basis will need to perform the manual sync proce-
dure at the beginning of each recording session.
Field test the transmission function.
Test Flashback-to-BWX Transmitting: Manually start a Flashback recording. Verify
that the BWX-100 started recording, then manually stop both recordings.
Test BWX-to-Flashback Transmitting: Manually start a BWX-100 recording. Verify that
the Flashback started recording, then manually stop both recordings.
15

Emergency Lights or Siren Activated Version
TB-100 Bluetooth Transmitter Hardware Installation Guide
Page 10 Safe Fleet Mobile-Vision 9.26.2019
Emergency Lights or Siren Activated Version
In this application, the Bluetooth Transmitter is used for sending a signal that can be re-
ceived by other Bluetooth-Transmitter-enabled Flashback systems or transmission-enabled
BWX-100s. It does not re-broadcast a signal received by other Bluetooth Transmitters or
BWX-100s.
Disconnect negative lead of vehicle battery
Mount the Bluetooth Transmitter
Begin by selecting a location that is:
On a flat surface in the trunk or cabin
Within 4 feet of the proposed antenna location
Away from possible spills.
Mount the Bluetooth Transmitter (ZAS-TM010001) to the surface using the self-tapping
screws provided.
Mount the antenna
Begin by selecting a location that is within 4 feet of the Bluetooth Transmitter, such as
on the vehicle’s back deck, cage wall, or A-pillar. Next, mount the antenna (ZAN-001-
0001) using the provided bracket hardware (ZMC-TM010002).
Connect the antenna cable (ZCA-C22021-6) to the antenna (ZAN-001-0001)
Connect the other end of the antenna cable (ZCA-C22021-6) to the Bluetooth
Transmitter
Plug the Signal & Power cable (ZCA-TM010001) into the POWER/SIGNAL port on the
back of the Bluetooth Transmitter
Make the wiring connections (see diagram on the next page):
Wire Color Connect to…
SIREN IN Blue Emergency lights or siren
GROUND Black Chassis ground
12V BATTERY Red To 2-amp fuse, then to battery positive
IGNITION White To 2-amp fuse, then to vehicle ignition sense
LIGHTS IN Green Emergency lights or siren
3
6
2
4
5
7
1

Emergency Lights or Siren Activated Version
TB-100 Bluetooth Transmitter Hardware Installation Guide
Safe Fleet Mobile-Vision 9.26.2019 Page 11
Antenna
ZAN-001-0001
Antenna mounting
bracket: ZMC-TM010002
Antenna cable: ZCA-C22021-6
To vehicle
ignition sense
To chassis
ground
Not used;
cap off
To battery positive
Bluetooth Transmitter: ZAS-TM010001
2 amp fuse
(yellow label)
Signal & power cable: ZCA-TM010001
PWR
. Power LED.
Turns solid green
when unit has
power & vehicle
ignition is on
STAT. Status LED:
Turns solid green when the system is fully initialized
and ready to receive input commands
Turns solid red when the transmission output is activated
due to any of the three transmission inputs
To 12v siren signal
(requires part MV-Siren)
2 amp fuse (white label)
2 amp fuse
(green label)
To 12v
light signal
2 amp fuse (green label)

Emergency Lights or Siren Activated Version
TB-100 Bluetooth Transmitter Hardware Installation Guide
Page 12 Safe Fleet Mobile-Vision 9.26.2019
Configure your BWX-100 device(s) in DES to support Bluetooth transmission.
a. Log into your DES video management software as an Admin user.
b. Display the BWX-100’s DVR record.
c. If there are tabs at the top of the record, click Video. Otherwise proceed to the next
step.
d. Set the Bluetooth Transmission field to Enabled.
e. Enter a unique code in the Bluetooth ID field (must be 1 - 12 characters long and
consist of a combination of numbers from 1 - 9 and/or letters from a - f). This will
ensure that your Bluetooth Transmitter only communicates with devices*that share
the same Bluetooth ID.
f. Click Close.
*May include BWX-100s and/or Bluetooth Transmitters. Just remember to assign the same Bluetooth ID to all devices
in the same group!
Sample DVR record with
Fleet Management ON
8
Sample DVR record with
Fleet Management OFF

Emergency Lights or Siren Activated Version
TB-100 Bluetooth Transmitter Hardware Installation Guide
Safe Fleet Mobile-Vision 9.26.2019 Page 13
Use the Bluetooth Transmitter Configuration Tool application provided by
Mobile-Vision to configure the new Bluetooth Transmitter.
This involves installing the Bluetooth Transmitter Configuration Tool on a laptop,
connecting that laptop to the Bluetooth Transmitter via an Ethernet cable, then logging
into the software and selecting your Bluetooth Transmitter settings. For detailed
instructions, please refer to the Bluetooth Transmitter Software Configuration Guide.
Manually sync the BWX-100 with the Bluetooth Transmitter.
a. If you have not done so already, turn the vehicle’s ignition on. Doing so will power
on the Bluetooth Transmitter. To ensure that the Bluetooth Transmitter is ready to
send and receive signals, check the STAT and PWR lights on the back of the unit.
Both lights should be solid green.
b. Press and hold the BWX-100’s Select button until the LCD screen reads “BLUE SYNC
ON”, then release the button.
Wait approximately 10
seconds. Once the screen
reads “SELECT DEVICE”,
proceed to step c.
c. Press the Select button again. A device name*or serial number will display.
(Continued)
*If you entered a value in the Config Tool’s “Name/Unit #” field, the device name displays. If not, the serial number
displays
9
10

Emergency Lights or Siren Activated Version
TB-100 Bluetooth Transmitter Hardware Installation Guide
Page 14 Safe Fleet Mobile-Vision 9.26.2019
d. If the displayed device name or serial number matches the Bluetooth Transmitter,
press the Select button.
– OR –
If the displayed device name or serial number does not match the Bluetooth
Transmitter, use the arrow buttons on your BWX-100 to display the correct record,
then press Select.
Once the BWX-100 has successfully synced with the Bluetooth Transmitter, a
confirmation message displays.
e. Repeat steps a – d for all BWX-100s you wish to sync with your Bluetooth
Transmitter.
Do I have to perform the manual sync procedure at the beginning of each
recording session? That depends on your assigned vehicle and camera. If you
always use the same vehicle and the same BWX-100, you do not have to perform
this procedure again. However, officers who use different vehicles and/or differ-
ent BWX-100s on a day-to-day basis will need to perform the manual sync proce-
dure at the beginning of each recording session.
Field test the transmission function:
a. Turn the vehicle on.
b. Position the BWX-100 within 100 feet of the Bluetooth Transmitter with line-of-sight
to the antenna.
c. Turn on the vehicle’s emergency lights or siren and verify that the BWX-100 started
recording.
d. Manually stop the BWX-100 recording.
11

FCC Compliance
TB-100 Bluetooth Transmitter Hardware Installation Guide
Safe Fleet Mobile-Vision 9.26.2019 Page 15
FCC Compliance
This device complies with Part 15 of the FCC Rules. Operation is subject to the following two
conditions:
1. This device may not cause harmful interference, and
2. This device must accept any interference received, including interference that may cause
undesired operation.
WARNING: Changes or modifications not expressly approved by the party responsible
for compliance could void the user’s authority to operate the equipment.
This equipment has been tested and found to comply with the limits for a Class B digital device,
pursuant to Part 15 of the FCC Rules. These limits are designed to provide reasonable protection
against harmful interference in a residential installation. This equipment generates uses and can
radiate radio frequency energy and, if not installed and used in accordance with the instructions,
may cause harmful interference to radio communications. However, there is no guarantee that
interference will not occur in a particular installation. If this equipment does cause harmful
interference to radio or television reception, which can be determined by turning the equipment
off and on, the user is encouraged to try to correct the interference by one of the following
measures:
Reorient or relocate the receiving antenna.
Increase the separation between the equipment and receiver.
Connect the equipment into an outlet on a circuit different from that to which the receiver is
connected.
Consult the dealer or an experienced radio/TV technician for help.
To comply with FCC/IC RF exposure limits for general population/uncontrolled exposure, the
antenna(s) used for this transmitter must be installed to provide a separation distance of at least
20 cm from all persons and must not be co-located or operating in conjunction with any other
antenna or transmitter.
Canadian Users
This device complies with Industry Canada License-exempt RSS standard(s). Operation is subject
to the following two conditions: 1) this device may not cause interference, and 2) this device
must accept any interference, including interference that may cause undesired operation of the
device.
Under Industry Canada regulations, this radio transmitter may only operate using a dipole
antenna and a maximum (or lesser) gain approved for the transmitter by Industry Canada. To
reduce potential radio interference to other users, the antenna type and its gain should be so
chosen that the equivalent isotropically radiated power (e.i.r.p.) is not more than that
necessary for successful communication.

FCC Compliance
TB-100 Bluetooth Transmitter Hardware Installation Guide
Page 16 Safe Fleet Mobile-Vision 9.26.2019
This device has been designed to operate with dipole antenna(s), and having a maximum gain
of 9 dBi. Dipole antennas having a gain greater than 9dBi are strictly prohibited for use with
this device. The required antenna impedance is 50 ohms.
This device is granted for use in Mobile only configurations in which the antennas used for this
transmitter must be installed to provide a separation distance of at least 20cm from all person
and not be co-located with any other transmitters except in accordance with FCC and Industry
Canada multi-transmitter product procedures.
Utilisateurs Canadiens
Cet appareil est conforme aux normes d'Industrie Canada en ce qui concerne les appareils de
type CNR exempts de licence. Son utilisation doit répondre aux deux conditions suivantes:
1) cet appareil ne peut produire d'interférence, et 2) cet appareil doit accepter toute
interférence, incluant celle capable de causer son fonctionnement indésiré.
En vertu du règlement d'Industrie Canada, cet émetteur radio ne peut fonctionner que si on
utilise une antenne dipôle et un gain maximal (ou moindre) approuvés par Industrie Canada en
fonction de l'émetteur. Pour réduire le risque d'interférence radio chez les autres utilisateurs,
on recommande de choisir le type d'antenne et son gain de manière à ce que la puissance
isotrope rayonnée équivalente (p.i.r.e.) suffise tout juste à assurer une communication efficace.
Cet appareil a été conçu pour être muni d'une antenne dipôle ou plus avec un gain maximal de
9 dBi. Il est strictement interdit d'utiliser des antennes dipôles présentant un gain supérieur à
9dBi avec cet appareil. L'antenne doit présenter une impédance de 50 ohms.
Cet appareil doit être utilisé uniquement dans les configurations mobiles, alors que les
antennes employées avec cet émetteur doivent être installées de manière à présenter une
distance de séparation d'au moins 20 cm de tout individu. De plus, elles ne doivent pas se
trouver au même endroit que d'autres émetteurs, sauf si on respecte la procédure de la FCC
et d'Industrie Canada en ce qui concerne les produits dotés de plusieurs émetteurs.
Other manuals for TB-100
1
Table of contents
Other Safe Fleet Transmitter manuals