LRA-EXTX-L Door hie Etener
Owner’s Manual
is viccoiswi Par5o rsraionoisvic issco
oowing coniions . is vica nocas arinrrnc. . isvics
accan inrrncincing inrrnca a cas nsiroraion.
Introution
The AT transmitter connects to a standard wired doorbell. hen the
wired push button outside is pressed, the doorbell dings as usual, and the A
T transmitter is triggered and sends a radio signal to a compatible A
receier for notification strobe, chime sounds, etc..
Iortant otes
•The AT chime extender can work with both the front door "second"
door of your wired doorbell.
•The transmitter only works with standard wired doorbells that play a "ding" or
"dingdong" sound. It does not work with intercom or ideo doorbells.
•The transmitter works A wired door chimes.
•owered by a A battery that should last up to years prior to
replacement.
•imensions are x x .
•ust be used in conjunction with a A receiers such as the AA
or the A.
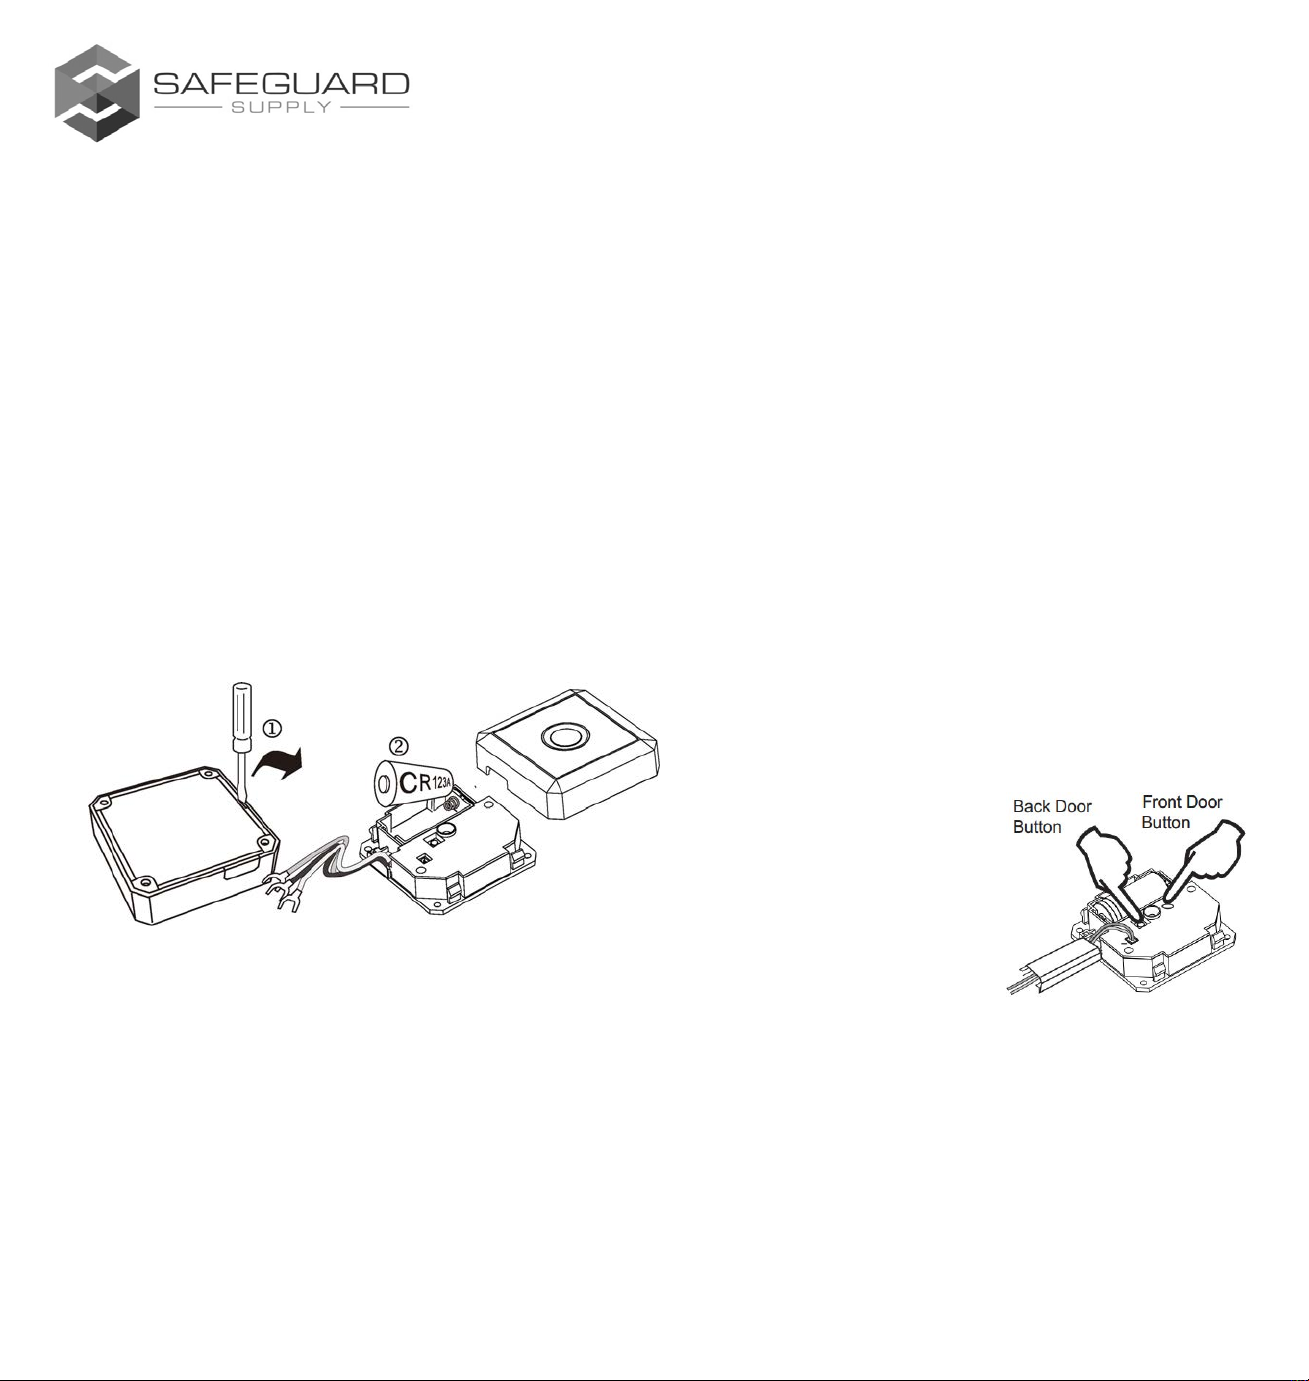
attery Installation
. pen the front coer using a small flathead screw drier see
aboe.
. Insert included A battery into the battery compartment see
aboe. nsure to remoe the plastic wrap around the battery
prior to installing.
. ress the "front door" or "back door" button. You should see a red
to show the transmitter is working correctly.
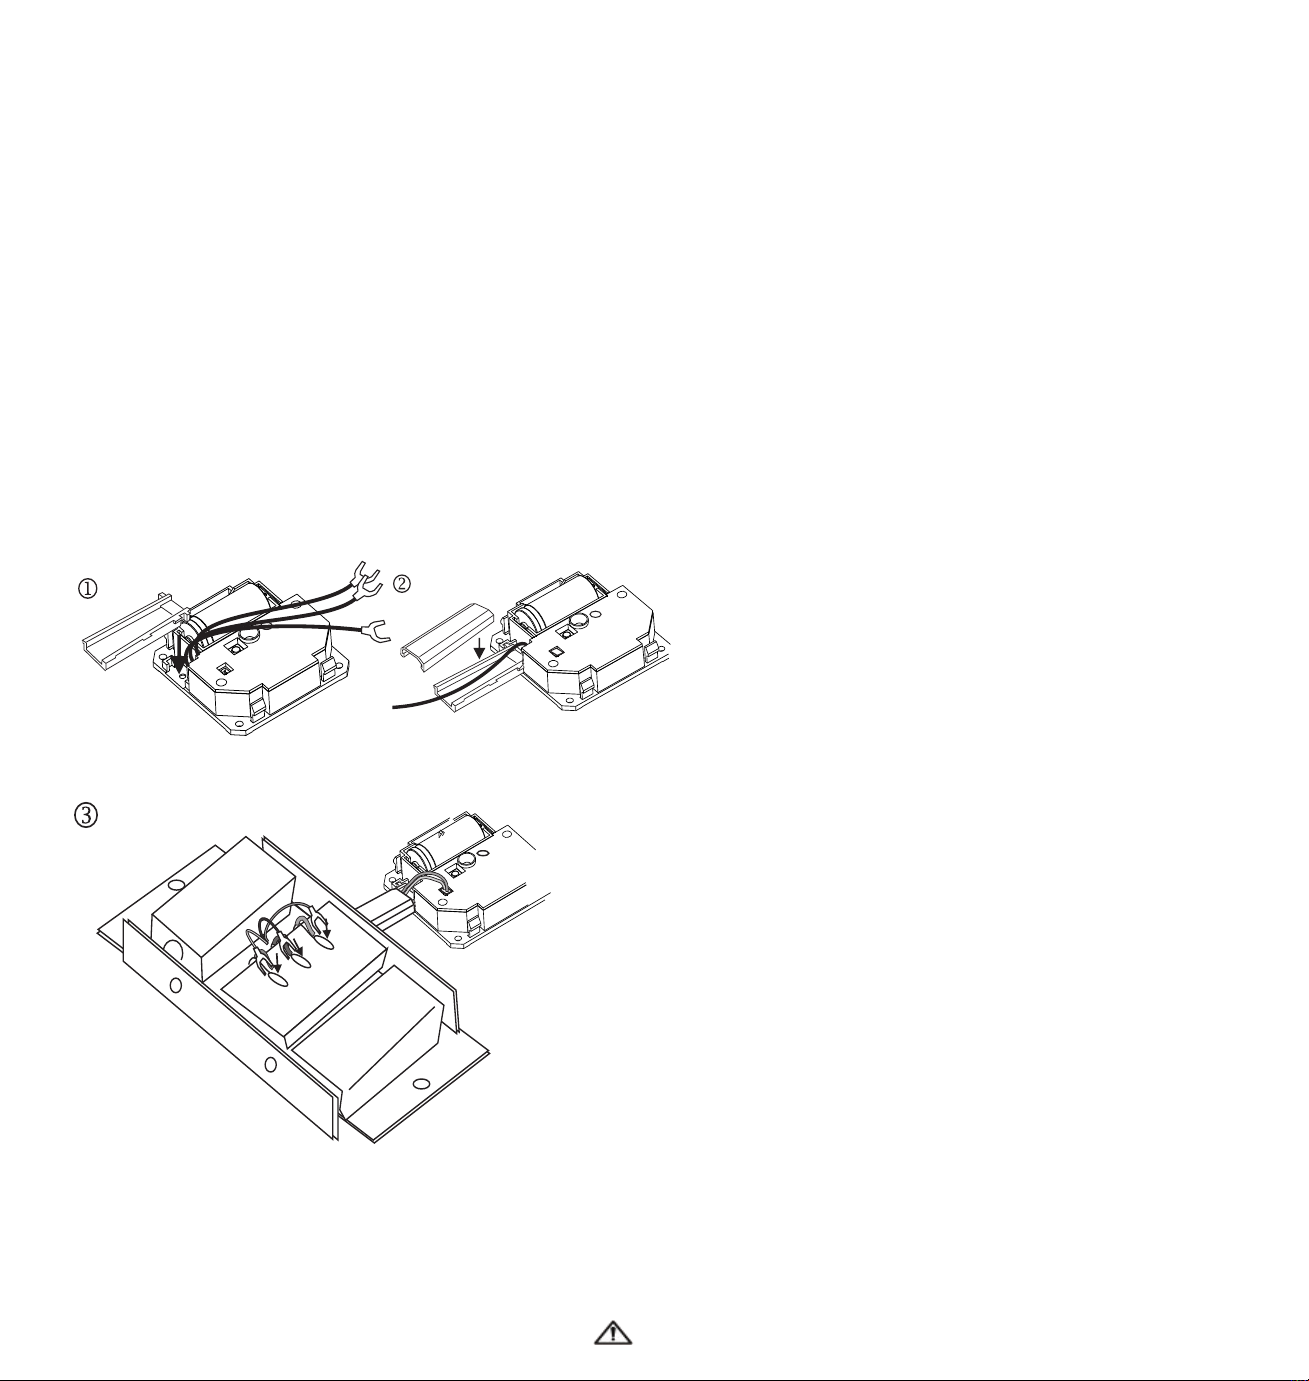
rograing the LRA-EXTX to Your ire Doorbell
The AT transmitter wires directly into the wired doorbelldoor
chime inside your home typically hanging in the foyer. e
recommend you pairprogram the AT to a compatible A
receier prior to wiring mounting the transmitter. A receiers are
multioned, meaning each transmitter is paired to a one with each
one haing a distinct melody assigned to it. If your wired doorbell is
connected to two doors front door and second door, then each door
outdoor wired push button will correspond to a one on the A
receier. The button labeled "front door" on the AT will wire
rograing the LRA-EXTX to Your ire Doorbell ont
to the front doorbell button on your existing wired doorbell
the "back door" button on the AT will wire to the back
doorbell button on your existing wired doorbell in your home. If
the existing wired doorbell in your home does not use or hae a
"back" or "second" doorbell button, you do not hae to program
the "back door" button .
ach A receier will come with instructions on programming
pairing that receier to a transmitter as each are slightly different.
The instrutions belo outline ho to air the transitter to
the LRA-DRXA-L.
•nsure the battery is installed in the AT transmitter
the compatible receier is powered on. nsure the plastic
wrap is remoed from battery prior to inserting into
transmitter.
•pen the front coer of the receier. ress hold the one
selector button for approximately three seconds until you
see "one " flashing on the receier. hen it starts to flash,
release the one selector button. The flashing one signifies
that this one is in programmingpairing mode.
•If you are programming the "front door" button on the
AT transmitter to this one, moe to the next
step. If you are programming the AT
transmitter to a different one, press the one selector
button again to scroll to the desired one.
•nce you hear the desired
melody, stop pressing the
melody selector button ♫.
•ress the "front door" button
on the AT transmitter.
•A red should flash on the transmitter after you press
the button. hen the transmitter has paired to the receier,
the strobe on the receier will flash once, and the next
ones will start blinking.
•If you would like to program the "back door button," follow
this step. If not, skip to the next step. sing the ♫button,
scroll to the desired melody you desire for this one. nce
you hear the desired melody, press the "back door button"
on the transmitter to pair the transmitter to this one
•To exit programmingpairing mode, scroll past one four
on the receier using the one selector button. After
scrolling past one four, none of the one lights should be
flashing. This shows you are no longer in pairing
programming mode.
•ext you will select the
desired melody for that
one by scrolling through
the melodies using the
melody selector button ♫
located next to one
selector button.