Sahara X150 Owner's manual

Assembly & User Instructions
X150
2 Burner Gas BBQ
These instructions are for your safety. Please read them
thoroughly before use and retain them for future reference.
• For outdoor use only.
• Read instructions before using the appliance. Failure to follow instructions could
result in death, serious bodily injury, and/or property loss.
• Warning: accessible parts may be very hot. Keep young children away.
• Do not move the appliance during use.
• Turn off the gas supply at the gas bottle after use.
• Any modication of the appliance, misuse, or failure to follow the instructions may
be dangerous and will invalidate your warranty. This does not affect your statutory
rights.
• Retain these instructions for future reference.
• Leak test your barbecue annually. Check the hose connections are tight and leak
test each time you reconnect the gas bottle.
FOR YOUR SAFETY
IF YOU SMELL GAS:
1. Shut off gas to the appliance.
2. Extinguish any open ame.
3. Open barbecue lid or hood.
4. If odour continues, discontinue use and contact your
local dealer.
FOR YOUR SAFETY
1. Do not store or use petrol or other ammable vapours or
liquids in the vicinity of this or any other appliance.
2. A gas bottle not connected for use shall not be stored in the
vicinity of this or any other appliance.

Page 2
Ref Description Illustration Qty Ref Description Illustration Qty
1
2
3
4
5
6
7
8
2
2
2
1
1
1
1
1
2
1
2
1
9
10
11
12
Large
Wheel
Side
Frame
Metal Cross
Bar
Hood + Sink
Assembly
Cooking
Grill
Vapourising
Bar
Warming
Rack
Handle
Left and Right
Side Trays
Front Panel
Front Panel
Brackets
Grease Cup
Parts Supplied

Page 3
Fixings Supplied
Tools Required For Assembly
• Philips Head Screwdriver
Before You Start
• Check the contents of the box and make sure you have all the parts and ttings listed. If not,
contact our Helpline 00 353 1 2873797 and we will be able to help you.
• When you are ready to start, make sure that you have plenty of space and a clean dry area
for assembly.
• Before cooking on this barbecue. Turn the barbecue on at the medium to high temperature
and burn for 30 minutes to allow curing of vapourising bars and to burn off cleaning residue
materials.
Assembly
• Please lay out all nuts and bolts and check lengths before assembly. It is recommended that
the carton is cut open and spread out on the oor and used as a protective surface during
assembly. Refer to the assembly diagrams as necessary.
• Important - while every precaution has been made in the manufacture of this product, care
must be taken during assembly in case sharp edges are present.
• Remove all transit packaged parts from the inside of the grill body before assembling.
Important - follow gas leak test advice before use. Ensure all connections are tight and secure.
• This product is for OUTDOOR USE ONLY.
• NEVER use indoors, in an enclosed area or below ground level.
• This barbecue is intended for use with LPG bottled gas only. (A regulator of 28mbar must be
used for Butane gas or 37mbar for Propane gas.)
• NEVER use an adjustable regulator with this barbecue.
M6x65mm
Bolt
M6 Washer
M6 Mica
Washer
M6x14
Wingnut
A
B
C
D
E
8
8
8
8
12
Ref Description Illustration Qty Ref Description Illustration Qty
M4x10mm
Bolt
Note: Fixings not shown to scale

Assembly Step 1
M6x65mm Bolt
(ref: A) x 8
Large Wheel x 2
Left Side
Frame
Assemble barbecue frame as shown.
Tip: Ensure both large wheels are tted to the right side.
Note: Do not fully tighten bolts.
Page 4
Side Frame x 2 Metal Cross Bar x 2
Metal
Cross Bar
M6x65mm Bolt
(ref: A)
M6x65mm Bolt
(ref: A)
FOLD AT TOP
(ENSURES STRAIGHT
ALIGNMENT OF WHEELS)
Right Side
Frame
Front Curved
Leg of Frame

Page 5
Assembly Step 2
Hood + Sink
Assembly
Attach hood and sink assembly to assembled barbecue frame using 8 of the wingnuts (ref. D)
and M6 washers (ref. B) and M6 Mica washers (ref. C) as shown.
Tighten all bolts on frame.
Hood + Sink
Assembly
NOTE: Order of xings.
M6x14
Wingnut
(ref: D) x 8
M6 Mica
Washer
(ref: C) x 8
M6 Washer
(ref: B) x 8

Assembly Step 3
Left +
Right Side
Trays
Handle
Fit the handle to the hood with the pre-tted wing nuts.
Remove the pre-tted wing-nuts and washers from the side trays. Slot the side trays into
position by inserting into the brackets on the frame. Secure the side trays using the pre-tted
wing-nuts.
Page 6

Page 7
Assembly Step 4
Grease
Cup
Insert the grease cup as shown.
Grease
Cup

Assembly Step 5
Page 8
Vaporiser
Bar
Place the vaporiser bar onto the pins on the sink.
Insert the cooking grill and insert the warming rack by installing into the holes in the hood and
sink.
Warming
Rack
Cooking
Grill
Vaporiser
Bar
Warming
Rack
Cooking
Grill

Page 9
Assembly Step 6
Secure front panel brackets to side frames using 6 M4x10 Bolts (ref:E).
Attach front panel to brackets using 6 M4x10 Bolts (ref:E).
Front
Panel
Front
Panel
Brackets
Front
Panel
Brackets
12
M4x10
Bolts
(ref:E) x 12
Front
Panel

Page 10
Leak Testing
• IMPORTANT – PERFORM LEAK TEST BEFORE USE
• NEVER use an open ame to test for leaks at anytime, DO NOT IGNITE THE BARBECUE
DURING THE LEAK TESTING.
• To be performed in a well ventilated area.
• Conrm all the control knobs are in the off position.
• Check for leaks by brushing a solution of 1/2 water and 1/2 soap over all the gas system joints,
including all valve connections, hose connections and regulator connections.
• Ensure soap solution has been applied to all connections – connect the regulator to the gas
cylinder, open the gas control valve on the regulator allowing gas to ow.
• OBSERVE – if bubbles form over any part of the joints there is a leak.
• Turn off the gas and tighten all joints
• Repeat test. If bubbles form again, do not use the barbecue. Please contact our helpline for
assistance: Phone: 00 353 (0)1 2873797 | Email: [email protected]
• Leak test annually and whenever the gas bottle is removed or replaced.
Gas and Regulator
• This barbecue can use either propane or butane LPG bottled gas.
• Propane bottles, will supply gas all year round, even on cold winter days.
• Butane bottles, will supply sufcient gas in summer. Butane gas must not be used in colder
temperatures.
The regulator will need to be changed if using a butane cylinder.
Contact your local gas supplier for advice.
• The bottle should be positioned underneath the main barbecue body.
• Gas bottles should never be stored or laid on their side.
• Never store gas bottles indoors.
• For optimal performance, we suggest the following:
• This barbecue is intended for use with LPG bottled gas only.
(A regulator of 28mbar must be used for Butane gas or 37mbar for Propane gas.)
• This appliance has been supplied with a PROPANE REGULATOR (conforming to EN 12864)
• NEVER use an adjustable regulator with this barbecue.
• Please contact your local gas supplier for advice on suitable gas bottles and regulators.
• The regulator is not suitable for (red) commercial propane cylinders.
Fitting Instructions
• This barbecue is for OUTDOOR USE ONLY and should be placed in a well-ventilated area.
• Take care to ensure that it is not placed UNDER any combustible surface.
• The sides of the barbecue should NEVER be closer than 1 metre from any combustible surface.
• Keep this barbecue away from any ammable materials.
• Important – Do not obstruct any ventilation openings in the barbecue body.
• Should you need to change the gas bottle, conrm that the barbecue is switched off, and that
there are no sources of ignition (cigarettes, open ame, sparks, etc.) nearby before proceeding,
• Inspect the gas hose to ensure it is free of any twisting or tension. The hose should hang freely
with no bends, folds, or kinks that could obstruct free ow of gas. Apart from the connection point,
no part of the hose should touch any hot barbecue parts.
• Always inspect the hose for cuts, cracks, or excessive wear before use.
• If the hose is damaged, it must be replaced with a hose suitable for use with LPG and meet the
national standards for the country of use. The length of the hose shall not exceed 1.5m.
• N.B – The date on U.K orange hose is the date of manufacture, not the expiry date.
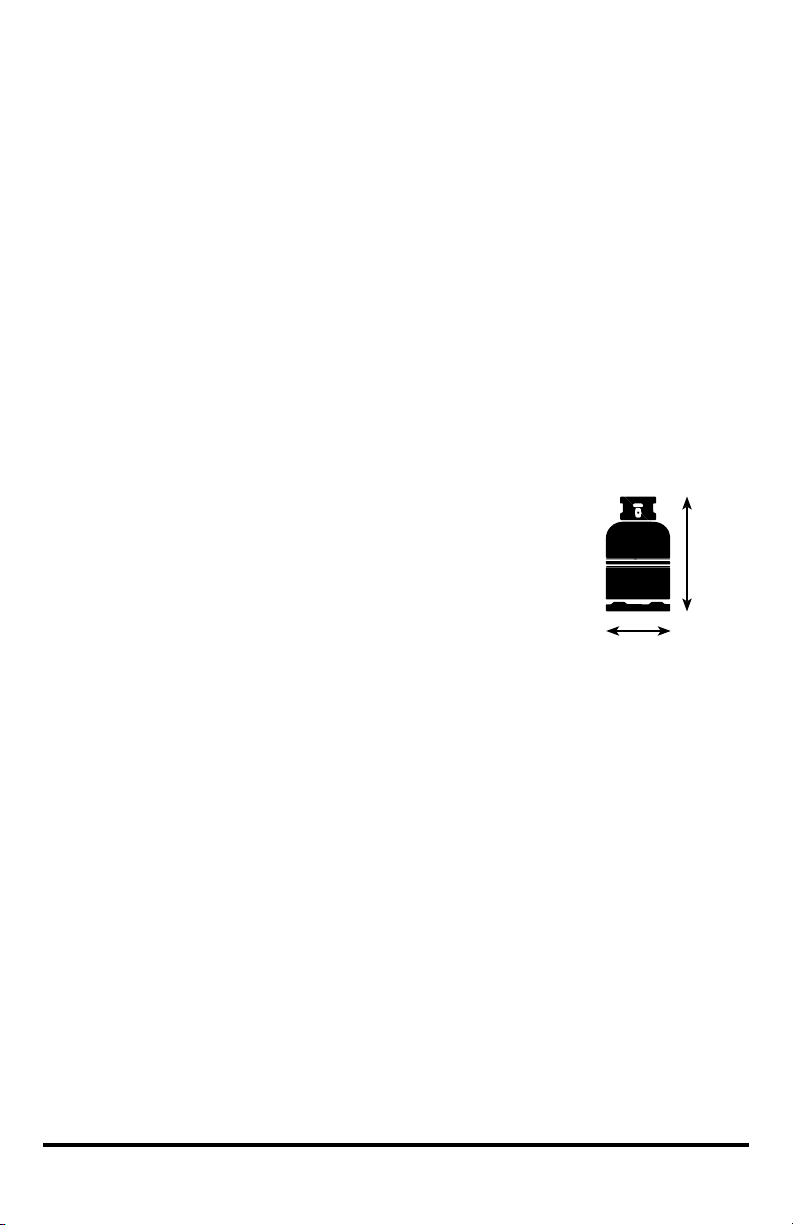
315mm
580mm
Maximum
bottle size

Page 11
Connecting to the Cylinder
• Conrm all barbecue control knobs are in the off position.
• Connect the regulator to the gas bottle according to your regulator and bottle dealer’s instructions.
Use Instructions
Before proceeding, make certain that you understand the WARNINGS section of this manual.
• Preparation before cooking – To prevent foods from sticking to the cooking grill, it is recommended
to apply a light coat of cooking oil to the food before placing on the grill.
• Note: When cooking for the rst time, paint colours may change slightly as a result of high
temperatures. This is normal and should be expected.
Lighting the Barbecue
• Turn on gas supply at gas cylinder.
• Push control dial in and slowly turn to “ ” position.
• If burner does not light, return to OFF position and try again.
• Once ignition has occured, hold dial in for at least 10 seconds to ensure the burner stays lit.
• If burner does not light or stay lit after holding dial in for 10 seconds, turn the dial to OFF position
and wait for 1 minute and try again. Do not continuously hold the dial in as you may cause a build
up of gas.
• In windy conditions shield from wind to ensure easy lighting.
• Turn control dial to alter burner settings as required.
• After ignition, the burners should be burned at the high position for 3-5minutes in order to preheat
the barbecue. This process should be done after every cooking session. IMPORTANT - The hood
should be open during preheating.
• After completion of preheating, turn burners to low position for best cooking results.
Manual Lighting Instructions
• Remove the cooking grill and vapour bar from barbecue.
• Place a lit match beside the burner (at the same location as the sparker shield)
• Push and turn the right most control knob anti-clockwise to the high position.
• After successful lighting, light each burner from left to right as desired.
• If burner fails to ignite after repeated attempts, contact the help line number stated in this manual.
Grill Cooking
The Vapour bar evenly distributes the heat across the cooking grill area. The natural food juices
produced during cooking fall onto the hot vapour bar below and vapourise. Even cooking of food will
be achieved by using the barbecue with the hood down. This should only be done with the burner
on low.
Flare-Up Control
IMPORTANT – FLARE UPS CAN OCCUR FROM RESIDUE FAT AND JUICES DRIPPING ONTO
THE BURNERS AND HOT VAPOUR BAR. To reduce this regularly clean the burners and vapour
bar. To control are-up, it is advisable to trim away excess fat from meat and poultry before grilling.
The burners should always be placed on the low setting during cooking. Always protect your hands
when handling anything near cooking surface of the barbecue.
End of Cooking Session
After each cooking session, turn the barbecue burners to the ‘high’ position and burn for 5 minutes.
This procedure will burn off cooking residue, thus making cleaning easier.
Turning Off Your Barbecue
• When you have nished using your barbecue, turn all control valves fully clockwise to the ‘Off’
position, and then switch off the gas at the bottle. Wait until the barbecue is sufciently cool before
closing the hood.

Page 12
Care and Maintenance
• Regularly clean your barbecue between uses and especially after extended periods of storage.
• Ensure the barbecue and it’s components are sufciently cool before cleaning.
• Do not leave the barbecue exposed to outside weather conditions or stored in damp, moist areas.
• Never douse the barbecue with water when its surfaces are hot.
• Never handle hot parts with unprotected hands.
• In order to extend the life and maintain the condition of your barbecue, we strongly recommend
that the unit is covered when left outside for any length of time, especially during the winter
months.
• IMPORTANT – We recommend that servicing of this appliance should be performed either after
every 100 hours of use or annually, which ever is achieved soonest.
• Change the exible tube when the national conditions require it.
Caution
• Regularly clean your barbecue after every use.
• If you smell gas – turn off the barbecue, extinguish all ames, open the barbecue hood. If the
odour continues, immediately contact your gas supplier.
• In the event of an uncontrollable re, immediately disconnect the gas cylinder moving it away from
re and contact the re services. DO NOT PUT YOURSELF AT RISK!
• Ensure aerosols are not used near this unit when in use.
• Ensure all packaging and plastic bags are disposed of safely.
Cooking Grill
• Clean with hot soapy water.
• To remove any food residue, use a mild cream cleaner on a non-abrasive pad.
• Rinse well and dry thoroughly.
Burner Maintenance
• In normal usage, burning off the residue after cooking will keep the burners clean.
• The burners should be removed and cleaned annually, or whenever heavy build-up is found, to
ensure that there are no signs of blockage (debris, insects) in either the burner portholes or the
venturi tubes of the burners tted over the valve outlets.
Vapourising Bar
• Clean the vapourising bars with soap and warm water using a low abrasive cleaning cloth or
sponge.
Grease Tray
• IMPORTANT – Check and clean the grease tray regularly before every use and replace if
necessary. Do not allow the fat residue to build up in the tray.
• NEVER use without grease tray in position.
Barbecue Body
• Regularly remove excess grease or fat from the barbecue body with a soft plastic or wooden
scraper.
• It is not necessary to remove all the grease from the body. If you need to clean fully, use hot soapy
water and a cloth, or nylon-bristled brush only.
• Remove cooking surfaces and burners before full cleaning.
• Do not immerse the gas controls or manifold in water.
• Check burner operation after carefully retting into body.
Fixings
• All screws and bolts, etc. should be checked and tightened on a regular basis.

Page 13
Storage
• Store your barbecue in a cool dry place.
• Cover the burners with aluminium foil in order to prevent insects or other debris from collecting in
burner holes.
• If the barbecue is to be stored indoors, the gas bottle must be disconnected and left outside. The
gas bottle should always be stored outside, in a dry, well-ventilated area, away from any sources
of heat or ignition.
• Do not let children tamper with the bottle.
Warnings
This product is for OUTDOOR USE ONLY.
• Important – Ensure the barbecue is positioned on at level ground to aid with fat/grease run off.
• Important – LEAK TEST THE BARBECUE WHEN FULLY ASSEMBLED BEFORE FIRST USE IN
ADDITION always leak test the unit – annually, when dismantled, when parts are replaced, of
if the gas cylinder is removed or replaced. FAILURE TO DO THIS COULD CAUSE SERIOUS
INJURY, OR DAMAGE TO THE BARBECUE.
• Always ensure that changing of the gas cylinder is carried out away from any source of ignition.
• NEVER use indoor, in an enclosed area or below ground level.
• This barbecue is intended for use with LPG bottled gas only. (A regulator of 28mbar must be used
for Butane gas or 37mbar for Propane gas).
• This appliance has been supplied with a PROPANE REGULATOR (only use with Propane gas).
• This appliance must be serviced by a competent person in accordance with the instructions
included.
• NEVER use an adjustable regulator with this barbecue.
• Failure to read and follow these instructions could result in serious injury or damage to property.
• This product will become hot when in use – take care when touching.
• Keep children and pets at a safe distance from the unit when in use.
• DO NOT move this product when in use.
• Always turn off gas supply at the gas cylinder when not in use.
• Any modication of this barbecue may be dangerous.
• DO NOT leave this product unattended when in use.
• Any parts sealed by the manufacturer or his agent must not be altered by the user.
• ALWAYS position the gas cylinder underneath the main body and ensure the cylinder is vertical at
all times.
• When igniting, always have the lid open.
• ONLY use barbecue on a at LEVEL non-ammable surface or ground.
• When positioning, ensure the unit is a minimum of 1 metre from ammable items or structure.
• This barbecue is not intended for use with charcoal or other similar fuel.
• Always leak test the unit – annually, when dismantled, when parts are replaced, or if the gas
cylinder is removed or replaced.
• DO NOT use petrol, white spirit, lighter uid, alcohol or other similar chemicals to ignite the
barbecue.
• When storing the barbecue or gas cylinder, ensure they are away from ammable materials or
liquids.
•The gas cylinder must not be stored next to this or any other appliance.
• Always follow care and maintenance instructions – regularly maintain your barbecue.
• DO NOT allow grease, fat or food residue to build up in or on the barbecue – RISK OF FIRE.
• Always replace worn parts – do not use barbecue if a leak, wear, or damage is found.
• Never overload the grill with food – evenly space over the cooking grill surface, ensuring sufcient
air circulation to the burners.
• DO NOT store or cover the barbecue until fully cooled.
• This product is not suitable for Lava Rock.
DO NOT leave your BBQ uncovered when not in use. Store your appliance in a shed or garage
when not in use to protect against the effects of extreme weather conditions, particularly if you live
near coastal areas. Prolonged exposure to sunlight, standing water, sea-air/saltwater can all cause
damage to your appliance.
(A cover may not be sufcient to protect your appliance in some of these situations)

Page 14
• Accessible parts may be very hot. Keep young children away.
• Always wear protective gloves when handling hot components or items such as pots.
• A cooking vessel with a diameter no less than 10cm and no greater than 20cm should only be
used.
Food Cooking Information
Please read and follow this advice when cooking on your barbecue.
• ALWAYS wash your hands before or after handling uncooked meat and before eating.
• ALWAYS keep raw meat away from cooked meat and other foods.
• Before cooking ensure barbecue grill surfaces and tools are clean and free of old food residue.
• DO NOT use the same utensils to handle cooked and uncooked foods.
• Ensure all meat is cooked thoroughly before eating.
• CAUTION - eating raw or under cooked meat can cause food poisoning (e.g bacteria strains such
as E.coli)
• To reduce the risk of under cooked meat cut open to ensure it is cooked all the way through
internally.
• CAUTION - if meat has been cooked sufciently the meat juices should be clear in colour and
there should be no traces of pink/red juice or meat colouring.
• Pre-cooking of larger meat or joints is recommended before nally cooking on your barbecue.
• After cooking on your barbecue always clean the grill cooking surfaces and utensils.
Technical Data
CE Approval: 0086
Heat Input: Main Burner 5.2kW
Burner: 2 Burner
Injector Size: Main Burner 0.8mm
Gas/Pressure: Butane-28mbar/Propane-37mbar
Gas Consumption: 375 grams per hour
Gas Category: I3+
Specications are subject to change without prior notice.
This barbecue is manufactured by: Universal Innovations, Kilcoole Industrial Estate,
Kilcoole, Co. Wicklow, Ireland.

Page 15
BARBECUE GUARANTEE
This barbecue is made by Universal Innovations. It is made to an exacting
quality standard and is covered by the following guarantee.
The product is fully guaranteed for 2 years, regarding proper use.
THIS GUARANTEE DOES NOT AFFECT YOUR STATUTORY RIGHTS IN ANY WAY
HELPLINE Dublin Ireland: 00 353 1 2873797
or at
Email: [email protected] / Web: www.uigroup.ie
IF YOU NEED ANY ASSISTANCE PLEASE DO NOT HESITATE TO CONTACT
US AT THE FACTORY
DO NOT BRING GOODS BACK TO PLACE OF PURCHASE.
Refer to Care and Maintenance section for advise on proper use.
Following these guidelines will ensure better performance and maximum
lifetime of the barbecue.
Universal Innovations strive to lead the eld in product design and innovation.
If you have any comments regarding this product we would be delighted to
hear from you.
Troubleshooting
Problem Possible Cause Solution
Burner will not light using the LP gas cylinder is empty Replace with full cylinder
ignition system
Faulty regulator Have regulator checked or
replace
Obstructions in burner Clean burner
Obstructions in gas jets Clean jets and gas hose
or gas hose
Electrode wire is loose Reconnect wire
Electrode or wire is Change electrode and wire
damaged
Low ame or ashback (re in LP gas cylinder too small Use larger cylinder
burner tube - a hissing or
roaring noise may be heard)
Obstructions in burner Clean burner
Obstructions in gas jets Clean jets and gas hose
or gas hose
Windy conditions Use BBQ in a more
sheltered position
Gas valve knob difcult to turn Gas valve jammed Replace gas valve
If you have any queries or require advice or spare parts for this product, please call
our Customer Helpline Number +353 1 2873797
or for online help - Email: [email protected] / Web: www.uigroup.ie

Table of contents
Other Sahara Grill manuals