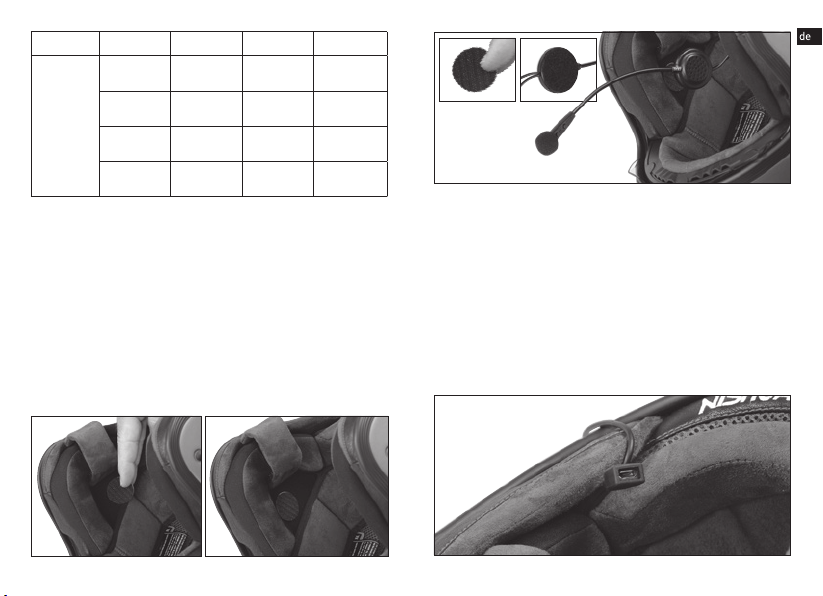
9
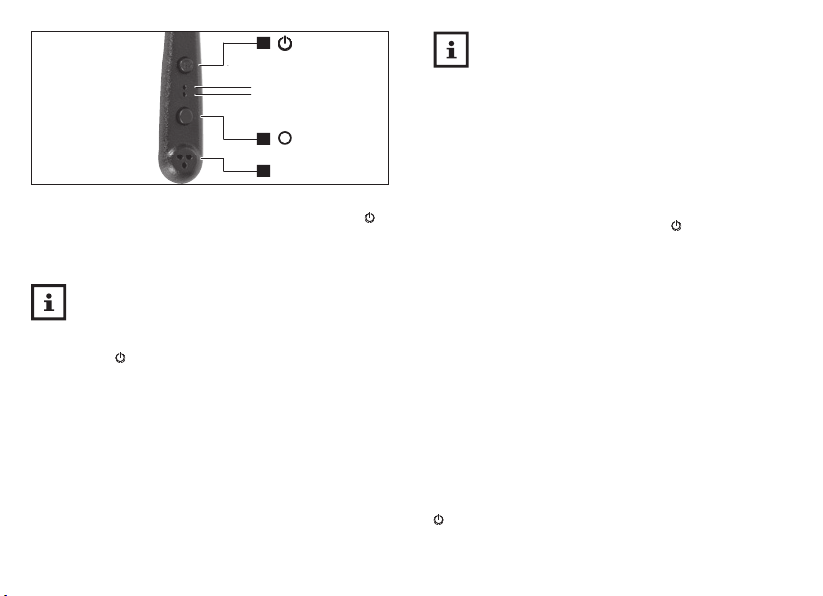
8.3 | Anrufe abweisen
Man kann einen eingehenden Anrufe abweisen, indem die
Powertaste 2 x kurz hintereinander gedrückt wird.
8.4 | Anrufe beenden
Soll ein angenommener Anruf beendet werden, 1 x kurz die
Powertaste drücken
8.5 | Wahlwiederholung
Soll die zuletzt gewählte Rufnummer erneut angerufen werden,
2 x kurz hintereinander die Powertaste drücken.
8.6 | Sprachsteuerung
Durch zweimaliges Drücken der Lautstärketaste ertönt ein
Signalton und es wird der Sprachassistent auf dem Smartphone
geöffnet. Legt man sich auf einen der möglicherweise mehreren
vorhandenen Sprachassistenten fest, kann dieser zukünftig nach
dem Betätigen der Lautstärketaste am Kommunikationssystem
geöffnet werden mit dem Aktivierungsbefehl (bspw. „Hey Google“,
„Alexa“ oder „Siri“) für Anrufe, das Abspielen von Musik, Wetterbe-
richte etc. genutzt werden.
9 | Abspielen von Musik
9.1 | Play/Pause
Um die bspw. per Sprachsteuerung gewünschte Musik abzuspielen
oder zu pausieren die Powertaste ca. 1 Sekunde lang drücken.
9.2 | Titel vor
Um während der Musikwiedergabe einen Titel weiterzuspringen,
die Powertaste 2 x kurz hintereinander drücken.
9.3 | Titel zurück
Möchte man während der Musikwiedergabe den Titel von vorne
bzw. einen vorausgegangenen Titel hören kann durch 2 x kurzes
Drücken der Lautstärketaste in der Playlist zurückgesprungen
werden.
10 |
Kopplung mit einem weiteren Kommunikations-
system zur Gegensprechanlage
Um während der Fahrt mit dem Sozius oder einem zweiten Fahrer
zu sprechen, lässt sich das saito Kommunikationssystem mit
einem weiteren saito Kommunikationssystem verbinden und so zu
einer Gegensprechanlage ausbauen.
10.1 | Kopplungsvorgang
Um zwei saito Kommunikationssysteme miteinander zu verbinden,
müssen beide eingeschaltet sein. Dann wird bei beiden Geräten die
Lautstärketaste 2 Sekunden lang gedrückt. Es ertönt die Ansage
„Pairing“ und die rote sowie die blaue Kontrollleuchte blinken
abwechselnd. An einem der beiden Kommunikationssysteme
wird jetzt kurz erneut die Lautstärketaste gedrückt. Es blinkt an
diesem Gerät nun die blaue Kontrollleuchte sehr schnell. War der
Kopplungsvorgang erfolgreich erlischt die blaue Kontrollleuchte
und am zweiten Gerät blinkt im langsamen Rhythmus die blaue
Kontrollleuchte. Anschließend am ersten Gerät (es leuchtet keine
Kontrollleuchte) kurz die Powertaste drücken und die Geräte sind
als Gegensprechanlage eingerichtet.
Einmal gekoppelte Geräte müssen diesen Vorgang nicht
erneut durchlaufen. Im eingeschalteten Zustand an einem
der beiden Geräte kurz die Powertaste drücken und die
Verbindung wird wieder hergestellt.
10.2 | Eingehen eines Anrufs
Ist das Kommunikationssystem zusätzlich mit einem Smartphone
gekoppelt und es geht ein Anruf ein, wird diesem automatisch Vor-
rang gewährt. Die Gegensprechfunktion wird außer Kraft gesetzt
und der Anruf kann angenommen bzw. abgewiesen werden wie in
Kapitel 8.2 bzw. 8.3 beschrieben.
Nach dem Beenden des Telefonats wird die Gegensprechfunktion
erneut hergestellt.