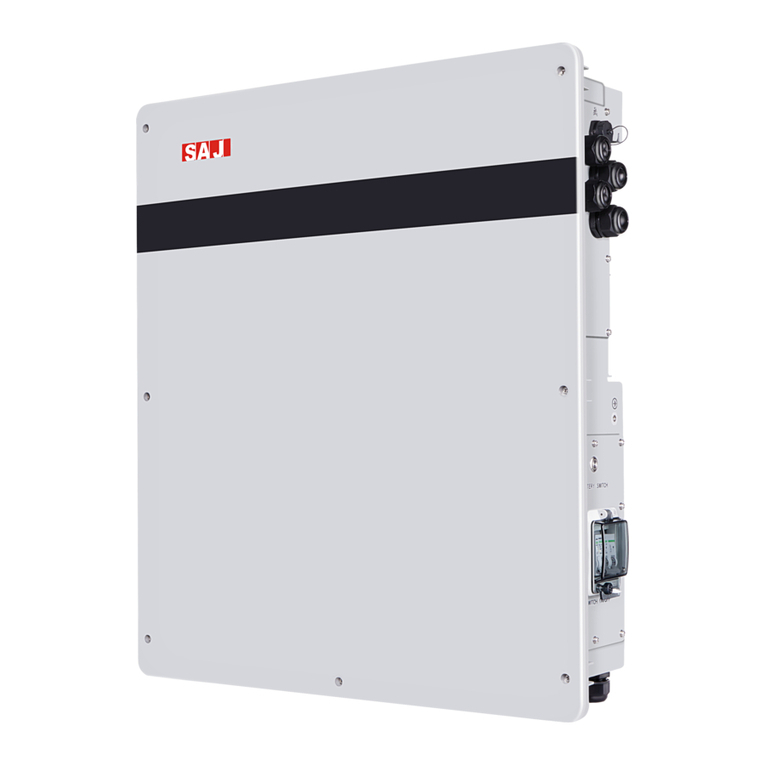
SAJ B2 Series User manual

B2 Series Battery
{=2*{page}-1}
Tel: (86)20 66608588 Fax: (86)20 66608589 Web: www.saj-electric.com
Add: SAJ Innovation Park,No.9, Lizhishan Road,Science City, Guangzhou High-tech Zone , Guangdong, P.R.China
GUANGZHOU SANJING ELECTRIC CO.,LTD
B2 Series
HIGH VOLTAGE BATTERY
USER MANUAL
B2-5.0-25.0-HV1

B2 Series Battery
{=2*{page}-1}
Preface
Thank you for choosing SAJ battery. We are pleased to provide you first-class products and exceptional
service.
This manual includes information for installation, operation, maintenance, trouble shooting and safety.
Please follow the instructions of this manual so that we can ensure delivery of our professional guidance
and wholehearted service.
Customer-orientation is our forever commitment. We hope this document proves to be of great
assistance in your journey for a cleaner, greener world.
Please check for the latest version at www.saj-electric.com
Guangzhou Sanjing Electric Co., Ltd.

B2 Series Battery
{=2*{page}-1}
1. SAFETY PRECAUTIONS ..........................................................................................................................1
1.1 Scope of Application ........................................................................................................................................................2
1.2 Safety Instructions ............................................................................................................................................................2
1.3 Target Group........................................................................................................................................................................2
2. PREPARATION..........................................................................................................................................3
2.1 Safety Instructions ............................................................................................................................................................4
2.2 Explanations Of Symbols................................................................................................................................................ 5
2.3 Battery Handling................................................................................................................................................................6
2.4 Emergency Situation........................................................................................................................................................ 6
3. PRODUCT INFORMATION.......................................................................................................................9
3.1 Application Scope of Products...................................................................................................................................10
3.2 Specification for Product Model ................................................................................................................................10
3.3 Overview of Productsl....................................................................................................................................................11
3.4 Battery Terminals Description.....................................................................................................................................11
3.5 Datasheet ...........................................................................................................................................................................13
4. INSTRUCTIONS FOR INSTALLATION ..................................................................................................15
4.1 Unpacking and Inspection...........................................................................................................................................16
4.1.1 Checking the Package....................................................................................................................... 16
4.1.2 Scope of Delivery................................................................................................................................ 16
4.2 Installation and Position............................................................................................................................................... 17
4.2.1 Installation Position and Clearance.............................................................................................. 17
4.2.2 Mounting Method............................................................................................................................... 19
4.3 Mounting Procedure...................................................................................................................................................... 20
4.3.1 Installation Tools.................................................................................................................................. 20
4.3.2 Mounting Procedure.......................................................................................................................... 21
5. ELECTRICAL CONNECTION..................................................................................................................29
5.1 Additional Grounding Cable ....................................................................................................................................... 30
5.2 Connecting Battery COMM Cable............................................................................................................................ 32
5.3 Connecting Battery Power Cable ............................................................................................................................. 33
5.4 Connecting Battery to Inverter ................................................................................................................................. 34
5.5 Communication Inteface.............................................................................................................................................. 35
5.6 Installation of Side Covers........................................................................................................................................... 36
6. COMMISSIONING...................................................................................................................................37
6.1 Start Up and Shut Down the Battery...................................................................................................................... 38
6.1.1 Start Up .................................................................................................................................................. 38
6.1.2 Shut Down ............................................................................................................................................. 38
6.2 Introduction of Human-computer Interface ........................................................................................................ 39
6.3 Commissioning................................................................................................................................................................. 40
7. Battery Maintanence.............................................................................................................................41
7.1 Transportation.................................................................................................................................................................. 42
7.2 Storage................................................................................................................................................................................ 42
8. Troubleshooting and Warranty............................................................................................................43
TABLE OF
CONTENTS

B2 Series Battery
1
2
SAFETY
PRECAUTIONS
1.1 Scope of Application
This User Manual describes instructions and detailed procedures for installing, operating, maintaining, and
troubleshooting of the following SAJ products:
B2-5.0-HV1; B2-10.0-HV1; B2-15.0-HV1; B2-20.0-HV1; B2-25.0-HV1;
1.2 Safety Instructions
DANGER
·DANGER indicates a hazardous situation which, if not avoided, will result in death or serious injury.
WARNING
·WARNING indicates a hazardous situation which, if not avoided, can result in death or serious injury or moderate injury.
CAUTION
·CAUTION indicates a hazardous condition which, if not avoided, can result in minor or moderate injury.
NOTICE
·NOTICE indicates a situation that can result in potential damage, if not avoided.
1.3 Target Group
Only qualified electricians who have read and fully understood all safety regulations contained in this manual
can install, maintain and repair the battery. Operators must be aware of the high-voltage device.
1.

B2 Series Battery
3
4
PREPARATION
2.1 Safety Instructions
For safety, be sure to read all the safety instructions carefully prior to any works, and please observe the
appropriate rules and regulations of the country or region where you installed B2 battery.
DANGER
·Please keep the power off prior to any operations
·Do not use the battery or the battery control unit if it is defective, broken or damaged.
·Do not expose the battery to temperatures in excess of 50°C.
·Do not subject the battery to any strong force.
·Do not place the battery near a heat source, such as direct sunlight, a fireplace.
·Keep inflammable and explosive dangerous items or flames away from the battery.
·Do not soak the battery in water or expose it to moisture or liquids.
·Do not use the battery in vehicles.
·Do not use the battery in areas where the ammonia content of the air exceeds 20ppm.
WARNING
·Only qualified personnel who has full knowledge of local safety regulations and local standards on battery can install,
maintain, retrieve and process this product.
·SAJ electric shall not be liable for any loss or warranty claims arising from any unauthorized change of product which may
cause fatal injury to the operator, third party or equipment performance.
·For personal and property safety, do not short-circuit the positive (+) and negative (-) electrode terminals.
CAUTION
·Do not modify or change any components in the battery.
·Risk of damage due to improper modification
·Use professional tools when operating the products.
NOTICE
·During installation of the battery B2 high voltage battery, circuit breaker must be disconnected from the battery pack wiring.
·The battery B2 can only be used as a set with SAJ's H2 high voltage series storage inverter, otherwise it cannot be used
normally.
2.

B2 Series Battery
5
6
2.2 Explanations of Symbols
Symbol
Description
Dangerous electrical voltage
This device is directly connected to public grid, thus all work to the battery shall only be carried out
by qualified personnel.
No open flames
Do not place or install near flammable or explosive materials.
Danger of hot surface
The components inside the battery will release a lot of heat during operation. Do not touch metal
plate housing during operating.
Attention
Install the product out of reach of children
An error has occurred
Please go to Chapter 7 “Troubleshooting”to remedy the error.
This device shall NOT be disposed of in residential waste
This battery module shall NOT be disposed of in residential waste
CE Mark
Equipment with the CE mark fulfills the basic requirements of the Guideline Governing Low-
Voltage and Electro-magnetic Compatibility.
Recyclable
2.3 Battery Handling
Operate and use the battery properly according to user manual, any attempt to modify battery without the permission from SAJ will void the limit
warranty for the battery.
•The battery must be installed at a suitable location with sufficient ventilation
•Do not use the battery if it is defective, damaged or broken.
•Only use the battery with compatible inverter.
•Do not use the battery with other type of battery.
•Make sure the battery is grounded prior to use.
•Do not pull out any cables or open the battery enclosure when the battery is powered on.
•Only use the battery as intended and designed.
2.4 Emergency Situation
Despite of its careful and professional protection design against any hazards, damage of the battery may still possible. If a small amount of battery
electrolyte is released due to a serious damage of the outer casing; or if the battery explodes due to not being treated timely after a fire breaks
out nearby, and leaks out poisonous gases such as carbon monoxide, carbon dioxide and etc., the following actions are recommended:
1)Eye contact: Rinse eyes with a large amount of running water and seek medical advice
2)Contact with skin: Wash the contacted area with soap thoroughly and seek medical advice
3)Inhalation: If you feel discomfort, dizziness or vomiting, seek medical advice immediately.
4)Use a FM-200 or Carbon Dioxide (CO2) fire extinguishers to extinguish the fire if there is a fire in the area where the battery pack is
installed. Wear a gas mask and avoid inhaling toxic gases and harmful substances produced by the fire.
5)Use an ABC fire extinguisher, if the fire is not caused by battery and not spread to it yet.
WARNING

B2 Series Battery
7
8
·If a fire has just occurred, try to disconnect the battery circuit breaker and cut off the power supply first, but only if you
can do so without endangering yourself.
·If the battery is on fire, do not attempt to extinguish the fire but evacuate the crowd immediately.
Potential danger of damaged battery:
Chemical Hazard: Despite of its careful and professional protection design against any hazard results, rupture of battery may still occur due
to mechanical damage, internal pressure etc., and may result in a leakage of battery electrolyte. The electrolyte is corrosive and flammable. When
there is fire, the toxic gases produced will cause skin and eyes irritation, and discomfort after inhalation. Therefore:
1) Do not open damaged batteries;
2) Do not damage the battery again (shock, fall, trample, etc.);
3) Keep damaged batteries away from water (except to prevent an energy storage system from catching fire);
4) Do not expose the damaged battery to the sun to prevent internal heating of the battery.
Electrical hazard: The reason of fire and explosion accidents in lithium batteries is battery explosion. Here are the main factors of battery
explosion:
1) Short circuit of battery. Short circuit will generate high heat inside battery, resulting in partial electrolyte gasification, which will stretch
the battery shell. The temperature reaching ignition point of internal material will lead to explosive combustion.
2) Overcharge of battery. Overcharge of battery may precipitate lithium metal. If the shell is broken, it will come into direct contact with the
air, resulting in combustion. The electrolyte will be ignited at the same time, resulting in strong flame, rapid expansion of gas and explosion.

B2 Series Battery
9
10
PRODUCT
INFORMATION
3.1 Application Scope of Products
The battery B2 is applied to residential photovoltaic storage system. The battery is built internally with a battery management system (BMS),
which is used to ensure efficiency of the battery and protect the battery from operating outside its specified limitations. B2 battery is a high
voltage battery system. The battery employs modular design for easy installation and wiring.
Figure 3.1
B2 battery application
3.2 Specification for Product Model
B2 –X.X –HV1
①②③
②B2 represents for product name.
②X.X represents rated energy XkWh of battery, for example, 5.0 means 5.0kWh.
③HV means high voltage.
3.

B2 Series Battery
11
12
3.3 Overview of Products
626
200
365
261
365
626
Figure 3.2
Dimensions of battery control unit and battery module
3.4 Battery Terminals Description
Figure 3.3 Battery control unit interface (left view and right view)
Position
Name
1
BAT +/BAT- port (to inverter)
2
Communication port (to inverter)
3
B+/B- port (to battery module)
4
Circuit breaker
5
Display
6
BAT+- port (for parallel connection)
7
Main switch
8
Communication port (to battery module)
9
Ground
10
Communication port (for parallel connection)
Table 3.1 Battery control unit interface
Figure 3.4 Battery module interface (left view & right view)
Code
Name
A
Link Port 0
B
Link port 1
C
Ground
D
B - port
E
B +port
Table 3.2 Battery module interface
1
3
24
5
6
789
10
AB
C
D
E

B2 Series Battery
13
14
3.5 Datasheet
Model
B2-5.0-HV1
B2-10.0-HV1
B2-15.0-HV1
B2-20.0-HV1
B2-25.0-HV1
Battery Module
BU2-5.0-HV1 (1P32S 102.4V50Ah)
No. of Modules
1
2
3
4
5
Rated Energy [kWh]
5.0
10.0
15.0
20.0
25.0
Usable Energy [kWh]
4.5
9.0
13.5
18.0
22.5
Dimension (H*W*D)[mm]
261*626*365
522*626*365
783*626*365
1044*626*365
1305*626*365
Weight [kg]
50.5
101
151.5
202
252.5
Nominal Voltage [V]
102.4
204.8
307.2
409.6
512
Operating Voltage [V]
89.6~115.2
179.2~230.4
268.8~345.6
358.4~460.8
448~576.0
Max. Charge Current [A]
30
Max. Discharge Current [A]
30
Short Time Withstand Current/
Conditional Short-circuit Current [A]
<10000
Control Module
BC2-HV1
Dimension (H*W*D)[mm]
200*626*365
Weight [kg]
11
General Data
Ingress Protection
IP65
Mounting
Wall-Mounted / Ground-Mounted
Operating Temperature Range
Charging: 0~50℃; Discharging: -10~50℃
Ambient Humidity
0~95% non-condensing
Cooling Method
Natural convection
Communication
CAN
Warranty [Year]
5/10
Applicable Standard
IEC62619(Cell&Pack)/EN62477-1/EN61000-6-1/2/3/4/UN38.3

B2 Series Battery
15
16
INSTRUCTIONS FOR
INSTALLATION
4.1 Unpacking and Inspection
4.1.1 Checking the Package
Although SAJ’s battery have thoroughly tested and checked before delivery, it is uncertain that the battery
may suffer damages during transportation. Please check the package for any obvious signs of damage, and if
such evidence is present, do not open the package and contact your dealer as soon as possible
4.1.2 Scope of Delivery
Please contact after sales if there are missing or damaged components.
Battery Control Unit Package
Battery control unit
M4*25 screw*6
Documents
Additional grounding cable
Side cover*2
M10*80 screw*2
M6*12 screw*2
Locking bracket*2
M4*10 screw*1
The documents include the user manual and packaging list.
4.

B2 Series Battery
17
18
Battery Module Package
Battery module
Side cover*2
M4*25 screw*4
Power cable
COMM cable
Locking bracket*2
Additional grounding cable
M4*10 screw*4
M4*10 screw*1
4.2 Installation Method and Position
4.2.1 Installation Position and Clearance
This device is cooled by natural convention and suggested an indoor installation or an installation under a
sheltered place to prevent the battery from exposure to direct sunlight, rain and snow erosion.
Figure 4.1
Installation location
Please reserve enough clearance around the battery to ensure a good air circulation at the installation area.
Because poor air ventilation will affect the working performance of internal electronic components and shorten
the service life of the system.
Figure 4.2
Installation clearance
Keep away from sunlight Keep dry Keep it clear of snow Sun Rain Accmulated snow

B2 Series Battery
19
20
4.2.2 Mounting Method
Figure 4.3
Mounting method
①The equipment employs natural convection cooling, and it can be installed indoor or outdoor.
②Mount vertically. Never install the battery tilted forwards, sideways, horizontally or upside down.
③When mounting the battery, please consider the solidity of wall for battery, including accessories, make
sure the wall has enough strength to hold the screws and bear the weight of products. Please ensure the
mounting bracket mounted tightly.
Installation Environment Requirements
•The installation environment must be free of inflammable or explosive materials.
•Install the battery away from heat source.
•Do not install the battery at a place where the temperature changes extremely.
•Keep the battery away from children.
Note: When installing outdoors, the height of the battery from the ground should be considered to prevent the
battery from soaking in water. The specific height is determined by the site environment.
4.3 Mounting Procedure
4.3.1 Installation Tools
Installation tools include but are not limited to the following recommended ones. Please use other auxiliary
tools on site if necessary.
Marker Measuring tape Utility knife
Multimeter
Measurement
range: 1100Vdc
Protective gloves Dust mask Earplugs Goggles
Insulated shoes
Heat shrink tubing Heat gun Hammer drill Rubber mallet
Phillips screwdriver
Wrench
√×
× × ×

B2 Series Battery
21
22
4.3.2 Mounting Procedures
The battery employs either ground mounting or wall mounting and its position is determined by the drilled
holes of bracket.
Ground Mounting
The ground should be flat and no inclination.
Step 1: Assemble the base. Adjust the height of foot cup, make sure the surface of base is horizontal.
Figure 4.4
Assembling the base
Step 2: Place the base on the ground, make sure the edge of base is 27mm away from wall. Place the battery
module on the base and secure it with screws (M4*10).
Figure 4.5
Securing the battery
Step 3: Stack the rest of the battery modules up and secure the battery modules with locking brackets by
screws (M4*10)
Figure 4.6
Securing battery modules
with locking brackets
Step 4: After the battery modules installation, mark the proper positions of battery control unit and drill holes
(13mm in diameter, 65mm in depth) on those positions by using the battery control unit as a template. Remove
the rubber feet for the top battery module before installing battery control unit.
Figure 4.7
Drilling holes to install
Battery control unit
Remove Rubber foot

B2 Series Battery
23
24
Step 5: Use a rubber hammer to drive the screw fixing seat into the holes to fix the bracket,use the wrench
to tighten the screws (M10*80 screw) to secure the battery control unit. Secure the locking bracket and battery
control unit with a screw (M6*12).
Figure 4.8
Installing battery control unit
Wall Mounting
Make sure that the wall is capable of mounting screws and supporting the weight of the battery pack before
installation. For safety reason, solid wall is recommended for wall mounting, cavity wall and timber wall are not
allowed to install the battery system.
Step 1: Assemble the bracket and secure it with screws
Figure 4.9
Assembling the bracket
Step 2: Mark the proper positions of mounting bracket and drill holes on those positions (13mm in diameter,
65mm in depth) by using the mounting bracket as a template, and then use a rubber hammer to drive the
screw fixing seat into the holes to fix the bracket.
Note: It is recommended to leave no gap between the bracket and ground.

B2 Series Battery
25
26
Figure 4.10
Drill holes’dimensions of
bracket
Step 3: Install the battery module on the bracket, make sure the battery module position fits with the position
of rubber feet on bracket, and use a screw(M4*10) to secure it with locking brackets.
Figure 4.11
Install the locking bracket
Step 4: After the battery modules installation, mark the proper positions of mounting bracket and drill holes
(13mm in diameter, 65mm in depth) on those positions by using the mounting bracket as a template. Remove
the rubber feet for the top battery module before installing battery control unit.
Figure 4.12
Drilling holes for installation of
battery control unit
Remove Rubber foot

B2 Series Battery
27
28
Step 5: Use a rubber hammer to drive the screw fixing seat into the holes to fix the bracket,use the wrench
to tighten the screws (M10*80 screw) to secure the battery control unit, secure the locking bracket and battery
control unit with a screw (M6*12).
Figure 4.13
Installing battery control unit

B2 Series Battery
29
30
ELECTRICAL
CONNECTION
5.1 Additional Grounding Cable
Electrical connection must only be operated by professional technicians. Before connection, necessary
protective equipment must be employed by technicians, including insulating gloves, insulating shoes and safety
helmet.
WARNING
·Connect this additional grounding cable before other electrical connection.
Note: The additional cable and OT/DT terminal should be prepared by user themselves.
Figure 5.1
Preparing additional grounding cable
1. Heat shrink tubing 2. OT/DT terminal
5.
12

B2 Series Battery
31
32
Remove the screw of grounding terminal and secure the additional grounding cable by insert a screw into the
screw hole in the OT/DT terminal. Connect the grounding cables as the following diagram.
Figure 5.2
Connecting the additional
grounding cable
5.2 Connecting Battery COMM Cable
Step1: Connect link port 0 of battery control unit to link port 1 of battery 5 (the battery number can be
varied, it should be depended on the number of battery modules in the system
Step 2: Repeat step 1 to connect the rest of the battery modules
Step 3: Insert a RJ45 plug to link port 0 of battery 1, insert a RJ45 plug to CAN port of battery control unit
Note: If the RJ45 plug is not installed, a communication error will occur.
Figure 5.3
Connecting battery COMM cable
RJ45 Plug
COMM
COMM
Battery 5
Battery 4
Battery 3
Battery 2
Battery 1
RJ45 Plug

B2 Series Battery
33
34
5.3 Connecting Battery Power Cable
WARNING
·Power off the battery system before connecting the power cable to avoid high voltage danger
··The electrical connection of high voltage battery systems must be operated by qualified technicians in accordance
with local and national power grid standards and regulations.
Step 1: Connect the power cable from B- port of battery control unit to B- port of the battery 5 (the battery
number can be varied, it should be depended on the number of battery modules in the system).
Step 2: Connect power cable from B+ port of battery 5 to B- port of battery 4.
Step 3: Repeat step 2 to connect the rest of the battery modules.
Step 4: Connect the B+ from battery control unit to B+ of battery 1.
Note: Please follow the following diagrams to connect cables.
Figure 5.4
Connecting battery power cables
5.4 Connecting Battery to Inverter
Please follow the following diagram to connect battery and inverter.
Inverter
COMM BAT+
BAT-
Figure 5.5
Connecting battery system to inverter
Battery
Control
Unit
Power cables
Power cables
Battery 1
Battery 2
Battery 3
Battery 4
Battery 5
This manual suits for next models
5
Table of contents
Other SAJ Camera Accessories manuals