4
9049 Tyler Blvd. • Mentor, Ohio 44060
Phone (440) 974-8888 • Fax (440) 974-0165
Toll-Free Fax 800-841-8003 • buyersproducts.com
1
2
3
4
5
6
7
3017793_E
Fig. 4
Fig. 5
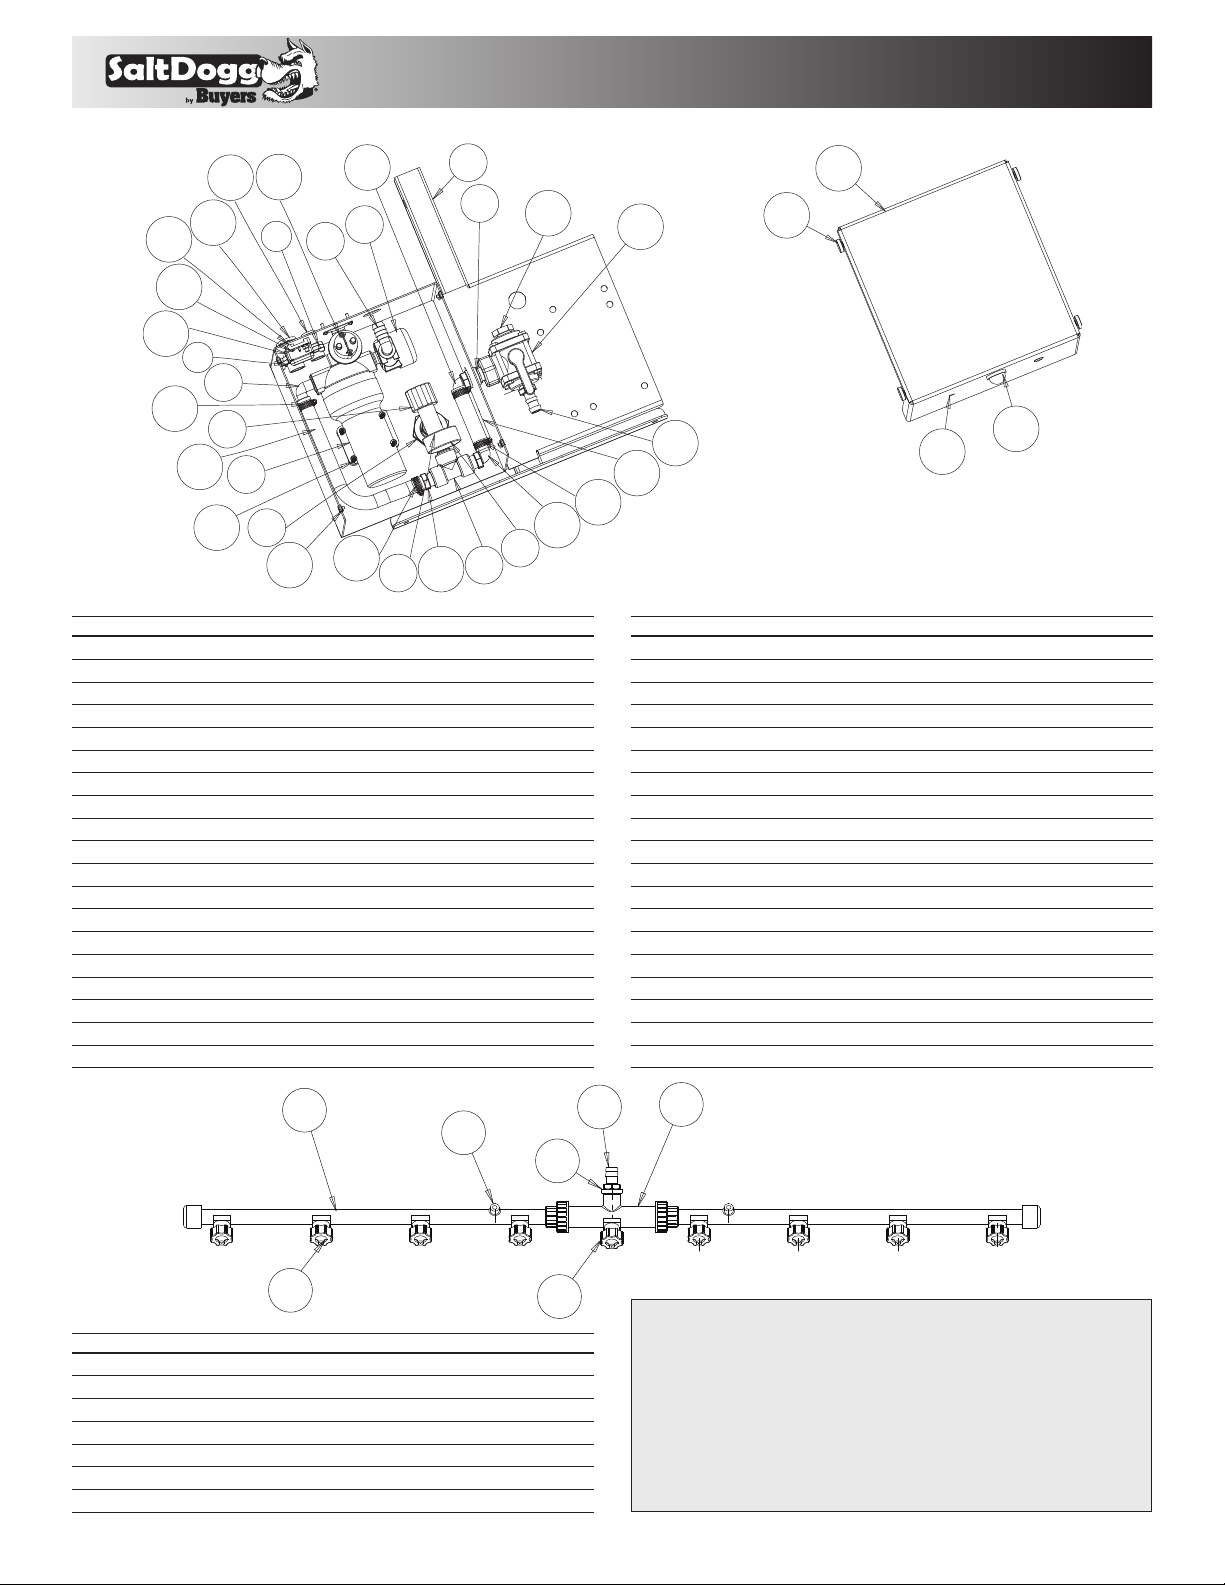
Bill of Materials
ITEM PART NO. QT Y. DESCRIPTION
13017780 1 Weldment, Base, Spray SYS
2 WSE90 A 1 Pump, 7 GPM, 80 PSI
3 WSE90 C 1 Strainer, Relief 1/2"
4 WSE90 D 2 Barb 90°, Quick Connect
5WSE92 1 Bulk Head Fitting 3/4"
6WSE102 2 Nipple, Hex, 3/4 x 3/4
7WSE93 1 Pressure Relief Valve, 3/4"
8HPGS100 1 Pressure Gauge 100 PSI
9WSE91 1 Tee Poly 3/4" x 3/4" x 3/4"
10 WSE99 2 Barb, Straight 3/4"
11 WSE112 1Barb, Hose, 90°
12 WSE116 1 3 Way Side Load Ball Valve
13 WSE126 1 Plug, 3/8 NPT, Poly
14 WSE128 5 in Hose 3/4" x 5"
15 3017789 1 Cover, Spray SYS, SS
16 5621534 1 Light, License Plate, LED
17 BBPF-3-8-3 2 Plug, Toolbox, Hanging Hole
18 WSE95 4 Clamp, Type F
19 3016933 4 Nut, Speed, U-Style, Extruded, 10-24
ITEM PART NO. QT Y. DESCRIPTION
20 3012194 4 Screw, Thumb Assembly, 10-24 x 3/4
21 WSE104 1 Strain Relief 1/2" NPT
22 WSE134 1 Strain Relief 3/4" NPT
23 WSE127 1 Hose 3/4" x 14"
24 WSE29 1 Nut, Plastic, 1/2" NPT
25 WSE105 1 Nut, Plastic, 3/4" NPT
26 WSE135 1Barb, Hose, 90°
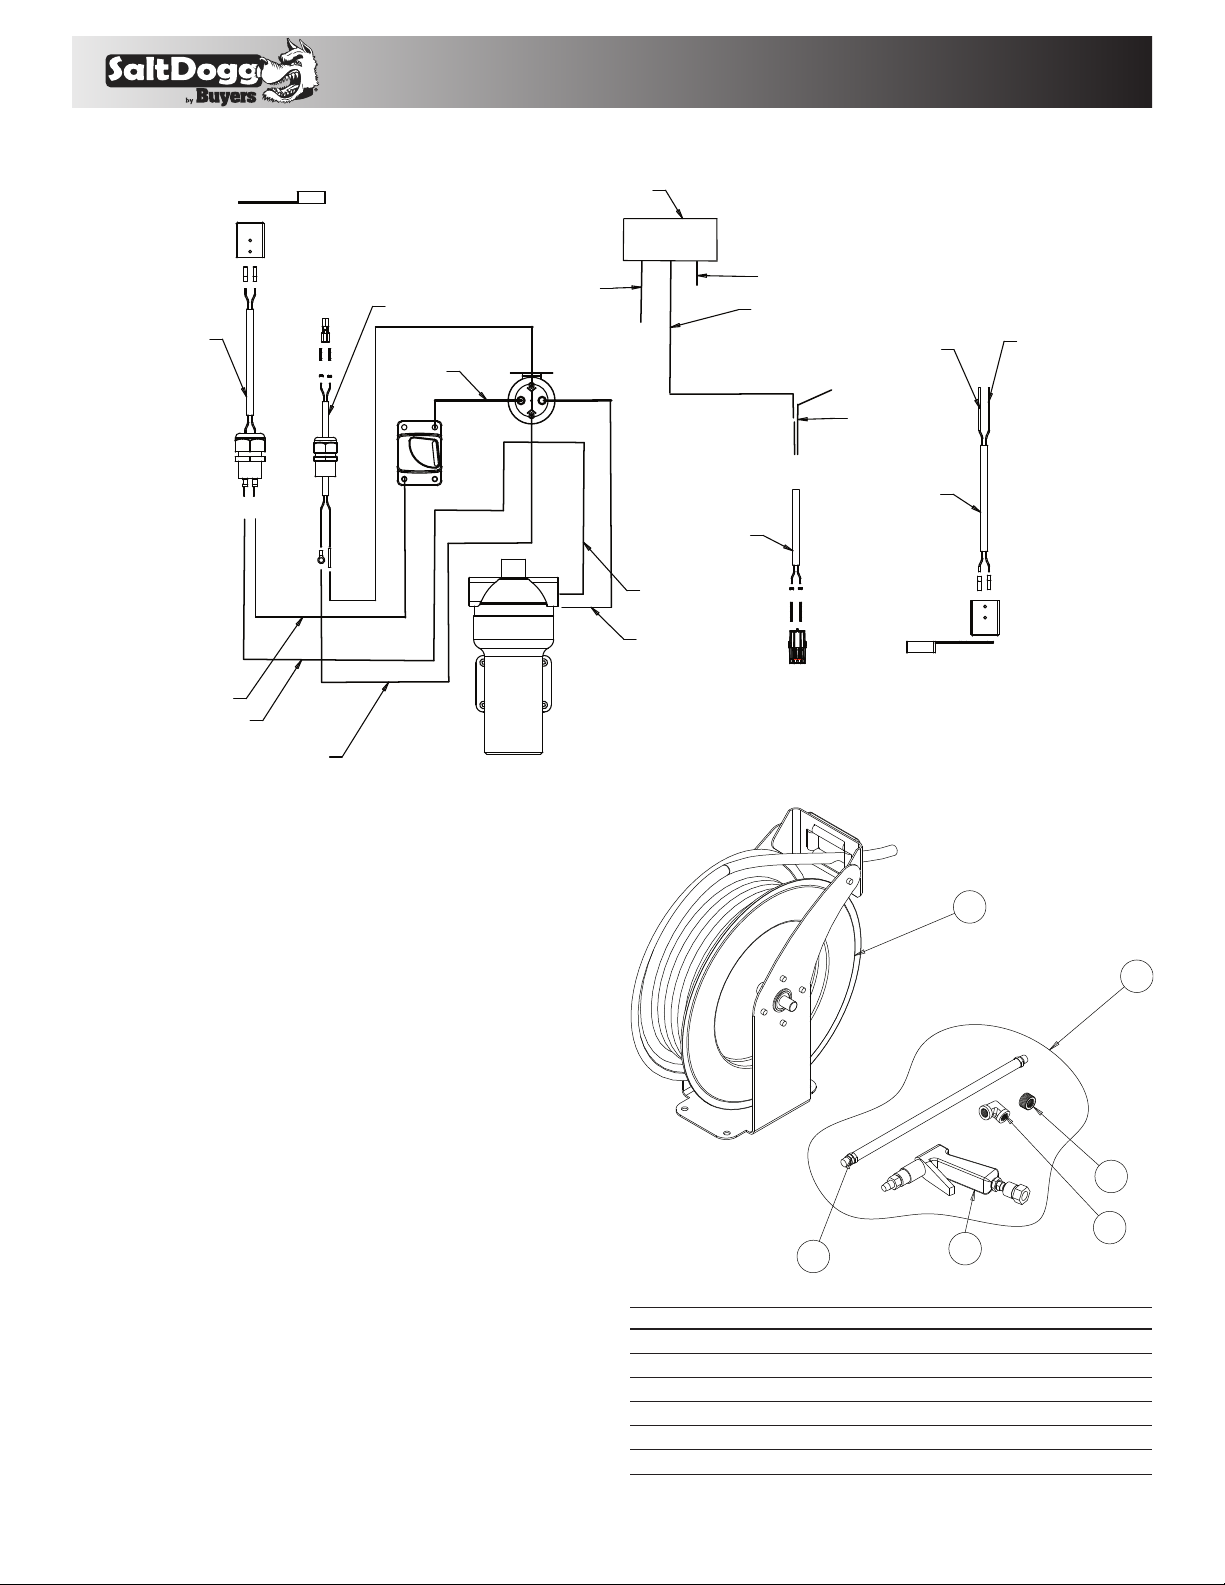
27 WSE153 1 Harness, 10 GA. 12" Long
28 WSE141 1 Wire Harness, 14 GA. 36" Spray SYS
29 WSE156 1 Jumper, 10 GA. 12" Long
30 CB30PB 1 Breaker, 30 AMP
31 FBSH01002475SS 4 Screw #10-24 x .75
32 FNE010024024SS 8 Nut, Elastic Stop 10-24 SS
33 13047191 1Solenoid
34 3032351 4 #10-24 x 1-1/2" Machine Screw
WSE26 – 55 Gallon Poly Tank
3042685 – 210 Gallon Poly Tank
3045169 – 325 Gallon Poly Tank
3042687 – 550 Gallon Poly Tank
Bill of Materials
ITEM PART NO. QT Y. DESCRIPTION
1WSE160 1 Tee, Spray Bar
2WSE162 1 Barb Threaded, 3/4" Hose
3WSE157 2 Pipe, 1" PVC
4WSE159 8 Nozzle, Spray System, .5 GPM Each
5WSE163 2 Bracket, Support w/3/8" Bolt
6WSE133 1 Nozzle, Spray System
7WSE140 1 Barb Threaded, 3/4" Hose
WARRANTY
Buyers Products Co. warrants all truck/trailer hardware manufactured or distributed by it, to be
free from defects in material and workmanship for a period of one year from date of shipment.
Parts must be properly installed and used under normal conditions. Any product which has been
altered, including modification, misuse, accident or lack of maintenance will not be considered under
warranty. Normal wear is excluded. The sole responsibility of Buyers Products Co. under this war-
ranty is limited to repairing or replacing any part or parts which are returned, prepaid, and are found
to be defective by Buyers Products Co. Authorization from Buyers Products Co. must be obtained
before returning any part. No charges for transportation or labor performed on Buyers’ products will
be allowed under this warranty.
17
20
1
2
5
6
7
8
9
10
3
4 12
11
14
15
16
13
21
22
23
10
4
18
18
18
19
26
6
30
31
32
33
34
24
25