BEFORE FIRST USE
1. Remove all packaging.
2. Remove the soleplate protection. If necessary, wipe the soleplate with
asoft cloth and a small amount of denatured alcohol. Wipe with a soft
dry cloth. Allow the soleplate to dry before heating.
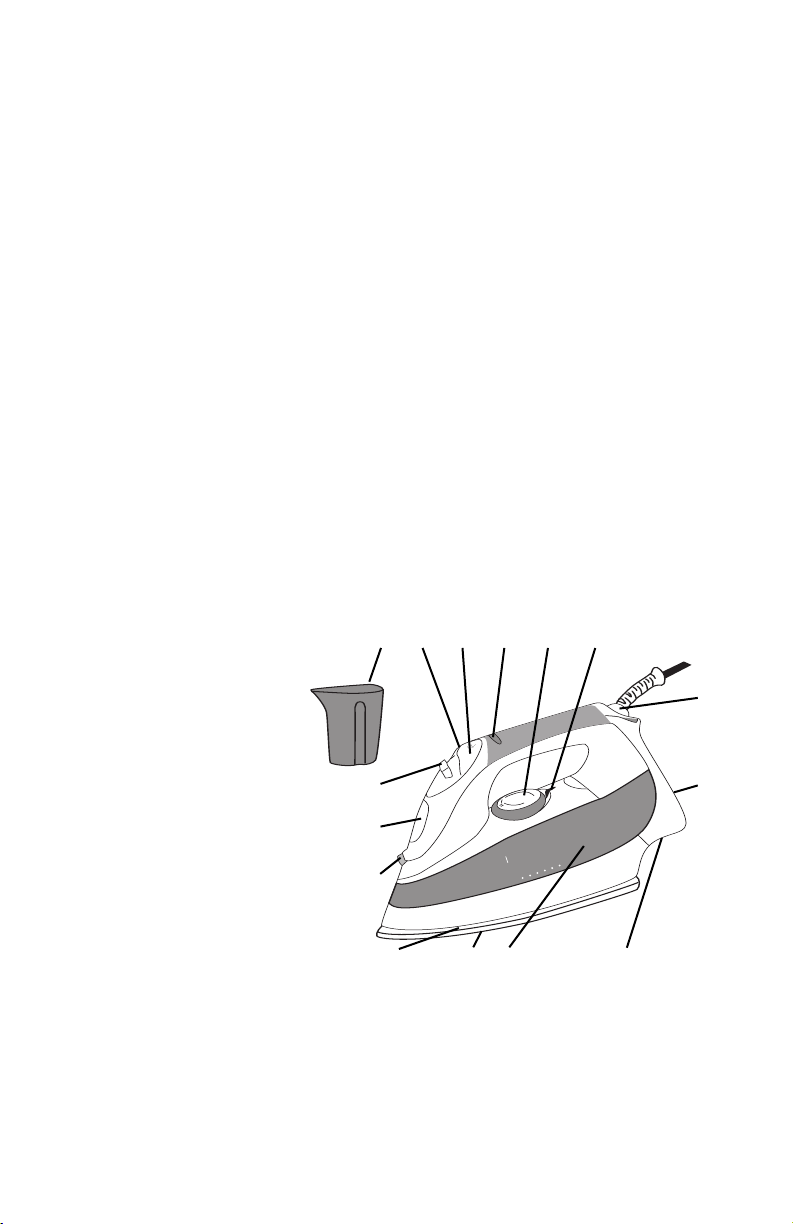
3. Fill the Water Reservoir with the supplied Water Jug. Empty out the Water
Reservoir to remove any foreign particles remaining in the Water Reservoir
from the manufacturing process. Never fill the Water Reservoir from a tap,
always use the supplied Water Jug. NOTE: Do not fill the Water Reservoir
above the MAX level indicated on the Water Reservoir.
4. When using the Iron for the first time, the Iron may give off vapours for
up to 10 minutes. This is due to the initial heating of the materials used.
This is normal and will only happen during the first use.
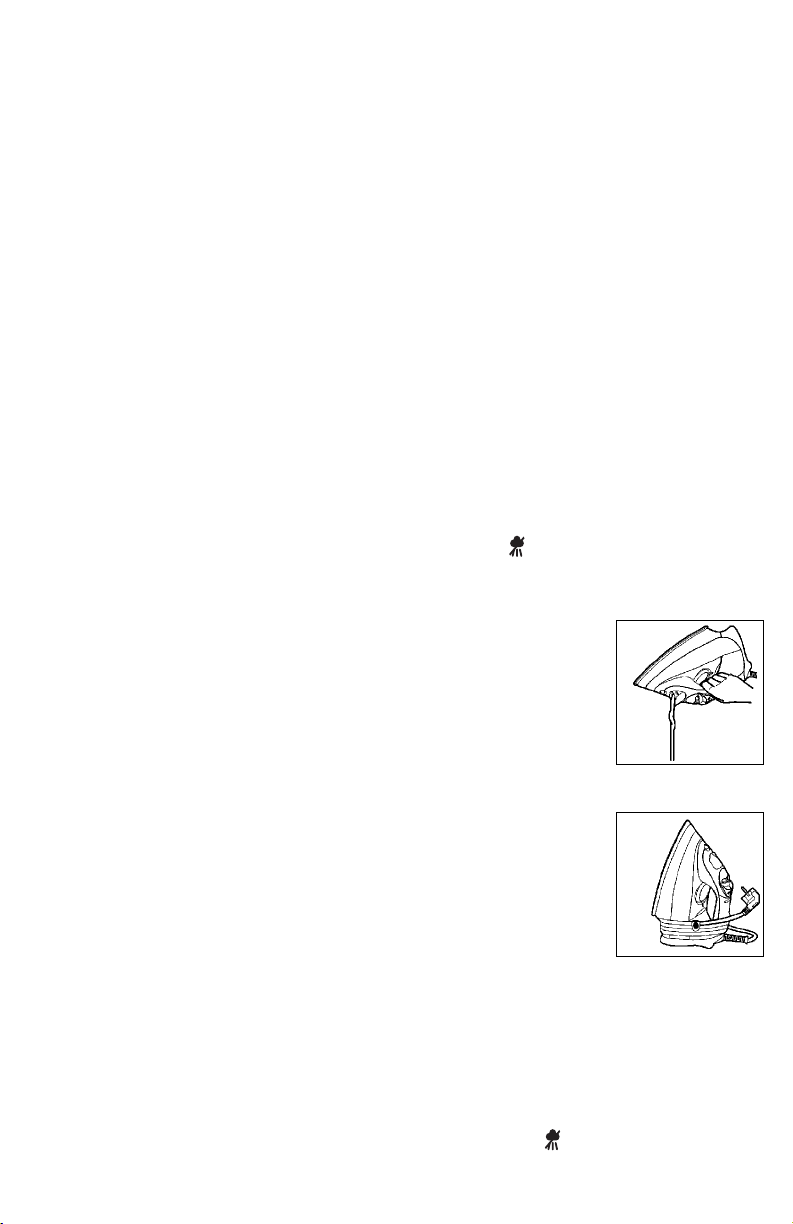
5. Toclean steam vents, follow the directions for steam ironing and iron
over an old cloth for a few minutes. Press the Shot of Steam Button
several times to clean the vents.
HOWTO USE
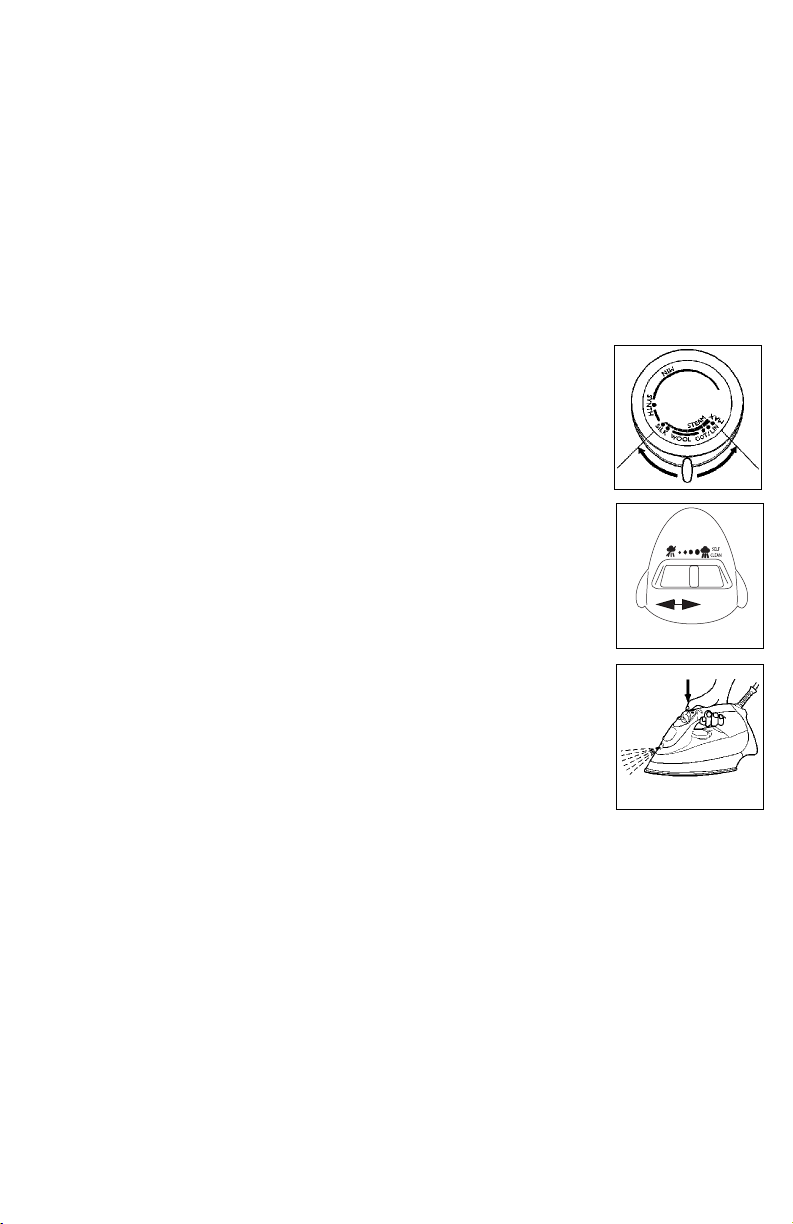
Setting the Temperature
1. Insert the plug into the wall outlet.
The Power ‘On’ Light at the top
of the handle will illuminate.
2. Sort the items to be ironed according to the
fabric type. Iron fabrics requiring the coolest
temperatures first. Work gradually to higher
temperatures. Both the temperature display
and most items of laundry have markings
corresponding with the following chart
(Ill. 2). NOTE: If you cannot determine what
type of fabric an item is made of, test the
item by ironing a small section on an inside seam.
3. Turn the Temperature Control Dial to the desired setting by aligning the
setting on the Temperature Control Dial with the Temperature Indicator
Light. The Temperature Indicator Light illuminates to show that the soleplate
is heating to the selected temperature. When the Temperature Indicator
Light goes out, the Iron has reached the selected temperature and
5
NOTE on label means: “This article cannot be
ironed!”(e.g. chlorofibre, acryl, elastodiene.)
Label (with
ironing
instruction)
kind
of
textile
velvet VELVET
synthetic
modacry
polypropylene
polyurethane
acetate
triacetate
metallized
cupro
polyamide(nylon)
polyester
modal
viscose (rayon)
(MAX
STEAM)
SYNTHETIC
silk SILK
wool WOOL
cotton COTTON
denim DENIM
linen LINEN
Temperature
Control
Display
Steamselector
(advised position)
DRY
Ill. 2
SAL6-487 Booklet Salton IRON IR_1031_EN_V3.qxd 31/07/06 16:25 Page 5