manuals.online logo
Brands
  1. Home
  2. •
  3. Brands
  4. •
  5. Samsung
  6. •
  7. Camcorder
  8. •
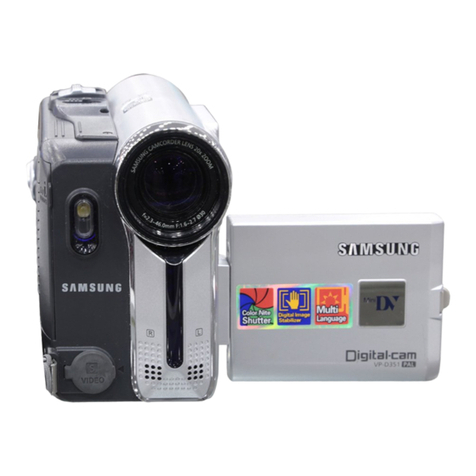
  9. Samsung SC-D6040 User manual

Samsung SC-D6040 User manual

Other manuals for SC-D6040

2

This manual suits for next models

1

Other Samsung Camcorder manuals

Samsung HMX-Q10BN User manual

Samsung

Samsung HMX-Q10BN User manual

Samsung HMX-W200RN User manual

Samsung

Samsung HMX-W200RN User manual

Samsung SC-HMX10C User manual

Samsung

Samsung SC-HMX10C User manual
Samsung VP-D6050 Owner's manual

Samsung

Samsung VP-D6050 Owner's manual

Samsung SC-L901 Setup guide

Samsung

Samsung SC-L901 Setup guide

Samsung SC-D305 Owner's manual

Samsung

Samsung SC-D305 Owner's manual

Samsung Hi8 SCL630 Owner's manual

Samsung

Samsung Hi8 SCL630 Owner's manual

Samsung VP-D20 User manual

Samsung

Samsung VP-D20 User manual

Samsung VP-D381I User manual

Samsung

Samsung VP-D381I User manual

Samsung SC-D453 Owner's manual

Samsung

Samsung SC-D453 Owner's manual

Samsung VP D 352 i User manual

Samsung

Samsung VP D 352 i User manual

Samsung VP-D30 User manual

Samsung

Samsung VP-D30 User manual

Samsung SC DX205 - Camcorder - 680 KP User guide

Samsung

Samsung SC DX205 - Camcorder - 680 KP User guide

Samsung VP-DX100(i) User manual

Samsung

Samsung VP-DX100(i) User manual

Samsung VP-D530 User manual

Samsung

Samsung VP-D530 User manual

Samsung HMX-U10RN User guide

Samsung

Samsung HMX-U10RN User guide

Samsung SC-D453 Owner's manual

Samsung

Samsung SC-D453 Owner's manual

Samsung SCD6550 - DuoCam MiniDV Camcorder Owner's manual

Samsung

Samsung SCD6550 - DuoCam MiniDV Camcorder Owner's manual

Samsung VP-D530 Owner's manual

Samsung

Samsung VP-D530 Owner's manual

Samsung Hi8 VP-W80 Owner's manual

Samsung

Samsung Hi8 VP-W80 Owner's manual

Samsung VP-D323 Owner's manual

Samsung

Samsung VP-D323 Owner's manual

Samsung VP-D363 User manual

Samsung

Samsung VP-D363 User manual

Samsung SMX-F40BN User manual

Samsung

Samsung SMX-F40BN User manual

Samsung SC-L630 Setup guide

Samsung

Samsung SC-L630 Setup guide

Popular Camcorder manuals by other brands

Vivitar DVR 830XHD owner's manual

Vivitar

Vivitar DVR 830XHD owner's manual

Panasonic HX-WA20PP Service manual

Panasonic

Panasonic HX-WA20PP Service manual

Sony HDR-AS10 operating guide

Sony

Sony HDR-AS10 operating guide

Canon FS1 instruction manual

Canon

Canon FS1 instruction manual

Sharp VL-H400S Operation manual

Sharp

Sharp VL-H400S Operation manual

Panasonic AJ-D900WAP operating instructions

Panasonic

Panasonic AJ-D900WAP operating instructions

Sony Handycam HDR-FX1E operating instructions

Sony

Sony Handycam HDR-FX1E operating instructions

Sony Handycam HDR-FX1000 Specifications

Sony

Sony Handycam HDR-FX1000 Specifications

Naxa NDC-402 instruction manual

Naxa

Naxa NDC-402 instruction manual

LG L320-BN owner's manual

LG

LG L320-BN owner's manual

Vivitar DVR 865HD user manual

Vivitar

Vivitar DVR 865HD user manual

Toshiba CAMILEO Z100 user guide

Toshiba

Toshiba CAMILEO Z100 user guide

Panasonic NV-VS40B operating instructions

Panasonic

Panasonic NV-VS40B operating instructions

Canon RC 260 instructions

Canon

Canon RC 260 instructions

Sony Handycam DCR-DVD7E operating guide

Sony

Sony Handycam DCR-DVD7E operating guide

Brinno TimeLapse TLC200 user manual

Brinno

Brinno TimeLapse TLC200 user manual

JVC GR-SXM68AC Schematic diagram

JVC

JVC GR-SXM68AC Schematic diagram

MYDLINK DCS-6100LH Quick installation guide

MYDLINK

MYDLINK DCS-6100LH Quick installation guide

manuals.online logo
manuals.online logoBrands
  • About & Mission
  • Contact us
  • Privacy Policy
  • Terms and Conditions

Copyright 2025 Manuals.Online. All Rights Reserved.

Camcorder Quick Start Guide
1. Attach the Battery Pack to the Camcorder.
2. Connect the AC Power Adapter to an AC Cord and connect
the AC cord to a wall socket.
3. Connect the DC Cable to the DC Jack Socket on the
Camcorder.
4. Turn the Camera Power Switch to off, and the charging indica-
tor will start to flash, showing that the battery is charging.
Battery charge time
SB - LS110 : Approx. 2hr
SB - LS220 : Approx. 3hr 30min
Connecting a Power Source
Preparation
Basic Recording
R
E
C
P
L
A
Y
OFFOFF
OFF
OFF
OFF
OFF
OFF
OFF
OFF
OFF
OFF
OFF
OFF
Power Switch
1 2
3
1. Insert the Lithium battery with the positive (+) terminal facing downward.
2. Insert a Cassette.
3. Select the appropriate OSD Language among English, French, Spanish, German
or Italian.
Press the MENU button.
Move the cursor to highlight INITIAL and press the OK button.
Using the DOWN button, select the LANGUAGE.
Press the OK button and select your language then press the OK button.
To exit, press the MENU button.
● CLOCK SET
Press the MENU button.
Move the cursor to highlight INITIAL and press the OK button.
The cursor is on the CLOCK SET menu. Press the OK button.
A blinking item indicates the item to be changed.
Using UP and DOWN button, change the value then press the OK button to
set.
The word COMPLETE! will appear, and a few seconds later, the menu
screen will automatically return to the sub menu.
1. Connect a Power source to the camcorder.
2. Remove the LENS COVER.
3. Set the Power Switch to the REC position.
4. To start recording, press the START/STOP button.
OFF
OFF
OFF
OFF
AD68-00779V
12
3 4
OFF
R
E
C
P
L
A
Y
OFFOFF
OFF
OFF
1
23
4
MENU button
OK button
UP button
DOWN button
1.Connect the camcorder to a TV with the AUDIO/VIDEO cable.
The yellow plug : Video
The white plug : Audio(L) - Mono
The red plug : Audio(R)
2. Set the Power Switch to the PLAY position.
3. Using the (FF) and (REW) buttons, find the first position
you wish to play back.
Press the (PLAY/STILL) button.
OFF
OFF
OFF
OFF
TAPE PLAYBACK
DSC Recording
DSC PLAYBACK
OFF
OFF
OFF
OFF
OFF
OFF
OFF
OFF
OFF
OFF
OFF
OFF
OFF
OFF
OFF
OFF
OFF
OFF
OFF
OFF
1 2
4
3
5
4
1. Turn the Power switch to OFF.
2. Insert the Memory Card into the Memory Card slot located on
the side of the Camcorder, in the direction of the arrow.
3. Set the Power Switch to
(CAMERA)
.
4. Turn the Mode Dial to the
(PROGRAM)
mode to take Still
Images.
To take motion clips, turn the Mode Dial to the
(MOVIE).
5. Still Image :
Press the PHOTO button to record a picture.
Motion Clip :
Press the START/STOP button to start
recording.
1. Turn the Power switch to OFF.
2. Insert the Memory Card into the Memory Card slot located on
the side of the Camcorder, in the direction of the arrow.
3. Set the Power Switch to
(CAMERA)
.
4. Turn the Mode Dial to the
(PLAY)
mode.
5. Still Image :
Using the 5-Way Button, browse your Still Images.
MPEG4 : Press the (PLAY/STILL) button to start play
back. You can use the (FF) and (REW)
buttons during the MPEG play back.
Press the (STOP) button to stop the play back.
S-VIDEO
Multi-AV
AUDIO(R)
AUDIO(L)
VIDEO
1 2 3
OFF
OFF
OFF
R
E
C
P
L
A
Y
OFF
OFF
STOP
STOP
FF
FF
REW
REW
PLAY/STILL
PLAY/STILL
MOVIE
MOVIE
PHOTO
PHOTO
R
E
C
P
L
A
Y
OFF
OFF
OFF
OFF
OFF
OFF
OFF
R
E
C
P
L
A
Y
OFF
OFF
OFF
OFF
OFF
R
E
C
P
L
A
Y
OFF
OFF
OFF
R
E
C
P
L
A
Y
OFF
OFF
OFF
OFF
OFF
1 2
5
3
5
4
5-Way Button