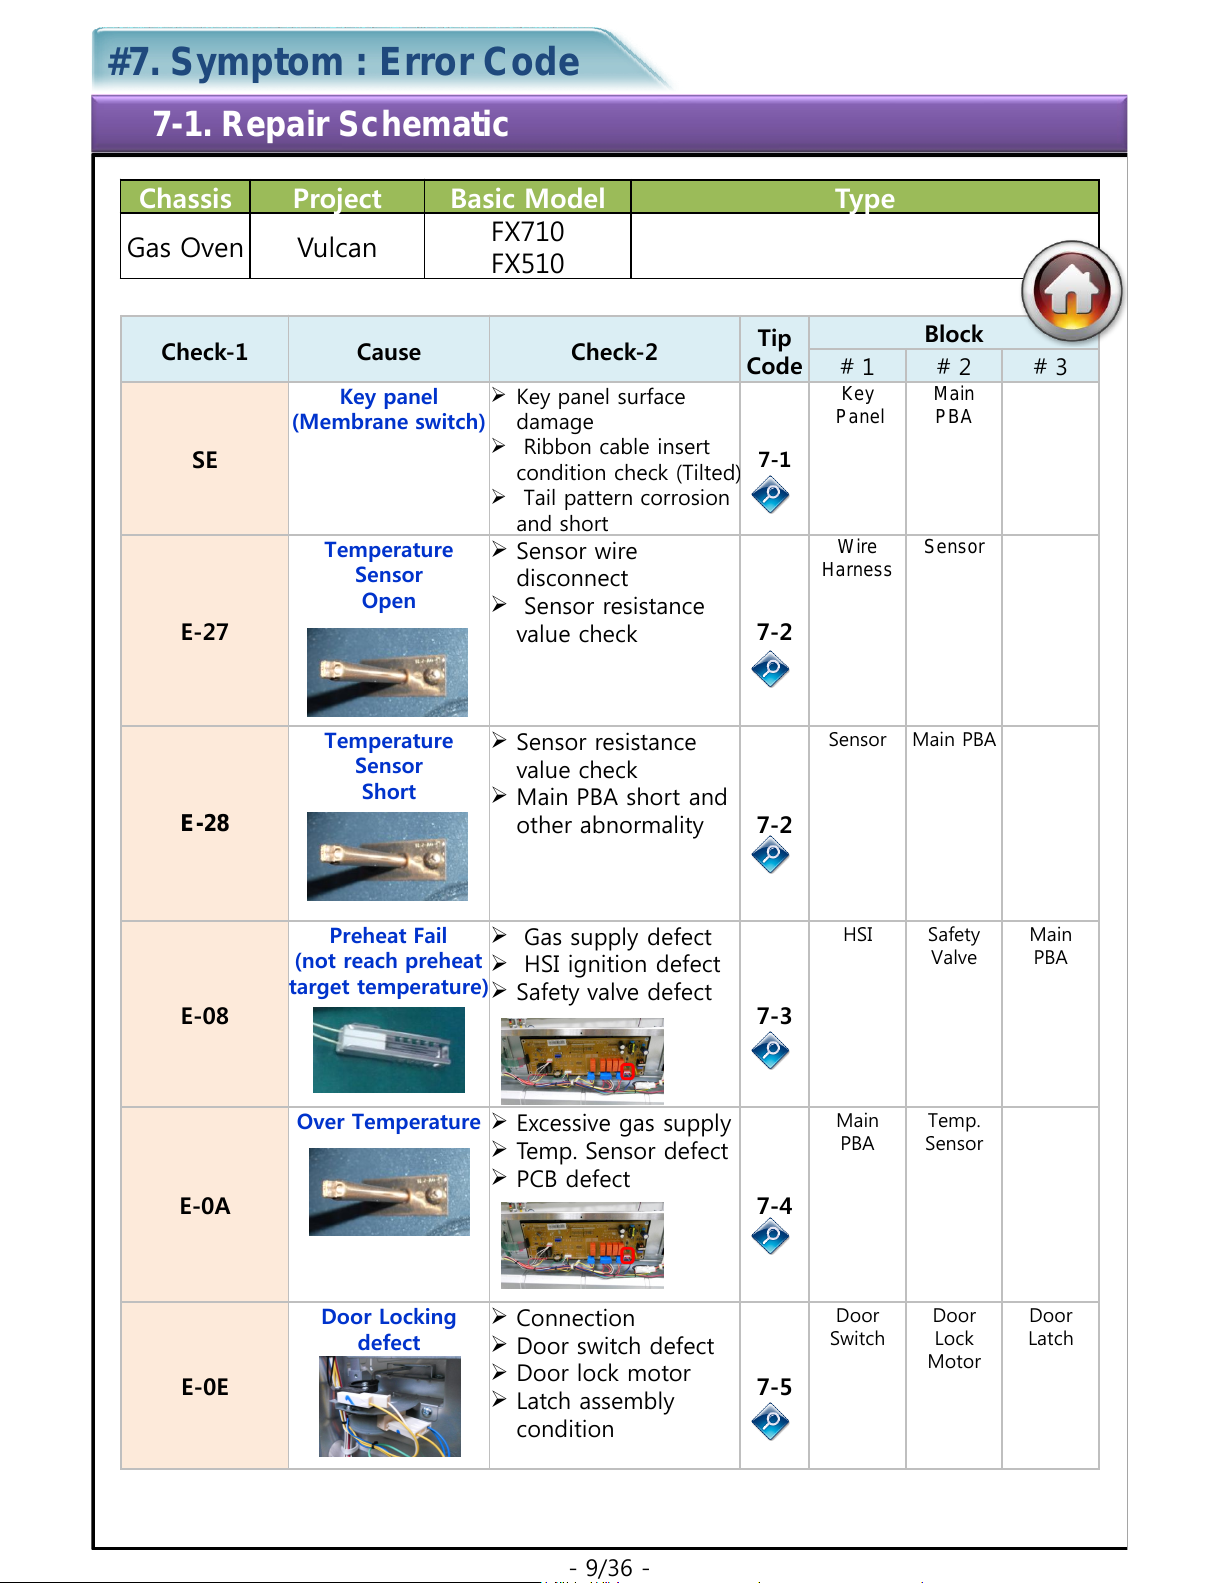
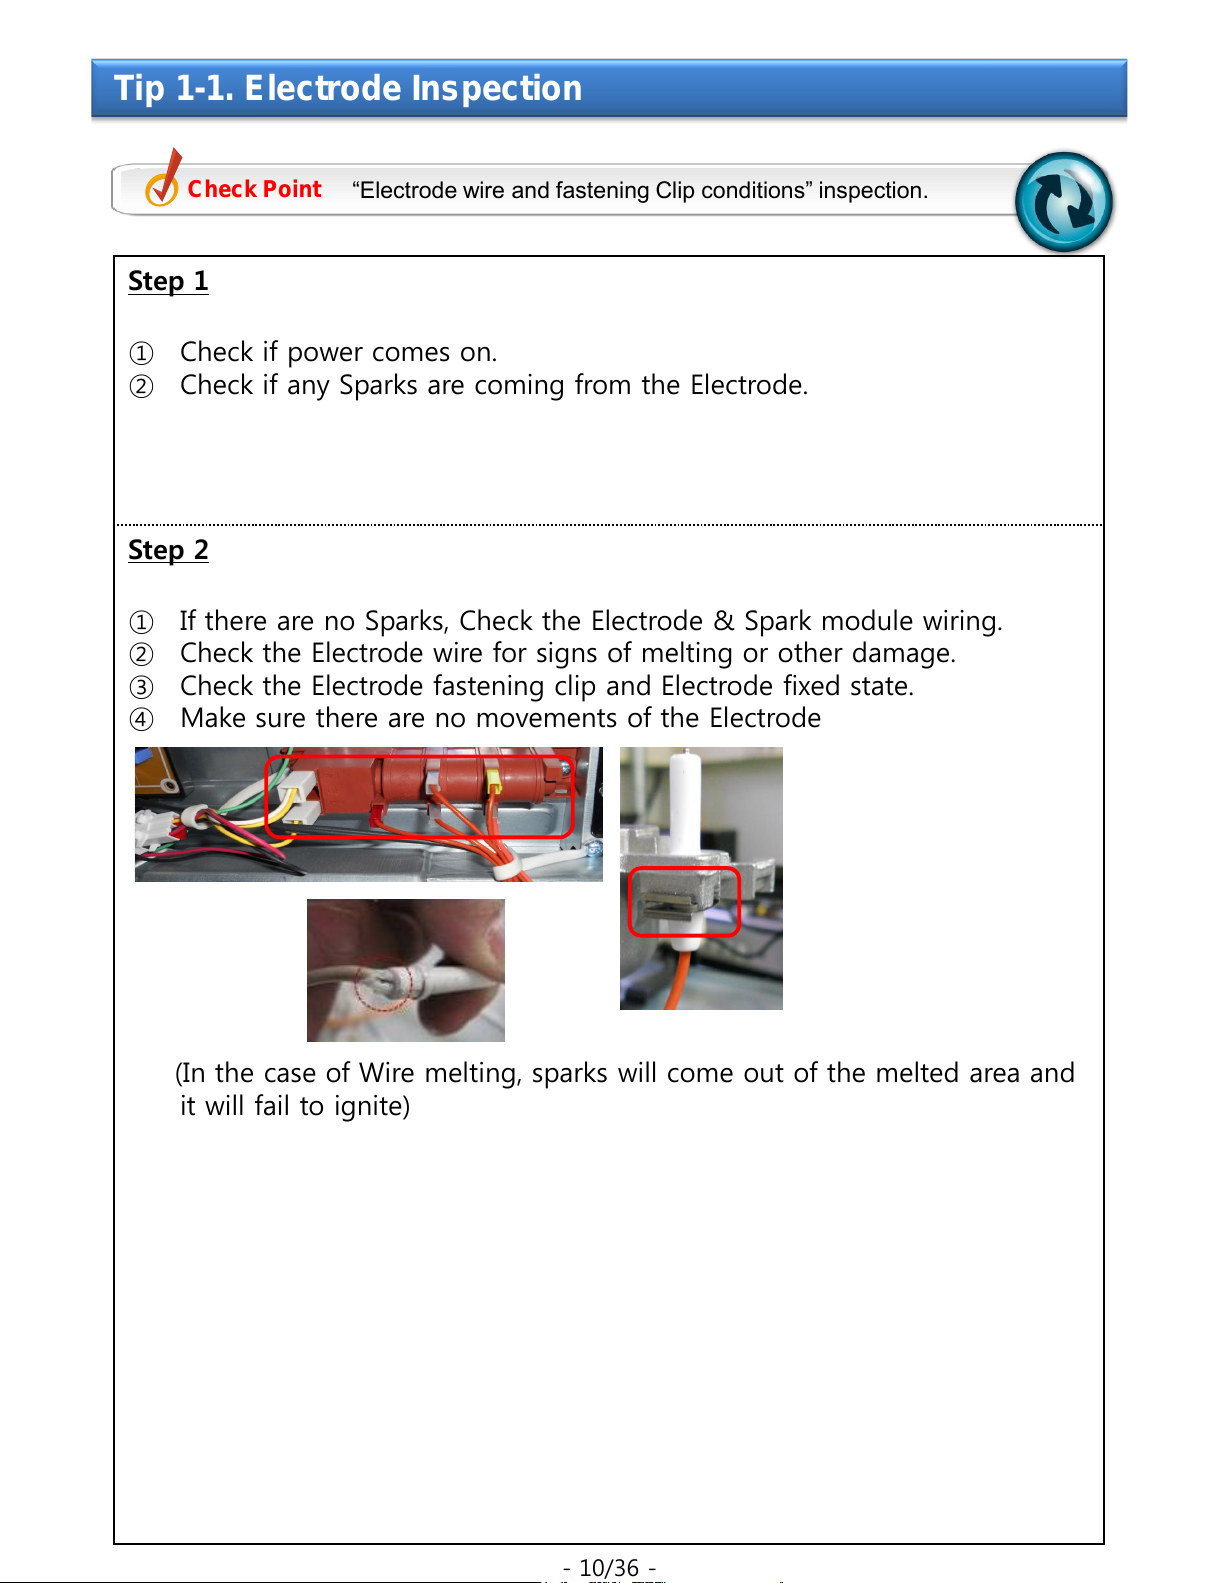
Samsung FX710 Series Assembly instructions
Other Samsung Oven manuals

Samsung
Samsung NQ50J9530 User manual

Samsung
Samsung NV70*55 Series User manual

Samsung
Samsung NQ50H5533KS Guide

Samsung
Samsung NQ50T9539BD User manual

Samsung
Samsung NV75N5641RS Guide

Samsung
Samsung BF1N4T123 User manual

Samsung
Samsung BQ1VQ6T012 User manual

Samsung
Samsung NV51K6650SG/AA User manual

Samsung
Samsung CQ1570U Use and care manual

Samsung
Samsung NV51T5511SS User manual

Samsung
Samsung NV70K1340BS/EF Guide

Samsung
Samsung NV75K5571RS Technical manual

Samsung
Samsung NV70K1340BS Guide

Samsung
Samsung NV7B667 Series Guide

Samsung
Samsung FQV213 User guide

Samsung
Samsung BF1 Series User manual

Samsung
Samsung FTQ352IWW User manual

Samsung
Samsung BT65TQBFST User manual

Samsung
Samsung NV51 5 D Series User manual

Samsung
Samsung BQ1D6T144 User manual