manuals.online logo
Brands
  1. Home
  2. •
  3. Brands
  4. •
  5. Samsung
  6. •
  7. Washer
  8. •
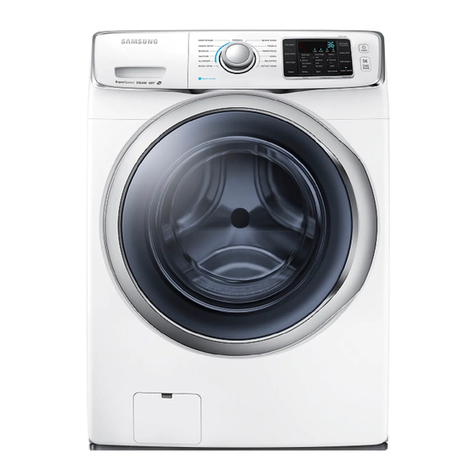
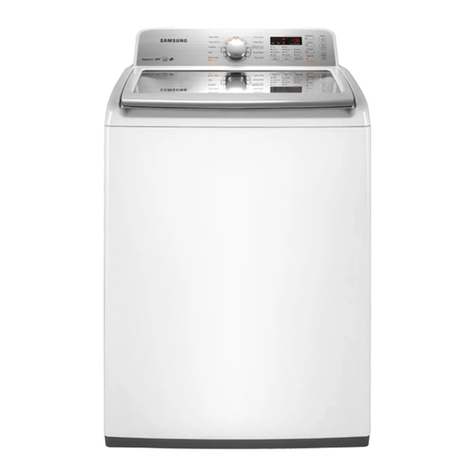
  9. Samsung WF42H5000 Operating instructions

Samsung WF42H5000 Operating instructions

Fast Track Troubleshooting
Model: WF42H5000
WF42H5200
Publication #Dr WF42 Production Date 9/2/14
IMPORTANT SAFETY NOTICE – “For Technicians Only” This service data sheet is
intended for use by persons having electrical, electronic, and mechanical experience and knowledge
at a level generally considered acceptable in the appliance repair trade. Any attempt to repair a
major appliance may result in personal injury and property damage. The manufacturer or seller
cannot be responsible, nor assume any liability for injury or damage of any kind arising from the use
of this data sheet.
Bulletins:
Support Information:
HELP: 1-888-751-4086 (Tech Sup. – ASC/SSD) -1-866-894-0637 (Tech Sup. - FE/ME)
GSPN: http://gspn3.samsungcsportal.com/main.jsp
PLUS ONE: http://my.plus1solutions.net/clientPortals/samsung
**With the Power On**
**Test Mode** With the Power Off
SERVICE MODE:WITH POWER ON - PRESS: Soil Level + Delay End
TEST FUNCTION PRESS
1 Cycle Count Temp
2 Version Soil Level
3
Board Input Test (Move Jog
dial to check LED) (See Chart
at bottom)
Delay End
4 DIAGNOSTIC ERROR CODE
CHECK (See Below)
SPIN - (“d” will start flashing) Turn dial
either clockwise (c.w) or counter c.w.
5 SPIN TEST ( RPM) (ref:
NB***)
Pre Wash + Soil Level for 3sec. (To Pause:
press - START/PAUSE)
QUICK TEST MODE:WITH POWER OFF - PRESS: Spin + Soil Level + POWER
NB*** Spin Test will NOT test Hall Sensor in this mode. NOTE: ALWAYS
remember to offset counter weight when spin testing an empty machine
FACT: It is NORMAL for this unit to be unbalanced until 350-400 RPM –
counter weights will only align correctly after this RPM is reached
•Activate the SERVICE MODE first (ref: above).
•Press the SPIN key to start DIAGNOSTIC CODE check mode. “d” will start flashing.
•To cycle through the diagnostic codes (d1, d2, d3, etc.), turn the rotary cycle selector
(knob) either clockwise or counter clockwise.
•When turning the rotary selector key (knob) in one direction, it shows diagnostic codes
from the latest (d1).
•Now when turning the knob in the opposite direction it shows the diagnostic codes in the
reverse order. E.g. When it stops at “d5” and then turn backwards, it shows from “d4” to
“d”. (Refer to Diag. Code interpretation).
Service mode Option 4:
DIAGNOSTIC ERROR CODE CHECK
Use the Board input test under service mode to test water temp,
during normal wash operation.
Service mode Option 3:
Board Input Test Chart
TEST FUNCTION PRESS
1 Water Valve Test
TEMP
**Door Lock Must be Activated 1st
before running Component **
2 Door Lock SPIN
3 Heater SUPER SPEED
4 Drain Pump /Bubble Pump SOIL
5 EEPROM MEMORY CLEAR DELAY END + POWER (with POWER OFF)
LED 1st LED is on 2nd LED is on
3rd LED on 4th LED On 5th LED on
Display Water Temp
C
Water Temp
F
Door Status
OP=Open
CL=Closed
Door lock
sw Status
UL=
unlocked
LO=Locked
Water
Frequency
Touch sensitive keys on these models make it difficult to enter. Multiple
attempts might be necessary , make sure fingers are clean and dry.
1. Check the water level sensor
frequency. Frequency should be
approx 25.5 – 26.5 when empty.
Approx 24.5 when full
2. Disconnect the connector and
check resistance Pin 1 & 2 / 2 & 3
should be OPEN, if resistance is
read between these points you
have a short replace sensor
switch. Pin 1 & 3 resistance is
normal.
1.
3.
2.
Note: Some errors do not display or get recorded to
memory until running a cycle 3 times!
( Drain pump will run for 3mins but stops, screen
remains on but washing does not continue ) If this is
happening press start to run again, during the 3rd
attempt the error will display on the screen and get
recorded to memory.
Additional Error codes
Sd
Main PCB
Motor
Connector
Communication
Connector
Hall Sensor
Connector
Step 1: Put your black lead on the stator motor CN6 Pin1 and Red lead measure CN2 pin 1- 2 -3 -4 all
measurements should be approx 4.6.
Step 2: Put your black lead on the stator motor CN6 Pin 1 and Red lead measure CN1 pin 1-2-3 all
measurements should be approx 4.6.
Step 3: Move the black lead to CN6 Pin2 and repeat steps above.
Step 4: Move the black lead to CN6 Pin3 and repeat steps above.
All measurements should be around 4.6 ohms.
Checking the Inverter Board Test 1

This manual suits for next models

1

Other Samsung Washer manuals

Samsung WA95V9 User manual

Samsung

Samsung WA95V9 User manual

Samsung WA80V3WEP/XSG User manual

Samsung

Samsung WA80V3WEP/XSG User manual

Samsung WE357A7W User manual

Samsung

Samsung WE357A7W User manual

Samsung WA62H3H3 User manual

Samsung

Samsung WA62H3H3 User manual

Samsung WA54CG7105A Series User manual

Samsung

Samsung WA54CG7105A Series User manual

Samsung J1043 User manual

Samsung

Samsung J1043 User manual

Samsung WA85F5S3 User manual

Samsung

Samsung WA85F5S3 User manual

Samsung WA45K7100A series User manual

Samsung

Samsung WA45K7100A series User manual

Samsung KTT5025AWE/YY User manual

Samsung

Samsung KTT5025AWE/YY User manual

Samsung WF8604FF(A/C/D/F/G/H/R/S/T/V/W/Z) User manual

Samsung

Samsung WF8604FF(A/C/D/F/G/H/R/S/T/V/W/Z) User manual

Samsung WF431ABF/XAA User manual

Samsung

Samsung WF431ABF/XAA User manual

Samsung WD-J1255(V/S/C/R) Owner's manual

Samsung

Samsung WD-J1255(V/S/C/R) Owner's manual

Samsung WF455ARGSWR/AA Manual

Samsung

Samsung WF455ARGSWR/AA Manual

Samsung WF350AN Series User manual

Samsung

Samsung WF350AN Series User manual

Samsung WA45T3200AW/A4 User manual

Samsung

Samsung WA45T3200AW/A4 User manual

Samsung WF1124XAU User manual

Samsung

Samsung WF1124XAU User manual

Samsung WA52M7750A Sereis User manual

Samsung

Samsung WA52M7750A Sereis User manual

Samsung WA10K2 User manual

Samsung

Samsung WA10K2 User manual

Samsung SW80ASP User manual

Samsung

Samsung SW80ASP User manual

Samsung WA7750M User manual

Samsung

Samsung WA7750M User manual

Samsung WD18H7 SERIES User manual

Samsung

Samsung WD18H7 SERIES User manual

Samsung Q1290 User manual

Samsung

Samsung Q1290 User manual

Samsung WF397UTPAGR User manual

Samsung

Samsung WF397UTPAGR User manual

Samsung WF461ABW User manual

Samsung

Samsung WF461ABW User manual

Popular Washer manuals by other brands

LG T1503TEFTO owner's manual

LG

LG T1503TEFTO owner's manual

Electrolux EW7F3846HS user manual

Electrolux

Electrolux EW7F3846HS user manual

Bosch WAU28TM9SN User manual and installation instructions

Bosch

Bosch WAU28TM9SN User manual and installation instructions

GEAppliances WCSE6270 owner's manual

GEAppliances

GEAppliances WCSE6270 owner's manual

Bosch WAW28660GB Instruction manual and installation instructions

Bosch

Bosch WAW28660GB Instruction manual and installation instructions

GE GE Energy Star WBVH5300K Dimensions and installation information

GE

GE GE Energy Star WBVH5300K Dimensions and installation information

Beko WMB 71432 S manual

Beko

Beko WMB 71432 S manual

LG WT7800CWH owner's manual

LG

LG WT7800CWH owner's manual

Asko W600 Use & care guide

Asko

Asko W600 Use & care guide

Amana Top Loading Washer owner's manual

Amana

Amana Top Loading Washer owner's manual

LG WD-3243RHD Service manual

LG

LG WD-3243RHD Service manual

LG WF-H700PC owner's manual

LG

LG WF-H700PC owner's manual

Hotpoint AQUALTIS AQ9L 29 U Instructions and installation for use

Hotpoint

Hotpoint AQUALTIS AQ9L 29 U Instructions and installation for use

Akai AK-95WM instruction manual

Akai

Akai AK-95WM instruction manual

Beko WTL84111B user manual

Beko

Beko WTL84111B user manual

Bosch WGG256ZXES User manual and installation instructions

Bosch

Bosch WGG256ZXES User manual and installation instructions

AEG L8FEE842 user manual

AEG

AEG L8FEE842 user manual

Indesit BWA 71053X W IT Instructions for use

Indesit

Indesit BWA 71053X W IT Instructions for use

manuals.online logo
manuals.online logoBrands
  • About & Mission
  • Contact us
  • Privacy Policy
  • Terms and Conditions

Copyright 2025 Manuals.Online. All Rights Reserved.