- 3 -
S
S
SA
A
AM
M
MS
S
SU
U
UN
N
NG
G
G
U
U
US
S
SB
B
B
P
P
PC
C
C
C
C
Ca
a
am
m
me
e
er
r
ra
a
a
I
I
In
n
ns
s
st
t
ta
a
al
l
ll
l
la
a
at
t
ti
i
io
o
on
n
n
G
G
Gu
u
ui
i
id
d
de
e
e
1. Before the installation
• Check your PC system if it is superior than the following
Minimum System
Requirements. In case of inferiority, it may cause the
installation error
or malfunction of the camera.
•Minimum System Requirements
- USB support Host PC
- Pentium 200MHz MMX (233MHz MMX or faster recommended)
- Windows 98/2000
- 32MB RAM (64MB recommended)
- 100MB hard disk space available
- CD-ROM drive
- 800x600, 16 bit color display (1024x768 recommended)
- Microsoft Internet Explorer for video e-mail
- LAN card or 56.6K bps modem for Video Conference
- Windows compatible sound card (full duplex sound card
recommended)
- Speakers required for receiving audio
- Microphone required for sending audio
• Power on the PC and start Windows.
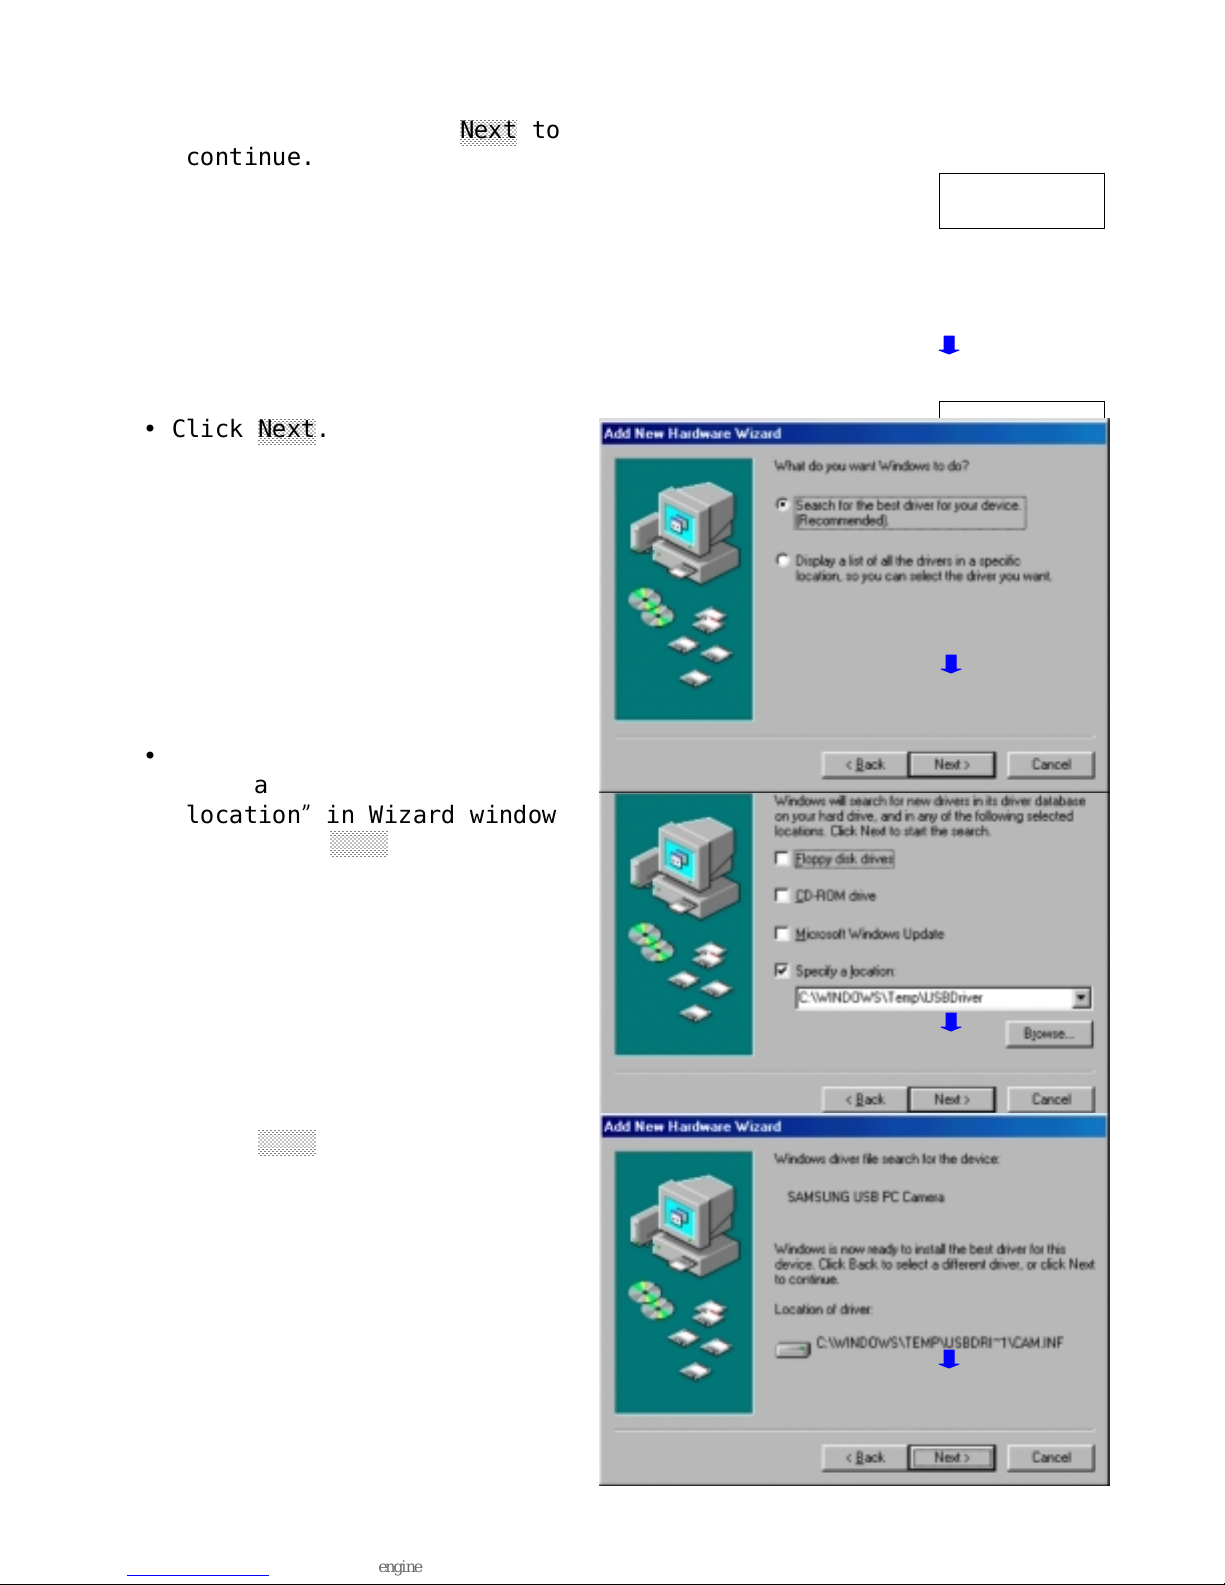
2. Installing the software
• Place the CD-ROM into your CD-ROM drive. The autoplay
installation program
will start automatically.
- It takes 5~10 seconds to load the autoplay according to PC
system.
If the software does not automatically load, run “Windows
Explorer”.
And then run “autoplay.exe”in CD-ROM drive.
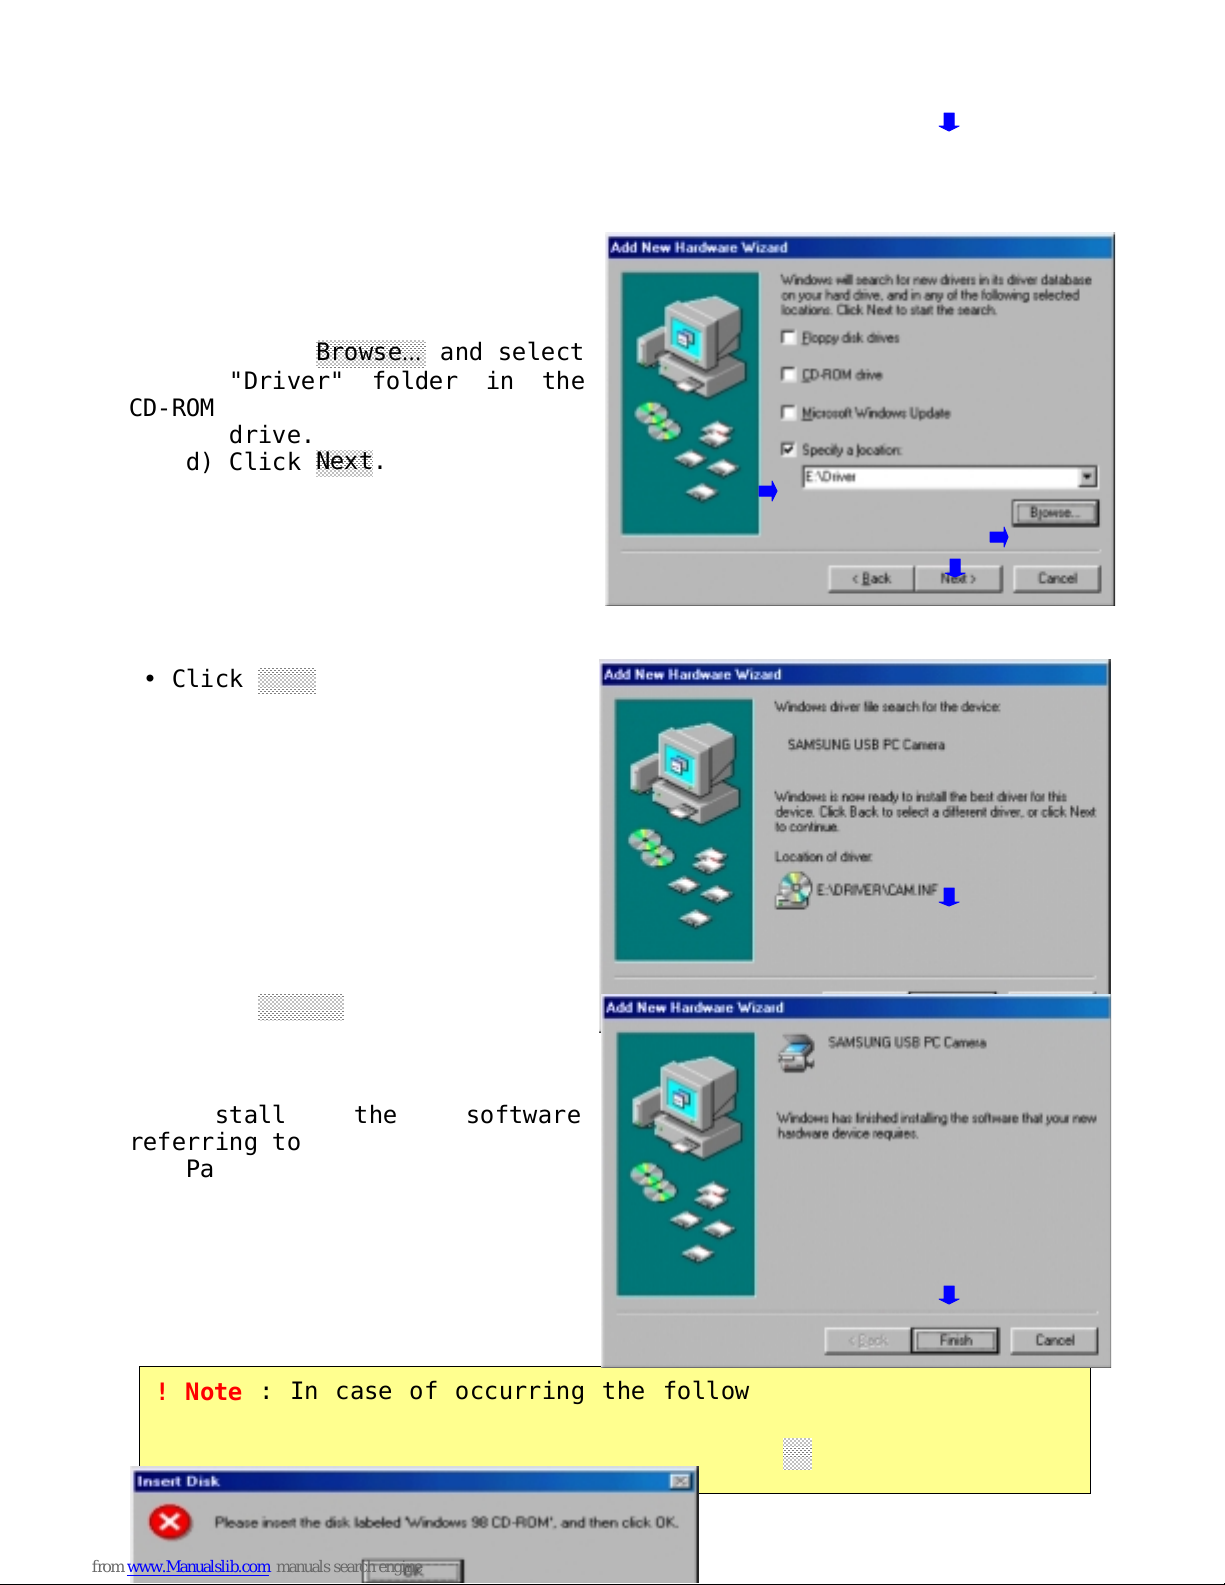
! Note : Install the software first before connecting the
! Note : Install the software first before connecting the