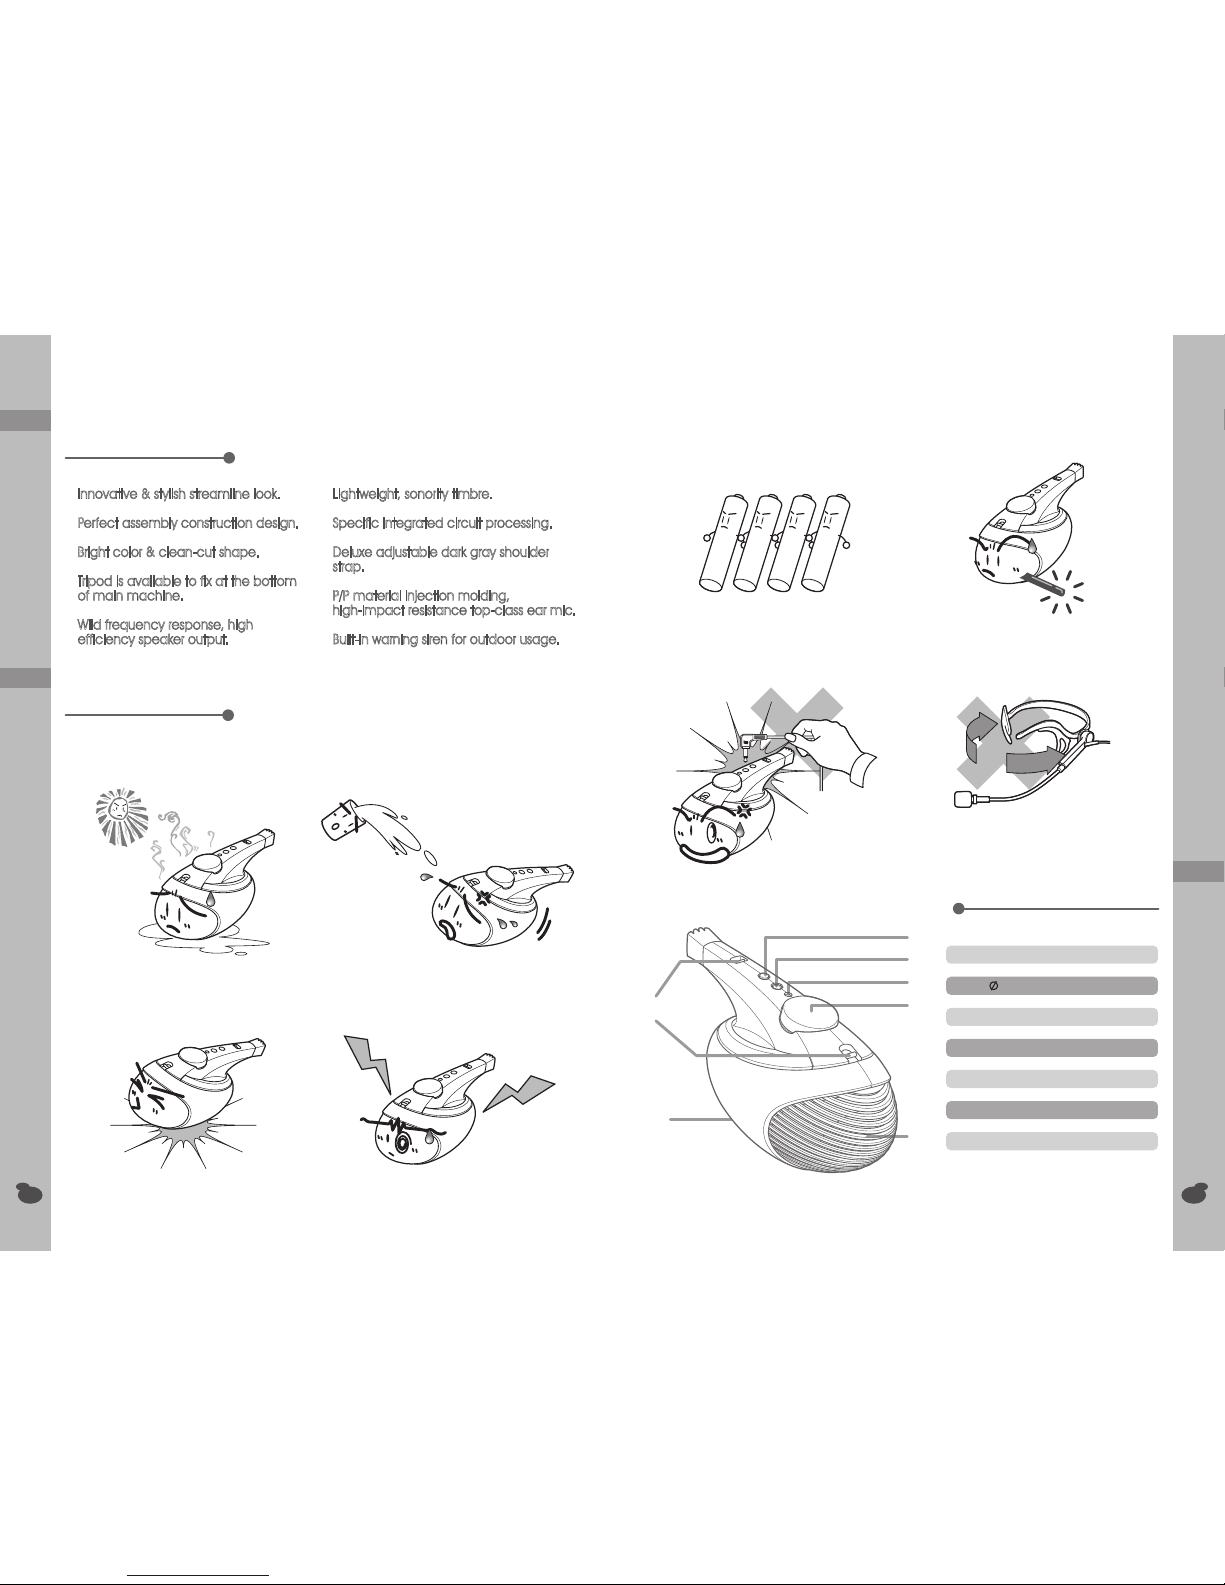
Sanha JLH-2003 Quick start guide

SPECIALIZED
JLH-2003
PORTABLE AMPLIFIER
PUBLIC ADDRESS SYSTEM
Specialized in Wireless Amplifier
HI-PERTORMANCE
LIGHTWEIGHT
OPERATION EASY
STREAMLINE
CHIH YIN ELECTRONIC CO.,LTD.
9F,No.3,Lane163,Shin Yi Rd.,Pan Chiao,Taipei Hsien,Taiwan,R.O.C. Tel:886-2-2953-8380 Fax:886-2-2954-2940
Please read the manual carefully before use.
使用前請詳閱本說明書
注意
Operation Instructions
使用說明書

1
English
Version Operational Manual
........................2
..............2
..........3
............4
......5
..............5
...........6
.............6
.................7
...........7
...8
............8
Feature
Important Caution
Controls and Indicators
Operation instruction
Amplifier´s wearing method
How to use TRIPOD
Microphone operation
How to use the siren
How to use the Microphone
Extension Cord
Electric Specifications
Ear microphone specifications
Equipment Supplied

2
3
1.Siren Switch
3.Power Indicator
4.Power Switch / Volume Control
5.Belt Fixed Hole
6.Battery Compartment
7.Speaker
● Don´t put it too close any liquid or too
● sweltering environment.
● Avoid any damages,prohibit to impact
● during movement.
● Must disconnect the battery if will store
● the amplifier for a long period of time
● without use.
● Please hold the microphone connector
● during taking off the microphone from
● amplifier.
● Foreign object in the front of speaker is
● prohibited.
Q
Innovative & stylish streamline look.
Q
Perfect assembly construction design.
Q
Bright color & clean-cut shape.
Q
Tripod is available to fix at the bottom
Q
of main machine.
Q
Wild frequency response, high
Q
efficiency speaker output.
Q
Lightweight, sonority timbre.
Q
Specific integrated circuit processing.
Q
Deluxe adjustable dark gray shoulder
Q
strap.
Q
P/P material injection molding,
Q
high-impact resistance top-class ear mic.
Q
Built-in warning siren for outdoor usage.
● Don´t push the siren over 2 second
● per time.
● Don´t pull apart microphone´s holder
● over its crash-worthiness.
● Don´t put it under swelter or insolating
● environment.
2.3.5 MIC Input Jack
JLH-2003 Feature
we must be togther !
Feature
Important Caution
Important Caution
Controls and Indicators
○
6
○
1
○
7
○
2
○
3
○
4
○
5

4
5
specifications/Q´ty/Power voltage
battery
How to install battery
Amplifier
´
s Wearing method
Wearing
How to use TRIPOD
Q
SELF-PURCHASE UNIT
How to use TRIPOD
Q
Please pull the red ribbon up to take off
Q
batteries for easy replacement.
3.Put the amplifier on the tripod and fix it.
Q
Battery specifications: AA/1.5V/SUM-3 (hi-capacity battery is recommend)
Q
Q´ty : 8 pcs
Q
Power voltage : DC 12V
1
2
3
4
1.
Please follow number indicaion to
1.
insert TWO batteries into beneath of
1.
battery compartment and stretch
1.
the red ribbon to right hand side.
3.
After setting, please insert two
1.
batteries to the rightmost & leftmost
1.
position and re-stretch the red ribbon
1.
to left hand side.
4.
Insert the 2 batteries on the ribbon.
●
Shoulder hanging
●
Side hanging
Q
Pleas adjust the belt
´
s length as desired.
1.Simple camera tripod is available.
2.One screw fixed hole at the amplifier
´
s
2.
bottom.
2.
Put 3 & 4 batteries on the middle
1.
position of red ribbon.
rd th

6
7
Microphone operation
Micorphone
How to use the siren
Siren
How to use the Microphone Extension Cord
Microphone Extension Cord
Electric Specifications
1.Plug in the microphone connector
into main machine´s MIC input jack.
2.Turn on the power switch by
clockwise direction and adjust the
volume as desired.
3.Hang on the ear mic behind ears.
4.Please adjust the microphone as
comfortable position as desired.
Recommend the best position is
2 CM between user´s mouth &
microphone for perfect vocal.
(there is one indication in the
front of microphone.)
1.Turn on the main machine´s power
switch. (the volume doesn´t have
the related with siren.)
2.Press the button on the siren.
Q
Microphone cable can DIY
replacement if damage or imperfect
contact.
Don´t continuous press the siren button over
2
seconds.
ATTENTION
2
1
1
2
1
2
1.Plug in extension cord´s 3.5
connector into main machine.
2.Please connect this extension
cord´s 3.5 connector at
another side to microphone.
3.Length: 10m
Power output
Frequency response
Operating voltage
Current consumption
Input signal
Speaker
Dimension
Weight
RMS 6W
150Hz ~ 10,000Hz 3dB
DC 12V ( SUM-3 1.5V X 8 )
12V-900mA ( w / Siren )
MIC ( -20dB 600Ω)
2-1/2
"
4Ω/ 15W
196mm X 85mm X 98mm
MAIN MACHINE=345g , IRM-50S MIC=43.2g
+
_
Q
SELF-PURCHASE UNIT
IRM-50S
EXTENSION CORD
IRM-50S

8
Ear microphone specifications
Polar pattern
Sensitivity
Frequency response
Battery power
Current consumption
S / N ratio
Output
Max input S.P.L.
Uni-directional
-66dB ( 0dB = 1V~1KHz )
100Hz ~ 15,000Hz 3dB
1.5V ( 1.1V ~ 9V )
< 250mA ( POWER: 1.5V )
> 40dB
2K ( 1,000Hz )
120dB S.P.L.
+
_
Equipment Supplied
Equipment Supplied
Q
JLH-2003 Main Machine
Q
IRM-50S Ear microphone
Q
AA / 1.5V / SUM-3
Q
SHOULDER HANGING STRAP
Q
Operation Manual
Q
Warranty
................................1
..............................1
...........................................8
...............................1
........................................1
.....................................................1
1
中 文
目
錄
.........................2
.....................2
.................3
.................4
.................5
.................5
...............6
...............6
...............7
.................7
.............8
.........................8
特點
注意事項
各部功能說明
電池安裝步驟
主機配掛方法
腳架安裝方法
麥克風操作方法
笛哨聲使用方法
延長線加裝說明
電氣特性規格
耳掛式麥克風規格
配件

2
3
1.笛哨聲開關
3.電源指示燈
4.電源開關/音量調節鈕
5.背帶孔
6.電池座
7.喇叭出力口
● 請勿置於任何液體容器附近,及潮濕
● 之場所存放,容易引起機件的損壞,
● 導致故障。
● 搬運時請小心,勿讓機體直接碰撞任
● 何堅硬之物體,以免導致機體或零件
● 故障、損壞。
● 長時間不使用時請取下電池,若需更
● 換電池必須一次全部更換。
● 不使用時請將麥克風接線取下,並注
● 意不可從線端直接拉扯,以免導致接
● 線損壞。
● 請勿將異物置入喇叭孔內。
Q
特殊流線的"飛狼"造型設計
Q
整體完善"結構"組合設計
Q
外型色彩明亮,線條清晰分明
Q
主機底部可加裝腳架固定使用
Q
頻率響應寬廣,高效率喇叭輸出
Q
體積輕巧,音色宏亮渾厚
● 笛哨鈕不可按壓太久。 (每次不可連
● 續按壓超過2秒)
● 耳掛式麥克風之耳架不可強制向外扳
● 開,以免造成斷裂。
● 請勿放置於潮溼、悶熱或陽光直曬的
● 地方。
2.3.5 電容式麥克風輸入孔
JLH-2003特點
Q
特殊積體IC網路整合處理
Q
寬扁黑灰色系背掛式肩帶,長度可自行調整
Q
一體成型完全P/P材質,耐衝擊性強耳掛式麥克風
Q
附加頂級之耳掛式DIY"永久性"麥克風
Q
耳掛式麥克風連接引線可自行DIY更換維修
Q
附加笛哨聲音效,戶外活動警示功能
we must be togther !
特
點
注意事項說明
注意事項
各部功能說明
各部功能說明
○
6
○
1
○
7
○
2
○
3
○
4
○
5

4
5
規格/數量/電壓
電
池
電池安裝步驟
主機配掛方法
配
掛
腳架安裝方法
Q
本品不附腳架,請自行選購
腳架安裝
Q
紅帶的用途為使電池方便取下,更換電池
Q
時,輕輕拉起紅帶,即可輕易取下電池。
3.將腳架與主機結合,固定於腳架上
Q
電池規格: AA / 1.5V / SUM-3 ( 請使用高容量電池 )
Q
電池數量: 1.5V X 8顆
Q
使用電壓: DC 12V
1
2
3
4
1.
請遵照數字編號順序先裝下層,最左
1.
及最右置入後,將紅帶往右拉直。
3.
下層裝妥後,再裝上層最左及最右之
1.
電池,將紅帶往左拉直。
2.
在紅帶上放入中間兩顆電池。
4.
在紅帶上放入上層最後兩顆電池。
● 掛肩式 ● 側掛式
Q
使用時長度可依個人需求來調整長短及配帶方式
1.可使用一般簡易的照相機腳架
2.主機底部有一螺絲固定孔

6
7
麥克風操作方法
麥克風
笛哨聲使用方法
笛哨聲
麥克風延長線加裝說明
麥克風延長線
電氣特性規格
特性規格
1.將麥克風之引線端插頭插入主機
之麥克風輸入孔。
2.將電源開關順時針開啟,調整在
適當音量位置。
3.將麥克風戴於耳朵之後上方。
4.麥克風戴妥後,麥克風前端位置
請與嘴部之距離在2cm左右為佳。
( 麥克風前端有一 圖,為"方
向位置",請對於嘴部位前 )
1.開啟主機之電源開關。
( 音量大小與哨聲無關 )
2.押下哨聲鈕即可。
Q
本麥克風之插頭連接線損壞或接觸不
Q
良時,可自行DIY更換新的連接線。
笛哨聲鈕請勿連續按押超過
2
秒以上。
注意
2
1
1
2
1
2
1.將延長線3.5 插頭插入主機之
麥克風出入孔。
2.將麥克風引線端之插頭插入延長
線另一端之3.5 座上。
3.長度規格: 10m
輸 出 功 率
頻 率 響 應
使 用 電 壓
消 耗 電 流
輸 入 信 號
喇 叭 規 格
體 積
重 量
RMS 6W
150Hz ~ 10,000Hz 3dB
DC 12V ( SUM-3 1.5V X 8 )
12V-900mA ( w / Siren )
MIC ( -20dB 600Ω)
2-1/2
"
4Ω/ 15W
196mm X 85mm X 98mm
MAIN MACHINE=345g , IRM-50S MIC=43.2g
+
_
Q
本品不附延長線,請自行選購
IRM-50S
IRM-50S
延長線

8
耳掛式麥克風規格
麥克風規格
指 向 特 性
出 力 感 度
頻 率 響 應
動 作 電 壓
消 耗 電 流
S / N 比
出 力
最 大 音 壓
Uni-directional
-66dB ( 0dB = 1V~1KHz )
100Hz ~ 15,000Hz 3dB
1.5V ( 1.1V ~ 9V )
< 250mA ( POWER: 1.5V )
> 40dB
2K ( 1,000Hz )
120dB S.P.L.
+
_
配件
配件
Q
JLH-2003主機
Q
IRM-50S耳掛式麥克風
Q
AA / 1.5V / SUM-3
Q
肩掛式背帶
Q
說明書
Q
保證卡
.........................1
..................1
....................8
...........................1
...............................1
...............................1
Table of contents
Other Sanha Amplifier manuals