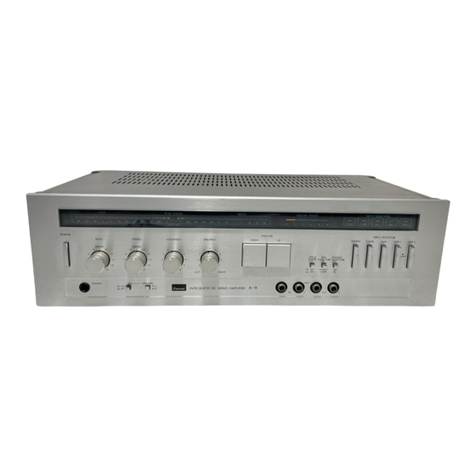
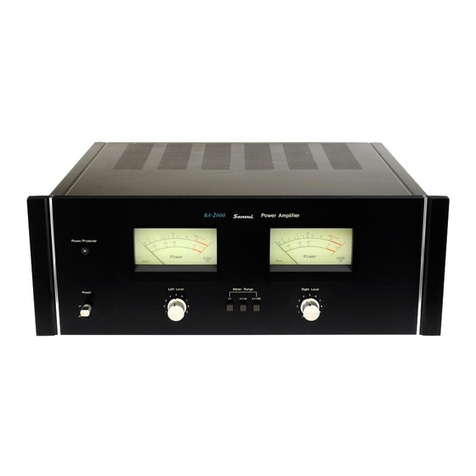
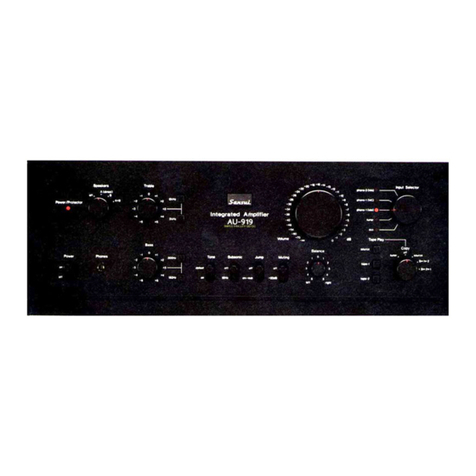
Sansui A-909 User manual

A909
OPERATING
INSTRUCTIONS-—
MODE
D’EMPLOIL~
BETRIEBSANLEITUNG
We
are
grateful
for
your
choice
ot
this
fine
Sansui
high
fidelity
product.
Before
you
operate
it,
we
suggest
that
you
read
this
booklet
once
through
carefully,
familiarizing
yourself
with
the
important
precautions,
operational
procedures
and
every
one
of
the
product's
many
features.
it
will
help
to
ensure
that
you
will
avoid
possible
damage
and
that
the
pro-
duct's
superb
performance
will
be
yours
to
enjoy
for
many
years
to
come.
Table
of
contents
Precautions
....
0.000...
00
0004
2
Connections...
........-2.02200-
3
Panel
information
.............0.
5
Operating
procedures
.............
8
Specifications.
.
2...
ee
12
©
The
Model
No.
and
Serial
No.
of
your
unit
are
shown
on
its
back
panel.
«Do
not
lose
the
Warranty
Card
that
carries
your
unit’s
Model
No.
and
Serial
No.
Nous
sommes
reconnaissants
pour
votre
choix
de
ce
produit
Sansui
d’une
remarquable
haute
fidéltité.
Avant
de
commencer
a
vous
en
servir,
nous
vous
recommandons
de
lire
cette
notice
complétement
et
soigneusement,
vous
familiari-
sant
ainsi
avec
les
précautions
importantes,
les
manceuvres
de
fonctionnement
et
chacune
des
nombreuses
caractéristiques
de
l'appareil.
Cela
vous
aidera
a
ne
pas
provoquer
d‘éventuels
dommages
et
a
vous
permettre
de
profiter
pen-
dant
de
longues
années
des
superbes
per-
formances
de
votre
appareil.
Table
des
matiéres
PRECAUTIONS
ewe
bok
ing
He
we
Se
2
CONNEXIONS
ysis
ee
we
ee
ee
3
Indications
sur
lepanneau...........
5
Procédésderéglage...........20.0.
8
Spécifications.
2...
0.0.0.2...
200.
12
®Le
numéro
du
modéle
et
le
numéro
de
série
de
!’appareil
sont
inscrits
sur
son
panneau
arriére.
@
Ne
perdez
pas
la
carte
de
garantie
ot
est
indi-
quée
le
numero
du
modéle
et
le
numéro
dans
la
série
du
type
de
I’appareil.
Wir
médchten
zu
dieser
Gelegenheit
unseren
Dank
aussprechen,
da
Sie
sich
fir
diesen
HiFi-
Baustein
von
Sansui
entschieden
haben,
Bitte
lesen
Sie
vor
der
Inbetriebnahme
des
Gerates
diese
Anleitung
sorgfaltig
durch,
um
sich
mit
den
wichtigen
VorsichtsmaRnahmen,
den
Be-
dienungsvorgangen
und
den
vielen
hervor-
rangenden
Eigenschaften
dieses
Gerates
vollstan-
dig
vertraut
zu
machen.
Mdgliche
Beschadigun-
gen
kénnen
dadurch
vermieden
werden,
so
da
Sie
das
hervorragende
Leistungsvermégen
dieser
Komponente
fir
viele
Jahre
geniekken
k6nnen.
Inhaltsverzeichnis
VorsichtsmaRnahmen
.........
Anschlusse.............00-
Bedienungsverfahren..........-
Technische
Daten
...........
ee
ae
wn
a
>
a
=
ot
o
ak
g
5
a
le)
3
3
a
Ge
fo)
3
NONWN
@Die
Modell-
und
die
Seriennumrmer
thres
Gerates
sind
auf
der
Geriteriickseite
ange-
geben.
©
Verilieren
Sie
bitte
nicht
den
Gararstieschein,
auf
dem
die
Modell-
und
die
Serie
nnummer
dieser
Einheit
angegeben
sind.
WARNING:
To
prevent
fire
or
shock
hazard,
do
not
expose
this
appliance
to
rain
or
moisture.
ATTENTION:
Pour
éviter
les
dangers
d’électrocution
ou
d’incendie,
ne
pas
exposer
cet
appareil
a
la
pluie
ou
a
I'humidité.
WARNING:
Setzen
Sie
diese
Gerat
zur
Verhiitung
von
Feuer-
und
Strom-
schlaggefahr
weder
Regen
noch?
Feu-
chtigkeit
aus.
4
SSR
aR
a
eT
A
I
Te
IS
PCIE
IT
LE
LE
I
ES
SE
EP
a
TE
Precautions
Bear
in
mind
the
following
points.
Power
plug
When
disconnecting
the
power
cord
from
the
power
outlet,
do
not
grasp
the
cord
itself
but
the
plug.
Never
connect
or
disconnect
the
power
plug
with
wet
hands
since
you
may
give
yourself
an
electric
shock.
*
Disconnect
the
power
plug
from
the
outlet
when
you
do
not
intend
to
use
the
unit
for
a
long
time.
Do
not
remove
the
case
or
bottom
panel
Making
inspections
or
adjustments
inside
the
unit
is
the
cause
of
trouble
and
electric
shocks.
Do
not,
under
any
circumstances,
poke
about
inside
the
unit.
Installation
precautions
Do
not
install
the
unit
in
the
types
of
location
given
below
since
the
unit’s
performance
may
deteriorate
or
trouble
may
be
caused.
@
Locations
near
heating
appliances
or
other
heat-radiating
products,
or
locations
exposed
to
direct
sunlight.
e@
Locations
susceptible
to
humidity
or
mois-
ture.
e
Poorly
ventilated
or
dusty
locations.
e
Locations
susceptible
to
vibration
or
loca-
tions
on
a
slope
which
are
unstable.
Do
not
block
the
ventilation
holes
Do
not
place
records
or
other
objects
over
the
ventilation
holes
on
top
of
the
unit.
Blocking
these
holes
will
raise
the
inside
temperature
which
may
result
in
trouble.
Do
not
use
thinners
for
cleaning
Wipe
the
panels
and
case
from
time
to
time
with
a
soft
cloth.
Using
any
kind
of
thinner,
alcohol
or
volatile
liquid
will
mar
the
surface,
cause
blotching
on
the
exterior
and
erase
the
markings
and
should
therefore
be
avoided.
Do
not
use
insecticide
sprays
in
the
vicinity.
AC
outlets
This
unit
is
provided
with
auxiliary
AC
outlets
which
are
handy
for
connecting
a
cassette
deck
or
turntable
to
supply
power
to
these
units.
The
power
of
the
connected
components
is
switched
on
and
off
when
the
unit’s
POWER
switch
is
operated.
*The
maximum
total
capacity
of
this
outlet
is
90
watts.
Connecting
an
electrical
appli-
ance
with
a
power
consumption
exceeding
this
rating
is
extremely
dangerous.
Check
the
rating
before
connection.
NA
INN
OEY
I
NP
MN
I
IN
NE
A
NN
tS
NOTE:
Depending
on
the
laws
and
regulation
enforced
locally,
models
without
AC
outlets
may
be
supplied
to
some
areas.
Also,
depending
on
the
sales
area,
the
shape
of
the
AC
outlets
and
their
capacity
may
differ.
ONO
Ea
A
ES
A
ANY
INN
MSN
Bt
SNS
BN
Precautions
Garder
présents
4
l’esprit
les
points
suivants.
Fiche
d’alimentation
Lorsque
l’on
débranche
le
cordon
d’alimenta-
tion
de
la
prise
d’alimentation,
ne
pas
tirer
sur
le
cordon
lui-méme
mais
sur
ta
fiche.
Ne
jamais
brancher
ou
débrancher
la
fiche
d’alimentation
avec
des
mains
humides
car
on
pourrait
recevoir
un
choc
électrique.
*
Débrancher
la
fiche
d’alimentation
de
la
prise
d’alimentation
lorsque
f’on
n‘a
pas
Vintention
d'utiliser
|‘apparei!
pendant
un
certain
temps.
Ne
pas
retirer
le
coffret
ou
le
panneau
du
dessous
Le
fait
de
procéder
a
des
vérifications
ou
a4
des
réglages
a
I’intérieur
de
l‘appareil
peut
entrainer
des
pannes
ou
des
chocs
électriques.
Ne
jamais,
sous
aucun
prétexte,
aller
farfouiller
a
|’in-
térieur
de
l'appareil.
Précautions
a
prendre
pour
I’installation
Ne
pas
installer
l'appareil
dans
des
endroits
tels
que
ceux
deécrits
ci-dessous
car
cela
pourrait
entraver
les
performances
de
l'appareil
ou
pro-
voquer
des
pannes.
@Endroits
a
proximité
d’appareils
de
chauffage
Ou
autres
appareils
dégageant
de
la
chaleur,
ou
endroits
directement
exposés
aux
rayons
du
soleil.
@
Endroits
exposés
a
I‘humidité
ou
a
la
buée.
@
Endroits
mal
aérés
ou
poussiéreux.
e
Endroits
exposés
aux
vibrations
ou
en
pente
instable.
Ne
pas
obstruer
les
orifices
d’aération
Ne
pas
poser
de
disques
ou
tout
autre objet
sur
les
orifices
d‘aération
pratiques
sur
le
dessus
de
l'appareil.
Le
fait
d‘obstruer
ces
orifices
pro-
voque
une
hausse
de
la
température
intérieure,
ce
qui
peut
entrainer
un
mauvais
fonctionne-
ment.
Ne
pas
utiliser
d’amincisseurs
pour
le
nettoyage
Essuyer
les
panneaux
et
le
coffret
de
temps
en
temps
avec
un
chiffon
doux.
Le
fait
d’utiliser
un
amincisseur,
un
liquide
a
base
d’alcool
ou
volatile
abime
les
surfaces,
engendre
des
taches
sur
l’extérieur
et
efface
les
inscriptions.
Ii
con-
vient
donc
d’éviter
ces
produits.
Ne
pas
utiliser
de
bombes
insecticides
a
proxi-
mité
de
l'appareil.
Prises
CA
auxiliaires
Cet
appareil
est
équipé
de
prises
CA
auxiliaires
qui
sont
pratiques,
lorsque
l'on
veut
brancher
un
magnétocassette
ou
une
platine
tourne-
disque,
pour
leur
fournir
l’alimentation
élec-
trique.
Les
composants
reliés
4
l'appareil
sont
sous
tension
ou
hors
tension
lorsque
!’on
ac-
tionne
l’interrupteur
POWER
de
|’appareil.
*
Cette
prise
a
une
capacité
totale
maximale
de
90
watts.
II
serait
extrémement
dangereux
d’y
connecter
un
appareil
électrique
dont
la
consommation
excéde
ce
régime.
Avant
d’ef-
fectuer
la
connexion,
vérifier
le
régime.
AN
Ee
ON
NI
A
ES
ME
EO
A
MN
EN
NS
REMARQUE:
En
raison
des
lois
et
reglements
en
vigueur
dans
certaines
régions,
il
peut
arriver
que
des
modéles
ne
soient
pas
équipés
de
prises
d‘alimentation
en
courant
alternatif.
De
méme,
la
forme
et
capacité
de
ces
prises
varient
égale-
ment
d'aprés
les
régions
ot
les
appareils
sont
mis
en
vente.
NN
Vorsichtsmafnahmen
Beachten
Sie
bitte
folgende
Punkte.
Netzstecker
Beim
Abziehen
des
Netzkabels
nicht
am
Kabel
sondern
am
Stecker
ziehen.
Niemals
den
Netz-
stecker
mit
nassen
Ha&nden
einstecken
oder
abziehen,
da
Sie
sonst
einen
Stromschliag
er-
leiden
konnen.
*Wenn
Sie
das
Gerat
fiir
langere
Zeit
nicht
benutzen,
den
Netzstecker
abziehen.
Weder
Gehause
noch
Bodenplatte
ent-
fernen
Eigenmachtige
Inspketionen
oder
Einstellungen
am
Gerateinneren
kOnnen
die
Ursache
von_
Stérungen
oder
Stromschlagen
sein.
Stochern
Sie
unter
keinen
Umstanden
im
Gerateinneren
herum.
Vorsichtsma&nahmen
beim
Aufstellen
Stellen
Sie
das
Gerat
nicht
an
den
nachfolgen-
den
Orten
auf,
da
die
Leistung
sich
versch-
lechtern
kann
oder
St6rungen
auftreten
kOnnen.
@Orte
in
der
Nahe
von
Heizkérpern
oder
son-
stigen
Warmequellen,
oder
Orte,
die
direkter
Sonneneinstrahlung
ausgesetzt
sind.
eOrte,
die
Feuchtigkeit
oder
Nasse
ausgesetzt
sind.
e
Schlecht
beliiftete
oder
staubige
Orte.
e
Orte,
die
Vibrationen
aisgesetzt
sind,
oder
un-
stabile
Orte
auf
Schragen.
Nicht
die
Ventilationsschlitze
blockieren
Keine
Schallplatten
oder
sonstige
Gegenstande
auf
die
Ventilationsschlitze
‘egen.
Ourch
Blockieren
dieser
Schlitze
steigt
die
Innentem-
peratur,
was
zu
St6rungen
fihren
kann.
Zum
Reinigen
keine
Verdiinnungsmittel
benutzen
Gehause
und
Schalttafel
ab
und
zu
mit
einem
weichen
Tuch
abreiben. Die
Verwendung
von
Verdiinnern,
Alkohol
oder
leichtfluchtigen
Reinigungsmitteln
ist
zu
vermeiden,
weil
es
dadurch
zu
Beschadigung
der
Oberflache,
Fleckenbildung
und
Abreiben
der
Markierungen
kommen
kann.
Keine
Insektensprays
in
der
Nahe
des
Gerates
verwenden.
Kaltgeratesteckdosen
Dieses
Gerat
ist
mit
zusatzlichen
Kaltgerate-
steckdosen
ausgestattet,
die
zweck
maigerweise
zum
Anschlu®
eines
Cassettendecks
oder
eines
Plattenspielers
verwendet
werden
kOnnen.
Die
angeschlossene
Komponente
wird
durch
Betatigen
des
Schalter
POWER
des
Gerates
ein-
und
ausgeschaltet.
*Die
maximale
Gesamtkapazitat
dieser
Steck-
dose
betragt
90
Watt.
Es
ist
auferst
gefahr-
lich,
ein
elektrisches
Gerat
mit
einer
Leist-
ungsaufnahme,
die
diesen
Nemnwert
Uber-
schreitet,
an
diese
Steckdose
anzuschlieRen.
Vor
dem
Anschlu&
immer
die
Nennieistung
uberprifen.
60
NP
MEN
MA
MI
ES
A
RN
NA
SN
AN
I
Ne
NA
ANMERKUNG:
Je
nach
den
ortBich
geltenden
Gesetzen
und
Bestimmungen
werden
fir
manche
Importgebiete
auch
Gerate
ohne
Netzausgangsbuchsen
geliefert.
AAukerdem
ist
die
Form
und
Kapazitat
der
Netzausgangsbuch-
sen
je
nach
Verkaufsgebiet
verschiéden.
0
Re
A
BN
EN
MI
AN
MN
MI
MEN
NN
NS

Connections
TUNER
O
Ghbebi
Connexions
PHONO
“Instructions
and
requirements
indicated
may
vary
to
some
extent
depending
on
sales
area,
local
laws
and
regulations.
Connection
precautions
*When
connecting
or
re-locating
the
unit,
be
sure
to
turn
the
power
off
or
disconnect
the
power
cable.
*
Be
sure
not
to
confuse
the
right
channel
with
the
left,
plus
cables
with
minus
or
inputs
with
outputs.
Check
each
step
carefully.
*
Use
connection
cords
of
dependable
quality.
,
Check
that
connections
are
secure
and
that
connecting
leads
are
not
frayed
or
in
contact
with
other
objects.
Poor
connection
may
cause
hum
noise
or
breakdown.
Speaker
systems
To
SPEAKE
RS
SYSTEM-A
or
B
terminals,
con-
nect
speaker
cords
taking
care
not
to
confuse
the
right
channel
with
the
left,
the
plus
polarity
with
the
minus.
e
Be
sure
that
exposed
leads
are
firmly
secured
to
the
terminals.
SPEAKER
IMPEDANCE
<
A100
ff
*Les
instructions
et
les
réglementation
in-
diquées
peuvent
varier
suivant
la
région,
les
lois
et
les
reglements
locaux.
Précautions
a
connexions
*
Quand
vous
branchez
I’appareil
ou
si
vous
I'in-
stallez
dans
un
nouvel
endroit,
assurez-vous
de
couper
l’alimentation
ou
de
déconnecter
le
cable
d‘alimentation.
*
S’assurer
de
ne
pas
confondre
le
canal
droit
avec
le
canal
gauche,
les
cdbles
de
polarité
positive
et
ceux
de
polarité
négative
et
les
en-
trées
et
les
sorties.
Contréler
chaque
étape
soigneusement.
*Utiliser
des
fils
de
connexion
de
bonne
qualité.
S’assurer
que
les
connexions
soient
parfaites
et
que
les
tétes
dénudées
des
fils
ne
soient
pas
cisaillées
ou
en
contact
avec
d’-
autres
objets.
De
mauvaises
connexion
peu-
vent
6tre
la
cause
de
grondements
ou
méme
d’une
panne
de
J'appareil.
Enceintes
Pour
les
bornes
SPEAKERS
SYSTEM-A
ou
B,
connecter
les
cables
des
enceintes
en
prenant
bien
soin
de
ne
pas
confondre
le
canal
droit
et
gauche
et
la
polarité
positive
avec
la
négative.
@
Bien
s‘assurer
que
les
parties
exposées
des
conducteurs
sont
bien
fixées
dans
les
bornes.
Anschlusse
*Die
Anleitungen
und
angegebenen
Werte
k6nnen
in
Abhangigkeit
vom
Verkaufsgebiet
und
den
Ortlichen
Gesetzen
etwas
atoweichen.
VorsichtsmaRnahmen
beim
AnschlieRen
*Zum
AnschlieRen
bzw.
wenn
der
Aufstellung-
sort
dieses
Gerates
geandert
wird,
unbedingt
den
Netzschalter
ausschalten
und
das
Netz-
kabel
abziehen.
*Nicht
den
rechten
Kanal
mit
dem
linken,
Positive
mit
negativen
Kabeln
bzw.
Eingange
mit
Ausgangen
verwechseln.
Nach
dem
Ansch-
lieBen
unbedingt
jede
einzelne
Ko
mponente
Uberprifen.
*Nur
Verbindungskabel
hoher
Qualit#t
benutz-
en.
Auf
richtigen
Anschiu&
achten
und
Uber-
prufen,
da&
die
Kabel
nicht
besch&digt
sind
bzw.
Kurzschlu
verursachen.
Falsctyer
Ansch-
lu&
kann
zu
Brumm
fihren
oder
cles
Gerat
beschadigen.
Lautsprecherboxen
An
die
mit
SPEAKERS
SYSTEM-A
oder
B
be-
zeichneten
Klemmen
sind
die
Lautspre
cherkabel
anzuschlieRen;
dabei
jedoch
darauf
acchten,
da
der
rechte
nicht
mit
dem
linken
Kanal
und
der
positive
Leiter
nicht
mit
der
negativen
ver-
wechseilt
wird.
e
Darauf
achten,
da&
die
blanken
Leiter
richtig
an
den
Klemmen
gesichert
sind.

COMPU
SELECTOR
COMPU
SELECTOR
Turntable
Connect
your
turntable
to
the
PHONO
termi-
nals.
!f
your
turntable
is
equipped
with
a
grounding
cable,
connect
it
to
the
unit's
GND
terminal.
But
disconnect
it
if
you
notice
in-
creased
hum.
Tuner
Connect
the
output
terminals
of
a
tuner
to
the
TUNER
input
terminals
on
the
rear
panel.
Tape
deck
You
can
connect
up
to
two
tape
decks
to
the
unit.
Connect
the
unit's
TAPE
REC
terminals
to
the
line
input
terminals
of
your
tape
deck,
and
the
unit's
TAPE
PLAY
terminals
to
the
output
terminals
of
the
deck.
*Connect
to
the
TAPE-1
terminals
if
you
are
using
a
SANSUI
cassette
deck
(such
as
the
D-77R,
D-77F
or
D-99D)
provided
with
a
COMPU
SELECTOR
function.
COMPU
SELECTOR
Jacks
These
jacks
are
for
connection
to
a
turntable
by
SANSUI
(such
as
the
P-D30,
P-L40
or
P-L50)
and
to
a
tuner
by
SANSUI!
(such
as
the
T-707
or
T-909)
and
to
a
cassette
deck
by
SANSUI
(such
as
the
D-77R,
D-77F
or
D-99D)
provided
with
the
same
COMPU
SELECTOR
jacks.
PHONO:
Use
the
cord
with
mini
plugs
acces-
sory
to
the
turntable
to
connect
this
jack
with
the
turntable’s
COMPU
SELECTOR
jack.
TUNER:
Use
the
cord
with
mini
plugs
acces-
sory
to
the
tuner
to
connect
this
jack
to
the
tuner’s
COMPU
SELECTOR
jack.
TAPE-1:
Use
the
cord
with
mini
plugs
acces-
sory
to
the
cassette
deck
to
connect
this
jack
to
the
cassette
deck’s
COMPU
SELEC-
TOR
jack.
*These
jacks
can
be
connected
only
to
the
COMPU
SELECTOR
jacks
on
the
turntable,
_
tuner
or
cassette
deck.
OurTPuT
O
fbhied
0
Tourne-disque
Raccorder
votre
tourne-disque
aux
bornes
PHONO.
Quand
votre
tourne-disque
est
muni
d’un
cable
de
mise
a
fa
terre,
le
raccorder
a
la
borne
GND
de
I‘appareil.
Mais
deconnectez-le
si
vous
remarquez
une
augmentation
anormale
du
ronflement.
Tuner
Connecter
les
bornes
de
sortie
du
tuner
aux
bornes
d’entrée
TUNER
du
panneau
arriére
de
l'appareil.
Magnétophone
Vous
pouvez
raccorder
jusqu’a
deux
magnéto-
phones
sur
l'appareil.
Raccorder
les
bornes
TAPE
REC
de
l'appareil
aux
bornes
d‘entrée
de
votre
magnétophone
et
les
bornes
TAPE
PLAY
de
l'appareil
aux
bornes
de
sottie
de
votre
mag-
nétophoen.
*
tLe
relier
aux
bornes
TAPE-1
si
|’on
utilise
un
magnétocassette
SANSUI
(comme
le
D-77R,
le
D-77F
ou
le
D-99D)
prévu
pour
la
fonction
de
compu-sélecteur.
Prises
de
compu-sélecteur
(COMPU
SELECTOR)
Ces
prises
permettent
de
relier
un
tournedisque
de
fabrication
SANSUI
(comme
le
P-D30,
le
P-L40
ou
le
P-L50)
et
un
tuner
de
fabrication
SANSUI
(comme
le
T-707
ou
le
T-909)
et
un
magnétocassette
de
fabrication
SANSUI
(comme
le
D-77R,
le
D-77F
ou
le
D-99D)
équipé
des
mémes
prises
COMPU
SELECTOR.
PHONO:
Utiliser
le
cordon
a
mini-fiches
fourni
en
accessoire
avec
le
tourne-disque
pour
relier
cette
prise
a
la
prise
COMPU
SELEC-
TOR
du
tourne-disque.
TUNER:
Utiliser
le
cordon
4
mini-fiches
fourni
en
accessoire
avec
le
tuner
pour
relier
cette
prise
a
la
prise
COMPU
SELECTOR
du
tuner.
TAPE-1:
Utiliser
te
cordon
a
mini-fiches
fourni
en
accessoire
avec
le
magnétocassette
pour
relier
cette
prise
a
la
prise
COMPU
SELEC-
TOR
du
magnétocassette.
*
Ces
prises
ne
peuvent
étre
reliées
qu’aux
prises
COMPU
SELECTOR
du
tournedisque,
du
tuner
ou
du
magnétocassette.
LINE
IN)
LINE
OUT
(REC)
(PLAY)
Plattenspieler
Ihren
Plattenspieler
an’
die
Buchsen
PHONO
anschlieRen;
Wenn
thr
Plattenspieler
mit
einem
Erdungskabel
ausgestattet
ist,
dieses
an
die
Klemme
GND
des
Gerates
anschlieRen;
falls
jedoch
dadurch
der
Brumm
verstérkt
wird,
das
Erdungskabel
wieder
abklemmen.
Tuner
SchlieRen
Sie
die
Ausgangsbuchsen
eines
Tuners
an
die
Eingangsbuchsen
TUNER
an
der
Geratertickseite
an.
Tonbandgerat
Sie
k6nnen
nach
Wunsch
bis
zu
zwei
Tonband-
gerate
anschlieRen.
Die
Buchsen
TAPE
REC
dieses
Gerates
an
die
Eingangs-
uid
die
Buchsen
TAPE
PLAY
an
die
Ausgangsbuchsen
des
Ton-
bandgerates
anschlieRen.
*
Falls
Sie ein
SANSUI-Cassettendeck
(Modelle
D-77R,
O-77F
oder
D-99D)
mit
COMPU
SELECTOR-Funktion
verwenden,
schlie&en
Sie
dieses
an
die
TAPE-1-Buchsin
an.
COMPU
SELECTOR-Buthsen
Diese
Buchsen
dienen
zum
Anschlu
eines
SANSU
I-Plattenspielers
(z.B.P-D30
,
P-L40
oder
P-L50)
und
eines
SANSUI-Tunes
(z.B.
T-707
oder
T-909)
und
eines
SANSU
I-Ca
ssettendecks
(z.B.
die
Modelle
D-77R,
D-77Foder
D-99D),
die
alle
ebenfalls
Uber
COMPU
SELECTOR-
Buchsen
verfiigen.
PHONO:
Verwenden
Sie
das
mi
Clem
Platten-
spieler
mitgelieferte
Kabel
mit
Ministeckern,
um
diese
Buchse
an
die
CCW
PU
SELEC-
TOR-Buchse
des
Plattenspiders
anzusch-
liessen.
TUNER:
Benutzen
Sie
das
mt
dem
Tuner-
mitgelieferte
Kabel
mit
Minsteckern,
um
diese
Buchse
an
die
COMPL
SELECTOR-
Buchse
des
Tuners
anzuschlieseen.
TAPE-1:
Benutzen
Sie
das
mit
tern
Cassetten--
deck
mitgelieferte
Kabel
mitMinisteckern,
um
diese
Buchse
an
die
CQM
PU
SELEC-
TOR
-Buchse
des
Cassettendecis
anzuschlies-
sen.
*Diese
Buchsen
kénnen
nur
an
ctie
COMPU
SELECTOR-Buchsen
des
Plattas
pielers,
Ver-
starkers
oder
Cassettendecks
arvgeschlossen
werden.

5
eres
mmm
a
eT
Panel
information
BRR
vcore
oe
weve
sree
osecume
Aan
1098
ene
I
:
i
4
i
if
:
:
\
{
if
H
i
*The
photos
and
illustrations
show
a
unit
with
a
silver
panel,
1
POWER
Switch
Push
the
POWER
switch
once
to
turn
the
unit
on,
once
more
to
turn
it
off.
For
several
seconds
after
you‘ve
turned
the
unit
on,
no
sound
will
come
from
the
speak-
ers;
the
built-in
protection
circuit
is
at
work
until
the
circuits
inside
the
unit
are
elec-
trically
stabilized,
2
PHONES
Jack
When
you
want
to
listen
through
headphones
privately,
insert
the
headphone
plug
into
the
PHONES
jack
and
turn
the
SPEAKERS
switch
off.
@Be
sure
to
disconnect
the
phones
from
the
jack
when
not
in
use.
3
SPEAKERS
Switches
Set
the
left-hand
switch
to
ON,
and
set
the
right-hand
switch
to
A
or
B
depending
on
the
terminals
to
which
the
speakers
have
been
con-
nected.
When
using
only
the
headphones
and
no
sound
is
wanted
from
the
speakers,
set
the
left-hand
switch
to
OFF,
4
MUTING
Switch
This
switch
cuts
the
volume
by
20
dB.
Depress
it
when
you
want
to
temporarily
reduce
the
volume;
the
indicator
lights
and
the
sound
is
muted.
When
the
switch
is
released,
the
indi-
cator
goes
off
and
the
sound
regains
its
former
strength.
Remember
that
the
sound
increases
at
the
flip
of
this
switch.
5
LOUDNESS
Switch
Depressing
this
switch
when
listening
at
a
low
volume
level
accents
the
lows
and
highs
pro-
perly
to
render
the
reproduced
sound
more
realistic.
This
compensates
for
the
fact
that
the
human
ear
becomes
insensitive
to
the
lows
and
highs
as
the
sound
volume
is
reduced.
Indications
sur
le
panneau
SERINE
ERIE
ISSR
SPY
RE
OTE
BPO
aU
SUR
tr
PSN
RTE
Hg
en
SRO
AR
RRR
*
Les
photographies
et
illustrations
présentent
le
modéle
4
panneau
argenté.
1
Interrupteur
d’alimentation
(POWER)
Appuyer
une
fois
sur
le
bouton
POWER
pour
mettre
l'appareil
en
fonction,
et
une
deuxiéme
fois
pour
|’arréter.
ePendant
quelques
secondes
aprés
que
vous
ayez
mis
l’apparei!
en
marche,
vous
n’‘en-
tendrez
aucun
son
en
provenance
des
en-
ceintes
acoustiques:
Le
circuit
de
protection
incorporé
a
été
activé
et
fonctionne
jusqu’a
ce
que
tous
les
circuits,
a
|'intérieur
de
l'appareil,
se
trouvent
électriquement
stabilisés.
2
Prise
de
casque
(PHONES)
Quand
vous
désirez
écouter
de
la
musique
a
aide
d'un
casque,
introduire
la
fiche
du
casque
dans
la
prise
PHONES
et
couper
le
commuta-
teur
SPEAKERS.
e@Prendre
bien
soin
de
débrancher
ta
fiche
du
casque
de
la
prise
quand
on
ne
I'utilise
pas.
3
Commutateurs
d’enceintes
acoustiques
(SPEAKERS)
Placer
le
commutateur
de
gauche
sur
ON.
Ré-
gler
le
commutateur
de
droite
sur
A
ou
B
en
fonction
des
bornes
auxquelles
les
enceintes
ont
été
raccordées.
Si
l'on
utilise
uniquement
le
casque
et
que
le
son
n’est
pas
nécessaire
aux
enceintes,
placer
le
commutateur
de
gauche
sur
OFF.
4
Commutateur
d’atténuation
(MUTING)
Ce
commutateur
diminue
le
volume
de
20qB.
L'enfoncer
lorsque
!’on
veut
réduire
le
volume
temporairement;
le
temoin
s‘allume
et
le
son
est
atténué.
Lorsque
ce
commutateur
est
relache,
le
témoin
s‘éteint
et
le
son
retrouve
sa
force
origi-
nelle.
Se
souvenir
que
le
son
augmente
au
moindre
mouvement
de
ce
commutateur.
5
Interrupteur
de
controur
sonore
(LOUDNESS)
En
enfongant
cet
interrupteur
lors
de
I’écoute
a
faible
niveau
sonore,
cela
permet
d’accentuer
les
graves
et
aigués
de
facon
convenable
pour
donner
un
effet
plus
réaliste
des
sons
repro-
duits.
Cela
compense
fe
fait
que
f'oreille
humaine
devient
insensible
aux
graves
et
aux
aigués
4
mesure
que
le
volume
sonore-est
réduit.
Schalttafelinformation
*
Die
Photos
und
IIlustrationen
zeigen
ein
Gerat
mit
einer
silberfarbenen
Frontplatte.
1
Netzschalter
(POWER)
Drucken
Sie
den
POWER
Schalter
zum
Ein-
schalten
des
Gerates,
driicken
Sie
ihn
erneut
zum
Ausschalten.
@Es
dauert
einigen
Sekunden
nach
dem
Ein-
schalten,
bis
die
Lautsprecher
in
Betrieb
gesetzt
werden.
Diese
ZeitverzOgerung
wird
durch
die
eingebaute
Schutzschaltung
ver-
ursacht,
die
die
Lautsprecherboxen
erst
ein-
schaltet,
wenn
die
elektrischen Schaltkreise
elektronisch
stabilisiert
sind.
2
Kopfhérerbuchse
(PHONES)
Fir
ungestéres
Hévergenigen
ein
Paar
Stereo-
Kopfhérer
an
die
PHONES-Buchse
anschlie@en
und
den
SPEAKERS-Schalter
abschalten.
e@
Werden
die
Kopfhérer
nicht
verwendet,
diese
unbegingt
vom
Gerat
abtrennen.
3
Lautsprecherschalter
(SPEAKERS)
Den
linken
Schalter
auf
ON
stellen.
Den
rechten
Schalter
je
nach
den
Klemmen,
an
welche
die.
Lautsprecher
angeschlossen
sind,
auf
A
oder
B
stellen.
Wenn
Sie
nur
den
Kopfhérer
benutzen
und
keinen
Ton
Uber
die
Lautsprecher
héren
mochten,
stellen
Sie
den
Linken
Schalter
auf
OFF.
4
Lautstarkedampfungstaste
(MIUTING)
Durch
Drucken
dieser
Taste
wird
die
L-autstarke
um
20dB
gedaémpft.
Driicken
Sie
diese
Taste,
wenn
Sie
die
Lautstarke
voriibergehend
redu-
zieren
wollen;
die
Kontroliampe
leuchtet
auf,
und
der
Ton
wird
gedampft.
Wenn
die
Taste
ausgerastet
wird,
geht
die
Kontrollampe
aus,
und
die
vorherige
Lautstarke
wird
wviederher-
gestellt.
Denken
Sie
daran,
dafi
die
L-autstarke
mit
dem
Ausrasten
der
Taste
plétzlich
zunimmt.
5
Gehorrichtige
Lautstarkekorrektur
(LOUDNESS)
Durch
Druck
auf
diesen
Schalter
be
#m
Horen
mit
geringer
Lautstarke
werden
die
T
iefen
und
Hohen
richtig
akzentuiert,
um
die
Tonwieder-
gabe
realistischer
zu
machen.
HierduUrch
wird
fiir
die
Tatsache
kompensiert,
daf&
das
men-
schliche
Ohr
bei
verringerfer
Lautstarkee
unemp-
findlich
fiir
tiefe
und
hohe
Téne
wird.

poser
ont
é
6
Input
Selector
Switches
These
switches
are
used
to
select
the
program
source
that
you
want
to
listen
to.
When
pressed,
the
corresponding
indicator
at
the
side
of
the
switch
lights.
PHONO:
For
playing
a
record
on
the
turntable
which
you
have
connected
to
the
PHONO
terminals.
TUNER:
For
listening
to
a
broadcast
on
the
tuner
which
you
have
connected
to
the
TUNER
terminals.
TAPE-1:
For
playing
back
a
tape
on
the
tape
deck
which
you
have
connected
to
the
TAPE-1
terminals
or
for
dubbing
a
tape
from
the
TAPE-1
deck
to
the
TAPE-2
deck.
TAPE-2:
For
playing
back
a
tape
on
the
tape
deck
which
you
have
connected
to
the
TAPE
-2
terminals.
*
The
switches
operate
when
you
push
them
gently.
Do
not
push
them
forcefully.
*
Recordings
cannot
be
monitored
on
this
deck.
Do
not
depress
the
TAPE-1
switch
during
a
tape
recording
or
else
the
recording
will
be
interrupted,
*When
the
TAPE-2
switch
is
pressed
once,
its
indicator
lights
and
the
tape
playback
mode
is
established;
when
it
is
pressed
again,
the
indi-
cator
goes
off
and
the
mode
is
released.
Keep
the
indicator
off
when
listening
to
any
pro-
gram
source
{such
as
records
or
radio
pro-
grams)
except
TAPE-2.
*
The
input
selector
is
set
to
TUNER
when
the
power
is
switched
on.
7
VOLUME
Control
This
is
used
to
adjust
the
volume
of
the
sound
heard
through
the
speakers
or
headphones.
The
volume
is
increased,
the
more
the
control
is
slid
upward;
it
is
set
to
its
lowest
level
(’'0"’)
at
the
bottom
position.
CATECHAREY
DC
SCRVET
SPORE
ARAM
tHE:
AMONG.
wae
4
Pete
6
Sélecteurs
d’entrée
Ces
sélecteurs
permettent
de
choisir
la
source
de
programme
que
l’on
veut
écouter.
Lorsqu’on
les
enfonce,
le
témoin
correspondant
qui
les
jouxte
s’allume.
PHONO:
Pour
la
lecture
d‘un
disque
sur
une
platine
reliée
aux
bornes
PHONO.
TUNER:
Pour
l'écoute
d’une
émission
par
le
tuner
relié
aux
bornes
TUNER.
TAPE-1:
Pour
la
lecture
d’une
bande
sur
un
magnétophone
relié
aux
bornes
TAPE-1
ou
pour
fon
copie
une
bande
du
magnéto-
phone
TAPE-1
sur
le
magnétophone
TAPE-
2.
TAPE-2:
Pour
la
lecture
d’une
bande
sur
un
magnétophone
relié
aux
bornes
TAPE-2.
*
Les
sélecteurs
fonctionnent
lorsqu’on
appuie
dessus
légérement.
Ne
pas
appuyer
avec
force.
*
|}
n’est
pas
possible
de
surveiller
les
enregistre-
ments
sur
cet
appareil.
Ne
pas
appuyer
sur
Vinterrupteur
TAPE-1
pendant
|'enregistre-
ment
d’une
bande
car
ceci
|’interromprait.
*
Lorsqu’on
appuie
une
fois
sur
|’
interrupteur
TAPE-2,
son
témoin
s‘allume
et
l’appareil
se
met
dans
le
mode
de
lecture
de
bande;
lors-
qu’on
appuie
encore
une
fois,
le
témoin
s'éteint
et
le
mode
est
libéré.
Laisser
le
témoin
éteint
lorsqu’on
écoute
toute
source
de
pro-
gramme
(comme
des
disques
ou
des
émissions
de
radio
par
exemple),
excepté
TAPE-2.
*
Le
sélecteur
d’entrée
se
régle
sur
TUNER
lors-
qu‘on
met
|’appareil
sous
tention.
7
Commande
de
VOLUME
Elle
permet
de
régler
le
volume
du
son
qui
par-
vient
par
les
enceintes
ou
par
le
casque.
Pluson
fait
glisser
la
commande
vers
le
haut,
plus
le
volume
augmente;
sur
sa
position
la
plus
en
bas,
il
est
réglé
au
niveau
le
plus
faible
(’'0’’).
6
Ejingangswahltasten
Diese
Tasten
dienen
zur
Wahl
der
Program-
mquelle,
die
gehdrt
werden
soll.
Bei
Driicken
einer
Taste
leuchtet
der
entsprechende
Indika-
tor
daneben
auf.
PHONO:
Zum
Abspielen
von
Schallplatten
mit
einem
Plattenspieler,
der
an
die
Buchsen
PHONO
verbunden
ist.
TUNER:
Zur
Rundfunkwiedergabe
mittels
Empfanger,
der
an
die
Buchsen
TUNER
verbunden
ist.
TAPE-1:
Zur
Tonbandwiedergabe
mit
einem
Gerat,
das
an
die
Buchsen
TAPE-1
ver-
bunden
ist
oder
zum
Uberspielen
eines
Bandes
von
Tonbandgerét
TAPE-1
auf
Tonbandgerat
TAPE-2.
TAPE-2:
Zur
Tonbandwiedergabe
mit
einem
Geraét,
das
an
die
Buchsen
TAPE-2
ver-
bunden
ist.
*
Diese
Tasten
sprechen
auf
leiciten
Druck
an
und
soliten
daher
nicht
mit
Knf
tanwendung
betatigt
werden.
*Mit
diesem
Deck
k6nnen
Aufira@hmen
nicht
mitgehort
werden.
Nicht
die
Taste
TAPE-1
wahrend
der
Aufnahme
driicker,
da
sonst
die
Aufnahme
unterbrochen
wird.
*Wird
die
TAPE-2-Taste
einmal
gedrickt,
so
feuchtet
der
dazugehGrige
Indilator
auf
und
das
Gerat
wird
auf
die
Betrebsart
Band-
wiedergabe
_eingestellt;
bei
mochmaligem
Drucken
erlischt
der
Indikator
und
diese
Betriebsart
wird
aufgehoben.
Achten
Sie
darauf,
daf&
der
Indikator
augeeschaltet
ist,
wenn
Sie
irgendeine
andere
Pngrammquelle
auer
TAPE-2
hdren
(z.B.
Shcal
platten
oder’
Rundfunksendungen).
*Beim
Einschalten
des
Gerates
wird
der
Ein-
gangswahler
auf
TUNER
gestellt
7
Lautstarkeregler
(VOLUME
)
Dieser
Regler
dient
zum
Justierer
der
Wieder-
gabelautstarke
Uber
Lautspreche
oder
Kop-
fhorer.
Je
héher
dieser
Regler
tach
oben
ge-
schoben
wird,
desto
mehr
nimmt
{ié
Lautstarke
zu;
die
Minimallautstarke
("'0")
wird
auf
der
untersten
Position
eingestellt.

8
BASS
Tone
Control
This
is
used
to
adjust
the
bass
and
low-fre-
quency-range
sound
in
accordance
with
the
acoustics
of
the
listening
room
and
your
per-
sonal
preference.
When
set
to
the
"0"
position,
the
frequency
response
is
made
flat.
When
rotated
to
the
right,
the
bass
is
emphasized
and
when
rotated
to
the
left,
it
is
deemphasized.
9
TREBLE
Tone
Control
This
is
used
to
adjust
the
treble
or
high-fre-
quency-range
sound
such
as
that
from
cymbals.
When
rotated
to
the
right
from
the
‘'0’'
posi-
tion,
the
treble
is
emphasized
and
when
rotated
to
the
left,
it
is
deemphasized.
10
BALANCE
Control
The
volume
of
the
left
and
right
speakers
can
be
adjusted
by
the
BALANCE
control.
As
the
control
is
turned
counterclockwise
from
the
center
position,
the
sound
from
the
left
speaker
becomes
louder
than
that
from
the
right
speaker,
and
vice
versa.
Adjust
so
that
the
sounds
from
the
left
and
right
speakers
are
heard
with
equal
volume
at
your
listening
posi-
tion,
11
SUBSONIC
Switch
This
switch
eliminates
the
low
frequencies
(15
Hz)
beyond
the
audible
frequency
range.
When
it
is
pressed,
its
indicator
lights
and
the
subsonic
filter
that
attenuates
the
subsonic
fre-
quencies
at
a
6
dB/oct
slope
is
activated.
The
ultra-low-frequency
noise
generated
when
play-
ing
warped
records
causes
intermodulation
dis-
tortion
which
has
an
adverse
effect
on
the
sound
quality.
This
noise
can
be
removed
by
this
filter.
When
the
switch
is
pressed
again,
the
indicator
goes
off
and
the
filter
is
released.
12
PEAK
POWER
Display
This
indicates
the
power
output
and
so
monitor
this
display
when
adjusting
the
volume.
Dis-
played
is
the
output
power!
in
watts
when
speakers
with
an
8-ohm
impednace
are
used.
t
When
impedance
is
other
than
8
ohms,
the
actual
Output
will
differ
from
output
shown
on
the
display.
Conversion
is
then
necessary
for
correct
readings.
To
do
so,
multiply
the
read
value
by
8,
divided
by
the
connected
speaker’s
impedance.
Indicated
power
8
(watts)
Speaker's
impedance
(ohms)
=
Correct
power
(watts)
8
Commande
des
tonalités
graves
(BASS)
Elle
sert
a
ajuster
les
graves
ou
les
sons
de
la
plage
basses
fréquences
en
fonction
de
l’acous-
tique
de
la
salle
d’écoute
et
de
ses
préférences
personnelles.
Quand
il
est
placé
a
la
position
‘0’
fa
cor-
rection
de
la
réponse
de
fréquence
est
annulée.
Une
rotation
de
la
commande
vers
la
droite
accentue
les
graves,
tandis
qu'une
rotation
a
gauche
les
réduit.
9
Commande
des
tonalités
aiqués
(TREBLE)
Elle
sert
4
ajuster
les
aigués
ou
tes
sons
de
Ja
plage
hautes
fréquences
tels
que
ceux
des
cym-
bales.
Une
rotation
a
droite
a
partir
de
la
posi-
tion
“OD”
accentue
les
aigués,
tandis
qu’une
rotation
a
gauche
les
réduit.
10
Commande
d’équilibrage
(BALANCE)
Le
volume
des
enceintes
acoustiques
gauche
et
droite
peut
étre
réglé
par
la
commande
BAL-
ANCE.
Si
la
commande
est
tourné
dans
le
sens
contraire
des
aiguilles
d'une
montre
a
partir
de
sa
position
médiane,
le
son
de
I'enceinte
acous-
tique
gauche
sera
accentué
par
rapport
a
celui
de
I’enceinte
acoustique
droite,
et
vice-versa.
Régler
de
fagon
que
le
son
provenant
des
en-
ceintes
acoustiques
gauche
et
droite
soit
entendu
avec
la
méme
intensité
depuis
la
posi-
tion
d'écoute.
11
Commutateur
de
infra-acoustique
(SUBSONIC)
Ce
commutateur
élimine
les
basses
fréquences
(15
Hz)
situées
audela
de
la
gamme
de
fré-
quence
audible.
Lorsqu’on
Ienfonce,
son
témoin
s‘allume
et
le
filtre
infra-acoustique
qui
qui
atténue
les
fréquences
infra-acoustiques
de
coefficient
angulaire
6
dB/oct
se
déclenche.
Les
parasites
de
trés
basses
fréquences
engendrés
a
la
lecture
de
disques
gondolés
provoquent
une
distorsion
d’intermodulation
qui
a
un
effet
néfaste
sur
la
qualité
sonore.
Ce
filtre
permet
de
les
supprimer.
Lorsqu’on
appuie
a
nouveau
sur
ce
commuta-
teur,
le
témoin
s‘éteint
et
le
filtre
est
libéré.
12
Affichage
de
puissance
de
créte
(PEAK
POWER)
Comme
il
indique
fa
puissance
de
sortie,
on
l‘observera
lors
du
réglage
du
volume.
La
puissance’
de
sortie
est
exprimée
en
watts
quand
on
utilise
des
haut-parleurs
d‘une
im-
pendance
de
8
ohms.
tSi
celle-ci
est
différente,
l’affichage
ne
cor-
respondra
pas
a
la
sortie
réelle
et
une
conver-
sion
sera
nécessaire
pour
acquérir
les
valeurs
exactes.
Pour
ce
faire,
multipliez
la
valeur
indiquée
par
8
et
divisez
par
la
valeur
de
\‘impédance
de
|’encheinte
raccordée.
8
Impédance
des
enceintes
acoustique
(ohms)
Puissance
indiquée
(watts)
=
Puissance
exacte
(watts)
8
Tiefenregler
(BASS)
Mit
Hilfe
dieses
Reglers
die
Wiedergabe
der
tiefen
T6ne
je
nach
Geschmack
und
Chara-
teristik
des
Abhdrraums
einstellen.
in
der
Stellung
‘“O’'
werden
die
Frequenzen
linear
wiedergegeben.
Durch
Drehen
nach
rechts
werden
die
tiefen
Frequenzen
angehoben
und
durch
Drehen
nach
links
abgeschwécht.
9
Hohenregler
(TREBLE)
Mit
diesem
Regler
kann
die
Wiedergabe
von
hohe
Frequenzen,
wie
z.B.
der
Ton
von
Becken,
beeinflu@t
werden.
Bei
Drehen
nach
rechts
werden
die
hohen
Frequenzen
angehoben,
bei
Drehen
nach
links
abgeschwacht.
In
der
Stellung
“O"
verlauft
der
Frequenzgang
finear.
10
Balanceregler
(BALANCE)
Mit
dem
BALANCE
Regler
kann
die
Lautstarke
der
linken
und
rechten
Lautsprecher
eingestellt
werden.
Durch
Drehen
des
Reglers
aus
der
Mittelstellung
nach
links
wird
der
linke
Laut-
sprecher
lauter
als
der
rechte
und
umgekehrt.
Stellen
Sie
so
ein,
da&
Sie
an
dem
Platz,
an
dem
Sie
héren
wollen,
beide
Lautsprecher
gleich
laut
hdren.
11
Infraschallfilter-Taste
(SUBSONIC)
Diese
Taste
dient
dazu,
die
tiefen
Frequenzen
(15
Hz)
unterhalb
des
hdrbaren
Frequenz-
bereichs
abzuschneiden.
Bei
Drucken
der
Taste
leuchtet
der
dazugehGrige
Indikator
auf
und
das
Infraschallfilter,
mit
dem
Infraschallfrequenzen
um
6dB/Oktave
gedémpft
werden,
wird
akti-
viert.
Das
ultra-tieffrequente
Rauschen,
das
beim
Abspielen
von
stark
verzogenen
Schall-
platten
erzeugt
wird,
ruft
Intermodulations-
verzerrungen
hervor,
die
die
Klanmgqualitat
stark
beeintrachtigen.
Diese
Stdrgerausche
lassen
sich
mit
diesem
Filter
abschneiden.
Wird
die
Taste
erneut
gedriickt,
so
erlischt
der
Indi-
kator
und
das
Filter
wird
aufer
Funktion
gesetzt.
12
Spitzenpegelanzeige
(PEAK
POWER)
Sie
zeigt
die
Ausgangsleistung
an,
und
ermdg-
licht
Ihnen,
die
Lautstarke
beim
Regutlieren
zu
liberwachen.
Die
Ausgangsleistung’
wird
in
Watt
angezeigt,
wenn
Lautsprecherboxen
mit
8
Ohm
tmpedanz
angeschlossen
sind.
tWenn
die
Impedanz
anders
als
8
Ohm
ist,
weicht
die
tatsdchliche
Ausgangsleistung
von
der
auf
der
Anzeige
angezeigten
ab.
Fur
korrektes
Ablesen
ist
dann
eine
Umrechnung
erforderlich.
Das
geschieht,
indem
man
den
angezeigt
Wert
mit
8
multipliziert
und
durch
die
Impedanz
des
angeschlossenen
Laut-
sprechers
teilt.
Angezeigte
Leistung
Sette
tote
es
(W)
Lautspreftcer-
impedanz
(Ohm)
=
Korrekte
Leistung
(W)

8
Operating
procedures
BASS"'0”
TREBLE‘‘0”
BALANCE“‘0”
Procédés
de
réglage
Bedienungsverfahren
VOLUME“'0"
SPEAKERS"ON”
Before
Operation
Before
operation,
check
the
positions
of
the
controls.
*Set
the
VOLUME
control
to
its
bottom
posi-
tion
to
minimize
the
volume.
*Set
the
left-hand
SPEAKERS
swtich
to
ON
and
select
the
speaker
you
intend
to
use
with
the
right-hand
SPEAKERS
switch.
*Set
the
BASS
and
TREBLE
tone
controls
to
the
“0”
position.
*Set
the
BALANCE
contro!
to
the
center
posi-
tion.
*Set
the
LOUDNESS
switch
to
the
“OFF”
Position.
*Set
the
TAPE-2
input
selector
switch
to
the
indicator
goes
off
position.
Playing
records
Records
can
be
played
in
a
single-touch
action
if
you
are
using
a
SANSUI
turntable
with
the
COMPU
SELECTOR
function.
*The
COMPU
SELECTOR
function
will
not
work
unless
the
turntable’s
power
is
on.
Using
the
P-D30:
*The
unit's
input
selector
switch
is
auto-
matically
set
to
PHONO
just
by
pushing
the
turntable’s
START/STOP
switch,
and
record
play
begins.
Using
the
P-L40
or
P-L50:
*The
unit's
input
selector
switch
is
auto-
matically
set
to
PHONO
just
by
pushing
the
turntable's
START/STOP
switch,
and
record
play
begins.
*
Just
by
pushing
the
unit’s
PHONO
input
selec-
tor
switch,
the
turntable
operates
auto-
matically
and
record
play
begins.
*The
turntable
is
automatically
stopped
when
the
unit’s
input
selector
switch
is
changed
to
another program
source
during
record
play.
Using
any
other
turntable:
1,
Push
the
PHONO
input
selector
switch.
2.
Operate
the
turntable
and
play
the
record.
*
Adjust
the
volume,
balance
and
tone
controls
to
your
preference.
LOUDNESS"
OFF”
Avant
de
faire
fonctionner
l'appareil
Avant
de
faire
fonctionner
|'appareil,
vérifier
la
position
des
commandes.
*
Enfoncer
la
commande
VOLUME
sur
sa
posi-
tion
la
plus
en
bas
pour
réduire
le
volume.
*Mettre
a
nouveau
le
commutateur
de
gauche
SPEAKERS
sur
ON
et
choisir
le
haut-parleur
que
l'on
veut
utiliser
4
l'aide
du
commutateur
de
droite
SPEAKERS.
*Mettre
les
commandes
BASS
et
TREBLE
sur
la
position
centrale
‘‘0’’.
*Mettre
la
commande
BALANCE
sur
la
posi-
tion
centrale.
*
Mettre
l’interrupteur
LOUDNESS
sur
la
posi-
tion
“OFF”.
*
Régler
le
sélecteur
d’entrée
TAPE-2
en
posi-
tion
le
témoin
s’éteint.
Lecture
de
disques
Il
est
possible
de
lire
des
disques
par
l’action
d'une
seule
touche
si
l’on
utilise
un
tourne-
disque
SANSU!
dotée
de
la
fonction
COMPU
SELECTOR.
*
Le
compu-sélecteur
ne
fonctionne
pas
si
I‘ap-
pareil
n’est
pas
mis
sous
tension.
Utilisation
de
la
P-D30:
*Le
sélecteur
d’entrée
de
l'appareil
se
régle
automatiquement
sur
PHONO
quand
on
appuie
sur
le
commutateur
START/STOP
du
tourne-disque,
et
la
lecture
du
disque
com-
mence.
Utilisation
de
la
P-L40
ou
de
la
P-L50:
*Le
sélecteur
d’entrée
de
l'appareil
se
régle
automatiquement
sur
PHONO
quand
on
ap-
puie
sur
le
commutateur
START/STOP
du
tourne-disque,
et
Ja
lecture
du
disque
com-
mence.
*
Lorsqu’on
appuie
sur
le
sélecteur
d’entrée
PHONO
de
l'appareil,
le
tourne-disque
se
met
automatiquement
a
fonctionner
et
la
lfecture
du
disque
commence.
*Le
tourne-disque
s‘’arréte
automatiquement
lorsque
le
sélecteur
d’entrée
de
l'appareil
est
réglé
sur
une
autre
source
de
programme
pendant
la
lecture
d’un
disque.
Utilisation
de
toute
autre
tourne-disque:
1.
Appuyer
sur
le
sélecteur
d’entrée
PHONO.
2.
Faire
fonctionner
le
tourne-disque
et
lire
le
disque.
*Régier
les
commandes
de
volume,
d’équili-
brage
et
de
tonalité
4
sa
convenance.
Vor
dem
Betrieb
Vor
dem
Betrieb
die
Positionen
aller
Regler
Uberprifen.
*Schieben
Sie
den
VOLUME-Regler
auf
die
unterste
Stellung
(Minimaliautstarke).
*
Drucken
Sie
die
linke
Taste
SPEAKERS
auf
ON
und
wahien
Sie
eine
der
angeschlossenen
Lautsprecherboxen
mittels
der
rechten
Taste
SPEAKERS.
*
Stellen
Sie
die
Klangregler
BASS
und
TRE-
BLE
auf
Mittenstellung
‘‘O”.
*Stelien
Sie
den
Regler
BALANCE
auf
Mitten-
stellung.
*Stellen
Sie
den
Schalter
“OFF”.
*
Stellen
Sie
die
Eingangswahltaste
TAPE-2
auf
die
erlischt
die
Anzeige
Stellung.
LOUDNESS
auf
Schallplattenwiedergabe
Wenn
Sie
einen
SANSU|I-Schaliplattenspieler
mit
COMPU
SELECTOR-Funktion
verwenden,
k6nnen
Sie
Schallplatten
auf
einfachen
Tasten-
druck
abspielen.
*Die
COMPU
SELECTOR-Funktion
wird
nur
aktiviert,
wenn
der
Plattenspieler
eingeschaltet
ist.
Bei
Gebrauch
des
P-D30:
*
Durch
einfaches
Driicken
der
START/STOP-
Taste
des
Plattenspielers
wird
clie
Eingangs-
wahltaste
des
Gerdtes
automatisch
auf
PHONO
gestellt,
und
die
Plattenwiedergabe
beginnt.
Bei
Gebrauch
des
P-L40
oder
P-L50:
*
Durch
einfaches
Driicken
der
START/STOP-
Taste
des
Plattenspielers
wird
lie
Eingangs-
wahltaste
des
Gerates
automatisch
auf
PHONO
gestellt,
und
die
Plattenwiedergape
beginnt.
*Durch
einfaches
Driicken
der
Eingangs-
wahitaste
PHONO
des
Gerdes
wird
der
Plattenspieler
automatisch
in
Betrieb
gesetzt
und
das
Abspielen
der
Schallplatte
beginnt.
*Wenn
beim
Abspielen
einer
Schaliplatte
eine
andere
Programmquelle
mit
emer
der
Ein-
gangswahltasten
des
Gerates
eingestellt
wird,
so
wird
der
Plattenspieler
automatisch
ab-
geschaltet.
Bei
Verwendung
eines
andeen
Platten-
spielers:
1.
Driicken
Sie
die
Eingangswahltaste
PHONO.
2.
Setzen
Sie
den
Plattenspieler
is
Betrieb
und
spielen
Sie
die
Schallplatte
ab.
*
Justieren
Sie
die
Regier
fir
Lautstarke,
Balance
und
Klangfarbe
wunschgemag,

Tape
playback
Tapes
can
be
played
back
in
a
single-touch
ac-
tion
if
aSANSUI
cassette
deck
with
the
COMPU
SELECTOR
function
is
connected
to
the
TAPE-
1
terminals.
é
*The
COMPU
SELECTOR
function
will
not
work
unless
the
cassette
deck’s
power
is
on.
Using
the
D-77R
or
D-77F:
*The
unit’s
input
selector
switch
is
auto-
matically
set
to
TAPE-1
just
by
pushing
the
cassette
deck’'s
PLAY
switch,
and
tape
play-
back
starts.
*
Just
by
pushing
the
unit’s
TAPE-1
input
selec-
tor
switch,
the
cassette
deck
operates
auto-
matically
and
tape
playback
starts.
*The
cassette
deck
is
automatically
stopped
when
the
unit's
input
selector
switch
is
chang-
ed
to
another
program
source
during
tape
playback,
Using
the
D-99D:
*The
unit’s
input
selector
switch
is
auto-
matically
set
to
TAPE-1
just
by
pushing
the
cassette
deck's
PLAY
switch,
and
tape
play-
back
starts.
Using
any
other
tape
deck:
1.
Push
the
TAPE-1
input
selector
switch.
2.
Operate
the
tape
deck
and
play
back
the
tape.
Playback
with
second
tape
deck
When
playing
back
a
tape
on
a
second
tape
deck
connected
to
the
TAPE-2
terminals,
press
the
TAPE-2
input
selector
switch
and
make
the
indicator
light.
*Once
the
tape
playback
is
completed,
press
,
the
TAPE-2
input
selector
switch
again
and
make
the
indicator
go
off.
If
the
TAPE-2
indicator
is
allowed
to
be
lighted,
sound
can-
not
be
reproduced
from
another
program
s
source.
*
Adjust
the
volume,
balance
and
tone
controls
to
your
preference.
Lecture
de
bande
tl
est
possible
de
lire
les
bandes
par
l’action
d‘une
seule
touche
si
I’on
a
relié
un
magnéto-
cassette
SANSUI
doté
de
la
fonction
COMPU
SELECTOR
aux
bornes
TAPE-1.
*
Le
compu-sélecteur
ne
fonctionne
pas
si
l’ap-
pareil
n'est
pas
mis
sous
tension.
Utilisation
du
D-77R
ou
du
D-77F:
*
Le
sélecteur
d’entrée
de
|'appareil
se
met
auto-
matiquement
sur
TAPE-1
quand
on
appuie
sur
le
bouton
PLAY
du
magnétocassette,
et
fa
lecture
commence.
*Lorsqu’on
appuie
sur
le
sélecteur
d’entrée
TAPE-1
de
l'appareil,
le
magnétocassette
se
met
automatiquement
a
fonctionner
et
la
lecture
de
la
bande
commence.
*
Le
magnétocassette
s‘arréte
automatiquement
lorsque
le
sélecteur
d’entrée
de
{’appareil
est
réglé
sur
une
autre
source
de
programme
pen-
dant
fa
lecture
d’une
bande.
Utilisation
du
D-99D:
*
Le
sélecteur
d’entrée
de
l'appareil
se
met
auto-
matiquement
sur
TAPE-1
quand
on
appuie
sur
le
bouton
PLAY
du
magnétocassette,
et
la
lecture
commence.
Utilisation
de
tout
autre
magnétocassette:
1.
Appuyer
sur
Je
sélecteur
d’entrée
TAPE-1.
2.
Faire
fonctionner
le
magnétocassette
et
lire
ja
bande.
Lecture
avec
un
deuxiéme
magnéto-
phone
Pour
lire
une
bande
sur
un
deuxiéme
magnéto-
phone
relié
aux
bornes
TAPE-2,
appuyer
sur
le
sélecteur
d'entrée
TAPE-2
de
facon
que
le
témoin
s’allume.
*
Une
fois
que
la
lecture
de
bande
est
terminée
‘
appuyer
a
nouveau
sur
le
sélecteur
d’entrée
TAPE-2
pour
que
le
témoin
s’éteigne.
Si
on
laisse
le
témoin
TAPE-2
allumé,
il
n’est
pas
possible
de
reproduire
le
son
d‘une
autre
source
de
programme.
*
Régler
les
commandes
de
volume,
d‘équili-
brage
et
de
tonalité
4
sa
convenance.
Tonbandwiedergabe
Bei
Anschlu&
eines
SANSU1I-Cassettendecks
mit
COMPU
SELECTOR-Funktion
an
die
TAPE-1-
Buchsen
ist
Bandwiedergabe
auf
einfachen
Tastendruck
mdglich.
*Die
COMPU
SELECTOR-Funktion
wird
nur
aktiviert,
wenn
der
Cassettendecks
einge-
schaltet
ist.
Bei
Gebrauch
des
D-77R
oder
D-77F:
*
Durch
einfaches
Drticken
der
PLAY
-Taste
am
Cassettendeck
wird
die
Eingangswahltaste
des
Gerates
automatisch
auf
TAPE-1
gestellt,
und
die
Bandwiedergabe
beginnt.
*Durch
einfaches
Driicken
der
Eingangswahl-
taste
TAPE-1
des
Gerates
wird
das
Cassetten-
deck
automatisch
in
Betrieb
gesetzt
und
die
Bandwiedergabe
beginnt.
*Wird
wahrend
der
Bandwiedergabe
eine
andere
Programmaquelle
mit
einer
der
Ein-
gangswahitasten
des
Gerdtes
eingestellt,
so
wird
das
Cassettendeck
automatisch
abge-
schaltet.
Bei
Gebrauch
des
D-99D:
*
Durch
einfaches
Drucken
der
PLAY
-Taste
am
Cassettendeck
wird
die
Eingangswah
Itaste
des
Gerates
automatisch
auf
TAPE-1
gestellt,
und
die
Bandwiedergabe
beginnt.
Bei
Verwendung
eines
anderen
T
onband-
gerates:
1.
Driicken
Sie
die
Eingangswahltaste
TAPE-1,
2.
Setzen
Sie
das
Tonbandgerat
in
Betrieb
und
spielen
Sie
das
Band
ab.
Wiedergabe
mit
einem
zweiten
Ton-
bandgerat
Wenn
Sie
ein
Band
mit
einem
zweiten
Ton-
bandgerat
abspielen,
das
an
die
TAPE-2-Buchsen
angeschlossen
ist,
driicken
Sie
die
Eing
angswah|-
taste
TAPE-2
und
lassen
den
Indilkator
auf-
leuchten.
*Driicken
Sie
die
Eingangswahltaste@
TAPE-2
nach
beendeter
Bandwiedergabe
nochmals,
so
da
der
Indikator
erlischt.
Tonwiedergabe
von
einer
anderen
Programmquelle
ist
micht
mog-
lich,
solange
der
TAPE-2-Indikator
auf-
leuchtet.
*Justieren
Sie
die
Regler
fiir
Lautstarke,
Balance
und
Klangfarbe
wunschgem28.

10
o
Broadcast
Reception
Radio
broadcast
can
be
listening
in
a
single-
touch
action
if
you
are
using
a
SANSUI
tuner
with
the
COMPU
SELECTOR
function.
*The
COMPU
SELECTOR
function
will
not
work
unless
the
tuner’s
power
is
on.
Using
the
T-707:
The
unit
input
selector
is
automatically
set
to
TUNER
when
the
tuner
is
operated
as
below:
*
When
the
UP
or
DOWN
switch
is
pushed
*When
the
SELECTOR
switch
position
is
changed
*When
the
TUNING
control
is
rotated
Using
the
T-909:
*The
unit's
input
selector
switch
is
automat-
ically
set
to
TUNER
just
by
pushing
the
tuner’s
SELECTOR
switch.
Using
any
other
tuner:
1.
Push
the
TUNER
input
selector
switch.
2.
Control
the
tuner
and
tune
in
the
desired
station.
*
Adjust
the
volume,
balance
and
tone
controls
to
your
preference.
Recording
disc
records
and
radio
broadcasts
Recording
can
be
made
on
tape
decks
con-
nected
to
the
TAPE
REC
terminals.
1.
Depress
the
appropriate
input
selector
switch
to
select
to
the
program
source
you
want
to
record,
2.
Start
playing
the
program
source.
3.
Operate
the
connected
tape
deck
and
start
recording.
@
Recordings
cannot
be
monitored
on
this
deck.
Do
not
depress
the
TAPE-1
input
selector
switch
during
a
tape
recording
or
else
the
re-
cording
will
be
interrupted.
Réception
d’emissions
de
radio
Il
est
possible
de
ecoute
de
Ja
radio
par
I’action
d’une
seule
touche
si
l’on
utilise
une
tuner
SANSUI
dotée
de
la
fonction
COMPU
SELEC-
TOR.
*
Le
compu-sélecteur
ne
fonctionne
pas
si
|’ap-
pareil
n’est
pas
mis
sous
tension.
Utilisation
du
T-707:
Le
sélecteur
d’entrée
de
|’appareil
se
met
auto-
matiquement
sur
TUNER
lorsqu’on
fait
fonc-
tionner
l‘amplificateur
de
la
facon
suivante:
*
Lorsqu’on
appuie
sur
le
commutateur
UP
ou
DOWN
*Lorsqu’on
modifie
la
position
du
bouton
SELECTOR
*
Lorsqu’on
fait
tourner
la
commande
TUNING
Utilisation
du
T-909:
*
Le
sélecteur
d'entrée
de
l‘appareil
se
met
auto-
matiquement
sur
TUNER
quand
on
appuie
sur
le
bouton
SELECTOR
du
tuner.
Utilisation
de
tout
autre
tuner:
1.
Appuyer
sur
le
sélecteur
d'entrée
TUNER.
2.
Manceuvrer
le
tuner
et
réglez
vous
sur
la
station
désirée.
*
Régler
les
commandes
de
volume,
d’équili-
brage
et
de
tonalité
4
sa
convenance.
Enregistrement
de
disques
et
d‘émis-
sions
radio
L’enregistrement
peut
étre
effectué
sur
des
platines
de
magnétophone
raccordées,
aux
bornes
TAPE
REC.
1.
Enfoncer
le
sélecteur
d’entrée
pour
choisir
la
source
de
programme
que
vous
désirez
en-
registrer.
2.
Commencer
a
lire
la
source
de
programme.
3.
Manceuvrez
la
platine
de
magnétophone
rac-
cordée
et
commencer
|’enregistrement.
@
{i
n’est
pas
possible
de
surveiller
les
enregistre-
ments
sur
cet
appareil.
Ne
pas
appuyer
sur
fe
sélecteur
d’entrée
TAPE-1
pendant
l‘enre-
gistrement
d'une
bande
car
ceci
l’interrom-
Pprait.
Radioempfang
Wenn
Sie
einen
SANSUI-Tuner
spieler
mit
COMPU
SELECTOR-Funktion
verwenden,
k6nnen
Sie
Tuner
auf
einfachen
Tastendruck
abspielen.
.
*Die
COMPU
SELECTOR-Funktion
wird
nur
aktiviert,
wenn
der
Tuner
eingeschaltet
ist.
Bei
Gebrauch
des
T-707:
Steckern
miteinander
verbunden,
so
wird
der
Eingangswahler
des
Geraét
automatisch
auf
TUNER
gestellt,
wenn
das
Verstarkers
wie
folgt
bedient
wird:
*
Bei
Betdtigen
der
Tasten
UP
oder
DOWN.
*
Bei
Veranderung
der
Einstellung
des
SELEC-
TOR-Schalter.
*
Bei
Drehen
der
TUNING-Regler.
Bei
Gebrauch
des
T-909:
*
Durch
einfaches
Driicken
der
SELECTOR-
Schalter
am
Tuner
wird
die
Eingangswahitaste
des
Gerdtes
automatisch
auf
TUNER
gestellt.
Bei
Verwendung
eines
anderen
Tuner:
1.
Drucken
Sie
die
Eingangswahltaste
TUNER.
2.
Den
Tuner
einschalten
und
auf
den
gewiin-
schten
Sender
abstimmen.
*Justieren
Sie die
Regler
fi
Lautstirke,
Balance
und
Klangfarbe
wunschema8.
Bandmitschnitte
von
Schallplatten
und
Rundfunkprogrammen
Fur
Bandmitschnitte
ist
ein
Tonoandgeraét
an
die
TAPE
REC
Ausgange
an
der
Gerateriickseite
anzuschliefen.
1.
Die
Eingangswahitasten
auf
di@
gewlinschte
Programmquelle
drucken,
2.
Beginnen
Sie
mit
dem
Abspielen
der
Pro-
grammauelle.
3.
Danach
das
Tonbandgerat
in
Betrieb
setzen
und
mit
der
Aufnahme
beginnen
.
,
@Mit
diesem
Deck
kOnnen
Aufnahmen
nicht
mitgehért
werden.
Nicht
die
—
ingangswahl-
taste
TAPE-1
wahrend
der
Aufndame
dricken,
da
sonst
die
Aufnahme
unterbroc
hen
wird.

ll
TAPE-1
Dubbing
from
tape
to
tape
Using
two
tape
decks,
it is
possible
to
record
the
contents
on
a
prerecorded
tape
onto
another
tape.
This
is
known
as
tape
dubbing
(copying),
and
it
allows
you
to
edit
the
record-
ed
contents
freely.
Tape
dubbing
is
performed
from
TAPE-1
to
TAPE-2.
1.
2.
Depress
the
TAPE-1
input
selector
switch.
Play
back
the
tape
in
the
tape
deck
con-
nected
to
the
TAPE-1
terminals,
set
the
tape
deck
connected
to
the
TAPE-2
terminals
to
the
recording
mode
and
begin
dubbing.
.
The
sound
heard
through
the
speakers
is
the
playback
sound
of
TAPE-1.
With
a
3-head
tape
deck
connected
to
the
TAPE-2
termi-
nals,
depress
the
TAPE-2
input
selector
switch,
and
monitor
the
recording.
For
the
United
Kingdom
only
Important
The
wires
in
this
mains
lead
are
coloured
in
accordance
with
the
following
code:
Blue:
Neutral
Brown:
Live
If
the
colours
of
the
wires
in
the
mains
lead
of
this
equipment
shouid
not
correspond
to
the
coloured
markings
identifying
the
ter-
minals
in
your
plug,
proceed
as
follows:
Copiage
d’une
bande
sur
une
autre
Si
l'on
utilise
deux
magnétophones,
il
est
possible
d’enregistrer
le
contenu
d’une
bande
préenregistrée
sur
une
autre
bande.
C’est
ce
que
{'on
appelle
le
mixage
(copiage).
Cette
fonction
permet
d’effectuer
librement
des
mon-
tages
avec
des
enregistrements.
Le
copiage
de
bande
s‘effectue
du
magnéto-
phone
TAPE-1
sur
le
magnétophone
TAPE-2.
1.
Enfoncer
le
sélecteur
d’entrée
TAPE-1.
2.
Reproduire
la
bande
du
magnétophone
relié
aux
bornes
TAPE-1,
mettre
le
magnétophone
relié
aux
bornes
TAPE-2
dans
le
mode
d’en-
registrement,
et
commencer
Je
mixage.
3.
Le
son
qui
parvient
a
travers
les
haut-parleurs
est
‘le
son
de
fa
Jecture
du
magnétophone
TAPE-1.
Lorsqu’un
magnétophone
a
trois
tétes
est
relié
aux
bornes
TAPE-2,
enfoncer
le
sélecteur
d’entrée
TAPE-2,
et
surveiller
enregistrement.
Uberspielen
von
einem
Tonband
auf
das
andere
Bei
Verwendung
von
zwei
Tonbandgeraten
ist
es
mdglich,
den
Inhalt
eines
bereits
bespielten
Bandes
auf
ein
anderes
Band
zu
Uberspielen.
Diesen
Vorgang
nennt
man
_
Uberspielen
(Kopieren),
der
Ihnen
die
Médglichkeit
gibt,
Aufnahmen
beliebig
zusammenzustellen.
Das
Uberspielen
erfolgt
von
Tonband
TAPE-1
auf
Tonband
TAPE-2.
1.
Die
Eingangswahltaste
TAPE-1
driicken.
2.
Spielen
Sie
das
Band
mit
dem
an
die
Buchsen
TAPE-1
angeschlossenen
Tonbandgerat
ab,
und
versetzen
Sie
das
an
die
Buchsen
TAPE-
2
angeschlossene
Tonbandgerat
in
Aufnah-
mebereitschaft.
Beginnen
Sie
nun
mit
dem
Uberspielen.
3.
Der
Uber
die
Lautsprecher
zu
hérende
Ton
ist
der
Wiedergabeton
von
Tonband
TAPE-1,
Bei
einem
an
die
Buchsen
TAPE-2
ange-
schlossenen
Tonbandgerat
in
3-Kopf-Technik
driicken
Sie
zur
Hinterbandkontrolle
die
Eingangswahltaste
TAPE-2.
The
wire
which
is
coloured
blue
must
be
connected
to
the
terminal
which
is
marked
with
the
letter
‘N‘
or
coloured
black.
The
wire
which
is
coloured
brown
must
be
connected
to
the
terminal
which
is
marked
with
the
fetter
‘L’
or
coloured
red.
Ensure
that
your
equipment
is
connected
correctly.
If
you
are
in
any
doubt,
consult
a
qualified
electrician.
For
equipment
purchased
outside
the
U.K.
with
a
“EUROPEAN”
two-pin
mains
Plug,
the
plug
should
be
removed
and
conneections
made
in
accordance
with
the
above
irtstruc-
tions.
Ensure
also
that
the
equiprrvent
is
properly
adjusted
to
240
volts
operation.
If
you
are
in
any
doubt,
consult
a
qualified
electrician,
or
our
Service
Agent
in
thé
U.K.

12
Specifications
Power
output
Min.
RMS,
both
channels
driven,
from
20
to
20,000
Hz,
with
no
more
than
0.05
%
total
harmonic
distortion
70
watts
per
channel
into
8
ohms
Load
impedance
.............
8
ohms
Total
harmonic
distortion.
.......
less
than
0.05
%
at
or
below
rated
min.
RMS
power
output
Frequency
response
(at
1
watt)...
.
.
5
to
60,000
Hz
+1dB,—-2dB
RIAA
curve
deviation
(PHONO,
20
Hz
to
20
kHz)
Cake
ol
BA Le
Gel
age
Metin
ted
4
Soe
+0.5
dB,
—0.5dB
input
sensitivity
and
impedance
(1
kHz,
for
rated
power
output)
PHONO?
St
eo
Boe
oh
ae
2.5
mV/47
kilohms
(Max.
input
capability;
120
mV
at
1
kHz,
less
than
0.1
%
total
harmonic
distortion)
Signal
to
noise
ratio
(short-circuit,
A-network)
PHONG
255.
323-dd:2
en
eoette
ae
ae
72dB
TUNER,
TAPE
PLAY
........
90
dB
Power
requirements
Power
voltage.
............
120/220/240
V
(50/60
Hz)
For
U.S.A.
&
Canada
.......
120
V
(60
Hz)
Power
consumption
.........
230
watts
280
VA
Rated
350
watts
Maximum
Dimensions
................
430
mm
(16-15/16")
W
118
mm
(4-11/16'')
H
245
mm
(9-11/16")
D
Weight...
¢
Jace
hbo
ke
5.6
kg
(12.4
Ibs.)
net
6.4
kg
(14.1
tbs.)
packed
*
Design
and
specifications
subject
to
changes
without
notice
for
im-*
TUNER,TAPEPLAY
........
150
mV
/47
kilohms
provements.
Output
level
(1
kHz)
*
In
order
to
simplify
the
explanation
illustrations
may
sometimes
TAPE
REG
...¢s.4:
25008
naw
Gah
2a
130
mV
into
47
kilohms
differ
from
the
originals.
4
ie
2
Specifications
Puissance
de
sortie
Puissance
efficace
minimale,
les
deux
canaux
en
fonction,
de
20
4
20.000
Hz,
avec
pas
plusde
0,05
%
de
distorsion
harmonique
total.
70
watts
par
canal
avec
8
ohms
Impédance
de
charge.
..........
8
ohms
Distorsion
harmonique
totale...
..
.
Moins
de
0,05
%
juste
ou
en
dessous
de
la
puissance
de
sortie
minimale
efficace.
Réponse
de
fréquence
(A
1
watt)...
.
5a
60.000
Hz
+1dB,—2dB
Déviation
de
la
courbe
RIAA
(PHONO,
20
Hz
a
20
kHz)
wnat
Wits
A
oe
ap
asada
2
ass
dae
By?
Mies
Ss
+0,5
dB,
—0,5
dB
impédance
et
sensibilité
d’entrée
(1
KHz,
pour
puissance
de
sortie
nominale)
PHONO
honed
cote
ye
hae
ee
2,5
mV/47
kohms
(Capacité
d’entrée
max;
120
mV
4
1
kHz,
moinsdeO,1
%
de
dis-
torsion
harmonique
totale)
TUNER,
TAPEPLAY
........
150
mV/47
kohms
Niveau
de
sortie
(1
kHz)
TAPE
REC
ick
s
pts
tiaaae
aes
130
mV
avec
47
kohms
Rapport
de
signal
a
bruit
(IHF)
PHONO!
wc
aes
tk
Pa
ew
me
Ree
72dB
TUNER,
TAPE
PLAY
........
90
dB
Alimentation
Tension
d’alimentation
.......
120/220/240
V
(50/60
Hz)
Pour
les
USA
et
le
Canada
Consommation
de
puissance
.
.
120
V
(60
Hz)
.
230
watts
280
VA
Nominale
350
watts
Maximum
Dimensions
...............-.
430
mm
(L)
118
mm
(H)
245
mm
(P)
POI
Sis
2.55
2h
os
Gory
WP
eknaed
d
4g}
Ses
5,6
kg
net
6,4
kg
emballé
*
La
présentation
et
spécifications
sont
susceptibles
d@tre
modifiées
sans
prévis
par
suite
d’ameliorations
éventuelles.
Pour
simplifier
les
explications,
les
illustrations
peuvent
quelquefois
6tre
différentes
des
originaux.
Technische
Daten
Ausgangsleistung
Min.
effektive,
beide
Kanale
betrieben,
von
20
bis
20.000
Hz
mit
nicht
mehr
als
0,05
%
Klirrgrad
70
W
pro
Kanal
an
8
Ohm
Lastimpedanz...............
8
Ohm
Klirrgrad
en
Weniger
als
0,05
%
bei
oder
unter
min.
effektive
Nennaus-
gangsleistung
Frequenzgang
(beil1
W)
.........
5
bis
60.000
Hz
+1dB,—2dB
RIAA-Kurvenabweichtung
(PHONO,
20
Hz
bis
20
kHz)
Seah
SEs
Ro
wid
dq
Baa
cetnihe
nig
8
+0,5dB,—-0,5dB
Eingangsempfindlichkeit
und
impedanz
(1
kHz,
fiir
Nennausgangsleist-
ung)
PINON:
.23
oo
3.4,
2.
hea
ee
os
2,5
mV/47
Kiloohm
(Max.
Eingangskapazitat,
120
mV
bei
1
kHz,
weniger
als
0,1
%
Ktirrgrad)
TUNER,
TAPE
PLAY
Ausgangspegel
(1
kHz)
TAPE
CVREG.
oo
enct
onto
nie
a
ot
130
mV
an
47
Kiloohm
eieSE
ve
ha
as
150
mV/47
Kiloohm
Signal-Rauschspannungsabstand
(1HF)
PHONO
wea
ea
Sse
de
eee
72
dB
TUNER,
TAPE
PLAY
........
90
dB
Stromversorgung
Netzspannung..........---
120/220/240
V
(50/60
Hz)
Fur
USA
und
Kanada
.......
120
V
(60
Hz)
Stromverbrauch
...........
230
Watt
280
VA
Nennverbrauch
350
Watt
Maximde
Verbrauch
Abmessungen.........-.....
430
mm
Breite
:
118
mm
Hohe
245
mm
Tiefe
Gewicht
..........0........
5,6
kg
netto
x
6,4
kg
verpackt
*
Anderungen,
die
dem
technischen
Fortschritt
dienen,
bleiben
vorbe-
halten.
*
Um
die
Erlauterung
zu
vereinfachen,
kénnen
die
Abtifldungen
man-
chmal
vom
Original
abweichen.
SANSUI
ELECTRIC
CO.,
LTD.
Sansui.
14-1
Izumi
2-Chome,
Suginami-ku,
TOK
YO
168,
JAPAN
Printed
in
Japan
(72M
)<46356500>
Other Sansui Amplifier manuals

Sansui
Sansui AU-6500 Troubleshooting guide

Sansui
Sansui 1000A Troubleshooting guide

Sansui
Sansui AU-D11 II User manual

Sansui
Sansui RA-500 Troubleshooting guide

Sansui
Sansui B-2102 User manual

Sansui
Sansui AU-4900 User manual

Sansui
Sansui A-9 User manual

Sansui
Sansui AU-555A Troubleshooting guide

Sansui
Sansui 350A User manual

Sansui
Sansui AU-7500 Troubleshooting guide

Sansui
Sansui AU-X701 User manual

Sansui
Sansui BA-5000 User manual

Sansui
Sansui AU-X711 User manual

Sansui
Sansui 1000X User manual

Sansui
Sansui AU-101 Troubleshooting guide

Sansui
Sansui AU-5500 User manual

Sansui
Sansui 3000 User manual

Sansui
Sansui AU-101 Troubleshooting guide

Sansui
Sansui RA-990 User manual

Sansui
Sansui SAP201V User manual