-9-
Press repeatedly toswitch the repeat modes.
(Note: For VCD2.0,SVCD, etc, this function is invalidwhen the PBC function is
activated.)
You can repeat a specific section of a disc with this button.
Press this buttonto mark down the starting point(A) and press it again to mark
down the endingpoint (B). Then, the unit will playback thissection over and over
again. Press itfor the third time to cancelA-B repeat and resume to the normal
playback.
Note: PointsA and B must bein the same title/ track.
SLOW
REPEAT
A-B
MUTE
Press this buttonto switch off the sound temporarily. Press it againto switch it on.
VOLUME+/-
Press [VOLUME+] toturn up the volume; press [VOLUME-]to turn down the
volume.
Press repeatedly forslow-motion playback in different speeds. The available
speeds are 1/2,1/4, 1/8, 1/16 of the normalspeed. Press [ ] to resumethe normal
playback. (Note:Applies to DVD, VCD discs, etc.)
Press to enterthe title menu of a DVDdisc.
TITLE
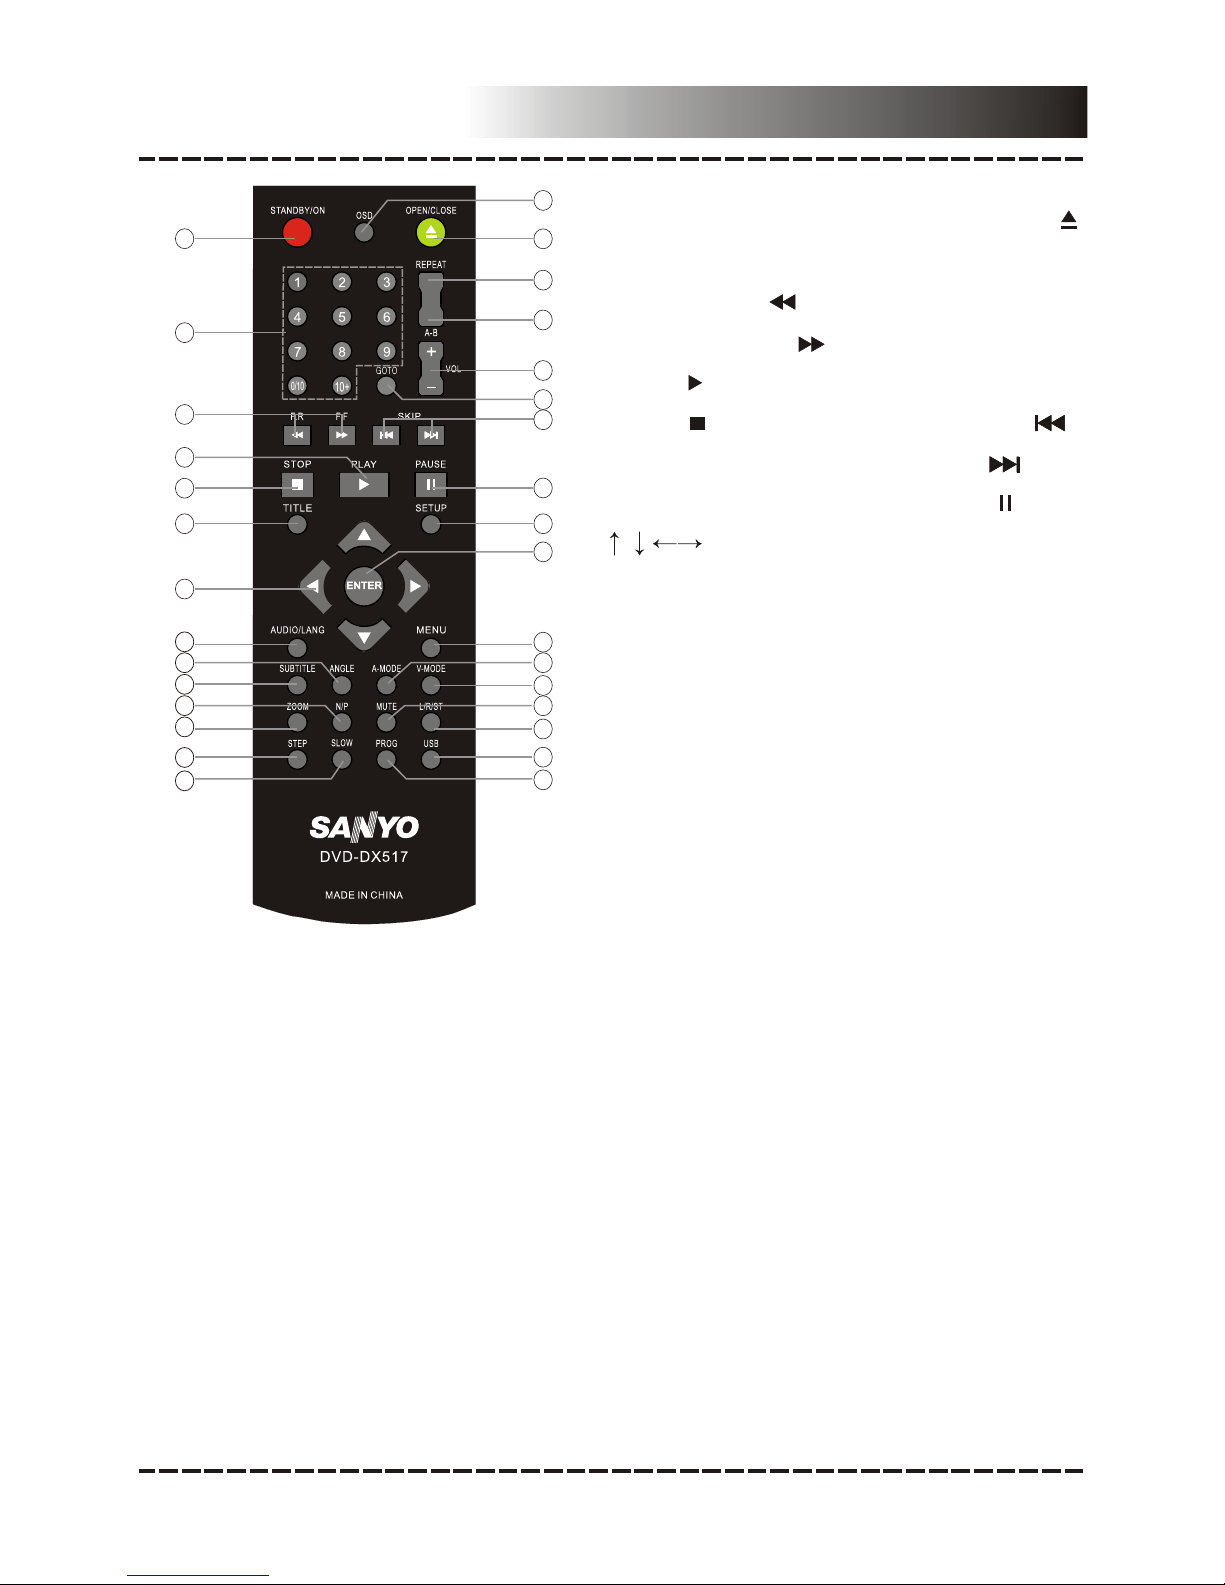
Remote control Function
Press to returnto the root menu.
When playing discencoded with PBC function, press todisplay the PBC menu.
Press it againto disable the PBC function. (Note:DVD, VCD1.1, CD-DAand MP3
disc have noPBC function.)
MENU
Press repeatedly toswitch the subtitles or switch off the subtitlefunction.
(Note: This function only workswith those discsencoded with subtitles.)
SUBTITLE
OSD
Press repeatedly toswitch or hide the relative informationof the playing disc.
Press repeatedly toselect the available audio languages provided by the disc (for
DVD).
AUDIO/LANG
Press repeatedly toswitch the available audio channels (LEFTMONO, RIGHT
MONO, MIX-MONO andSTEREO) provided by the disc (forVCD).
L/R/ST
Press to switchthe viewing angles.
(Note: This function only workswith the discs encoded with multiplecamera
angles.)
ANGLE
V-MODE
Press repeatedly toswitch the video output modes.
A-MODE Press to switchthe audio output mode between 5.1CHANNELS OUTPUT and
STEREO OUTPUT.
ZOOM Press this buttonto zoom in/out the scene. The available zoomratios are 1/2X,
1/3X, 1/4X, 2X,3X and 4X. In zoomed-in mode,the direction keys can be used to
move the zoomingcenter.(Note: Applies to DVD,VCD, etc).
Press repeatedly toswitch to the connected USB driveor to return to the DVD
mode.
USB