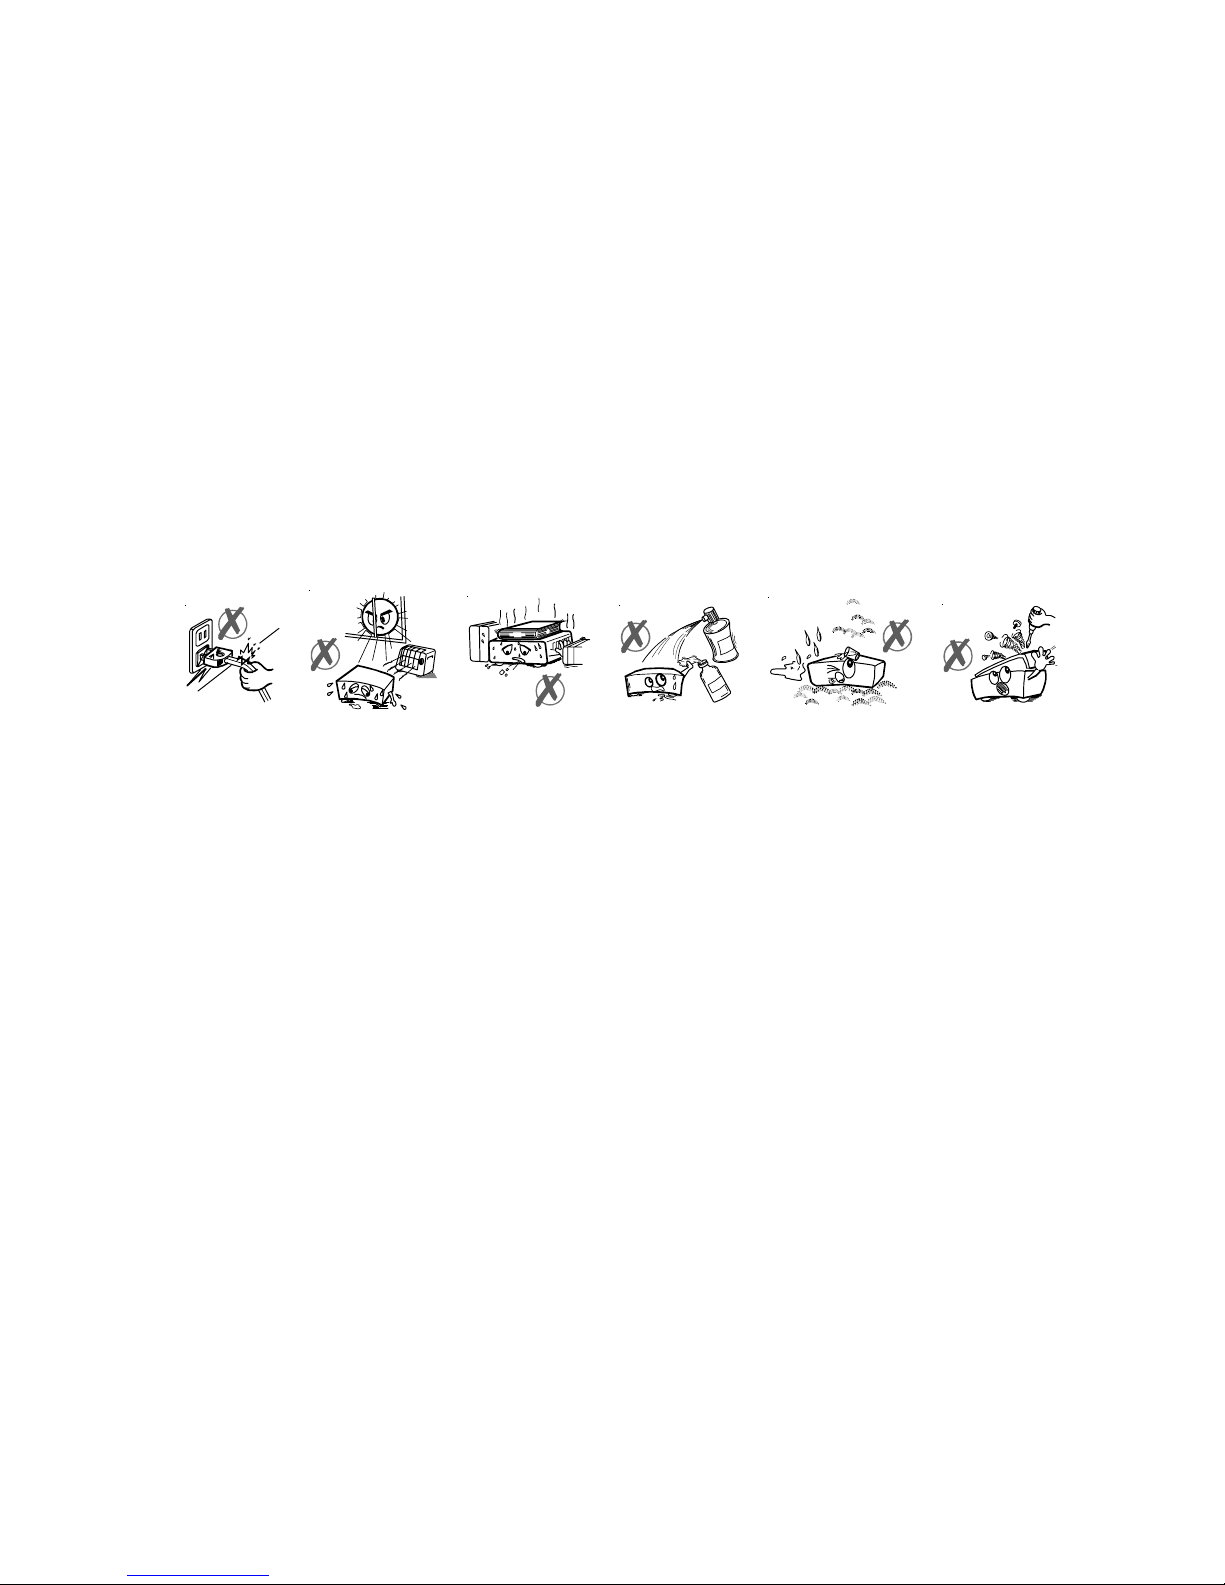
Sanyo SX25 User manual

DVD-Player
DVD-SX25
GB English
OPERATING INSTRUCTIONS
DIGITAL AUDIO
DIGITAL VIDEO
JPEG
READABLE
READABLE
UK

- 1 -
0RGHO1DPH'9'6;8.
7KLVPRGHOKDVWKHIROORZLQJIHDWXUHV
'9' ''$ '5 '5:3OD\EDFN
9 '3OD\EDFN
033OD\EDFN
-3(*3OD\EDFN
KDQQHODQDORJDXGLRRXWSXW
2SWLFDO'LJLWDO$XGLR2XWSXW
RD[LDO'LJLWDO$XGLR2XWSXW
0DQXIDFWXUHGXQGHUOLFHQVHIURP'ROE\/DERUDWRULHV'ROE\DQGWKH
GRXEOH'V\PERODUHWUDGHPDUNVRI'ROE\/DERUDWRULHV
7KLVSURGXFWLQFRUSRUDWHVFRS\ULJKWSURWHFWLRQWHFKQRORJ\WKDWLVSURWHFWHGE\
PHWKRGFODLPVRIFHUWDLQ863DWHQWVDQGRWKHULQWHOOHFWXDOSURSHUW\ULJKWV
RZQHGE\0DFURYLVLRQ&RUSRUDWLRQDQGRWKHUULJKWVRZQHUV
8VHRIWKLVFRS\ULJKWSURWHFWLRQWHFKQRORJ\PXVWEHDXWKRULVHGE\0DFURYLVLRQ
&RUSRUDWLRQDQGLVLQWHQGHGIRUKRPHDQGRWKHUOLPLWHGYLHZLQJXVHVRQO\
XQOHVVRWKHUZLVHDXWKRULVHGE\0DFURYLVLRQ&RUSRUDWLRQ
5HYHUVHHQJLQHHULQJRUGLVDVVHPEO\LVSURKLELWHG
'76DQG'76'LJLWDO2XWDUHWUDGHPDUNVRI'LJLWDO7KHDWHU6\VWHPV,QF

- 2 -
ABOUT THIS MANUAL .............................................................................. 3
WARNING ................................................................................................. 3
SAFETY INFORMATION ............................................................................ 4
SAFETY PRECAUTIONS ........................................................................... 5
SAFETY PRECAUTIONS ........................................................................... 6
GENERAL PROPERTIES ......................................................................... 8
DISC TYPES COMPATIBLE WITH THIS UNIT ......................................... 9
NOTES ON CD-R AND CD-RW DISCS ................................................. 10
NOTES ON DISCS ................................................................................. 11
FRONT PANEL FUNCTIONS ................................................................. 1
FRONT PANEL DISPLAY (VFD) ............................................................. 13
REAR PANEL CONNECTIONS ............................................................... 14
CONNECTION OF YOUR DVD PLAYER WITH TV ................................ 15
VIDEO & AUDIO OUTPUT SOCKETS .................................................... 15
CONNECTION OF YOUR DVD PLAYER WITH AV AMPLIFIER ............ 16
DIGITAL AUDIO OUTPUT SOCKETS ..................................................... 17
FITTING BATTERIES IN YOUR REMOTE CONTROL ............................ 18
REMOTE CONTROL FUNCTIONS ........................................................ 18
REMOTE CONTROL FUNCTIONS ........................................................ 19
DVD PLAYBACK ..................................................................................... 0
USING A DVD MENU ............................................................................. 4
VIDEO CD PLAYBACK ........................................................................... 4
CD MENU ............................................................................................... 7
SETUP MENU ......................................................................................... 9
USING PAGES ........................................................................................ 30
LANGUAGE SETUP ................................................................................ 31
TROUBLESHOOTING ............................................................................ 3
SPECIFICATIONS ................................................................................... 33
WEE ........................................................................................................ 34
CONTENTS

- 3 -
ABOUT THIS MANUAL
The aim of this manual is to give detailed information about the device, so it can be employed easily. To
run your device just utilize the button(s) on the Front Panel and/or emote Controller.
Dear Customers
We would like to thank you for purchasing this DVD/VCD/CD- /CD- W/MP3/JPEG player.
We strongly recommend that you carefully study the operating instructions before attempting to operate
the unit and that you note the listed safety precautions.
WARNING
To reduce the risk of fire or electric shock, do not expose this equipment to rain or moisture.
To reduce the risk of fire or electric shock, and any interference, use the recommended accessories only.
6JGNKIJVP PIHNCUJYKVJCTTQYJGCF U[ODQNYKVJKPCP
GSWKNCVGTCNVTKCPINGKUKPVGPFGFVQCNGTVVJGWUGTVQVJG
RTGUGPEGQHWPKPUWNCVGF FCPIGTQWUXQNVCIG YKVJKPVJG
RTQFWEV UGPENQUWTGVJCVOC[DGQHUWHHKEKGPVOCIPKVWFG
VQEQPUV VWVGCTKUMQHGNGEVTKEUJQEMVQRGTUQPU
6JGGZENCOCV QPRQKPVYKVJKPCPGSWKNCVGTCNVT CPING
KU
KPVGPFGFVQCNGTVVJGWUGTVQVJGRTGUGPEGQH ORQTVCPV
QRGTCVKPICPFOCKPVGPCPEGUGTXKEKPI PUVTWEVKQPUKP
VJGNKVGTCVWTGCEEQORCP[KPIVJGCRRNKCPEG
614'&7%'6*'4+5-1('.'%64+%5*1%-&1016
4'/18' 5%4'95 01 75'45'48+%'#$.' 2#465
+05+&' 4'('4 5'48+%+0)61 37#.+(+'& 5'48+%'
2'45100'.
%#76+10
&101612'0
4+5-1('.'%64+%5*1%-
9#40+0)
A Laser Warning safety label has been placed inside the chasis at the location shown above
This set complies with the EMC Directive 89/336 and with the LVD Directive 73/23

- 4 -
SAFETY INFORMATION
CAUTION
/$6(5&/$66
:DYHOHQJWKQP'9'
QP&'
0D[LPXPRXWSXWRIDFFHVVLEOHODVHUUDGLDWLRQP:FRQWLQXRXVZDYH
&ODVVLILHGDFFRUGLQJWR,(&$
DVD Player is a class 1 laser product. However this product uses a visible laser beam which could cause
hazardous radiation exposure. Be sure to operate the player correctly as instructed.
While this player is plugged to the wall outlet, do not place your eyes close to the opening of the disc tray
or other openings to look into the inside of this product for your own safety.
Use of controls or adjustments or performance of procedures other than those specified may result in
hazardous radiation exposure. Do not open covers and do not attempt to repair any damaged parts. efer
product to a service technician or qualified professional for any necessary repair.
Apparatus shall not be exposed to dripping or splashing and no objects filled with liquids,
such as vases, shall be placed on the apparatus.
The mains plug or the appliance coupler is used as the disconnect device, the disconnect
device shall remain readily operable.
CAUTION
Danger of explosion if battery is incorrectly replaced. Replace only with the same
or equivalent type.

- 5 -
SAFETY PRECAUTIONS
PROPER VENTILATION :
CAUTION
Do not block the ventilation openings or holes.
(If the ventilation openings or holes are blocked by a newspaper or cloth, etc., the heat may
not be able to get out.)
Do not place any naked flame sources, such as lighted candles, on the apparatus.
hen discarding batteries, environmental problems must be consid ered and local rules or
laws governing the disposal of these batteries must be followed strictly.
Do not expose this apparatus to rain, moisture, dripping or splashing and that no objects filled
with liquids, such as vases, shall be placed on the apparatus.
Caution:
To avoide risk of electric shock and fire and to protect from damage.
Locate the apparatus as follows:
Front: No obstructions and open spacing.
Si es: No obstructions in 3 cm from the sides.
Top: No obstructions in 5 cm from the top.
Back: No obstructions in 15 cm from the back
Bottom: No obstructions, place on the level surface.
6SDFLQJFPRUPRUH
:DO O R U
REVWUXFWLRQV 6WDQGKHLJKW
FPRUPRUH
)URQW
)ORRU
'YG3OD\HU

- 6 -
SAFETY PRECAUTIONS
Power Source:
The unit should be operated only from a 220-240V~ 50 Hz outlet. Please do not open the cover by yourself.
There is high voltage in the set, which will endanger your life. Please contact local service agent for help
and advice. epairs should be carried out by a qualified technician only.
The player is not disconnected from the AC power source (mains) as long as it is connected to the wall
outlet, even if the player itself has been turned off.
If the player will not be used for a long time, be sure to disconnect it from the wall outlet.
Power Cord:
Do not place the unit, a piece of furniture, etc., on the power cord (mains lead), and do not pinch the cord.
Handle the power cord by the plug. Do not pull out the plug by tugging the cord and never touch the power
cord when your hands are wet as this could cause a short circuit or electric shock. Never make a knot in
the cord or tie it with other cords. The power cords should be routed in such a way that they are not likely
to be stepped on. A damaged power cord can cause fire and electrical shock. Check the power cord once
in a while. When you find it damaged, ask closest service agent for help. When the AC power cord needs
to be changed, it should be done at a qualified service shop only.
32:(5
7KLV'9'9&5RSHUDWHVRQDPDLQVVXSSO
\
RI
9a+]
7KLVDSSOLDQFHLVVXSSOLHGZLWK%6DSSURYHG
$PSIXVHGPDLQVSOXJ:KHQUHSODFLQJWKHIXVH
DOZD\VXVHD$PS%6DSSURYHGW\SH
1HYHUXVHWKLVSOXJZLWKWKHIXVHFRYHURPLWWHG
7RREWDLQDUHSODFHPHQWIXVHFRYHUFRQWDFW\RXU
VXSSO\LQJGHDOHU
,IWKHPDLQVVRFNHWVLQ
\
RXUKRPHGLIIHURUDUHQRWVXLW
DEOHIRUWKHW\SHRISOXJVXSSOLHGWKHQWKHSOXJVKRXOG
EHUHPRYHGDQGDVXLWDEOHW\SHILWWHG
,IWKHPDLQVSOXJEHFRPHVVHYHUHGIURPWKHPDLQV
OHDGLWPXVWEHGHVWUR\HG$ PDLQVSOXJZLWKEDUHG
ZLUHVLVKD]DUGRXVLIHQJDJHGLQDPDLQVRXWSXWOLQH
VRFNHW
,ID$PS%6SOXJLVQRWVXLWDEOHRUDQ\
RWKHUW\SHRISOXJXVHGWKHQWKLVDSSOLDQFHPXVWEH
SURWHFWHGE\D$PSIXVH
6KRXOG\RXQHHGWRFKDQJHWKHSOXJ
7KHZLUHVLQWKLVPDLQVOHDGDUHFRORXUHGLQDFFRUGDQFHZLWK
WKHIROORZLQJFRGHV
%/8(a1HXWUDO
%52:1a/LYH
$VWKHFRORXUVRIWKHZLUHVLQWKHPDLQVOHDGRIWKLV
DSSOLDQFHPD\QRWFRUUHVSRQGZLWKWKHFRORXUHGPDUNLQJV
LGHQWLI\LQJWKHWHUPLQDOVLQ\RXUSOXJSURFHHGDVIROORZV
7KHZLUHZKLFKLVFRORXUHG%/8(PXVWEHFRQQHFWHGWR
WKHWHUPLQDOZKLFKLVPDUNHGZLWKWKHOHWWHU1RUFRORXUHG
%/8(RU%/$&.
7KHZLUHZKLFKLVFRORXUHG%52:1PXVWEHFRQQHFWHGWRWKH
WHUPLQDOZKLFKLVPDUNHGZLWKWKHOHWWHU/ RUFRORXUHG%52:1
RU5('
'2127FRQQHFWHLWKHUZLUHWRWKH($57+WHUPLQDO

- 7 -
Choice of Location:
Please do not place the set in a place subject to direct sun light, excessive dust or mechanical shock or
in a location near heat sources.
The set should be placed on a solid and safe base. Do not place the player on a soft surface such as a rug
that might block the ventilation holes on the bottom.
A location should not be selected such as a room with high humidity, as the condensation, arising in the kitchen
for example, may cause malfunction or damage the set.
Heating or other thermal radiation under the set also may cause malfunction or damage the set.
The hot air, which arises during the operation, should be ventilated with sufficient air circulation. Please do
not put the set into closed areas and do not cover it.
Please avoid the contact of the set with water or humidity. Do not put it into operation near bath, swimming
pools.
Make sure enough air circulation is provided around the product. Place the player in a location with adequate
ventilation to prevent heat build-up in the player.
Should any solid object or liquid fall into the cabinet, unplug the player and have it checked by qualified
personnel before operating it any further.

- 8 -
GENERAL PROPERTIES
1-DVD/VCD/CD/CD- /CD- W/MP3/JPEG playback
2-NTSC/PAL playback
3-User-friendly Multilanguage OSD menu control
4-Vacuum Fluorescent Display (VFD)*
5-Dolby Digital, DTS, MPEG Multichannel, LPCM audio via coaxial and optical digital audio outputs.
6-Multiple Aspect atio support (16:9 Widescreen, 4:3 Letterbox, 4:3 PAN & SCAN)
7-Multi-Audio (up to 8) support (According to disc content)
8-Multi-Subtitle (up to 32) support (According to disc content)
9-Multi-Angle (up to 9) support (According to disc content)
10- 8 level parental control
11- Fast forward and rewind in 5 different speeds. (2x, 4x, 8x, 16x, 32x)
12- Slow motion playback in 4 different speeds. (1/2x, 1/4x, 1/8x, 1/16x forward)
13- Frame by frame forward playback.
14- Time Search
15- epeat
16- A - B repeat
17- Scart Socket
18- Video output
19- Coaxial & Optical* Digital Audio outputs
20- Zoom

- 9 -
DISC TYPES COMPATIBLE WITH THIS UNIT
This player can play the following discs.
',*,7$/$8',2
',*,7$/9,'(2
$XGLR
9LGHR
FP
$XGLR
9LGHR
$XGLR
FP
FP
FP
FP
FP
$XGLR
[[[[PS
-3(*
5($'$%/(
9LGHR
VWLOOSLFWXUH
FP
FP
03LVUHFRUGHGDVD'LJLWDO6LJQDOZLWK
EHWWHUDXGLRTXDOLW\OHVVGLVWRUWLRQDQG
OHVVGHWHULRUDWLRQRIDXGLRTXDOLW\
RYHUWLPH
-3(*LVUHFRUGHGDVD'LJLWDO6LJQDOZLWK
EHWWHUSLFWXUHTXDOLW\RYHUWLPH
5($'$%/(
'LVF7\SHV
/RJRV 5HFRUGLQJ
7\SHV 'LVF6L]H 0D[
3OD\LQJ
7LPH
PLQ
PLQ
PLQ
PLQ
6LQJOH
VLGHGPLQ
'RXEOH
VLGHGPLQ
6LQJOH
VLGHGPLQ
'RXEOH
VLGHGPLQ
&KDUDFWHULVWLFV
'9'FRQWDLQVH[FHOOHQWVRXQGDQGYLGHR
GXHWR'ROE\'LJLWDODQG03(*6\VWHP
9DULRXVVFUHHQDQGDXGLRIXQFWLRQVFDQEH
HDVLO\VHOHFWHGWURXJKWKHRQVFUHHQ
PHQX
9LGHRZLWK&'VRXQG9+6TXDOLW\
03(*FRPSUHVVLRQWHFKQRORJ\
$Q/3LVUHFRUGHGDVDQDQDORJVLJQDOZLWK
PRUHGLVWRUWLRQ&'LVUHFRUGHGDVD
'LJLWDO6LJQDOZLWKEHWWHUDXGLRTXDOLW\
OHVVGLVWRUWLRQDQGOHVVGHWHULRUDWLRQRI
DXGLRTXDOLW\RYHUWLPH

- 10 -
NOTES ON CD-R AND CD-RW DISCS
CD- ( ecordable) and CD- W ( ewritable) discs, recorded by the users, may only be used after finalization
process.
CD- and CD- W discs may not be usable, depending on the disc features, recording conditions and
damage or dirt on disc. The disc configuration and features are determined by the tool and device used for
recording. Therefore, users may face with the following undesired consequences:
Some discs may not be read at all.
Some discs may cause system crash after playing for a while.
Some parts of the disc may be skipped or worked abnormally.
Compare with the original discs, the time passed for reading a CD- and CD- W discs may be longer.

- 11 -
NOTES ON DISCS
On handling discs
To keep the disc clean, handle the disc by its edge. Do not touch the surface.
Do not stick paper or tape on the disc.
If the disc is contaminated with any substance like glue remove before using it.
Do not expose the disc to direct sunlight or heat sources such as hot air ducts, or leave it in a car parked
in direct sunlight as the temperature can rise quickly and damage the disc.
After playing, store the disc in its case.
On cleaning
Before playing, clean the disc with a cleaning cloth. Wipe the disc from the center out.
Do not use solvents such as benzene, thinner, commercially available cleaners or anti-static spray intended
for vinyl LPs.
Discs that should not be used
Only the discs including the marks shown on page 7 can be played.
Note, however, that discs with special shapes (heart-shaped discs, hexagonal discs, etc.) cannot be played.
Do not attempt to play such discs, as they may damage the player.
¥ NOTE:
Do not use record spray or antistatic. Also do not use volatile chemicals such as benzene or thinner.
5(&25'
635(< 7+,11(5 %(1=(1(

- 12 -
FRONT PANEL FUNCTIONS
1. STANDBY button: Turns the unit on or turns the unit to standby mode.
2. Disc Tray: Place a disc on the tray.
3. OPEN/CLOSE button: Opens or closes the disc tray.
4. STOP : Stops playing the disc.
5. PLAY/PAUSE
××
: Plays/pauses the disc.
6. Front Panel Display (VFD): Indicates the playing time, title, chapter/track, etc.
7. SKIP / SKIP buttons: Press to go back to the preceding chapter/track or to go to the next chapter/
track.

- 13 -
FRONT PANEL DISPLAY (VFD)
1. Play/Pause
2. Current Disc
3. Time or Title / Chapter / Track Number
4. Dolby Digital / DTS
5. Zoom
6. Title Number
7. Angle
8. Chapter / Track Number
9. epeat

- 14 -
REAR PANEL CONNECTIONS
1. DIGITAL OUT (OPTICAL) connector
Connects to an audio component using the optical digital connection cord.
. DIGITAL OUT (COAXIAL) connector
Connects to an audio component using the coaxial digital connection cord.
3. VIDEO connector
Connects to the video input connectors on the TV.
4. AUDIO connectors
Connects to the TV or AV amplifier by using 2 cords (Left, ight).
5. SCART connector.
Connects to the scart-input connector on the TV.

- 15 -
CONNECTION OF YOUR DVD PLAYER WITH TV
Be sure to turn off the power of each component before making the connections.
Scart socket:
Connecting your DVD player to TV via scart socket with a scart cable gives you the best picture performance.
If your DVD player will not be connected to a hi-fi set or A/V amplifier to hear better sound, scart is enough
for both audio & video connections.
VIDEO & AUDIO OUTPUT SOCKETS
Video (yellow) & Audio ( ed: right, White: left) output sockets can be used to connect the DVD player to
your TV set via cables. To make this connection, your TV set must have Video & audio input connectors.
This type of connection is alternative to scart connection. Picture quality is not as good as Scart connection
but audio performance is the same.
/HIW5LJKW
2XWSXW
9LGHR
2XWSXW
Putting into operation:
After making the necessary connections stated above, plug the power cord to the mains socket. Unit will
be in standby mode. Press standby to turn on the unit. Open the disc tray with open/close button and insert
a playable disc (DVD/VCD/CD). Press open/close button again to close the disc tray and to start operating
the player. Player will start playing the disc automatically.

- 16 -
CONNECTION OF YOUR DVD PLAYER WITH AV AMPLIFIER
Be sure to turn off the power of each component before making the connections.
Analog Audio Output Sockets:
To get better sound quality, the unit can be connected to a Dolby Prologic amplifier via analog audio left/
right outputs.
79
+,),
/HIW5LJKW
2XWSXW
9LGHR
2XWSXW
7XQHU
$XGLR&DEOHFRPPHUFLDOO\DYDLODEOH
9LGHR&DEOHFRPPHUFLDOO\DYDLODEOH

- 17 -
DIGITAL AUDIO OUTPUT SOCKETS
Digital Audio Output Sockets:
For the best sound, the unit can be connected via optical or coaxial digital audio outputs to an AV amplifier
with a built-in Dolby Digital decoder. By using 6 speakers, user can enjoy the 5.1 channel surround sound.
'9'3OD\HU
$03/,),(5
&RD[LDODXGLRFDEOHWR
FRD[LDOGLJLWDODXGLR
LQSXWFRQQHFWRU
'XVWSURWHFWLRQFDS 2SWLFDOGLJLWDOFDEOH
&(17(563($.(5
)521763($.(5
5,*+7
)521763($.(5
/()7
68%:22)(5
5($563($.(5
/()7 5($563($.(5
5,*+7
79
5&$W\SH$9FDEOH
WR5&$9LGHRRQ79

- 18 -
FITTING BATTERIES IN YOUR REMOTE CONTROL
First open the battery cover under the remote control. Fit both batteries 1.5Volt ( 03/AAA) referring to the
imprinted symbols (+/-) in the battery case and close the battery cover again.
While using the remote control, direct it towards the front of the DVD player. If the remote control does not
work or the chosen function can not be exercised, the batteries are most probably exhausted and they should
be replaced as soon as possible. Please use only the leak proof batteries. If you will not be using your remote
control for a long time, it is recommended to take out the batteries from your remote control to avoid possible
damage from battery leakage and corrosion. Do not leave the remote in an extremely hot or humid place.
Do not dispose of the battery along with household waste. Insert the used batteries at recicle bins in
order to protect the environment.
REMOTE CONTROL FUNCTIONS

- 19 -
REMOTE CONTROL FUNCTIONS
1. STANDBY button: Turns the unit on or turns the unit to standby mode.
. OPEN/CLOSE button: Opens or closes the disc tray.
3. TITLE button: Displays the title menu on the TV screen or changes the status of PBC functionality
for VCD .
4. DISPLAY button: If pressed during playback of a disc, opens/closes information display otherwise
displays setup menu on the TV screen.
5. MENU button: Displays the DVD root menu on screen.
6. ZOOM button: Zooms the picture by 2x, 3x, 4x while playing DVD/VCD. Enter zoom mode for
JPEG files.
7. RETURN button: eturns to root menu to the main page in setup menu, or resumes playback from
root menu.
8. Arrow buttons (3/46/5): Moves to the items or settings.
9. SELECT button: Executes the items or settings.
10. PLAY/PAUSE button : Plays/pauses the disc. For any DVD title that has a root menu with still
picture, this button functions as button select (selects highlighted item) on the root menu. Otherwise
the disc will prohibit play/pause button function, and symbol will appear.
11. STOP button : Stops playing disc.
12. SKIP/FRAME button : Press to go to the next chapter or track, or to go back to the preceding
chapter or track during playback and next frame during pause.
13. SEARCH/SLOW button: Press to adjust the forward and reverse playback speed x2, x4, x8, x16
and x32 times during playback (rapid advance/reverse) and x1/2, x1/4, x1/8, x1/16 times during pause
(slow advance).
14. SUBTITLE button: Changes the subtitle language while playing a DVD.
15. AUDIO button: Changes the audio language while playing a DVD.
16. ANGLE button: Changes the angles when playing a DVD.
17. SEARCH MODE button: Press to select the unit for search (title, chapter, track, time etc.)
18. PROGRAM button: Press to enter file list mode to list all the files in the disc. In file list mode, the
same type of files can be played back together in repeat modes.
19. REPEAT button: Press to change the current repeating mode.
0. A-B button: Press to execute the A-B repeat play.
1. TIME button: Changes the play time display mode of the disc, title, track, on the OSD and front
panel display.
. Number buttons: Use number buttons to enter track/chapter/title/time/etc. numbers directly.
3. C button: Using this button you can delete the mistyped entries or you can cancel some
functions.
4. +10 button: Using this button you can enter the numbers greater than 9.
Table of contents
Other Sanyo DVD Player manuals

Sanyo
Sanyo RB-7201 User manual

Sanyo
Sanyo DVD-SL33 User manual

Sanyo
Sanyo DWM-400 User manual

Sanyo
Sanyo DVD-X5 User manual

Sanyo
Sanyo DRW-1000 User manual

Sanyo
Sanyo FWDP105F B User guide

Sanyo
Sanyo DVD-SL330 User manual

Sanyo
Sanyo FWDP105F B User manual

Sanyo
Sanyo DVD-9201 User manual

Sanyo
Sanyo HV-DX350A User manual

Sanyo
Sanyo HV-DX350A User manual

Sanyo
Sanyo DVD-SL38KR User manual

Sanyo
Sanyo DVD-5100 User manual

Sanyo
Sanyo DVD-DX500 User manual

Sanyo
Sanyo DVD-SL20 User manual

Sanyo
Sanyo DVD-HP70 User manual

Sanyo
Sanyo DVD-DX506 User manual

Sanyo
Sanyo DVD-8000 User manual

Sanyo
Sanyo DVD-DX405 User manual

Sanyo
Sanyo DVD-SL33KR User manual