Sanyo CDF-MS11 User manual

Other
pages 46 ~
CD
operation page 25 ~
Introduction Page 3 ~
Radio operation
page 36 ~
Changer
operation page 41 ~
MD
operation Page 31 ~
Common
operation page 18 ~
instruction manual
MD / CD tuner installed 1DIN receiver part
number CDF-MS11
This product cannot be used overseas.
FOR USE IN JAPAN ONLY
The product number displayed on the packaging box, CDF-MS11 (S), (K), etc. The symbols in parentheses are color
symbols. The display of color symbols is omitted in the manual. Silver black
Thank you for your purchase. Please read this
instruction manual carefully and use it correctly. After reading
it, keep it in a safe place with the warranty card so that you can take
it out at any time.
Machine Translated by Google

Operation of CD
1
First
Cooperative operation
Operation of MD
Table of contents
To listen to MD
To listen to a
CD To insert a disc ……………………………………………………………… 25 To adjust
the volume / sound quality …………………… ……………………………………… 26 To
eject the disc …………………………………………………………… 26 To switch to CD
mode ……………………………………………………………… 27 To choose your
favorite song …………………………………………………… …………………… 27 To
find a favorite place in the middle of a song (fast forward / fast rewind) ………………………… 28
To turn the power on / off ……………………………………………………………… 18 To adjust the audio
…………………………………… …………………………… 19 To adjust the volume
…………………………………………………………………… 19 To emphasize the bass range
……………………………………………………………………………………………………………………………………………………………………………………………………………………………………………………………………………………………………………………………………………………………………………………………………………………………………………………………………………………………………………………. ……… 20 To make various settings …………………………………………………………… 21 To change the brightness of the display section ……………… ……………………………………… 21 To select whether or not the illumination is dimmed ………………………………… 21 To scroll the title automatically ……………………………………… 22 To select the presence or absence of button operation sound ……………………………………………… 22 To switch the priority display ……………………………………………………………… 23 How to set the time ……………………………………………………………… …………… 24 To adjust the time signal …………………………………………………………………………………………………………………………………………………………………………………………………………………………………………………………………………………………
Main features …………………………………………………………………………………… 3 Safety precautions ………………………… …………………………………………………… 5 Precautions for use
…………………………………………………………………… ………… 10 How to handle CDs
………………………………………………………………………………………………………………………………………………………………………………………………………………………………………………………………………………………………………………………………………………………………………………………… ……………………………………………………………………………………………………………………………………………………………………………………………………………………………………………………………………………………………………………………………………………………………………………………………………………………………………………………………………………………………………………………………………………………………………………… How to display only ………………………………………………………………………………………………………………………………………………………………………………………………………………………………………………………………………………………………………………………………………………………………………………………………………………………………………………
To play various music
Repeat (repeat) / random (in no particular order) / scan (intro) performance …… 29
To switch the display Play time / disc name / track name / clock display ……………………
30
To insert a disc ……………………………………………………………… 31 To adjust
the volume / sound quality …………………………………… ………………………… 31
To eject the disc …………………………………………………………… 31 To use the
MD mode button ……… ……………………………………………… 32 To choose your
favorite song …………………………………………………………………… … 32 To find
a favorite place in the middle of a song (fast forward / fast rewind) ………………………… 32
Machine Translated by Google

Operation of MD
2
others
Operation of the changer
Radio operation
To play various music
To memorize a broadcasting station
To listen to the radio broadcast
To listen to the radio broadcast ……………………………………………………………… 36 To select a band
…………………… ……………………………………………… 36 To tune in (area tuning / manual tuning /
automatic tuning) ………………………… 37, 38 frequencies To display
…………………………………………………………………… 37 About the radio mode button
……………………………………………… …………… 38 To listen to road traffic information
…………………………………………………………… 38
Repeat (repeated) performance, random (random) performance, scan (intro) performance ………… 33
About group functions To select your favorite group ……………………………………………… ……………
34 Group repeat (repeating groups) / Group random (group order) / Group scan (group intro) performance
……………………………………………… 34 To switch the display
…………………………………………………………………… 35 To display the playing time / disc name /
group name / track name / clock… 35
What is the name of each part and how it works
………………………………………………………………………………………………………………………………………………………………………………………………………………………… ……………………………………… 42 About the changer mode button ……………………………………………… 42 To play To select the disc you want to listen to ……………………………………………………… 43 To choose your favorite song …………………………………………………………… ………… 43 To find a favorite place in the middle of a song (fast forward / fast rewind) ………………………… 43 To play various performances ……………………………… …………………… 44, 45 Repeat (repeat) / Random (in no particular order) / Scan (intro) / Disc repeat (disc repeat) / Disc random (disc order) / Disc scan (disc intro) Performance
To manually memorize a broadcasting station (preset tuning) ………………………… 39 To recall a manually
memorized broadcasting station ……………………………………………… 39 To memorize a broadcasting
station automatically (Auto Travel Preset (ATP) channel selection)… 40 To recall an automatically
memorized ATP station ………………………………………… 40
Message display ……………………………………………………………… 46 Before installation
…………………………………………………… ………………………… 47 Wiring method
……………………………………………………………………………… 49 Installation method …………
…………………………………………………………………… 51 Is it a malfunction? If you think
………………………………………………………………… 52 Main specifications
…………………………………………………… ………………………………… 54 After-sales service
……………………………………………………………… 55 Area tuning memory station list …………
…………………………………………………… 56
Machine Translated by Google
* The group function can be operated only for discs registered as a group.
First
3
MD part
CD part
Main features
Text information
English
You can display the track elapsed time.
LP4 (4x mode) can play for 320 minutes.
¡ Group function *
¡ Supports MDLP
playback You can also play MDLPs with a recording time that is up to 4 times longer.
80 minutes for normal recording 80 minutes for 80 minutes disc, 160 minutes for LP2 (double mode),
Plays all songs on the playing disc in no particular order.
This is convenient when operating an MDLP mode disc that can record for a long
time. ¡ Group title display Displays the group title.
¡ Title display
The disc name and song name recorded on the MD can be displayed during
performance. The disc on which text information is recorded is marked on the left.
¡ Title display
¡ Performance time display
¡ Performance
time display You can display the elapsed track
time. ¡ 8cm CD compatible 8cm CD can be played automatically without an adapter.
¡ Scan function Plays the intro of each song for about 10 seconds. ¡ Repeat function
You can listen to your favorite songs repeatedly. ¡ Random (random performance)
function
Play the intro of a group for about 10 seconds each, and repeat the operation to
move to the next group. ¡ Group repeat function You can repeatedly listen to only
the tracks in the group. ¡ Group random function
¡ Skip operation in group units
You can display the disc name and song name recorded on the CD during
performance. The disc on which text information is recorded is marked on the left.
You can skip for each group. ¡ Group
scan function
Plays all songs on the playing disc in no particular order.
¡ Scan function Plays the intro of each song for about 10 seconds.
¡ Repeat function You can listen to your favorite songs repeatedly.
¡ Random (random performance) function
Plays all tracks in the group in no particular order from within the group being
played.
Machine Translated by Google

US and foreign patents licensed from Dolby Laboratories Licensing Corporation.
The above label is affixed to this machine. This means that this machine was
manufactured under a license agreement with Dolby Laboratories Licensing Co., Ltd.
It shows.
¡ Various setting functions
You can select the presence or absence of button operation sound, set the automatic
scrolling of the title, adjust the brightness of the display, turn the illumination on / off, and
set the time. ¡ Built-in changer controller You can operate the separately sold CD changer (CDF-
C61J3) with this unit. ¡ ¡With clock. 45W x 4 high power ¡ 4-speaker fader control
¡ Road traffic information
button You can adjust to 1620kHz with one touch. (Also
possible in other than radio mode) ¡ Area tuning FM / AM
broadcasting stations in 42 regions (areas) nationwide are stored in
advance. When you select an area, you can call up the stations in that area with the
preset buttons. ¡ Automatic tuning Selects a broadcasting station automatically. ¡ Auto
Travel Preset (ATP) FM6 and AM6 stations can be preset automatically. ¡ Preset FM12
stations and AM12 stations can be preset.
Four
First
Radio part
others
Machine Translated by Google

t Note:
t Warning:
Safety Precautions (1)
tThe: e sign tells you what you shouldn't do.
Specific precautions (general precautions in the case of the left figure) are drawn in the figure.
It indicates that if this indication is ignored and the product is
handled improperly, there is a risk of death or serious injury.
Some of the figures show specific prohibited contents (in the case of the left figure, disassembly is
prohibited).
• • • • • • • • • • •
Precautions are divided into two categories, "t warning" and "t caution", depending on the degree of
harm or damage that may occur if you do not observe them.
• • • • • • • • • • • • • •
It indicates that if this indication is ignored and the product is
handled improperly, it is possible that a person may be injured
or that only property damage may occur.
Specific instructions (general instructions in the case of the left figure) are drawn in the figure.
¡ Please read this instruction manual carefully before use to ensure correct use. ¡ After
reading it, be sure to keep it in a place where you can see it at any time. ¡ In this
instruction manual and the display of this machine, various precautions are displayed so that
you and the people around you can use this machine safely and correctly without causing
any harm or damage. ..
The: r symbol tells you that you have to be careful.
• • • • • • • • •
In addition, the nature of the caution content is shown in a pictorial display.
The: w sign tells you that you have to do it.
First
Five
q
Machine Translated by Google

e
q
e
e
q
q
t warning
Do not place the machine in a place that obstructs the front view or
the driving operation of the steering wheel, shift lever, brake pedal, etc.
When installing with holes in the car body, check the positions
of pipes, tanks, electrical wiring, etc., and interfere with them.
Keep the cords together so that they do not interfere with driving
operations. It is dangerous to wrap it around the steering wheel,
shift lever, brake pedal, etc.
Never use safety parts such as. Using these may cause
inability to brake or fire.
Do not install it in a place that interferes with driving or poses a
danger to passengers. It may cause a traffic accident or injury.
Be careful not to touch it. It may cause a fire.
This machine is for 12V vehicles only. For 24V cars (trucks, buses, etc.)
When using, handle / brake system and tank
Please do not use. It may cause a fire.
During wiring work, remove the _ terminal of the battery. It may
cause electric shock or injury due to a short circuit accident.
When installing this machine or grounding, use the bolts and nuts of the car body. First
6
Machine Translated by Google
After installation and wiring, brake lights, lights,
Stop using it immediately and be sure to consult the store where you
purchased it. Continued use may cause an accident, fire or electric
shock.
Make sure it works properly. It may cause a
traffic accident.
Do not disassemble or modify this machine. It may
cause an accident, fire or electric shock.
In the unlikely event that a foreign substance has entered, water or drink has splashed, or smoke
All electrical components such as horns, turn signals, wipers, etc.
If something goes wrong, such as a strange smell or a strange smell,
Do not use it in a faulty state such as no display or no sound. It may cause an accident, fire
or electric shock.
Never disconnect the power lead wires to power other equipment. It
may exceed the current capacity of the lead wire and cause a fire or
electric shock.
Do not change discs or adjust the volume while driving a car. Be
sure to park your car in a safe place for such operations.
Safety Precautions (2)
First
7
t warning
q
q
Disassembly prohibited
Machine Translated by Google

For your safety, be sure to ask the store where you purchased the product.
Avoid mounting in places where it cannot be firmly fixed, such as
places with a lot of vibration. It may come off and cause an accident
or injury.
It may cause electric shock or injury.
Be sure to use the attached parts as specified. specify
Failure to make a proper connection may cause a fire or accident.
Do not use the _ side of the left and right speakers as a common line or ground the
vehicle body. It may cause electric shock or injury due to a short circuit accident.
Do not block the ventilation holes or heat sink of this machine. Blocking the ventilation
holes and heat sink may cause heat to build up inside and cause a fire.
May occur.
If you use any parts other than the above, it is dangerous because the parts inside
the machine may be damaged or the parts may not be firmly fixed and may come off.
Expertise and experience are required to install and wire this machine.
Do not install it in a place exposed to water such as a place where
it is exposed to rain, or in a place with a lot of humidity or dust. If
water, moisture or dust gets mixed into the machine, it may cause
smoke or fire.
Connect the power cords (red and yellow cords) at the end
of the wiring work. Due to a short accident
Follow the instructions to wire correctly.
t Attention
q
q
q
q
First
8
Machine Translated by Google

q
q
q
Safety Precautions (3)
First
9
t Attention
please give me. If you drive without hearing the sound outside the car,
A disconnection or short circuit may cause an accident,
electric shock, or fire.
Remove the disc when not in use.
Do not put your hands or fingers in the disc
insertion slot. It may cause injury.
Use the volume while driving so that you can hear the sound outside the car.
Do not use this machine except for in-vehicle use. It
may cause electric shock or injury.
Do not insert foreign matter into the disc
insertion slot. It may cause fire or electric shock.
It may damage the disc.
Be careful not to pinch it.
It may cause an accident.
If you leave it in the machine for a long time, it may be hot.
Wiring to moving parts such as the car body, screw parts, seat rails, etc.
Do not touch the heat sink or amplifier on the back of the unit when the power
of the unit is on or immediately after the power is turned off. Due to the high
temperature, it may cause burns.
No contact
Machine Translated by Google

About 8cm CD
About condensation
First
About disk storage
Ten
About the temperature inside the car
Precautions for use
The temperature inside a car with the windows closed, such as in midsummer, becomes quite high. When the internal
temperature of this unit becomes higher than the standard, the circuit that protects the inside works to automatically stop the
playback of the disc and eject it. In such a case, open the window and lower the temperature inside the car before using.
Dew (water droplets) may form on the optical lens inside the unit, such as on a rainy day,
when the humidity is extremely high, or when it is cold, immediately after the heater is turned
on. If this is left as it is, the laser may not be able to read and the machine may not operate normally. In such a
case, depending on the surrounding conditions, if you take out the disc and leave it for about 1 hour, the
condensation will be removed and it will operate normally.
Liquid crystal display The
display may be difficult to see at extremely high or low temperatures, but this is not a malfunction.
When the ambient temperature returns to normal temperature, it returns to the normal display.
It may not operate normally when it is extremely cold or
extremely hot. In such a case, warm the inside of the car to
an appropriate temperature before use.
About sound skipping of CDs Sound
skipping may occur when the CD is installed improperly or when driving on
an extremely poor road surface. In such a case, check the mounting condition and
return to the road with good road surface before using.
This unit does not require an 8cm CD adapter. Insert the 8cm
CD as it is, just like the 12cm CD. Using an 8cm CD adapter may cause a
malfunction.
Be sure to remove the disc when not in use. It may cause warping due to the influence
of direct sunlight. Be sure to put the disc in a case and store it in a place out of direct sunlight.
Machine Translated by Google

Dirt on the compact disc, dust, scratches, warpage, etc. may cause the sound to skip and cause malfunctions such as
deterioration of sound quality. Please note the following so that you can enjoy the beautiful sound.
compact disc
First
11
CD How to handle
¡ Do not use discs with special shapes such as heart-shaped or octagonal.
¡ Only compact discs with the mark on the left can be used.
¡ When holding the disc, try not to touch the playing surface as much as possible.
Please do not.
There is a match. ¡ CD-ROMs cannot be played.
¡ Stick paper or stickers on the printed or playing surface, or scratch it.
ÿ About CD with copy protection function (copy control CD) ¡ Use a
disc that matches the [CD logo] on the disc label side (print side). ¡ If
you play a CD with a copy protection function (copy control CD) for
the purpose of copy protection on a personal computer, etc., it may not be played normally. This
is a phenomenon because the CD with copy protection function (copy control CD) does not
conform to the CD standard, and is not a malfunction of this unit. If you have problems playing
a copy-protected CD (copy control CD), contact the publisher of the copy-protected CD (copy
control CD).
JIS standards such as those with marks
Please do not use the desk.
¡ Do not use discs that have glue sticking out or have been peeled off,
such as cellophane tape or rental CD labels. This may prevent the
disc from being ejected or cause the unit to malfunction. ¡ Since the disc rotates at high
speed during performance, cracked discs and large warped discs
It may cause a malfunction of this machine.
¡ Be sure to put it in a case so that it does not bend, and do not store it in
a place exposed to direct sunlight. Especially in the summer, the car
seats and dashboards that are closed in direct sunlight can get quite hot,
so do not leave them unattended.
¡ Before using, gently wipe the playing surface with a soft cloth from the
inner circumference to the outer circumference of the disc. ¡ Do not use
record sprays, antistatic agents, etc. Also, do not use volatile chemicals
such as benzine and thinner as they may damage the disk.
¡ CD-R / RW cannot be played due to disc characteristics, scratches, dirt, etc.
please.
Printed surface
Machine Translated by Google

Since the disc body is housed in a cartridge, you can easily handle it without worrying about dust
and fingerprints. However, dirt or warpage of the cartridge may cause malfunction. Please note
the following so that you can enjoy the beautiful sound.
Mini disc
About care
Please do not open the shutter.
First
About storage
12
MDHow to handle
When not in use, be sure to put it in a case and
store it away from direct sunlight. Especially in
the summer, the seats of cars closed in direct
sunlight and the top of the dashboard can get
quite hot, so do not leave them unattended.
Storage of recording discs Keep the
recording MD away from magnetic objects
(magnets, etc.). The recorded data may be
erased due to the influence of magnetism.
¡ Periodically wipe off any dust or debris on the
surface of the cartridge with a dry cloth.
¡ Reattach the label that is about to come off
or replace it with a new label.
Do not open the shutter and touch the surface of
the disc, or wipe it with a solvent such as a record
cleaner, alcohol, or thinner.
Please use the minidisc with the mark on the left.
Machine Translated by Google

Common operation • is the reference page.
TRK BAS TRE BAL FAD VOL
BAS TRE BAL FAD VOL
¡ Used to set the brightness of the display. @ 1 ¡ Used
for time signal adjustment. @Four
Used to set the scroll action selection. @ 1 @ 2
¡ Used for priority display switching. @ 3 ¡ It is used
to set the presence or absence of operation sound. @ 1 @ 2
Names and functions of each part (1)
Road traffic information button () Press
for 1.5 seconds or longer to display "T.INF" and receive road traffic information. # 8
* If you press preset button 1 while holding down this button, the
clock display priority mode display priority is switched. ¡ If you hold
down this button and press the up / down button, you can set the
clock. If you hold down this button and press preset button 3, the
time signal will be adjusted. @Four
Up / Down button (,) ¡ Used for time
adjustment. @ 4 ¡ Used to set the
illumination dimming time. @ 2
* If you press the button for 3 seconds or longer while it is OFF, the area setting screen will be displayed.
Emphasizes the bass range. ! 9
¡ Mode display Switches the clock display for about 5 seconds. @ 3
¡ Press for 4 seconds or longer to switch to brightness / title
scroll / operation sound / illumination setting mode. @@ 1 2
¡ Turns the power on and off. ! 8
For CD / MD
¡ Used in audio operation mode. @ 0
¡ Brightness / Title scroll / Operation
sound / Illumination setting mode. @@ 1
2
To
eye
13
character
teeth
Display
Power button (PWR)
Level adjustment
knob ¡ Used for audio adjustment
and track selection. Turn this knob
to adjust the VOLUME. ! 9
Bus expander button (BAS-X)
Select button (SEL) ¡ Each
time you press it, the audio operation
mode switches. @ 0
Display button (DISP)
Preset button 2
Preset button 3
Preset button 1
Preset button 4
Used to set the illumination
dimming time. @ 1
Machine Translated by Google

Press. @ 6
When ejecting a CD
If you are in EXT mode, press this button
again.
* When the power is off or switched from radio mode
Playing time Disc name Track name Clock display
Switch to CD mode. (When a CD is inserted in this unit) @ 7
Track skip button (,) Select your favorite
song. You can also press and hold this
button while playing to fast forward () or
fast rewind (). @@ 7 8
¡ When playing a CD, the display changes each time you press it. # 0
CD operation • is the reference page.
Scan Button (SCN) Plays
the beginning of a song in sequence. @ 9
Select button (SEL) Used
to directly search for your
favorite song. @ 7
Repeat Button (RPT) Plays
the song you are playing over and over again. @ 9
Level adjustment knob
Use this to directly search
for your favorite song. @ 7
From the CD mode button
(CD) power off state, radio mode, or EXT (changer) mode
Eject button ()
Display button (DISP)
Random Button (RDM) Plays
all songs on the playing disc in no
particular order. @ 9
CD insertion slot * @ 5 character
14
To
eye
teeth
¡ If the disc name or track name is too long to be displayed at once,
press it for 1.5 seconds or longer to scroll the display. # 0
* Only one MD or CD can be inserted into this unit.
Machine Translated by Google

* When the power is off or switched from radio mode
Press. # 1
Performance time Disc name Group name Track name Clock display
If you are in EXT mode, press this button
again.
When taking out the MD
Track skip button (,) Select your
favorite song. You can also press and
hold this button while playing to fast
forward () or fast rewind (). # 2
Switch to MD mode. (When MD is inserted in this machine) # 2
¡ When playing MD, the display changes each time you press it. #Five
Names and functions of each part (2)
¡ If the disc name, group name, or track name is too long to display all at once,
press for 1.5 seconds or longer to scroll the display. #Five
character
eye
teeth
15
To
MD insertion slot * # 1
Group select button (-, +) Select the group
you like. ## 3 4
Repeat Button (RPT) Plays
the song you are playing over and over again. ## 3 4
Display button (DISP)
Level adjustment knob
Use this to directly search
for your favorite song. # 2
From MD mode button (MD)
power off state, radio mode, EXT (changer) mode
Eject button ()
Scan Button (SCN) Plays
the beginning of a song in sequence. ## 3 4
Select button (SEL) Used
to directly search for your
favorite song. # 2
Random Button (RDM) Plays
all songs on the playing disc in no
particular order. ## 3 4
MD operation • is the reference page.
* Only one MD or CD can be inserted into this unit.
Machine Translated by Google

Level adjustment
knob Area setting mode
Use when choosing. # 7
Up / Down button
Used to tune in to a radio. # 8
Radio operation • is the reference page.
Radio mode button (BAND)
¡ Switches to radio mode from the power off state, CD mode,
MD mode, and EXT (changer) mode. ## 6 8
Preset button
Power Button (PWR) When
turning on the power, press the power button for 3 seconds or longer to display the area
setting screen. ## 6 7
ATP button (ATP)
Display button (DISP) ¡ When
the area is selected, the broadcasting station
frequency is switched. # 7
Auto travel preset
¡ Switches between FM1, FM2, AM1 and AM2. # 6
¡ If the station name is too long to be displayed at
once, press it for 1.5 seconds or longer to scroll the display. # 7
Press for 1.5 seconds or longer to preset your favorite station. # 9
FM6 station and AM6 station are automatically preset.
Calls are made in preset order each time the ATP button is
pressed (less than 1.5 seconds). $ 0
clock
In preset memory mode, use this button to select a channel
¡ Press for 1.5 seconds or longer to enter preset memory mode.
¡ If you decide on an area on the area setting screen, you can use this
button to call a station in that area that has been stored in advance. # 7
¡ It is used to determine the area on the area setting screen. # 7
¡ Calls a station that has preset memory. (Press for less than 1.5 seconds.) # 9
character
16
teeth
eye
To
Machine Translated by Google

character
17
eye
teeth
To
How to display
* When the car's ACC is turned on, [Morning] (6: 00-9: 59) or [Good day] (10: 00-)
* You can adjust the brightness of the display. z21, page 22
17:59) or [Hello!] (18:00 to 5:59) is displayed for about 2 seconds.
"" Or "" lights up in radio mode
LP2 (double mode) or
Scan performance display
Flashes "" when playing a CD changer
Lights according to the mode during MDLP playback
Lights when receiving a stereo broadcast
Audio mode (VOL, BAS, TRE, BAL, FAD, TRK) display, band (FM1, FM2, AM1,
AM2) display, CD display, MD display, changer number (EXT1, EXT2) display,
clock, frequency, preset number , Area setting screen, Brightness / Title scroll /
Operation sound setting screen, Broadcasting station name, Disc number, Group
number, Track number, Performance time, Disc name, Group name, Track name, etc. * Number of tracks for MD / CD
When is greater than 100, or when the playing time exceeds 100 minutes, the 100s digit is not displayed.
Repeat performance display
LP4 (4x mode)
Random performance display
"" Lights up when playing a CD changer
Lights when a disc is inserted in this unit
"" Lights up when playing MD
Group registration disk display
Bus expander display
"" Lights up when playing a CD
ATP display
Machine Translated by Google

Area setting screen (example)
To turn on / off the power
1 Tokyo
Cooperative operation
To turn off the power
18
The area setting screen is displayed. •
When using for the first time after
installation • When the power button is pressed for
3 seconds or more z * If you do not tune in to the area, press the power button () to turn off the power once.
After that, press the power button again (less than 3 seconds) to turn on the power.
Radio Mode: Press the Radio Mode button (). z Page 36 EXT mode: Press the EXT
(changer) mode button (). z42 page
[Good bye] is displayed for about 1 second, and the clock is displayed.
Area tuning
Press the power button ().
MD mode: Press the MD mode button (). z31 page
(Page 37)
CD mode: Press the CD mode button
(). z Page 27 (when a CD is inserted) * If you
are in EXT (changer) mode, press this button again.
A few words
¡ You can also turn on the power by pressing the button of the mode you want to hear.
Press the power button ()
to turn on the power. In this case, it
will be the mode before turning off the power. Also, when
you insert the disc, the power turns on automatically and the performance starts. ¡ In
the following cases, when the power is turned on,
MD / CD / EXT (changer) mode button
Power button
Radio mode button
(When an optional CD changer is
connected) * If you are in CD mode / MD mode, press this button again.
(When MD is inserted) * If
you are in EXT (changer) mode, press this button again.
Machine Translated by Google

Press the bus expander button ().
* Turn to the right to increase the volume, and turn to the left to decrease the volume.
[BASS X] lights up to emphasize the bass
range. Each time you press the button, the bus expander mode switches as follows.
Adjust with the level adjustment knob ().
To adjust the VOL volume
To emphasize the bass range (BAS-X)
19
Cooperative operation
To adjust audio
BS-X Hi
BS-X OFF
BS-X Mid
Level adjustment knob
Bus expander button Select button
Machine Translated by Google
Table of contents
Other Sanyo Tuner manuals

Sanyo
Sanyo VA-SW3050S User manual

Sanyo
Sanyo FMT-450K User manual

Sanyo
Sanyo t-9990 User manual

Sanyo
Sanyo FMT 611LU User manual

Sanyo
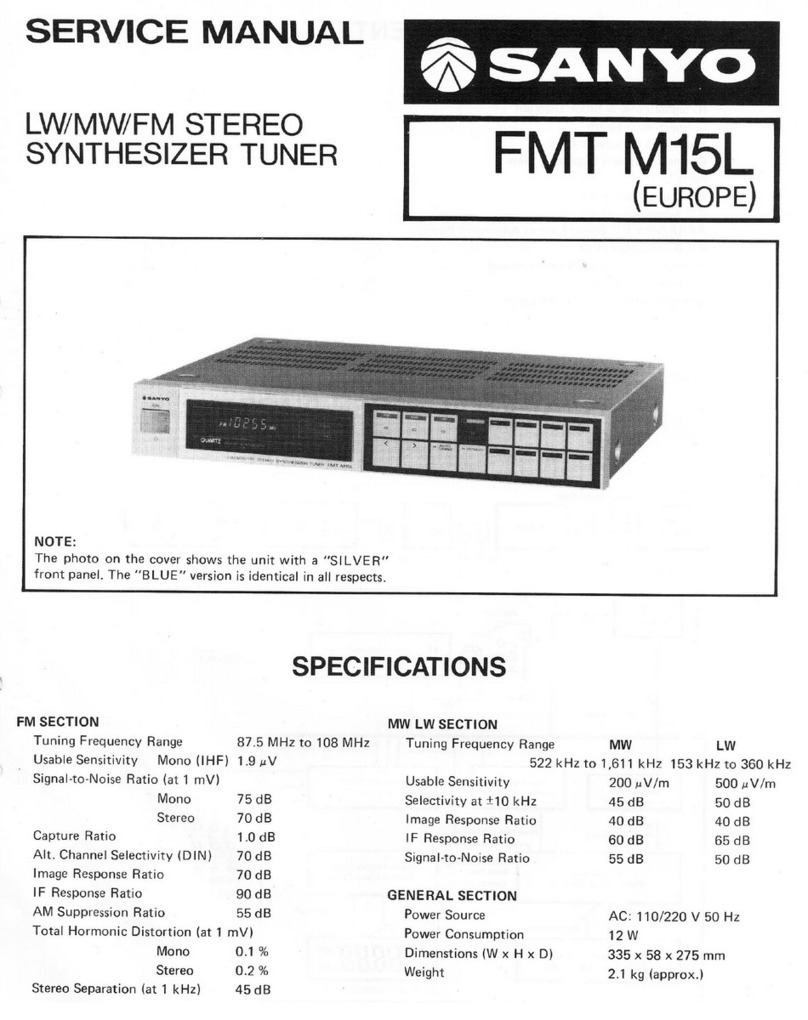
Sanyo FMT M15L User manual

Sanyo
Sanyo VA-SW3050LITE User manual

Sanyo
Sanyo JT250L User manual

Sanyo
Sanyo ESR-T100 User manual

Sanyo
Sanyo ESR-T100 User manual

Sanyo
Sanyo FMT 205L User manual