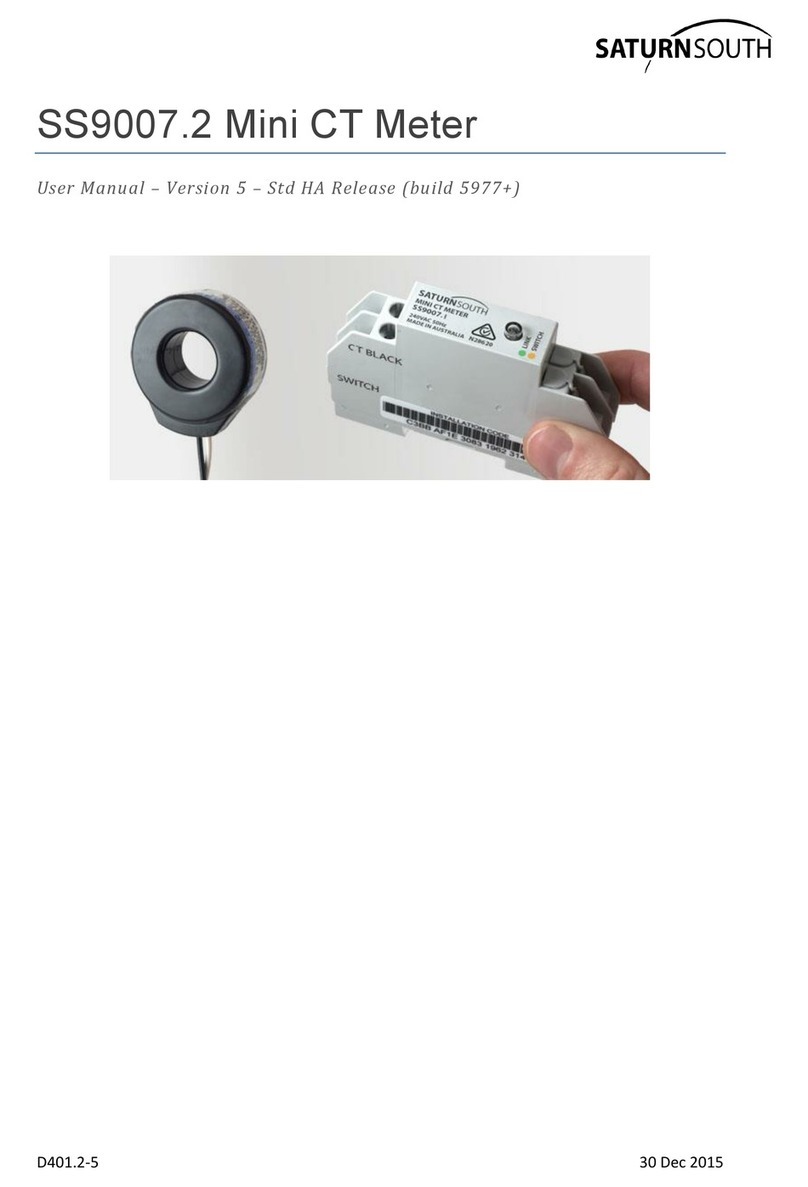
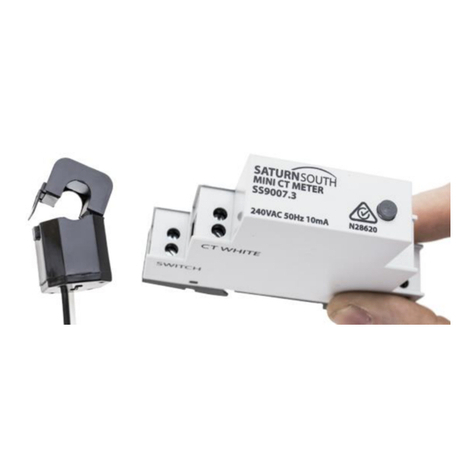
Saturn South SS9005 User manual

D501.2-4 29 Oct 2015
SS9005 Mini Three Phase Meter
User Manual –Version 1.3 –Std HA Release (build V003+)

2
Table of Contents
1 Safety Notices .................................................................................................................................3
2 Quick Reference..............................................................................................................................4
3 Product Overview ........................................................................................................................... 5
4 Technical Specifications .................................................................................................................. 6
5 Commissioning and Installation Instructions..................................................................................7
5.1 Before Installation...................................................................................................................7
5.2 Installation ..............................................................................................................................7
5.3 Commissioning......................................................................................................................11
6 Switching.......................................................................................................................................12
7 Metering .......................................................................................................................................13
8 Device Clusters and Attributes......................................................................................................14
8.1 Basic Cluster..........................................................................................................................14
8.2 On/Off Cluster.......................................................................................................................15
8.3 Simple Metering Cluster .......................................................................................................15
9 Troubleshooting............................................................................................................................19

3
1Safety Notices
This manual does not comprehensively cover all safety measures for installation and operation of
the device, since local code requirements and special operating conditions may necessitate further
measures. This manual does however contain important safety information pertaining to the correct
installation and usage of the device, and should be read carefully before attempting to install and
use the device.
Qualified Personnel
This device should be installed by technically qualified personnel. Failure to install in compliance
with national and local electrical codes and according to Saturn South recommendations may result
in electrical shock or fire hazard, unsatisfactory performance, or equipment failure.
This product is not intended for use by persons (including children) with reduced physical, sensory or
mental capabilities, or lack of experience or knowledge, unless they have been given supervision or
instruction concerning use of the product by a person responsible for their safety.
Children should be supervised to ensure that they do not play with the product.
Maintenance
Do not rely on this product to provide galvanic isolation to a circuit. If maintenance is being
performed on the connected circuit, disconnect the power by means of a primary protection device
such as a circuit breaker or mains switch in accordance with local regulations.
Servicing of this device in the field is not possible and should not be attempted. If servicing is
required, please return this device to Saturn South or an authorised distributor. Opening the product
enclosure, for any reason, will render the Product Warranty void.

4
2Quick Reference
Green
Red
Connectivity
Switch
Comment
Fast, continuous blinking between green
and red.
N/A
N/A
When device is in the Factory Reset state
Four blinks of red, four blinks of green,
repeating.
Connected
N/A
When device is set to Locate Mode
Off
Off
Not connected
Open
Not Connected, switch open
Off
On
Not connected
Closed
Not Connected, switch closed
Short blink every 4s
Off
Connected
Open
Connected, switch open
Short blink every 4s
On
Connected
Closed
Connected, switch closed
On (up to 10s)
Off
Attempting to connect
N/A
While device is attempting to join network
Fast Blink (3s)
Off
Joined or re-joined
successfully
N/A
Indicates successful network join or re-join attempt
Off
Fast Blink (3s)
Failed to join or re-join
N/A
Indicates unsuccessful network join or re-join attempt
Slow blink between green and red at ~1Hz
Connected
N/A
Indicates that the device is being remotely updated
Feature Name
Button Action
Resulting Action
Association
Join
5 second press
and release
Device will join any ZigBee HA network with ‘Permit Joining’ mode enabled. When the button is pressed the button
colour will change to yellow, and then begin to rapidly blink green once is has been held long enough to trigger an
Association Join. At this point the button should be released, and the button will shine solid green while it scans for a
suitable network. The button will then blink green if the join operation is successful, or blink red on failure.
Factory Reset
Press and hold
button for at least
10 seconds
Returns the device to its factory reset state. When the button is pressed, the button colour will change to yellow, and
after 10 seconds the button will begin to rapidly blink red indicating that the device will return to factory reset state.
The user should wait about 5 seconds before attempting another Association Join following a Factory Reset.
Manual
Switch
Press the button
briefly (<1 second)
Manually switches the device relay. Has no effect on non-switching variants of this device.
SS9005 Mini Three Phase Meter –Std HA Release
Button LED Indication Quick Reference
Button Command Quick Reference
Note: The LEDs will automatically dim to one
third brightness after 15 seconds of inactivity.

5
3Product Overview
The SS9005 Mini Three Phase Meter is a compact power metering and load switching device that can
be used to monitor three phase electrical loads or up to three individual single phase circuits.
Designed to sit on a standard switchboard DIN rail, the SS9005 has the same form factor as a
standard Residual Current Device, and accepts a wide range of external Current Transformers.
The SS9005 Mini Three Phase Meter is suitable for a range of applications including sub-metering,
Demand Management, autonomous load shedding, and site automation.
The SS9005 Mini Three Phase Meter is designed to meter and switch a wide range of single and
three-phase loads at up to 240VAC. Load switching is performed by an internal isolated relay that
can be used to trigger an external third-party contactor or relay. Designed to function in all major
electrical networks, the Mini Three Phase Meter boasts a high measurement accuracy (<1% error)
with a customizable reporting frequency of up to 1Hz. Import/export energy accumulations and true
signed active and reactive power measurements make the SS9005 an ideal choice for monitoring
renewable generation sources and energy storage devices.
Three phase consumption is tracked independently to provide instantaneous three phase power and
accurate three phase import/export energy readings. In addition to providing power factor
information for each monitored circuit, voltage phase separation angles are reported to enable
back-office reconstruction of full polar plots for three phase circuits.
High-resolution waveform sampling features provide unique insight into the behaviour and
condition of monitored loads, yielding detailed information for load profiling and classification
purposes.
Once installed, the Mini Three Phase Meter can receive important software updates over the
network, reducing the cost of network maintenance and guaranteeing an up-to-date feature set for
all devices in the field.
The SS9005 Mini Three Phase Meter communicates to other Saturn Energy devices using the ZigBee
communications standard in the 2.4GHz ISM band. All wireless communications to and from the
device are secured with AES-128 encryption using standards based technologies to ensure privacy
and data integrity.
Important:
The SS9005 Mini Three Phase Meter is not rated as a protection device, and must be placed
downstream of an approved protection device.

6
4Technical Specifications
Type: Three Phase Meter and Switch with External Current Transformers
Model: SS9005
Operational Voltage Range: 240/415 VAC
Operational Frequency Range: 50Hz
Operating Temperature Range:
-20°C to +70°C for non-switching variant
-20°C to +50°C for switching variant
Storage Temperature Range: -25°C to +80°C
Relative Humidity: 10-95% non-condensing
Average Power Consumption: <2W
Mass: 0.103kg
Dimensions: 60.5 x 90 x 35.5mm
Wire gauge: 0.1mm2min - 2.5mm2(stranded) or 2.5mm2(solid core) max
IP Rating: IP20
Switch Rating: 5A, 240V (isolated bi-stable relay installed on switching variant)
Measurement Accuracy: Class 1
Number of Switching Operations: > 10,000 cycles (5A, resistive load) on switching variant
Standards and Approvals:
AS/NZS 3100
AS/NZS 61000.6.3:2007 and AS/NZS 4268:2003
Certificate of Suitability

7
5Commissioning and Installation Instructions
5.1 Before Installation
The individual performing the installation must have access to the commissioning tools provided by
the Energy Services Company (ESCo).
An SS9002 ESBox or other compatible ZigBee network coordinator device must be present at the
site, and be authorised to communicate with a control server provided by the ESCo.
The radio environment at the location of installation may be tested to ensure the new device will be
able to connect to the existing ZigBee network. For more information on radio environment test
equipment and procedures, please contact Saturn South.
There are two stages to device installation:
1. Installation - Identify the circuit(s) and phase(s) on which the device will be used, confirm
that there is sufficient space to mount the device.
2. Commissioning - Wire the device into the switchboard as per the guidelines below and apply
power.
5.2 Installation
The SS9005 Mini Three Phase Meter is designed to be straightforward to install into a standard
domestic or commercial switchboard.
The following steps should be followed to install the device:
1. Identify the circuits that are to be monitored by the device. Note the major appliance(s) or
load(s) that the circuits are connected to for future reference, and if necessary make a note
of the device's HAN address.
2. Ensure that there is adequate mounting space for the device within the switchboard.
The SS9005 Mini Three Phase Meter draws power from the phase connected to the ‘A’ terminal, and
requires at least 70VAC on terminal ‘A’ relative to Neutral (terminal ‘N’) to operate. A connection to
each phase being monitored is required to provide a reference for high accuracy voltage
measurements.
The reference phase connected to the each phase input terminal must be the same phase from
which the load current is to be sensed by the corresponding clip-on Current Transformer (i.e. CTA
must be monitoring a load on the same phase that is connected to the ‘A’ phase input terminal), and
must be drawn downstream from an existing or dedicated protection device (e.g. MCB or RCD).

8
IMPORTANT:
The phase connected to each phase input terminal must match the phase being monitored
by the respective CT, or the meter will not generate accurate measurements.
Upstream protection devices must be selected such that the cable gauge for the reference inputs to
the SS9005 do not exceed the maximum gauge indicated in the technical specifications.
The three phase input terminals, marked ‘A’, ‘B’ and ‘C’, are shown in the image above.
IMPORTANT:
Ensure the sources of the reference phases are isolated before performing these steps.
The SS9005 Mini Three Phase Meter is not rated as a protection device and may only be
connected to a circuit that is protected up-stream by an approved circuit breaker.
The maximum voltage permitted between the Neutral (‘N’) terminal and any of the phase
input terminals (‘A’, ‘B’, or ‘C’) is 240VAC. Exceeding this limit may cause permanent
damage to the product. Ensure that the Neutral wire is connected correctly before
powering on the device.
1. Mount the device in the switchboard.
2. Wire the Current Transformers (CTs) to the device, taking care to match the coloured CT
leads with the appropriate "CTX " (black) and "CTX " (white) terminals.
3. Clip each CT on to the target load conductor, ensuring that the arrow on the CT points
towards the load (away from the grid). If monitoring a generator, ensure the arrow points
towards the generator (away from the grid).
4. Connect the output of a MCB, RCD, or other protection device to each of the required phase
reference terminals of the Mini Three Phase Meter, and a neutral line to the “Neutral”

9
terminal. The protection devices used for this purpose need not necessarily be on the same
circuit that the device will be monitoring (i.e. the circuit to which the CT is connected),
although care should be taken to ensure the current sources and voltages share the same
phase.
Figure 1: Mini Three Phase Meter monitoring a Three Phase load
Cable of minimum cross section 0.1mm2and maximum cross section 1.5mm2(stranded) or 2.5mm2
(solid core) may be used.
IMPORTANT:
If the circuits being monitored are connected to a protected neutral (e.g. via an RCD),
ensure that the Mini Three Phase Meter is also connected to the same protected neutral,
and not to the main neutral link.

10
Figure 2: Mini Three Phase Meter monitoring three individual single phase loads
5. If your Mini Three Phase Meter has switching capability, the two terminals marked 'SWITCH'
are connected internally to an isolated relay rated for 5A at 240V. The front panel button will
glow red to indicate that the relay is closed. This relay can be used to switch an external
relay, contactor, or control system. Refer to the relevant documentation when connecting
this Mini Three Phase Meter to a third party control device. See Section 6 Switching for
more information.
6. Apply power to the device. The button will blink continuously between green and red to
indicate that the device is in factory reset state. If the device is not in its factory reset state
when it is initially powered up, it can be reset by pressing and holding the front panel button
for at least 10 seconds, until the button starts to blink continuously between green and red.

11
5.3 Commissioning
To complete the installation process, the SS9005 Mini Three Phase Meter must be joined to an
existing ZigBee network. The following instructions apply specifically to networks based on the
Saturn South ESBox Ethernet-ZigBee Gateway device, however the process will be very similar when
using third party ZigBee coordinators.
1. Set the site's ESBox to ‘Permit Joining’ mode using the LSSS button sequence on the button
on the back panel of the ESBox (see the SS9002 ESBox LT documentation for more
information). When Permit Joining mode is successfully enabled, the EBox's ZigBee LED will
blink green for 120 seconds. During this 120 second window devices may be joined to the
network by repeating step 2.
If this site is being commissioned for the first time it is recommended that a factory reset be
performed on the ESBox before activating the first device using the Factory Reset (LLLSS)
button sequence.
2. Instruct the new Mini Three Phase Meter to join the network by pressing and holding the
front panel button for 5 seconds and then releasing it. The button will glow solid green to
indicate that the device is scanning for available networks. The device will then spend up to
10 seconds attempting to join the ZigBee network. If the device joins the network
successfully, the button will flash green for 6 seconds. If the device fails to join the network,
the button will flash red for 3 seconds. Please see the Troubleshooting section for more
information on debugging connection issues.
When joining multiple devices, perform the Association Join button sequence on each device
in turn, rather than entering the sequence on multiple devices at once.
3. If the device successfully joins the network, as indicated in step 2, verify that the device
appears as ‘connected’ in the out-of-band secure ESCo web management interface, and that
it is reporting power metrics.

12
6Switching
Switching variants of the SS9005 Mini Three Phase Meter can be used to switch loads of arbitrary
size indirectly using an inbuilt 5A 240VAC latching relay. If your device is marked with an R on its
variant label (e.g. “120A/R”), the two terminals marked 'SWITCH' are connected internally to an
isolated relay.
The internal relay would typically be used to control a third party external contactor or to signal a
control system. Because the relay contacts are isolated, the SS9005 Mini Three Phase Meter can be
connected directly to a digital IO on a control device such as a PLC.
The example below shows a SS9005 Mini Three Phase Meter being used to control an external
contactor with a 240V coil by switching the active input to the contactor’s control coil.
Figure 3: Mini Three Phase Meter connected to an external single-phase contactor
The internal relay in the SS9005 Mini Three Phase Meter is rated for over 10000 switching
operations of a 5A load at unity power factor. The relay is limited to one switch state transition per
second (e.g. the device cannot be switched on and off at a rate faster than 0.5Hz).
A value of 1 in the ‘Switch State’ attribute of the On/Off Cluster indicates that the relay is closed
(connected), and a value of 0 indicates that the relay is open (disconnected).

13
7Metering
As shown in Section 5, phase voltages are monitored by connecting reference signals directly to the
three phase input terminals, providing a power supply for the device as well as enabling high
accuracy voltage measurements. Current is measured using clip-on current transformers (CTs), with
nominal primary current ratings of 60A, 120A and 200A available as standard.
Each individual Saturn South meter is calibrated in the final stage of the production process. The
calibration procedure matches each device to a particular CT variant, meaning that measurements
will not be accurate if a device calibrated for a 120A CT is used with a 40A CT. Furthermore, given
the wide range of secondary current ratings available for CTs, the SS9005 Mini Three Phase Meter
must only be used with the supplied CTs.
IMPORTANT: Attaching a third party CT to the device can damage the device and will void the
product warranty.
SS9005 Mini Three Phase Meter devices have a ‘variant label’ on the front panel that describes the
rated primary current (and hence the CT variant to use), as well as indicating whether or not the
device has an internal relay. For example:
“120A” –Device is rated for a 120A nominal primary current.
“60A/R” –Device is rated for a 60A nominal primary current and includes an internal relay.
Max calibrated voltage
error
0.1%
Max calibrated current
error
0.5%
Typical absolute transfer
ratio error for 120A CT
< 0.5%
Typical absolute transfer
ratio error for 60A CT
< 0.5%
Region of linearity for
120A CT (<1% error)
8% to >110% of rated
primary current
Region of linearity for
60A CT (<1% error)
15% to >150% of rated
primary current
Figure 4: Measurement accuracy specification
For a full list of measured attributes delivered by the SS9005 Mini Three Phase Meter, please refer to
Section 8.

14
8Device Clusters and Attributes
The following Clusters are supported in the Std HA release of the SS9005 Mini Three Phase Meter:
Basic
On/Off
Simple Metering
This section lists the available attributes in each supported cluster.
A maximum of 11 attributes can be configured for reporting at once. There is only one timer for
attribute reports, and attributes will be reported at the interval specified in the most recent report
configuration message. Because ZigBee attributes have a variable size however, it may not be
possible for a device to send 11 attributes in a single report. If the total size of the report exceeds
the maximum payload size (60 bytes), some attributes will be excluded from the report. The device
will not automatically follow up with the remaining attributes if this is the case, and any missing
attributes must be requested separately.
8.1 Basic Cluster
Cluster ID: 0x0000 (0)
Manufacturer ID: 0x0000 (0)
Attr ID
Attr ID
(Hex)
Attribute Name
Writeable
0
0
ZigBee Cluster Library Version
N
1
1
Application Version
N
2
2
Stack Version
N
3
3
Hardware Version
N
4
4
Manufacturer Name
N
5
5
Model Identifier
N
6
6
Date Code
N
7
7
Power Source
N
16
10
Location Description
Y
18
12
Device Enabled
N

15
8.2 On/Off Cluster
Cluster ID: 0x0006 (6)
Manufacturer ID: 0x0000 (0)
Standard ‘turn on’, ‘turn off’, and ‘toggle’ functionality is provided by the On/Off Cluster.
Attr ID
Attr ID
(Hex)
Attribute Name
Writeable
0
0
Switch State
N
57726
e17e
Switch Safe State
Y
57727
e17f
Switch Safe State Reversion Delay
Y
Safe State Mechanism
If the SS9005 is equipped with a switch there is provision for the switch to be automatically returned
to a specified safe state in the event that the device loses contact with the Zigbee network, or if the
ZigBee coordinator indicates that contact with the ESCo has been lost.
There are 5 valid settings for the Switch Safe State attribute:
0. Switch reverts to Off state with no report.
1. Switch reverts to On state with no report.
2. Switch reverts to Off state with report.
3. Switch reverts to On state with report.
4. Switch reversion to safe state is Disabled.
The default factory state for Switch Safe State is 4 –Disabled.
There are two conditions which can trigger a safe state reversion:
1. Loss of ZigBee communications between the meter and the coordinator (e.g. ESBox)
2. Receipt of a ‘start revert’command from the ZigBee coordinator (regularly sent to the meter
by the ESBox when the ESBox is unable to communicate with the ESCo)
Following receipt of either one of these signals, the device will wait ‘Switch Safe State Reversion
Delay’seconds and then set the switch state to the value indicated by the ‘Switch Safe State’
attribute. If ‘Switch Safe State Reversion Delay’is zero, the switch will revert to safe state
immediately. If the switch is already counting down to revert to safe state, and another ‘revert now’
command is received, the countdown will continue normally (i.e. the countdown is not reset).
There are two conditions which can cancel a safe state reversion countdown while it is in progress:
1. Manually changing the switch state using the front panel button will cause the switch to go
into ‘manual override’mode and change state immediately, cancelling the safe state
reversion process.
2. Receipt of a ‘stop revert’command from the ZigBee coordinator (e.g. ESBox) will cancel the
safe state reversion process.

16
ZigBee coordinators that properly implement safe state functionality will send regular ‘stop revert’
commands to all connected meters whenever they are communicating successfully with the ESCo,
and will send regular ‘start revert’commands during ESCo communications outages.
Safe State Manual Override
In normal operation, the state of the relay can be set remotely by the ESCo or manually using the
front panel button on the device. When communications are interrupted –due either to a loss of
ESCo communications from the ESBox, or a loss of ZigBee communications between the meter and
the ESBox –the safe state mechanism can guarantee that the switch state will revert to a pre-
defined safe state. However, the designated safe state may not always be the state desired by the
consumer, meaning that there must be a mechanism to manually override the switch state during
times when the normal ESCo controls are not available.
Safe State Manual Override enables consumers to manually set the switch state of their device
during communications outages. When the switch state is manually set following the start of a safe
state reversion countdown, the switch will ignore safe state reversion triggers until manual override
is disabled by receipt of a ‘stop revert’message from the ZigBee coordinator. Since ‘stop revert’
messages will only be received by the device if the ZigBee network is working and the ESBox is able
to communicate with the ESCo, the device will be under the control of the ESCo meaning that
manual control can be cancelled.
Safe State Reversion Reports
The safe state mechanism includes a report capability to enable the ESCo to determine if a switch
state transition occurred autonomously. If safe state reversion reporting is enabled, bit 1 of the
Switch State attribute will be set to 1 if a reversion to safe state was the cause of the most recent
switch state transition.
Safe state reporting example: The Switch Safe State attribute is set to 3, and the relay is currently
OFF (Switch State = 0). The SS9005 loses contact with the ZigBee network, causing the switch state
to revert to the selected safe state (ON). The Switch State attribute (attribute 0) will be set to 3,
indicating that the switch is on (bit 0 ==1) and a reversion has occurred (bit 1 = 1).
The reversion to safe state report bit in the Switch State attribute will be cleared the next time the
switch state is changed, either remotely or using the front panel button on the SS9005.
Effect of Factory Reset on Safe State Settings
Performing a factory reset on the device will reset the ‘Switch Safe State’attribute to 4 (disabled),
and the ‘Switch Safe State Reversion Delay’attribute to zero.

17
8.3 Simple Metering Cluster
Cluster ID: 0x0702 (1794)
Manufacturer ID: 0x0000 (0)
Saturn South devices expose an expanded set of attributes in a non-standard range within the
Simple Metering Cluster.
The following attributes are available on endpoint 1, 2, and 3 (Phase A, Phase B, and Phase C). Any or
all of the Phase A, B, and C attributes can be configured for reporting using the ZigBee report
configuration/bind process on endpoints 1, 2, and 3 respectively.
Attr ID
Attr ID
(Hex)
Attribute Name
Units
Divisor
Writeable
57610
e10a
Voltage 1 RMS Mean
"V"
100
N
57628
e11c
Current 1 RMS Mean
"A"
100
N
57646
e12e
Power 1 Active Mean
"W"
1
N
57649
e131
Power 1 Reactive Mean
"var"
1
N
57655
e137
Power Factor 1 Mean
1000
N
57664
e140
Accumulated Energy 1 Active Import
"Wh"
1
N
57665
e141
Accumulated Energy 1 Reactive Import
"varh"
1
N
57721
e179
Accumulated Energy 1 Active Export
"Wh"
1
N
57722
e17a
Accumulated Energy 1 Reactive Export
"varh"
1
N
The following attributes are available on endpoint 4 (Phase D / Three-Phase Aggregate). Any or all of
the Phase D attributes can be configured for reporting using the ZigBee report configuration/bind
process on endpoints 1, 2, and 3 respectively.
Attr ID
Attr ID
(Hex)
Attribute Name
Units
Divisor
Writeable
57646
e12e
Power 1 Active Mean
"W"
1
N
57649
e131
Power 1 Reactive Mean
"var"
1
N
57664
e140
Accumulated Energy 1 Active Import
"Wh"
1
N
57665
e141
Accumulated Energy 1 Reactive Import
"varh"
1
N
57721
e179
Accumulated Energy 1 Active Export
"Wh"
1
N
57722
e17a
Accumulated Energy 1 Reactive Export
"varh"
1
N
57723
e17b
Phase Angle A->B
“deg”
100
N
57724
e17c
Phase Angle B->C
“deg”
100
N

18
The following attribute is available on endpoint 1 (Phase A) only
Attr ID
Attr ID
(Hex)
Attribute Name
Units
Divisor
Writeable
57667
e143
Frequency 1 Mean
"Hz"
100
N
57725
e17d
Maximum Current
"A"
100
N
Note that the Maximum Current attribute cannot be configured for reporting. All SS9005 phases are
calibrated for the same CT type. The Maximum Current attribute specifies the rating of the supplied
current transformers.
The frequency value reported in this endpoint is derived from the signal measured on the Phase A
voltage input. Only one frequency measurement is made on the SS9005 (it is assumed that all input
signals have the same frequency).

19
9Troubleshooting
Issue:
There is no indication from the device when power is applied, and no response to pressing the
front panel button.
Actions:
Verify that the device is wired according to the instructions in Section 5.2. Ensure that the
live source is disconnected before connecting the meter.
Verify that all upstream switches and protection devices are in their closed configuration.
If one or more other devices are to be installed in the same location, install another device
to compare. If other devices function correctly, remove the non-functioning device.
Issue:
When performing the steps outlined in the Commissioning section of the Commissioning and
Installation Instructions, the device does not successfully connect (indicated by button flashing red
for several seconds).
Actions:
Ensure that ‘Permit Joining' mode is enabled on the ZigBee Coordinator (If using an ESBox,
use the LSSS button sequence on the ESBox to enable ‘Permit Joining’ mode).
Try to join the device again –Saturn South metering devices will initially scan a reduced
subset of the full range of available ZigBee channels. If the network is on a channel that is
not in the ‘preferred channels’ list, the meter will initially fail to locate the network. A
second join attempt will then cause the meter to scan the full set of channels.
Check the RF environment to ensure the ESBox and Mini Three Phase Meter can
communicate - contact Saturn South for more information.
Issue:
Device stops communicating to the site ESBox.
Actions:
Verify that other nearby devices are still communicating successfully with the site ESBox
(normally, this can be done by checking for recent data in the ESCo client or management
tools)
If this is a standalone device, or if other nearby devices are also not functioning, perform a
radio test in the deployment environment to verify that the device is in range of the ESBox
radio.
If the device exhibits abnormal behaviour (e.g. device does not respond to button presses,
does not give button LED indications described in the Quick Reference guides in this
manual) please contact Saturn South.
Table of contents
Other Saturn South Measuring Instrument manuals
Popular Measuring Instrument manuals by other brands

Bently Nevada
Bently Nevada 3300/40 Operation manual

Hanna Instruments
Hanna Instruments HI8424NEW instruction manual

Martin Lishman
Martin Lishman Protimeter Balemaster instruction manual

Rotem
Rotem RAM GENE-1 operating manual

LI-COR
LI-COR LI-600 quick start guide

Velleman
Velleman CAMCOLBUL4 quick start guide

PCB Piezotronics
PCB Piezotronics Triaxial ICP 356A12/010CA Installation and operating manual

Calypso Instruments
Calypso Instruments ULP Pro user manual

OPTILAB
OPTILAB Phoenix Series user manual

Fungilab
Fungilab Visco Ball V9000 Operation manual

Mid-Continent Instrument
Mid-Continent Instrument MD23-104 user guide

Ecom
Ecom Ex-MX2 Safety instructions