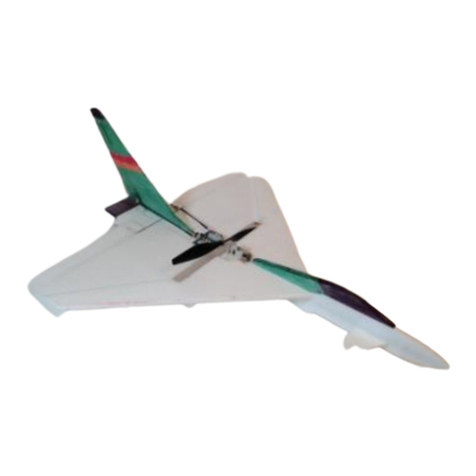
Sawn Craft Micro Gloster Javelin User guide

Revised 2015-11-21
Micro Gloster Javelin
Assembly and Setup Manual
Specifications Recommended Power System
Wingspan 12” RX/ESC/Servo Spektrum AR6400 (or similar)
Overall Length 14.88”
Motor
Parkzone P-51 Motor & Gearbox (PKZ3624)
Wing Area 73.98 in2or
Flying Weight 1.25oz / 34g Hobbyzone Champ Motor & Gearbox (HBZ4930)
Intended Use Indoor/Calm Winds Battery 160mAh 1S 3.7V 25C LiPo (or similar)

ThankyoufromSawnCraft.
ThankyouforpurchasingtheSawnCraftMicroGlosterJavelinaircraft.Likethefull‐scaleGlosterJavelin,
inyourhandsisaremarkablyversatileairplanedesignedtodeliverapleasurecruiserwithanincredible
look.ThelightweightandrigidXPSandcarbonconstructionmakesitpossibleforyoutoexperiencea
wideperformanceenvelope.Thismeansthatnomatterhowyouliketofly,you’llenjoybothstability
andmaneuverabilitywithoutanysacrificeinprecisionorcontrolfeel.
YourSawnCraftMicroGlosterJavelinaircraftrepresentsthebenchmarkofultra‐microperformanceand
aerobaticversatility.Allyouhavetodonextisreadandapplytheinformationpresentedinthis
instructionmanual.
Isincerelyhopethatyouenjoyyourmodelasmuchaswedo!Ifyouhaveanytroubleswiththese
instructionsorinthesetupofyourmodelfeelfreetocontactusandwewillprovideyouwiththe
serviceyouexpectfromahobbyist‐ownedandoperatedbusiness.
JonathanSawn
Owner,SawnCraft
Jonathan@Sawn‐Craft.com

Table of Contents
1Introduction1
1.1StyleConventions1
1.2RequiredTools&Supplies1
1.3RequiredPartsforCompletion 2
1.4IncludedPartsDescription 3
2AssemblyInstructions4
2.1PartsSheetRemoval4
2.2FuselageLamination5
2.3WingReinforcementLamination6
2.4ElevonHinging7
2.5ElectronicsInstallation8
2.6SkidInstallation10
2.7ControlRodInstallation11
2.8FuselageInstallation12
2.9VerticalStabilizerInstallation13
3SetupandTuning14
3.1CenterofGravity14
3.2RadioSetupandMixing14
3.3ControlThrowsandExpo15
3.4Launching15
3.5FlyingTips16
3.6Decorating/Finishing16
3.7Repairs&SpareParts16

SawnCraftMicroJavelinManual
Page1151120MicroJavelinManual.docx
1 Introduction
Thecontentsofthismanualassumetheoperatorwillhavethefollowingprerequisites:
•Understandingofallappropriatesafetyproceduresandrequirements
•Theabilitytofollowwrittenproceduresandpossessbasichobbybuildingskills
1.1 Style Conventions
Belowaretheimportantstyleconventionsthatwillbeusedthroughouttheguide.
Note:Keypointsorhintsforsuccesswillbeformattedinthismanner.
Warning:Anyareathatposeseitheraphysicalhazardorthedangerwillbeformattedinthismanner.
Arrowsinformwheretoclickortoperformthespecifiedoperation.
Circleditemsinformofitemsofinterestforthespecifiedoperation.Circleditemswilltypicallybe
accompaniedbytextfurtheridentifyingtheregionofinterest.
1.2 Required Tools & Supplies
Thelistbelowcontainsalloftherequiredtoolsandsuppliesthatarerequiredfortheassemblyand
tuningofthismodel.
•Clean,flatworksurface
•#11hobbyknife
•Straight‐edgeruler
•Foam‐safeadhesive
•3MBlendermtapeorClearpackingtape
•200‐gritSandpaper
•Solderingiron&solder
•Heatgun
•Wirecutters
•Needlenosepliers

SawnCraftMicroJavelinManual
Page2151120MicroJavelinManual.docx
SawnCraftrecommendstheuseofBeaconFoam‐Tacadhesiveand3MBlendermHingeTapeforthe
constructionofthismodelduetoitsstrength,lightweight,andeasyuse.BothBlendermandFoam‐
TaccanbepurchasedbyvisitingtheBuildingSuppliestabonSawn‐Craft.com
1.3 Required Parts for Completion
Thismodelwasdesignedwiththeintentionofputtingtousetheelectronicsthatareusedintoday’s
popular1SLiPo‐poweredUltra‐Microaircraft.Onceyouhavewornouttheairframeonyour
Hobbyzone©ChamporParkzone©UMP‐51Mustang,simplyremovetheelectronicsandusethemto
powerthismodel.Thelistbelowcontainsthetestedandrecommendedpartsforyourmodel:
•1SLiPo“Brick”‐ParkZoneReceiver/ESCDSM2/X‐Part#PKZ3352
•Ultra‐MicroGearbox–HobbyZoneGearbox(NoMotor):Champ‐Part#HBZ4929
•Ultra‐MicroMotor–HobbyZoneMotor:Sukhoi/Champ–Part#PKZ3516
•Ultra‐MicroMotor(HP)–ParkZoneMotor:UltraMicroP‐51‐Part#PKZ3616
•Propeller–E‐FlitePropandSpinner130x70(2)‐Part#EFL9051
•1SLiPoBattery–TurnigyNano‐Tech160mAh25c1SLiPo‐AvailablefromSawnCraft
Pleasenotethatotherpowersystemsandcomponentsmaybecompatibleandmayworkwithout
issue,butthelistedcomponentshavebeenusedsuccessfullybySawnCraft.
Optional Parts for Completion
Tomakeyourbuildeasierandensurethenicestlookingfinishedproduct,thefollowingproductsare
offeredonSawnCraft.com.SeetheBuildingSuppliestabfortheseproducts.
•SawnCraftCustomDecalSheets
•ColoredPackingTape
Theorderofassemblypresentedinthisinstructionhasbeentestedanditisrecommendedthatyou
donotdifferfromthemtoprovidethemostaccurateandeasiestassemblypossible.Also,the
constructiontechniquesofmanyofouraircraftareextremelysimilar.Thoughwewilltrytoinclude
asmanyphotosofyourspecifickitinthisinstruction,otherkitassemblyphotosmaybeusedifthe
instructionand“look”oftheassemblyisthesame.
SawnCraftMicroJavelinManual
Page3151120MicroJavelinManual.docx
1.4 Included Parts Description
Pleaseinspectyourkitandensurethatalllistedpartsarepresentandundamaged.Ifyoufindmissing
partsorsignsofdamagepleasecontactSupport@Sawn‐Craft.comforassistance.
a) MainWing
b) KFmStep
c) FuselageHalf(2each)
d) VerticalStabilizer
e) HorizontalStabilizer
f) Elevon(2each)
g) Skid(2each)
h) VentralFin
i) MicroControlHorn(4each)
j) 3”x0.024”ControlLinkageWire(2each)
k) 6”0.083”CarbonRod
l) 2”3mmHeatShrinkTube(2each)
m) 12”MicroWire
n) MicroVelcro(notshown)
a
b
c
d
e
f
g
h
i
j
k
l
m
f
c
e

SawnCraftMicroJavelinManual
Page4151120MicroJavelinManual.docx
2 Assembly Instructions
2.1 Parts Sheet Removal
•PartsRequired:
oKitPartsSheets
oHardwarePack
1) Laybothkitpartssheetsoutaswellasthehardwarepacktoinspectfordamageandconfirmthat
allpiecesareinthekit.Ifyoufindthatthereisanissue,pleasesendanemailtoSupport@Sawn‐
Craft.comandwe'llgetrightbacktoyou.
2) Usingasharphobbyknifecarefullycutthefoampartsoutofthesheets.Thesmalltabsholding
thepartsintothesheetcansometimesbetrickytofindsoifyouhavetroubleremovingapart
fromthesheetkeeplookingforthatlasttab.Onceoutofthesheet,youmaychoosetocleanup
theremainingtabonthefoampieceswithsomesandpaper.

SawnCraftMicroJavelinManual
Page5151120MicroJavelinManual.docx
2.2 Fuselage Lamination
•PartsRequired:
oFuselageHalf(2each)
o6”0.083”CarbonRod
1) Laybothfuselagehalvesflatonthetablewiththerecessedslotfacingup.Applyabeadofglue
aroundtheentireperimeterofoneofthefuselagehalves.
2) Presstheungluedfusehalfontothegluedfusehalf,recessedslotsfacingeachother,andgently
slidethepartsaroundtospreadtheglueevenly.
3) Separatethetwofusehalvesandinsertthecarbonrodintooneoftherecessedslots.
4) Rejointhetwofusehalves,gluesidetowardeachother,ensuringthatthecarbonrodalreadyin
theslotalignswiththerecessedslotontheotherfusehalf.Settheassembledfuselamination
asidetoallowthegluetocure.Ifdesiredyoucanplaceaflatweight(book,etc.)ontopofthe
laminationwhilecuringtoensureaflatassembly.
5) Oncecured,sandleadingedgestoyourliking.

SawnCraftMicroJavelinManual
Page6151120MicroJavelinManual.docx
2.3 Wing Reinforcement Lamination
•PartsRequired:
oMainWing
oKFmStep
1) Laythemainwingonthetablewiththemilledbricklocationmarkingsslotfacingup.Applyabead
ofgluearoundtheentireperimeteroftheKFmStep.
2) PressthegluedsideoftheKFmontotheMainWing,aligningtheleadingedgesofbothparts,and
gentlyslidethepartsaroundtospreadtheglueevenly.
3) Settheassembledfuselaminationasidetoallowthegluetocure.Ifdesiredyoucanplaceaflat
weight(book,etc.)ontopofthelaminationwhilecuringtoensureaflatassembly.
4) Oncecured,sandleadingedgestoyourliking.

SawnCraftMicroJavelinManual
Page7151120MicroJavelinManual.docx
2.4 Elevon Hinging
•PartsRequired:
oElevon(2each)
oMicroControlhorn(2each)
oMainWing
Warning:Thisprocessinvolvesusingextremelysharpcuttingblades.Caremustbetakentoavoidinjury.
ElevonSetup
1) Laytheelevonsonthetablewiththeleadingedgefacingyourselfandthewidepartoftheelevons
ontheoutside.Useastraightedgerulerandahobbyknifeorasandingblocktocutan
approximate45°bevelintotheleadingedgeofthecontrolsurface,ensuringthatyouhavebotha
leftandrightelevon.Dryfitamicrocontrolhornintotheslots,ensuringthatthehingebevelis
facingdown.
2) Placetheelevonandmainwingtogetherwithtrailingandleadingedgestouching,orientedsuch
thatthehingebevelfacesdownwhentheKFmStepisfacingup.Usetwosmallpiecesoftapeto
attachthesmoothsidesoftheelevonandmainwingtogether.Fliptheassemblyoverandinstall
twoadditionalpiecesoftapeonthebevelsideofthehingetocompletethetapehinge.

SawnCraftMicroJavelinManual
Page8151120MicroJavelinManual.docx
2.5 Electronics Installation
•PartsRequired:
oMainWingAssembly
oRX/ESC/Servo“Brick”
oMotor&Gearboxw/Prop
o12”MicroWire
o3mmHeatShrinkTube
1) Cutthemotorandbatterywiresonyourbrickapproximatelyinthecenter.Striptheinsulationoff
thewireabout1/8”andtinthewires.Stripandtinoneendofthemicrowireaswell.Cutpieces
ofshrinktubetocovertheexposedwires.Slidetheshrinktubeontothewiresleadingtothe
motor.Solderthemicrowiretothemotorwireends,matchingpolarity.Oncesoldered,slidethe
shrinktubeoverthecompletedsolderjointanduseaheatguntoshrinkthetubes.
Warning:Thisprocessinvolvesusingsolderingequipmentthatisextremelyhot.Extremecautionmust
betaken
2) GluetheRX/ESC/Servo“Brick”onthetopofthemainwingatthelocationmarkedbyasquare,just
behindthepropslot.Ensurethattheservogearsarefacingforwardandthebrickandallwiresare
completelyclearoftheprop.

SawnCraftMicroJavelinManual
Page9151120MicroJavelinManual.docx
3) Ifyoualreadyhaveaproponyourgearboxfromanotheraircraftyouwillneedtoremovetheprop
andinstallit"backwards".Bythis,youwillscrewthepropontothemotorshaftwiththemolded‐
innumbersonthepropfacingthemotor.Thisisdonebecauseofthelocationofthe
motor/gearboxascomparedtotheotheraircraft'sstocklocation.
4) Gluethemotorontothetopofthemainwingbyinsertingthemotormountingpinsintothepre‐
cutalignmentdotsinthewingwiththeproplocatedinsidetheopenslot.Routethemotorwires
aroundtheslotandtothebrickandcutthemicrowiretotheproperlength.Solderthemotor
plugontothemicrowireandcoverwithheatshrinktube.Usesmallpiecesoftapeorglueto
securethemotorwiresaroundtheslot.Plugthecompleted,longermotorwireintothebrick.
Wehavefoundthatsomepilotsprefertohavesomedown‐thrustintheirmotorasopposedtoit
beingmountedflushonthemainwingwhenusingmorepowerfulmotors.Todothis,simplyadda
smallpieceofscrapfoambelowtherearofthemotor/gearboxassembly(thenon‐propside)andglue
theassemblydownasyouwouldnormally.Doingthiscanpreventsomeunwantedclimbingunder
power,butotherwisedoesn’tnoticeablychangetheflightcharacteristics.
AlignmentDots

SawnCraftMicroJavelinManual
Page10151120MicroJavelinManual.docx
2.6 Skid Installation
•PartsRequired:
oMainWingAssembly
oSkid(2each)
oVentralFin
1) LaythemainwingassemblyonthetablewiththeKFmstepfacingdown.Applyabeadofglue
downtheentirelengthofthetopoftheskid.
2) PressthegluedsideoftheskidontotheMainWing,aligningtheslotsonthewingwiththetabson
theskids,andgentlypressthepartstogethertospreadtheglueevenly.Thestraightsectionon
thebottomoftheskidwillgotowardtherearoftheplane.
3) Gluetheventralfininthecenterslots.Theroundedprotrusiononthebottomoftheskidwillgo
towardtherearoftheplane.Allowgluetocurebeforeproceeding.
Slot
FrontFront

SawnCraftMicroJavelinManual
Page11151120MicroJavelinManual.docx
2.7 Control Rod Installation
•PartsRequired:
oMainWingAssembly
o0.024"ControlRodWire
1) Youwillnowbendthecontrolrodwireintothepropershape.Usingapairofneedlenosepliers,
bendthewireintotheshapeasdescribedintheimagesbelow.YouwillhaveaZ‐bendoneither
endofthewirewithanadjustingV‐bendinthecenter.Theproperdistancebetweentheparallel
flatsofthetwoZ‐bendsare50mm.UsetheV‐bendinthecentertoadjustthelengthbypinching
orsqueezingtheV.
2) Attachthecontrolrodstothecontrolhornsandtheservos.Securethecontrolhornsintheirslots
withglueandlettheassemblysituntilthegluehascured.

SawnCraftMicroJavelinManual
Page12151120MicroJavelinManual.docx
2.8 Fuselage Installation
•PartsRequired:
oMainWingAssembly
oFuselageAssembly
oMicroVelcro
1) Applyabeadofgluedowntheentirelengthoftheflatspotontheslotattherearofthefuselage
assembly.Alsoapplyglueontheinsideedgesofthemainwingassemblyfuselageslot.
2) Pressthegluedsideofthefuselageassemblyontothemainwingassembly,slidingthefuseallthe
wayback,andgentlyslidethepartsbackandforthtospreadtheglueevenly.Checkthatthefront
ofthewingthatisgluedtothesideofthefuseisstraightandevenonbothsidesofthefuse.Allow
gluetocurebeforeproceeding.
3) Applyapieceoftapejustundertheleadingedgeofthewingwhereitattachestothefuse.Attach
apieceofhookandloopmaterialtothetopofthetapeforbatterymountingandadjustment.
MicroVelcro

SawnCraftMicroJavelinManual
Page13151120MicroJavelinManual.docx
2.9 Vertical Stabilizer Installation
•PartsRequired:
oAircraftAssembly
oVerticalStabilizer
oHorizontalStabilizer
1) Youmaychoosetogentlyroundtheedgesofthefoamontheleadingedgeofthehorizontaland
verticalstabilizerswithsandpaperbeforeproceeding.
2) Applyabeadofgluedowntheentirelengthofthetopoftheverticalstabilizer.Pressthe
horizontalstabontothetopoftheverticalstabilizerusingthealignmentslots.Allowtheglueto
curebeforemovingon.
3) Applyabeadofgluedowntheentirelengthofthebottomoftheverticalstabilizerassembly.Press
thegluedverticalstabassemblyontothetopofthemainwingassemblyontotheproperslots,
ensuringthatthestabsitsevenlyonthewing.Thiscompletesthebuildprocess!
RoundEdges

SawnCraftMicroJavelinManual
Page14151120MicroJavelinManual.docx
3 Setup and Tuning
3.1 Center of Gravity
TheCGofthisplaneislocatedapproximately1/4”infrontofthepropslot.MovingtheCGforeandaft
willdramaticallychangethehandlingoftheplanesoadjusttoyourliking.AnaftCGwillallowforslow,
high‐alphaflightwhileamoreforeCGwillprovideafasterflightexperience.Usetheincludedhookand
loopfastenertoadjustthefore/aftlocationofthebatterytoadjusttheCGwithoutaddingadditional
weight.
3.2 Radio Setup & Mixing
Dependingonthetransmitterand“brick”thatyouareusingtocontrolyourmodelyoumayfindthat
youneedtodosomespecialsetuptomakethecontrolsworkproperly.Thisisespeciallytrueforelevon
controlssobelowarealistoftestedradiosandthemixesusedtomakethecontrolsfunctionproperly
withtherecommendedbrick.
ElevonMixingReference
TransmitterWingModeMix1Mix2Notes
SpektrumDX6iDeltaN/AN/A
Youmustreverseeithertheelevatoror
aileronforpropermovement
SpektrumDX7s
&DX8ElevonELE>LEL=‐125%AIL>REL=‐125%
Controlthrowsmaybereducedwhenusing
thismix,sothehighandlowratecontrol
throwswillneedtobeadjustedtosuityour
flyingstyle.
SpektrumDX9&
DX18Elevon‐BN/AN/A
Note:Themixesgivenabovereflectwhatwastestedusingourprototypesetupsandelectronics.Theyshouldbeusedasa
startingpointandyoumayfindthatyouendupwithadifferentsetting.Ifyouarehavingtroublepleasecontactusfor
assistance.

SawnCraftMicroJavelinManual
Page15151120MicroJavelinManual.docx
3.3 Control Throws & Expo
Byalteringtheamountofcontrolthrowthesurfaceshaveyoucanfine‐tunethehandlingand
performance.Belowaretherecommendedsettingsastestedthatwillprovideasuccessfulflying
experience.Throwsaremeasuredatthepointfarthestfromthehinge.
ControlSurfaceLowRateThrow LowRateExpo HighRateThrowHighRateExpo
Elevator1/4in(70%)20%3/4in(100%)25%
Rudder1/4in(70%)20%3/4in(100%)30%
Elevon1/4in(70%)25%3/4in(100%)40%
3.4 Launching
Launchingthisaircraftisverysimpleandiseasytodo.Simplyholdtheairplanebythewingtipinone
handwithyourradiointheother.Advancethethrottletofullandgentlyswingtheaircraftforward,
releasingitwithwingslevelandaslightlyupattitude.

SawnCraftMicroJavelinManual
Page16151120MicroJavelinManual.docx
3.5 Flying Tips
Thisaircraftisdesignedtoflyinthespaceassmallasasinglebasketballcourt.Beingsuchlightweight,
itisrecommendedthatthisaircraftbeflownindoorsoroutdoorsincalmwindconditions.Always
ensurethatyouarecomfortablewiththeaircraftanditsflightcharacteristicspriortoflyinginasmall
venue.Neverflyoverpeopleoranimals.
Thisaircraftfliesmuch“bigger”thanitreallyisandthetechniquesofflyinglargeraircraftapply.Rudder
turnswillbanktheaircraftsoelevatorwillneedtobeaddedtomaintainaltitude.Thedelta‐wingdesign
isinherentlystableandmakesthismodelapurejoytofly!Thismodelcanflyslowlyinhighalphaflight,
butwhenyoudropthenoseitisremarkablyquickandnimble.Landingtheaircraftissimple;keepsome
throttleappliedandastheplanenearstheground,pullbackontheelevatortoflare.
3.6 Decorating/Finishing
Thebeautyofthisaircraftisthatyouhavetheopportunitytofinishitwiththelookthatyoudesire.We
recommendusingourCustomDecalSetsorcoloredpackagingtape(availableontheBuildingSupplies
tab)fordecoratingasitiseasytouse,lightweight,andprovidesanice,glossyfinish.Water‐based
acryliccraftpaintshavebeenusedwithsuccessinthepastashavepermanentmarkers.Priortousing
anypaintsormarkers,testonascrappieceoffoamtoensurethatitdoesn’tdamagethefoam.
Rememberthatanyweightyouaddtotheairframewillaffectitsperformancesokeepheavy
applicationsofpaintanddecalstoaminimum.
3.7 Repairs & Spare Parts
Duetothismodelsextremelylightweight,itissurprisinglydurable!Ifapartofthemodelisdamagedit
cantypicallyberepairedusingsmallpiecesofpackagingtapeorbygluingusingBeaconFoamTac.
Ifapartisdamagedbeyondrepair,simplysendusanemailatSupport@Sawn‐Craft.comaswehave
replacementpartsforpurchase.
Table of contents
Other Sawn Craft Toy manuals

Sawn Craft
Sawn Craft Mana-Tee User guide

Sawn Craft
Sawn Craft Micro B-58 User guide

Sawn Craft
Sawn Craft Micro F-16 User guide

Sawn Craft
Sawn Craft Mini 4-Fitt User guide

Sawn Craft
Sawn Craft Micro Eurofighter User guide

Sawn Craft
Sawn Craft Zero 32 User guide

Sawn Craft
Sawn Craft Micro F-4D Skyray User guide

Sawn Craft
Sawn Craft Micro F-22 User guide

Sawn Craft
Sawn Craft Cherokee 24 User guide