SC2000 BlackView PL1751 User manual

User manual V2.0

Thank you for purchasing BlackView.BlackView is a
portable, Stylish, high-performance vehicle drive
recorder. It has 5.0M effective pixel high-definition CMOS
image sensor, intelligent voice reminder, enhanced
night shooting,140°wide-angle lens.
Specific performance parameters are as follows:
CMOS sensor 5,000,000 pixels
Viewing angle o f lens Wide-angle 140°
Turning angle of lens 200° back and fo rth
Screen 2.0TFT high resolution
Quality vedio HD(1280×720)@30fps
Night vision Enhanced night vision
Format of picture JPEG
Pixel of picture 2560x1920
Voice guidance intelligent voice guidance
Type of memory card TF card
Capacity of memory Card Supports up to 32G
Battery 800MA Polymer lithium battery
Power consumption 150MA

Check the product and the accompanied accessories
!
distributor.
If there is any problem of the accessories, contact your local product
Checking the packing content
BlackView Support Slot
Power cable Driver disk
User m aualn Cable holders

Checking the main body of the BlackView
Lens
Enhanced night vision light
Speaker
Vedio Play Camera
Microphone
Switching&Menu
TF Card Slot
USB Interface
TFT LCD
Reset
Support slot

1.Stop the engine and remove the key from the ignition.
Installing the BlackView
Install the BlackView in a well-lit and safe location.
2.Insert the Micro SD card into the BlackView.
3.Attach the BlackView into the windshield of your car
using double-sided tape.
Use a soft and dry cloth to wipe the foreign material and moisture
attached in the surface of the support slot.
4.Connect the [USB] terminal of the BlackView and the
cigarette jack of your car using the power cable.
5.Tie the power cable
Use the provided cable holder, when necessary.
6.Adjust the position of the camera lens of the BlackView.
Ensure that it is level with the ground.
7.Start the engine. Check whether the BlackView is installed
When the BlackVue is installed correctly, its Intelligent voice systems
will play“The BlackView has been starting normal recording”.

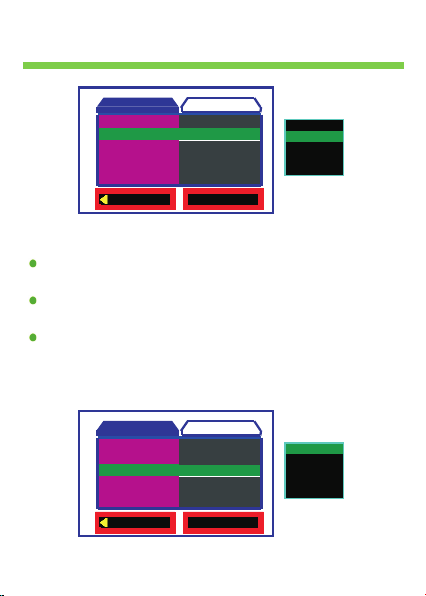
Using the Normal Recording Function
Using the BlackView
Start the engine.
BlackView turns on and starts the Normal Recording function. After
it is turned on, it will records and saves scenes at each specified
period.
Stop the engine.
BlackView will turn off after about 5 seconds.
Using the Manual Reconrding Function
Press the <Switching> button on the BlackView.
After BlackView turns on.Press the <Camera> button to starts the
Manual Recording function. It will record and saves scenes at each
specified period.
Press the <Camera> button again.BlackView will exit
.
Manual
Recording function
Using the Camera Function
Using the Playback Function
When BlackView turns on.
To enter the Camera Function Press the <Camera> button.
Press the <Camera> button again.BlackView will take photograph.
When BlackView turns on.
Press and hold <Play> button for 2 seconds to enter the Playback
Function.
Press <Camera> or <Vedio>button to select the video or photo
which you want,Then Press <Play> button to play.
Press and hold <Play> button for 2 seconds again. The BlackView
will exit the Playback Function.

Setting video output
Setting the BlackView
Video output including【Size】【EV】【White Balance】【Video Time】【Night Mode】
1.Setting 【Size】
When System is turned on.Press <Switching> button to display video
output page.
Press <Camera> or <Vedio> button to select【Size】,Then Press
<Play> button to display Sub-page.
Sub-page including【VGA】【QVGA】【D1】【HD】,Press
<Camera> or <Vedio>button to select the setting which you want,Then
Press <Play> button to confirm.
2.Setting 【EV】
When System is turned on.Press < Switching > button to display video
output page.
Press <Camera> or <Vedio> button to select【EV】,Then Press <Play>
button to display Sub-page.
Sub-page including【+2.0】【+5/3】【+4/3】【+1.0】【+2/3】【+1/3】
【+0.0】【-1/3】【-2/3】【-1.0】【-4/3】【-5/3】【-2.0】,Press
<Camera> or <Vedio> button to select the setting which you want,Then
Press <Play> button to confirm.
O K Set
Size
White Balance
Vedio Time
Night Mode
HD
Auto
1 Min
O ff
Exit
Vide o output Setup
Q VGA
D1
EV +0.0
VGA

Setting the BlackView
3.Setting 【White Blance】
When System is turned on.Press < Switching > button to display video output
page.
Press <Camera> or <Vedio> button to select【White Blance】,Then
Press <Play> button to display Sub-page.
Sub-page including【Auto】【Daylight】【Cloudy】【Tungsten】【
Fluorescent】,Press <Camera> or <Vedio> button to select the setting
which you want,Then Press <Play> button to confirm.
O K Set
White Balan ce
Size
Vedio Time
Night Mode
Auto
HD
1 Min
O ff
Exit
Vide o output Setup
Auto
EV +0.0 Daylight
Tun gsten
Cloudy
Flu orescent
O K Set
EV
White Balance
Vedio Time
Night Mode
+0.0
Auto
1 Min
O ff
Exit
Vide o output Setup
+0.0
Size HD +1/3
-2/3
-1.0
-1/3

Setting the BlackView
4.Setting 【Vedio Time】
5.Setting 【Night Mode】
When System is turned on.Press < Switching > button to display video
output page.
Press <Camera> or <Vedio> button to select【Night Mode】,Then
Press <Play> button to display Sub-page.
Sub-page including【Off】【On】,Press <Camera> or <Vedio> button
to select the setting which you want,Then Press <Play> button to
confirm.
O K Set
Vide o Ti me
White Balance
Size
Night Mode
1 Min
Auto
HD
O ff
Exit
Vide o output Setup
O ff
2 Min
EV +0.0 1 Min
When System is turned on.Press < Switching > button to display video
output page.
Press <Camera> or <Vedio> button to select【Night Mode】,Then
Press <Play> button to display Sub-page.
Sub-page including【Off】【On】,Press <Camera> or <Vedio> button
to select the setting which you want,Then Press <Play> button to
confirm.

Setting the BlackView
O K Set
Night Mode
White Balance
Vedio Time
O ff
Auto
1 Min
Exit
Vide o output Setup
O ff
EV +0.0
Size HD
On
Setting Setup
Setup including【Format】【beep】【language】【auto off】【sys.reset】
【Light Freq.】【USB】【Screen Set】
1.Setting 【Format】
Double click<Switching> button to display
Setup page.
Press <Camera> or <Vedio> button to select Format ,Then Press
<Play> button to display subpage.
Subpage including【Cancel】【Execute】,Press <Camera> or <Vedio>
button to select the setting which you want,Then Press <Play> button to
confirm.
When System is turned on.
【 】
O K Set
Format
Language
Auto Off
Bee p
Next Me nu
En gl ish
O ff
On
Exit
Vide o output
Cancel
Exe cute
Setup
Sys.Rese t
Next Me nu

Setting the BlackView
2.Setting 【Beep】
When System is turned on.Double click<Switching> button to display
Setup page.
Press <Camera> or <Vedio> button to select【Beep】,Then Press
<Play> button to display subpage.
Subpage including【On】【Off】,Press <Camera> or <Vedio> button to
select the setting which you want,Then Press <Play> button to confirm.
3.Setting 【Language】
When System is turned on.Double click<Switching> button to display
Setup page.
Press <Camera> or <Vedio> button to select【Language】,Then
Press <Play> button to display subpage.
Subpage including【English】【繁體中文】【简体中文】【日本語】【
Русский】,Press <Camera> or <Vedio> button to select setting
which you want,Then Press <Play> button to confirm.
O K Set
Bee p
Language
Auto Off
Format
On
En gl ish
O ff
Next Me nu
Exit
Vide o output
On
O ff
Setup
Sys.Rese t
Next Me nu

Setting the BlackView
O K Set
Language
Format
Auto Off
Bee p
En gl ish
Next Me nu
O ff
On
Exit
Vide o output
En gl ish
Setup
Sys.Rese t
Next Me nu
简体中文
日本語
Русский
文
4.Setting 【Auto Off】
When System is turned on.Double click<Switching> button to display
Setup page.
Press <Camera> or <Vedio> button to select【Auto Off】,Then Press
<Play> button to display subpage.
Subpage including【1 Min】【3 Min】【5 Min】【Off】,Press
<Camera> or <Vedio> button to select the setting which you want,Then
Press <Play> button to confirm.
O K Set
Auto Off
Format
Language
Bee p
O ff
Next Me nu
En gl ish
On
Exit
Vide o output
1 Min
Setup
Sys.Rese t
Next Me nu
3 Min
5 Min
Off

Setting the BlackView
5.Setting 【Sys.Reset】
When System is turned on.Double click<Switching> button to display
Setup page.
Press <Camera> or <Vedio> button to select【Sys.Reset】,Then
Press <Play> button to display subpage.
Subpage including【Cancel】【Execute】,Press <Camera> or
<Vedio> button to select the setting which you want,Then Press <Play>
button to confirm.
6.Setting 【Light Fre.】
When System is turned on.Double click<Switching> button to display
Setup page.
Press <Camera> or <Vedio> button to select【Light Fre.】,Then Press
<Play> button to display subpage.
Subpage including【60Hz】【50Hz】,Press <Camera> or <Vedio>
button to select the setting which you want,Then Press <Play> button to
confirm.
O K Set
Sys.Rese t
Bee p
Auto off
Language
Next Me nu
Language
Light Freq.
Date Input
Exit
Vide o output
Cancel
Exe cute
Format
Next Me nu
Setup

Setting the BlackView
O K Set
Light Freq.
USB
Screen Set
60Hz
PC Cam
Aways On
Exit
Vide o output
60Hz
50Hz
Setup
7.Setting 【USB】
When System is turned on.Double click<Switching> button to display
Setup page.
Press <Camera> or <Vedio> button to select【Light Fre.】,Then Press
<Play> button to display subpage.
Subpage including【60Hz】【50Hz】,Press <Camera> or <Vedio>
button to select the setting which you want,Then Press <Play> button to
confirm.
O K Set
USB
Light Freq.
Screen Set
PC Cam
60Hz
Aways On
Exit
Vide o output
PC Cam
Disk Drive
Setup

Setting the BlackView
8.Setting 【Screen Set】
When System is turned on.Double click<Switching> button to display
Setup page.
Press <Camera> or <Vedio> button to select【Screen Set】,Then
Press <Play> button to display subpage.
Subpage including【Always On】【1 Min】【3 Min】,Press
<Camera> or <Vedio> button to select the setting which you want,Then
Press <Play> button to confirm.
O K Set
Screen Set
Light Freq.
USB
Aways On
60Hz
PC Cam
Exit
Vide o output
Away On
1 Min
Setup

Ballasoft
Table of contents
Other SC2000 Dashcam manuals