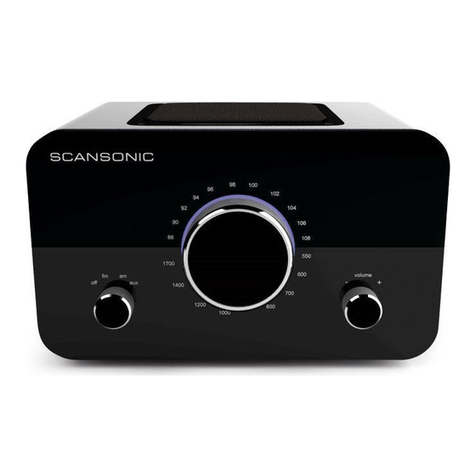
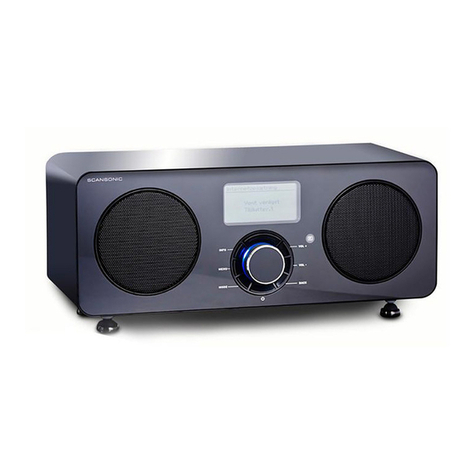
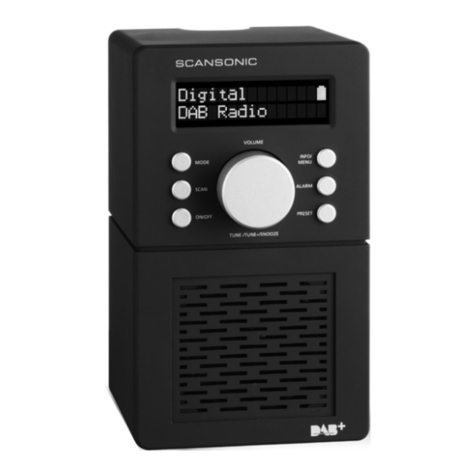
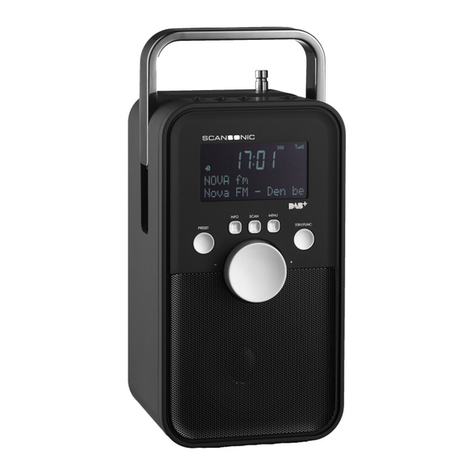
Scansonic DA18 User manual

1
DA18
FM DAB+
UK User Manual
DK Brugervejledning
DE Bedienungsanleitung
FR Guide d’instructions
IT Manuale di istruzioni

2
DA18
FM DAB+
Contents
2 Contens
3 Information
4 Safety precautions
5 Features and Controls
6 Operating your radio
7 DAB
8 FM
9 Storing and recalling stored stations

3
DA18
FM DAB+
Information
Congratulations on your new radio.
Please take a moment to read this manual.
Safety Instructions
Please store this instruction manual for future reference.
• Place the unit on a solid surface.
• Do not expose Scansonic DA18 FM/DAB+ to high humidity, direct
sunlight, dirt, heavy vibration or extreme temperatures.
• Donotopenthecabinet.Onlyqualiedtechniciansareallowedto
handle this Scansonic radios internal parts.
• Ifserviceorrepairisrequired,thismustalsobedonebyqualied
technicians.
• Useradusteroraslightlydamp,softandNon-uffyragtocleanthe
cabinet. Do not use corrosive or strong cleaning agents.
• Make sure no liquids or moisture penetrates the radio during cleaning.
Unplug the radio before cleaning it.
Unplug the radio in following cases:
• Foreign objects or liquids have penetrated the radio.
• The radio cannot be operated properly.
• The cabinet has been damaged.
• The mains plug or the mains cable is defective.
• If the radio is not to be used for a longtime.
Disclaimer
Despite our best efforts we cannot guarantee that the technical data indicated are correct,
complete and updated, We, Scansonic, reserve the right to make technical changes without
prior notice.

4
DA18
FM DAB+
DAB+ / DAB / FM Digital Radio
DC (battery) operation
1. Ensure the AC/DC adaptor is disconnected from the radio and AC mains.
2. Installed the batteries (4X1.5V UM3/AA battery) into the battery compartment.
3. Slide the POWER ON/OFF switch to the “ON” position to turn the radio on.
Note: To obtain the best performance in DC operation, the use of alkaline batteries is highly recommended.
Display backlight
When the radio is switched to on (in both AC & DC battery operation), the display backlight will be turned on to full
brightness for around 10 seconds and then go to dim, it will then be turned on to full brightness again for 10 seconds
on every key press.
LISTENING TO YO UR RADI O
Hints for better reception
This radio is fitted with a single DAB/FM telescopic antenna, to obtain the best performance, you should fully extend
the antenna and this is highly recommended for DAB reception.
DAB mode
If the radio is switched on for the first time, it will automatically enter into the DAB mode and perform auto scan
function. During the scan the display will show “Scanning …” together with a slide bar that indicates the progress of
the scan and the amount of stations that have been found so far. (F. 1) (F. 2)
Once the scan has finished, the radio will select the first alphanumerically found station. You can now press the ▲ or
▼ button to explore the found stations followed by pressing the SELECT button to select listening to the station.
Note: If there is no stations found after auto scan, the radio will then enter into the Tune Select Menu, you can now
press the ▲ or ▼ button followed by pressing the SELECT button to select “Manual tune” or “Autoscan” for stations.
SWITCHING YOUR RADIO ON FOR THE FIRST T IME
AC operation
1. Ensure the POWER ON/OFF switch located at the back of the radio is in the “OFF” position.
2. Insert the DC power jack of the AC/DC adaptor to the DC input socket located at the back of the radio.
3. Plug the AC/DC Adaptor to the AC mains outlet.
4. Slide the POWER ON/OFF switch to the “ON” position to turn the radio on.
UK-3
UK-2
DAB+/DAB/FM Digital Radio
NE-6207
INSTRUCTION MANUAL
FEATURES AND CONTROLS
13. DC INPUT SOCKET
14. POWER ON/OFF SWITCH
15. HEADPHONE JACK
16. BATTERY DOOR
1. SPEAKER
2. INFO BUTTON
3. BUTTON
4. LCD DISPLAY
5. VOLUME + BUTTON
6. MENU BUTTON
▲
7. PRESET BUTTON
8. SELECT BUTTON
9. BUTTON
10. MODE BUTTON
11. VOLUME - BUTTON
12. ANTENNA
▼
UK-1
To achieve the utmost in enjoyment and performance, and in order to become familiar with its features, please read this manual carefully
before attempting to operate the unit.
Important Notes
This safety and operating instruction should be retained for future reference.
The apparatus shall not be exposed to dripping or splashing and no objects filled with liquids, such as vases, shall be placed on
apparatus. Avoid installing the unit in locations described below:
* - Places exposed to direct sunlight or close to heat radiating appliances such as electric heaters,
on top of other stereo equipment that radiate too much heat.
* - Places blocking ventilation or dusty places.
* - Places subject to constant vibration, humid or moist places.
No naked flame sources such as lighted candles should be placed on the unit.
Attention should be drawn to the environmental aspects of battery disposal.
Make sure not to obstruct the ventilation openings, a minimum of 10cm should be kept around the apparatus for ventilation.
The ventilation should not be impeded by covering the ventilation openings with items such as newspaper, table-cloths, curtains,
etc.Use apparatus in moderate climates only.
Operate tuning controls and switches as instructed in the manual.
The normal function of the product may be disturbed by Strong Electro Magnetic Interference. If so, simply reset the product to
resume normal operation by following the instruction manual. In case the function could not resume, please use the product in
other location.
Do not attempt to remove any screws, or open the casing of the unit; there are no user serviceable parts inside, refer all servicing
to qualified service personnel.
CAUTION : TO REDUCE THE RISK OF ELECTRIC SHOCK DO NOT REMOVE COVER(OR BACK), NO USER SERVICEABLE
PARTS INSIDE, REFER SERVICING TO QUALIFIED SERVICE PERSONNEL.
DANGEROUS VOLTAGE
Conductor dangerous voltage, that may be of sufficient magnitude to constitute a risk of electric shock to persons is
present within this product's enclosure.
ATTENTION
The owner's manual contains important operating and maintenance instructions, for your safety, it is necessary to refer
to the manual.
WARNING :TO PREVENT FIRE OR SHOCK HAZARD, DO NOT EXPOSE THIS APPLIANCE TO DRIPPING OR SPLASHING.
Note: This unit will become warm when used for a long period of time. This is normal and does not indicate a problem with the
unit.This unit includes micro-processors which may malfunction as a result of external electrical interference/ noise or electrostatic
discharge. If the unit is not working properly, disconnect the power source and then reconnect it.
The AC/DC adaptor is used as the disconnect device. It shall remain readily operable and should not be obstructed during intended use.
To be completely disconnected the apparatus from supply mains, the AC/DC adaptor of the apparatus shall be disconnected from the
mains socket outlet completely.
13 14 15 16
12
F.1 F.2
1 2 3 4 5
6 7 8 9 10 11
INSTRUCTION MANUAL
SAFETY PRECAUTIONS
To achieve the utmost in enjoyment and perfomance, and in order to become familiar with its
features, please read this manual carefully before attempting to operate the unit.
Important Notes
This safety and operating instruction should be retained for future reference.
Theapparatusshallnotbeexposedtodrippingorsplashingandnoobjectslledwithliquids,such
as vases, shall be placed on apparatus. Avoid installing the unit in locations described below:
* - Places exposed to direct sunlight or close to heat radiating appliances such as electric heaters,
on top of other stereo equipment that radiate too much heat.
* - Places blocking ventilation or dusty places.
* - Places subject to constant vibration, humid or moist places.
Nonakedamesourcessuchaslightedcandlesshouldbeplacedontheunit.Attentionshouldbe
drawn to the environmental aspects of battery disposal.
Make sure not to obstruct the ventilation openings, a minimum of 10cm should be kept around the
apparatus for ventilation.
The ventilation should not be impeded by covering the ventilation openings with items such as
newspaper, table-cloths, curtains, etc. Use apparatus in moderate climates only.
Operate tuning controls and switches as instructed in the manual.
The AC/DC adaptor is used as the disconnect device. It shall remain readily operable and should not
be obstructed during intended use. To be completely disconnected the apparatus from supply mains,
the AC/DC adaptor of the apparatus shall be disconnected from the mains socket outlet completely.
The normal function of the product may be disturbed by Strong Electro Magnetic Interference.

5
DA18
FM DAB+
1. SPEAKER
2. INFO BUTTON
3. ▲BUTTON
4. LCD DISPLAY
5. VOLUME + BUTTON
6. MENU BUTTON
7. PRESET BUTTON
8. SELECT BUTTON
9. ▼BUTTON
10. MODE BUTTON
11. VOLUME - BUTTON
12. ANTENNA
13. DC INPUT SOCKET
14. POWER ON/OFF
SWITCH
15. HEADPHONE JACK
16. BATTERY DOOR
If so, simply reset the product to resume normal operation by following the instruction manual. In
case the function could not resume, please use the product in other location.
Do not attempt to remove any screws, or open the casing of the unit; there are no user serviceable
partsinside,referallservicingtoqualiedservicepersonnel.
CAUTION
RISK OF ELECTRIC
SHOCK
CAUTION: TO REDUCE THE RISK OF ELECTRIC SHOCK DO NOT REMOVE COVER(OR
BACK), NO USER SERVICEABLE PARTS INSIDE, REFER SERVICING TO QUALIFIED SERVICE
PERSONNEL.
DC (battery) operation
1. Ensure the AC/DC adaptor is disconnected from the radio and AC mains.
2. Installed the batteries (4X1.5V UM3/AA battery) into the battery compartment.
3. Slide the POWER ON/OFF switch to the “ON” position to turn the radio on.
Note: To obtain the best performance in DC operation, the use of alkaline batteries is highly recommended.
Display backlight
When the radio is switched to on (in both AC & DC battery operation), the display backlight will be turned on to full
brightness for around 10 seconds and then go to dim, it will then be turned on to full brightness again for 10 seconds
on every key press.
LISTENING TO YO UR RADI O
Hints for better reception
This radio is fitted with a single DAB/FM telescopic antenna, to obtain the best performance, you should fully extend
the antenna and this is highly recommended for DAB reception.
DAB mode
If the radio is switched on for the first time, it will automatically enter into the DAB mode and perform auto scan
function. During the scan the display will show “Scanning …” together with a slide bar that indicates the progress of
the scan and the amount of stations that have been found so far. (F. 1) (F. 2)
Once the scan has finished, the radio will select the first alphanumerically found station. You can now press the ▲ or
▼ button to explore the found stations followed by pressing the SELECT button to select listening to the station.
Note: If there is no stations found after auto scan, the radio will then enter into the Tune Select Menu, you can now
press the ▲ or ▼ button followed by pressing the SELECT button to select “Manual tune” or “Autoscan” for stations.
SWITCHING YOUR RADIO ON FOR THE FIRST T IME
AC operation
1. Ensure the POWER ON/OFF switch located at the back of the radio is in the “OFF” position.
2. Insert the DC power jack of the AC/DC adaptor to the DC input socket located at the back of the radio.
3. Plug the AC/DC Adaptor to the AC mains outlet.
4. Slide the POWER ON/OFF switch to the “ON” position to turn the radio on.
UK-3
UK-2
DAB+/DAB/FM Digital Radio
NE-6207
INSTRUCTION MANUAL
FEATURES AND CONTROLS
13. DC INPUT SOCKET
14. POWER ON/OFF SWITCH
15. HEADPHONE JACK
16. BATTERY DOOR
1. SPEAKER
2. INFO BUTTON
3. BUTTON
4. LCD DISPLAY
5. VOLUME + BUTTON
6. MENU BUTTON
▲
7. PRESET BUTTON
8. SELECT BUTTON
9. BUTTON
10. MODE BUTTON
11. VOLUME - BUTTON
12. ANTENNA
▼
UK-1
To achieve the utmost in enjoyment and performance, and in order to become familiar with its features, please read this manual carefully
before attempting to operate the unit.
Important Notes
This safety and operating instruction should be retained for future reference.
The apparatus shall not be exposed to dripping or splashing and no objects filled with liquids, such as vases, shall be placed on
apparatus. Avoid installing the unit in locations described below:
* - Places exposed to direct sunlight or close to heat radiating appliances such as electric heaters,
on top of other stereo equipment that radiate too much heat.
* - Places blocking ventilation or dusty places.
* - Places subject to constant vibration, humid or moist places.
No naked flame sources such as lighted candles should be placed on the unit.
Attention should be drawn to the environmental aspects of battery disposal.
Make sure not to obstruct the ventilation openings, a minimum of 10cm should be kept around the apparatus for ventilation.
The ventilation should not be impeded by covering the ventilation openings with items such as newspaper, table-cloths, curtains,
etc.Use apparatus in moderate climates only.
Operate tuning controls and switches as instructed in the manual.
The normal function of the product may be disturbed by Strong Electro Magnetic Interference. If so, simply reset the product to
resume normal operation by following the instruction manual. In case the function could not resume, please use the product in
other location.
Do not attempt to remove any screws, or open the casing of the unit; there are no user serviceable parts inside, refer all servicing
to qualified service personnel.
CAUTION : TO REDUCE THE RISK OF ELECTRIC SHOCK DO NOT REMOVE COVER(OR BACK), NO USER SERVICEABLE
PARTS INSIDE, REFER SERVICING TO QUALIFIED SERVICE PERSONNEL.
DANGEROUS VOLTAGE
Conductor dangerous voltage, that may be of sufficient magnitude to constitute a risk of electric shock to persons is
present within this product's enclosure.
ATTENTION
The owner's manual contains important operating and maintenance instructions, for your safety, it is necessary to refer
to the manual.
WARNING :TO PREVENT FIRE OR SHOCK HAZARD, DO NOT EXPOSE THIS APPLIANCE TO DRIPPING OR SPLASHING.
Note: This unit will become warm when used for a long period of time. This is normal and does not indicate a problem with the
unit.This unit includes micro-processors which may malfunction as a result of external electrical interference/ noise or electrostatic
discharge. If the unit is not working properly, disconnect the power source and then reconnect it.
The AC/DC adaptor is used as the disconnect device. It shall remain readily operable and should not be obstructed during intended use.
To be completely disconnected the apparatus from supply mains, the AC/DC adaptor of the apparatus shall be disconnected from the
mains socket outlet completely.
13 14 15 16
12
F.1 F.2
1 2 3 4 5
6 7 8 9 10 11
DANGEROUS VOLTAGE
Conductordangerousvoltage,thatmaybeofsufcientmagnitudetoconstituteariskof
electric shock to persons is present within this product’s enclosure.
ATTENTION
The owner’s manual contains important operating and maintenance instructions, for
your safety, it is necessary to refer to the manual.
WARNING: TO PREVENT FIRE OR SHOCK HAZARD, DO NOT EXPOSE THIS APPLIANCE TO
DRIPPING OR SPLASHING.
Note: This unit will become warm when used for a long period of time. This is normal and does not
indicate a problem with the unit. This unit includes micro-processors which may malfunction as a
result of external electrical interference/ noise or electrostatic discharge. If the unit is not working
properly, disconnect the power source and then reconnect it.
FEATURES AND CONTROLS
DC (battery) operation
1. Ensure the AC/DC adaptor is disconnected from the radio and AC mains.
2. Installed the batteries (4X1.5V UM3/AA battery) into the battery compartment.
3. Slide the POWER ON/OFF switch to the “ON” position to turn the radio on.
Note: To obtain the best performance in DC operation, the use of alkaline batteries is highly recommended.
Display backlight
When the radio is switched to on (in both AC & DC battery operation), the display backlight will be turned on to full
brightness for around 10 seconds and then go to dim, it will then be turned on to full brightness again for 10 seconds
on every key press.
LISTENING TO YO UR RADIO
Hints for better reception
This radio is fitted with a single DAB/FM telescopic antenna, to obtain the best performance, you should fully extend
the antenna and this is highly recommended for DAB reception.
DAB mode
If the radio is switche d on for the first time, it will automatically enter into the DAB mode and perform auto scan
function. During the scan the display will show “Scanning …” together with a slide bar that indicates the progress of
the scan and the amount of stations that have been found so far. (F. 1) (F. 2)
Once the scan has finished, the radio will select the first alphanumerically found station. You can now press the ▲ or
▼ button to explore the found stations followed by pressing the SELECT button to select listening to the station.
Note: If there is no stations found after auto scan, the radio will then ent er into the Tune Select Menu, you can now
press the ▲ or ▼ button followed by pressing the SELECT button to select “Manual tune” or “Autoscan” for stations.
SWITCHING YOUR R ADIO ON FOR THE FIRST TIME
AC operation
1. Ensure the POWER ON/OFF switch located at the back of the radio is in the “OFF” position.
2. Insert the DC power jack of the AC/DC adaptor to the DC input socket located at the back of the radio.
3. Plug the AC/DC Adaptor to the AC mains outlet.
4. Slide the POWER ON/OFF switch to the “ON” position to turn the radio on.
UK-3
UK-2
DAB+/DAB/FM Digital Radio
NE-6207
INSTRUCTION MANUAL
FEATURES AND CONTROLS
13. DC INPUT SOCKET
14. POWER ON/OFF SWITCH
15. HEADPHONE JACK
16. BATTERY DOOR
1. SPEAKER
2. INFO BUTTON
3. BUTTON
4. LCD DISPLAY
5. VOLUME + BUTTON
6. MENU BUTTON
▲
7. PRESET BUTTON
8. SELECT BUTTON
9. BUTTON
10. MODE BUTTON
11. VOLUME - BUTTON
12. ANTENNA
▼
UK-1
To achieve the utmost in enjoyment and performance, and in order to become familiar with its features, please read this manual carefully
before attempting to operate the unit.
Important Notes
This safety and operating instruction should be retained for future reference.
The apparatus shall not be exposed to dripping or splashing and no objects filled with liquids, such as vases, shall be placed on
apparatus. Avoid installing the unit in locations described below:
* - Places exposed to direct sunlight or close to heat radiating appliances such as electric heaters,
on top of other stereo equipment that radiate too much heat.
* - Places blocking ventilation or dusty places.
* - Places subject to constant vibration, humid or moist places.
No naked flame sources such as lighted candles should be placed on the unit.
Attention should be drawn to the environmental aspects of battery disposal.
Make sure not to obstruct the ventilation openings, a minimum of 10cm should be kept around the apparatus for ventilation.
The ventilation should not be impeded by covering the ventilation openings with items such as newspaper, table-cloths, curtains,
etc.Use apparatus in moderate climates only.
Operate tuning controls and switches as instructed in the manual.
The normal function of the product may be disturbed by Strong Electro Magnetic Interference. If so, simply reset the product to
resume normal operation by following the instruction manual. In case the function could not resume, please use the product in
other location.
Do not attempt to remove any screws, or open the casing of the unit; there are no user serviceable parts inside, refer all servicing
to qualified service personnel.
CAUTION : TO REDUCE THE RISK OF ELECTRIC SHOCK DO NOT REMOVE COVER(OR BACK), NO USER SERVICEABLE
PARTS INSIDE, REFER SERVICING TO QUALIFIED SERVICE PERSONNEL.
DANGEROUS VOLTAGE
Conductor dangerous voltage, that may be of sufficient magnitude to constitute a risk of electric shock to persons is
present within this product's enclosure.
ATTENTION
The owner's manual contains important operating and maintenance instructions, for your safety, it is necessary to refer
to the manual.
WARNING :TO PREVENT FIRE OR SHOCK HAZARD, DO NOT EXPOSE THIS APPLIANCE TO DRIPPING OR SPLASHING.
Note: This unit will become warm when used for a long period of time. This is normal and does not indicate a problem with the
unit.This unit includes micro-processors which may malfunction as a result of external electrical interference/ noise or electrostatic
discharge. If the unit is not working properly, disconnect the power source and then reconnect it.
The AC/DC adaptor is used as the disconnect device. It shall remain readily operable and should not be obstructed during intended use.
To be completely disconnected the apparatus from supply mains, the AC/DC adaptor of the apparatus shall be disconnected from the
mains socket outlet completely.
13 14 15 16
12
F.1 F.2
1 2 3 4 5
6 7 8 9 10 11

6
DA18
FM DAB+
SWITCHING YOUR RADIO ON FOR THE FIRST TIME
AC operation
1. Ensure the POWER ON/OFF switch located at the back of the radio is in the “OFF” position.
2. Insert the DC power jack of the AC/DC adaptor to the DC input socket located at the back of
the radio.
3. Plug the AC/DC Adaptor to the AC mains outlet.
4. Slide the POWER ON/OFF switch to the “ON” position to turn the radio on.
DC (battery) operation
1. Ensure the AC/DC adopter is disconnected from the radio and AC mains.
2. IInstalled the batteries (4x1.5V UM3/AA battery) into the battery compartment.
3. Slide the POWER ON/OFF switch to the “ON” position to turn the radio on.
Note: To obtain the best perfomance in DC operation, the use of Alkaline batteries is highly
recommended.
Display backlight
When the radio is switched to on (in both AC & DC battery operation), the display backlight will be
turned on to full brightness for around 10 seconds and then go to dim, it will then be turned on to full
brightness again for 10 seconds on every key press.
LISTENING TO YOUR RADIO
Hints for better reception
ThisradioisttedwithasingleDAB/FMtelescopicantenna,toobtainthebestperformance,you
should fully extend the antenna and this is highly recommended for DAB reception.
DAB mode
Iftheradioisswitchedonforthersttime,itwillautomaticallyenterintotheDABmodeandperform
auto scan function. During the scan the display will show “Scanning …” together with a slide bar
that indicates the progress of the scan and the amount of stations that have been found so far. (F. 1)
(F. 2)
Oncethescanhasnished,theradiowillselecttherstalphanumericallyfoundstation.Youcan
nowpressthe▲or▼buttontoexplorethefoundstationsfollowedbypressingtheSELECTbutton
to select listening to the station.
Note: If there is no stations found after auto scan, the radio will then enter into the Tune Select
Menu,youcannowpressthe▲or▼buttonfollowedbypressingtheSELECTbuttontoselect
“Manual tune” or “Autoscan” for stations.
DC (battery) operation
1. Ensure the AC/DC adaptor is disconnected from the radio and AC mains.
2. Installed the batteries (4X1.5V UM3/AA battery) into the battery compartment.
3. Slide the POWER ON/OFF switch to the “ON” position to turn the radio on.
Note: To obtain the best performance in DC operation, the use of alkaline batteries is highly recommended.
Display backlight
When the radio is switched to on (in both AC & DC battery operation), the display backlight will be turned on to full
brightness for around 10 seconds and then go to dim, it will then be turned on to full brightness again for 10 seconds
on every key press.
LISTENING TO YO UR R A D I O
Hints for better reception
This radio is fitted with a single DAB/FM telescopic antenna, to obtain the best performance, you should fully extend
the antenna and this is highly recommended for DAB reception.
DAB mode
If the radio is switched on for the first time, it will automatically enter into the DAB mode and per form auto scan
function. During the scan the display will show “Scanning …” together with a slide bar that indicates the progress of
the scan and the amount of stations that have been found so far. (F. 1) (F. 2)
Once the scan has finished, the radio will select the first alphanumerically found station. You can now press the ▲ or
▼ button to explore the found stations followed by pressing the SELECT button to select listening to the station.
Note: If there is no stations found after auto s can, the radio will then ent er into the Tune Select Menu, you can now
press the ▲ or ▼ button followed by pressing the SELECT button to select “Manual tune” or “Autoscan” for stations.
SWITCHING YOUR R ADIO O N F OR T HE F IRST T I M E
AC operation
1. Ensure the POWER ON/OFF switch located at the back of the radio is in the “OFF” position.
2. Insert the DC power jack of the AC/DC adaptor to the DC input socket located at the back of the radio.
3. Plug the AC/DC Adaptor to the AC mains outlet.
4. Slide the POWER ON/OFF switch to the “ON” position to turn the radio on.
UK-3
UK-2
DAB+/DAB/FM Digital Radio
NE-6207
INSTRUCTION MANUAL
FEATURES AND CONTROLS
13. DC INPUT SOCKET
14. POWER ON/OFF SWITCH
15. HEADPHONE JACK
16. BATTERY DOOR
1. SPEAKER
2. INFO BUTTON
3. BUTTON
4. LCD DISPLAY
5. VOLUME + BUTTON
6. MENU BUTTON
▲
7. PRESET BUTTON
8. SELECT BUTTON
9. BUTTON
10. MODE BUTTON
11. VOLUME - BUTTON
12. ANTENNA
▼
UK-1
To achieve the utmost in enjoyment and performance, and in order to become familiar with its features, please read this manual carefully
before attempting to operate the unit.
Important Notes
This safety and operating instruction should be retained for future reference.
The apparatus shall not be exposed to dripping or splashing and no objects filled with liquids, such as vases, shall be placed on
apparatus. Avoid installing the unit in locations described below:
* - Places exposed to direct sunlight or close to heat radiating appliances such as electric heaters,
on top of other stereo equipment that radiate too much heat.
* - Places blocking ventilation or dusty places.
* - Places subject to constant vibration, humid or moist places.
No naked flame sources such as lighted candles should be placed on the unit.
Attention should be drawn to the environmental aspects of battery disposal.
Make sure not to obstruct the ventilation openings, a minimum of 10cm should be kept around the apparatus for ventilation.
The ventilation should not be impeded by covering the ventilation openings with items such as newspaper, table-cloths, curtains,
etc.Use apparatus in moderate climates only.
Operate tuning controls and switches as instructed in the manual.
The normal function of the product may be disturbed by Strong Electro Magnetic Interference. If so, simply reset the product to
resume normal operation by following the instruction manual. In case the function could not resume, please use the product in
other location.
Do not attempt to remove any screws, or open the casing of the unit; there are no user serviceable parts inside, refer all servicing
to qualified service personnel.
CAUTION : TO REDUCE THE RISK OF ELECTRIC SHOCK DO NOT REMOVE COVER(OR BACK), NO USER SERVICEABLE
PARTS INSIDE, REFER SERVICING TO QUALIFIED SERVICE PERSONNEL.
DANGEROUS VOLTAGE
Conductor dangerous voltage, that may be of sufficient magnitude to constitute a risk of electric shock to persons is
present within this product's enclosure.
ATTENTION
The owner's manual contains important operating and maintenance instructions, for your safety, it is necessary to refer
to the manual.
WARNING :TO PREVENT FIRE OR SHOCK HAZARD, DO NOT EXPOSE THIS APPLIANCE TO DRIPPING OR SPLASHING.
Note: This unit will become warm when used for a long period of time. This is normal and does not indicate a problem with the
unit.This unit includes micro-processors which may malfunction as a result of external electrical interference/ noise or electrostatic
discharge. If the unit is not working properly, disconnect the power source and then reconnect it.
The AC/DC adaptor is used as the disconnect device. It shall remain readily operable and should not be obstructed during intended use.
To be completely disconnected the apparatus from supply mains, the AC/DC adaptor of the apparatus shall be disconnected from the
mains socket outlet completely.
13 14 15 16
12
F.1 F.2
1 2 3 4 5
6 7 8 9 10 11

7
DA18
FM DAB+
DAB auto scan
TheautoscanwillsearchfortheentireDABBandIIIchannels.Afterthescanhasnished,therst
alphanumerically found station will be automatically selected.
1. Toactivateautoscan,rstpresstheMENUbuttontoenterintotheTuneSelectMenuand
thenpressthe▲or▼buttontoselect“Autoscan”,nallypresstheSELECTbuttonto
conrm,thedisplaywillshow“Scanning…”andaprogressingslidebar.(F.3)
2. All the stations that have been found will be stored automatically, to explore the stations that
havebeenfound,pressthe▲or▼buttonsandwhenyoundastationthatyouwouldlike
to listen to, press the SELECT button.
DAB manual tune
1. Toselectmanualtune,rstpresstheMENUbuttontoenterintotheTuneSelectMenu,then
press the SELECT button to select “Manual tune”. (F. 4) (F. 5)
2. Pressthe▲or▼buttontomovethroughtheDABchannels,thedisplaywillshow“5Ato
13F” and their associated frequencies.
3. Whenyourdesiredfrequencyappearsinthedisplay,presstheSELECTbuttontoconrm.
The name of the station group (ensemble/multiplex) will be displayed.
4. To listen to the station selected, press the SELECT button again.
UK-4
UK-5
UK-6
UK-7
DAB auto scan
The auto scan will search for the entire DAB Band III channels. After the scan has finished, the first alphanumerically
found station will be automatically selected.
1. To activate auto scan, first press the MENU button to enter into the Tune Select Menu and then press the ▲ or
▼ button to select “Autoscan”, finally press the SELECT button to confirm, the display will show “Scanning …”
and a progressing slide bar. (F. 3)
2. All the stations that have been found will be stored automatically, to explore the stations that have been found,
press the ▲ or ▼ buttons and when you find a station that you would like to listen to, press the SELECT button.
DAB manual tune
1. To select manual tune, first press the MENU button to enter into the Tune Select Menu, then press the SELECT
button to select “Manual tune”. (F. 4) (F. 5)
2. Press the ▲ or ▼ button to move through the DAB channels, the display will show “5A to 13F” and their
associated frequencies.
3. When your desired frequency appears in the display, press the SELECT button to confirm. The name of the
station group (ensemble/multiplex) will be displayed.
4. To listen to the station selected, press the SELECT button again.
DAB secondary services
On some occasions you will see a “>” symbol directly after the name of the station, this indicates that there are
secondary services available to that station. These secondary services contain extra services that relate to the
primary station. E.g. a sports station may want to add extra commentaries. The secondary services are inserted
directly after the primary station. To select the secondary station, press on the SELECT control once.
DAB display modes
Every time you press the INFO button, the display will cycle through the following display modes:
FACTORY RESET
When you move the radio to another part of the country, your pre-tuned and stored DAB stations may no longer be
available. If this is the case then you will need to reset your radio back to its original factory settings; to perform a
factory reset, please do the following:
Note: All of your stored DAB & FM presets will be lost once the reset has taken place.
HEADPHONE JACK
A 3.5mm type headphone jack is located at the back of the radio. Connect a set of headphones (not included) to this
jack for private listening without disturbing others. The speaker is automatically disconnected when the headphones
are in use.
IMPORTANT: When using headphones always set the volume to a low level before you put the headphones on.
Then insert the headphones and gradually increase the volume to a comfortable listening level.
1. Connect the radio to AC mains (via the AC/DC adaptor), then slide the POWER ON/OFF switch to the “ON”
position to turn the radio on.
2. Press and hold the MENU button until the display shows “Press SELECT to confirm reset”.
3. Release the MENU button and press the SELECT button once, the display will first show “Restarting …” and
after the reset is completed, the radio will then automatically enter into the DAB mode and perform auto scan
function. After the scan has finished, the radio will select and display the first alphanumerically found station.
SPECIFICATION
***SPECIFICATION SUBJECT TO CHANGE WITHOUT FURTHER NOTICE.
POWER SUPPLY : AC/DC ADAPTOR INPUT: 100-240V~60/50Hz OUTPUT: 6V 0.8A
DC(BATTERY) 6V 1.5V(UM3) x 4
OUTPUT POWER : 1.0 W
FREQUENCY RANGE : DAB 174 - 240 MHz
FM 87.5 - 108 MHz
UNIT DIMENSION : 181 (L) x 45 (W) x 105 (H) mm
WEIGHT: 0.4kg
FM radio
1. To select FM, press the MODE button, the display will show FM and the frequency.
2. To activate auto search, press and hold the ▲ or ▼ button until it starts to scan up or down the frequency band,
the display will show “Searching … > .” or “Searching … < .”, and it will stop automatically once a station has
been found. (F. 6)(F. 7)
3. To activate manual search, repeatedly press the ▲ or ▼ button.
4. To select audio mode, press the SELECT button to toggle between the “Auto” or “Mono” selection.
Note: The radio will automatically switch between stereo and mono mode, but you can override this and switch this
function manually which is helpful for poor signal reception.
STORING AND R ECALLING S TORED STATIONS
In either DAB or FM mode, you can store up to 10 stations to the favourite pres ets; this will en able you to get direct
access to your favourite stations.
1. To store a preset, fir st tune to your desired statio n, then press and hold the PRESET button, the display will
show “Empty preset 1”, and the preset number will flash. (F. 8)
2. Press the ▲ or ▼ button to select your desired station preset number.
3. Press the SELECT to confirm your selection, the display will show “Preset # saved” (F. 9)
4. To recall a preset station, first press the PRESET bu tton once, then press the ▲ or ▼ button to scroll up or
down the presets that you have stored. When the display shows your desired preset number, release the
buttons. If the preset hasn't been allocated a station, the display will show “Empty preset #”.
Time and date
The time and date will be automatically updated by the broadcasted information; it is no need to set the clock
manually. In the unlikely event that no clock information is received, the display will show “<TIME/DATE>”.
Frequency
The frequency of the present station will be displayed.
Audio bit rate
The display will show the digital audio bit rate being received.
Signal strength
The display will show a slide bar to indicate the signal strength, the stronger the signal, the longer the bar will be from
left to right.
DLS
DLS stands for Dynamic Label Segment which is a scrolling message that the broadcaster may include in their
transmissions. The message usually includes information such as programme details …etc.
Programme type
This describes the style of the programme that is being broadcast. If the information is not available, the display will
show “<Programme Type>”.
Ensemble/Multiplex (Group name)
The Ensemble/Multiplex is a collection of radio stations that are bundled and transmitted together in a single
frequency. There are national and local multiplexes, local ones contain stations that are specific to that area.
Note: Press and hold the INFO button for longer than 2 seconds, the software version number will be displayed.
Ensemble/Multiplex(Group name)
Time/Date Signal strength
DLS
Audio Bit Rate
Programme Type
Frequency
F.3 F.4 F.5
F.8
F.6 F.7
F.9
DAB secondary services
On some occasions you will see a “>” symbol directly after the name of the station, this indicates
that there are secondary services available to that station. These secondary services contain extra
services that relate to the primary station. E.g. a sports station may want to add extra commentaries.
The secondary services are inserted directly after the primary station. To select the secondary
station, press on the SELECT control once.
DAB display modes
Every time you press the INFO button, the display will cycle through the following display modes:
UK-4
UK-5
UK-6
UK-7
DAB auto scan
The auto scan will search for the entire DAB Band III channels. After the scan has finished, the first alphanumerically
found station will be automatically selected.
1. To activate auto scan, first press the MENU button to enter into the Tune Select Menu and then press the ▲ or
▼ button to select “Autoscan”, finally press the SELECT button to confirm, the display will show “Scanning …”
and a progressing slide bar. (F. 3)
2. All the stations that have been found will be stored automatically, to explore the stations that have been found,
press the ▲ or ▼ buttons and when you find a station that you would like to listen to, press the SELECT button.
DAB manual tune
1. To select manual tune, first press the MENU button to enter into the Tune Select Menu, then press the SELECT
button to select “Manual tune”. (F. 4) (F. 5)
2. Press the ▲ or ▼ button to move through the DAB channels, the display will show “5A to 13F” and their
associated frequencies.
3. When your desired frequency appears in the display, press the SELECT button to confirm. The name of the
station group (ensemble/multiplex) will be displayed.
4. To listen to the station selected, press the SELECT button again.
DAB secondary services
On some occasions you will see a “>” symbol directly after the name of the station, this indicates that there a re
secondary services available to that station. These secondary services contain extra services that relate to the
primary station. E.g. a sports station may want to add extra commentaries. The secondary services are inserted
directly after the primary station. To select the secondary station, press on the SELECT control once.
DAB display modes
Every time you press the INFO button, the display will cycle through the following display modes:
FACTORY RESET
When you move the radio to another part of the country, your pre-tuned and stored DAB stations may no longer be
available. If this is the case then you will need to reset your radio back to its original factory settings; to perform a
factory reset, please do the following:
Note: All of your stored DAB & FM presets will be lost once the reset has taken place.
HEADPHONE JAC K
A 3.5mm type headphone jack is located at the back of the radio. Connect a set of headphones (not included) to this
jack for private listening without disturbing others. The speaker is automatically disconnected when the headphones
are in use.
IMPORTANT: When using headphones always set the volume to a low level before you put the headphones on.
Then insert the headphones and gradually increase the volume to a comfortable listening level.
1. Connect the radio to AC mains (via the AC/DC adaptor), then slide the POWER ON/OFF switch to the “ON”
position to turn the radio on.
2. Press and hold the MENU button until the display shows “Press SELECT to confirm reset”.
3. Release the MENU button and press the SELECT button once, the display will first show “Restarting …” and
after the reset is completed, the radio will then automatically enter into the DAB mode and perform auto scan
function. After the scan has finished, the radio will select and display the first alphanumerically found station.
SPECIFICATION
***SPECIFICATION SUBJECT TO CHANGE WITHOUT FURTHER NOTICE.
POWER SUPPLY : AC/DC ADAPTOR INPUT: 100-240V~60/50Hz OUTPUT: 6V 0.8A
DC(BATTERY) 6V 1.5V(UM3) x 4
OUTPUT POWER : 1.0 W
FREQUENCY RANGE : DAB 174 - 240 MHz
FM 87.5 - 108 MHz
UNIT DIMENSION : 181 (L) x 45 (W) x 105 (H) mm
WEIGHT: 0.4kg
FM radio
1. To select FM, press the MODE button, the display will show FM and the frequency.
2. To activate auto search, press and hold the ▲ or ▼ button until it starts to scan up or down the frequency band,
the display will show “Searching … > .” or “Searching … < .”, and it will stop automatically once a station has
been found. (F. 6)(F. 7)
3. To activate manual search, repeatedly press the ▲ or ▼ button.
4. To select audio mode, press the SELECT button to toggle between the “Auto” or “Mono” selection.
Note: The radio will automatically switch between stereo and mono mode, but you can override this and switch this
function manually which is helpful for poor signal reception.
STORING AND R ECALLING STO RED STATI ONS
In either DAB or FM mode, you can store up to 10 stations to the favourite presets; this will enable you to get direct
access to your favourite stations.
1. To store a preset, first tune to your desired station, then press and hold the PRESET button, the display will
show “Empty preset 1”, and the preset number will flash. (F. 8)
2. Press the ▲ or ▼ button to select your desired station preset number.
3. Press the SELECT to confirm your selection, the display will show “Preset # saved” (F. 9)
4. To recall a preset station, first press the PRESET button once, then press the ▲ or ▼ button to scroll up or
down the presets that you have stored. When the display shows your desired preset number, release the
buttons. If the preset hasn't been allocated a station, the display will show “Empty preset #”.
Time and date
The time and date will be automatically updated by the broadcasted information; it is no need to set the clock
manually. In the unlikely event that no clock information is received, the display will show “<TIME/DATE>”.
Frequency
The frequency of the present station will be displayed.
Audio bit rate
The display will show the digital audio bit rate being received.
Signal strength
The display will show a slide bar to indicate the signal strength, the stronger the signal, the longer the bar will be from
left to right.
DLS
DLS stands for Dynamic Label Segment which is a scrolling message that the broadcaster may include in their
transmissions. The message usually includes information such as programme details …etc.
Programme type
This describes the style of the programme that is being broadcast. If the information is not available, the display will
show “<Programme Type>”.
Ensemble/Multiplex (Group name)
The Ensemble/Multiplex is a collection of radio stations that are bundled and transmitted together in a single
frequency. There are national and local multiplexes, local ones contain stations that are specific to that area.
Note: Press and hold the INFO button for longer than 2 seconds, the software version number will be displayed.
Ensemble/Multiplex(Group name)
Time/Date Signal strength
DLS
Audio Bit Rate
Programme Type
Frequency
F.3 F.4 F.5
F.8
F.6 F.7
F.9
Time and date
The time and date will be automatically updated by the broadcasted information; it is no need to set
the clock manually. In the unlikely event that no clock information is received, the display will show
“<TIME/DATE>”.
8
DA18
FM DAB+
Frequency
The frequency of the present station will be displayed.
Audio bit rate
The display will show the digital audio bit rate being received.
Signal strength
The display will show a slide bar to indicate the signal strength, the stronger the signal, the longer
the bar will be from left to right.
DLS
DLS stands for Dynamic Label Segment which is scrolling message that the broadcaster may
include in their transmissions. The message usually includes information such as programme
details... etc.
Programme type
This describes the style of the programme that is being broadcast. If the information is not available,
the display will show “<Programme Type>”.
Ensemble/Multiplex (Group name)
The Ensemble/Multiplex is a collection of radio stations that are bundled and transmitted together
in a single frequency. There are national and local multiplexes, local ones contain stations that are
specictothatarea.
Note: Press and hold INFO button for longer than 2 seconds, the software version number will be
displayed.
FM radio
1. To select FM, press the MODE button, the display will show FM and the frequency.
2. Toactivateautosearch,pressandholdthe▲or▼buttontoselectyourdesiredstation
preset number until it starts to scan up or down the frequency band, the display will show
“Searching...>” and “Searching...<”, and it will stop automatically once a station has been
found. (F.6) (F.7)
3. Toactivatemanualsearch,repeatedlypressthe▲or▼button.
4. To select audio mode, press the SELECT button to toggle between the “Auto” or “Mono”
selection.
Note: The radio will automatically switch between stereo and mono mode, but you can override this
and switch this function manually which is helpful for poor signal reception.
UK-4
UK-5
UK-6
UK-7
DAB auto scan
The auto scan will search for the entire DAB Band III channels. After the scan has finished, the first alphanumerically
found station will be automatically selected.
1. To activate auto scan, first press the MENU button to enter into the Tune Select Menu and then press the ▲ or
▼ button to select “Autoscan”, finally press the SELECT button to confirm, the display will show “Scanning …”
and a progressing slide bar. (F. 3)
2. All the stations that have been found will be stored automatically, to explore the stations that have been found,
press the ▲ or ▼ buttons and when you find a station that you would like to listen to, press the SELECT button.
DAB manual tune
1. To select manual tune, first press the MENU button to enter into the Tune Select Menu, then press the SELECT
button to select “Manual tune”. (F. 4) (F. 5)
2. Press the ▲ or ▼ button to move through the DAB channels, the display will show “5A to 13F” and their
associated frequencies.
3. When your desired frequency appears in the display, press the SELECT button to confirm. The nam e of the
station group (ensemble/multiplex) will be displayed.
4. To listen to the station selected, press the SELECT button again.
DAB secondary services
On some occasions you will see a “>” symbol directly after the name of the station, this indicates that there are
secondary services available to that station. These secondary services contain extra services that relate to the
primary station. E.g. a sports station may want to add extra commentaries. The secondary services are inserted
directly after the primary station. To select the secondary station, press on the SELECT control once.
DAB display modes
Every time you press the INFO button, the display will cycle through the following display modes:
FACTORY RESET
When you move the radio to another part of the country, your pre-tuned and stored DAB stations may no longer be
available. If this is the case then you will need to reset your radio back to its original factory settings; to perform a
factory reset, please do the following:
Note: All of your stored DAB & FM presets will be lost once the reset has taken place.
HEADPHONE JACK
A 3.5mm type headphone jack is located at the back of the radio. Connect a set of headphones (not included) to this
jack for private listening without disturbing others. The speaker is automatically disconnected when the headphones
are in use.
IMPORTANT: When using headphones always set the volume to a low level before you put the headphones on.
Then insert the headphones and gradually increase the volume to a comfortable listening level.
1. Connect the radio to AC mains (via the AC/DC adaptor), then slide the POWER ON/OFF switch to the “ON”
position to turn the radio on.
2. Press and hold the MENU button until the display shows “Press SELECT to confirm reset”.
3. Release the MENU button and press the SELECT button once, the display will first show “Restarting …” and
after the reset is completed, the radio will then automatically enter into the DAB mode and perform auto scan
function. After the scan has finished, the radio will select and display the first alphanumerically found station.
SPECIFICATION
***SPECIFICATION SUBJECT TO CHANGE WITHOUT FURTHER NOTICE.
POWER SUPPLY : AC/DC ADAPTOR INPUT: 100-240V~60/50Hz OUTPUT: 6V 0.8A
DC(BATTERY) 6V 1.5V(UM3) x 4
OUTPUT POWER : 1.0 W
FREQUENCY RANGE : DAB 174 - 240 MHz
FM 87.5 - 108 MHz
UNIT DIMENSION : 181 (L) x 45 (W) x 105 (H) mm
WEIGHT: 0.4kg
FM radio
1. To select FM, press the MODE button, the display will show FM and the frequency.
2. To activate auto search, press and hold the ▲ or ▼ button until it starts to scan up or down the frequency band,
the display will show “Searching … > .” or “Searching … < .”, and it will stop automatically once a station has
been found. (F. 6)(F. 7)
3. To activate manual search, repeatedly press the ▲ or ▼ button.
4. To select audio mode, press the SELECT button to toggle between the “Auto” or “Mono” selection.
Note: The radio will automatically switch between stereo and mono mode, but you can override this and switch this
function manually which is helpful for poor signal reception.
STORING AND R ECALLING S TORED STATIONS
In either DAB or FM mode, you can store up to 10 stations to the favourite pres ets; this will en able you to get direct
access to your favourite stations.
1. To store a preset, fir st tune to your desired statio n, then press and hold the PRESET button, the display will
show “Empty preset 1”, and the preset number will flash. (F. 8)
2. Press the ▲ or ▼ button to select your desired station preset number.
3. Press the SELECT to confirm your selection, the display will show “Preset # saved” (F. 9)
4. To recall a preset station, first press the PRESET bu tton once, then press the ▲ or ▼ button to scroll up or
down the presets that you have stored. When the display shows your desired preset number, release the
buttons. If the preset hasn't been allocated a station, the display will show “Empty preset #”.
Time and date
The time and date will be automatically updated by the broadcasted information; it is no need to set the clock
manually. In the unlikely event that no clock information is received, the display will show “<TIME/DATE>”.
Frequency
The frequency of the present station will be displayed.
Audio bit rate
The display will show the digital audio bit rate being received.
Signal strength
The display will show a slide bar to indicate the signal strength, the stronger the signal, the longer the bar will be from
left to right.
DLS
DLS stands for Dynamic Label Segment which is a scrolling message that the broadcaster may include in their
transmissions. The message usually includes information such as programme details …etc.
Programme type
This describes the style of the programme that is being broadcast. If the information is not available, the display will
show “<Programme Type>”.
Ensemble/Multiplex (Group name)
The Ensemble/Multiplex is a collection of radio stations that are bundled and transmitted together in a single
frequency. There are national and local multiplexes, local ones contain stations that are specific to that area.
Note: Press and hold the INFO button for longer than 2 seconds, the software version number will be displayed.
Ensemble/Multiplex(Group name)
Time/Date Signal strength
DLS
Audio Bit Rate
Programme Type
Frequency
F.3 F.4 F.5
F.8
F.6 F.7
F.9

9
DA18
FM DAB+
STORING AND RECALLING STORED STATIONS
In either DAB or FM mode, you can store up to 10 stations to the favourite presets; this will enable
you to get direct access to your favourite stations.
1. Tostoreapreset,rsttunetoyourdesiredstation,thenpressandholdthePRESETbutton,
thedisplaywillshow“Emptypreset1”,andthepresetnumberwillash.(F.8)
2. Pressthe▲or▼buttontoselectyourdesiredstationpresetnumber.
3. PresstheSELECTtoconrmyourselection,thedisplaywillshow“Preset#saved”.(F.9)
4. Torecallapresetstation,rstpressthePRESETbuttononce,thenpressthe▲or▼button
to scroll up or down the presets that you have stored. When the display shows your desired
preset number, release the buttons. If the preset hasn’t been allocated a station, the display
willshow“Emptypreset#”.
UK-4
UK-5
UK-6
UK-7
DAB auto scan
The auto scan will search for the entire DAB Band III channels. After the scan has finished, the first alphanumerically
found station will be automatically selected.
1. To activate auto scan, first press the MENU button to enter into the Tune Select Menu and then press the ▲ or
▼ button to select “Autoscan”, finally press the SELECT button to confirm, the display will show “Scanning …”
and a progressing slide bar. (F. 3)
2. All the stations that have been found will be stored automatically, to explore the stations that have been found,
press the ▲ or ▼ buttons and when you find a station that you would like to listen to, press the SELECT button.
DAB manual tune
1. To select manual tune, first press the MENU button to enter into the Tune Select Menu, then press the SELECT
button to select “Manual tune”. (F. 4) (F. 5)
2. Press the ▲ or ▼ button to move through the DAB channels, the display will show “5A to 13F” and their
associated frequencies.
3. When your desired frequency appears in the display, press the SELECT button to confirm. The nam e of the
station group (ensemble/multiplex) will be displayed.
4. To listen to the station selected, press the SELECT button again.
DAB secondary services
On some occasions you will see a “>” symbol directly after the name of the station, this indicates that there are
secondary services available to that station. These secondary services contain extra services that relate to the
primary station. E.g. a sports station may want to add extra commentaries. The secondary services are inserted
directly after the primary station. To select the secondary station, press on the SELECT control once.
DAB display modes
Every time you press the INFO button, the display will cycle through the following display modes:
FACTORY RESET
When you move the radio to another part of the country, your pre-tuned and stored DAB stations may no longer be
available. If this is the case then you will need to reset your radio back to its original factory settings; to perform a
factory reset, please do the following:
Note: All of your stored DAB & FM presets will be lost once the reset has taken place.
HEADPHONE JACK
A 3.5mm type headphone jack is located at the back of the radio. Connect a set of headphones (not included) to this
jack for private listening without disturbing others. The speaker is automatically disconnected when the headphones
are in use.
IMPORTANT: When using headphones always set the volume to a low level before you put the headphones on.
Then insert the headphones and gradually increase the volume to a comfortable listening level.
1. Connect the radio to AC mains (via the AC/DC adaptor), then slide the POWER ON/OFF switch to the “ON”
position to turn the radio on.
2. Press and hold the MENU button until the display shows “Press SELECT to confirm reset”.
3. Release the MENU button and press the SELECT button once, the display will first show “Restarting …” and
after the reset is completed, the radio will then automatically enter into the DAB mode and perform auto scan
function. After the scan has finished, the radio will select and display the first alphanumerically found station.
SPECIFICATION
***SPECIFICATION SUBJECT TO CHANGE WITHOUT FURTHER NOTICE.
POWER SUPPLY : AC/DC ADAPTOR INPUT: 100-240V~60/50Hz OUTPUT: 6V 0.8A
DC(BATTERY) 6V 1.5V(UM3) x 4
OUTPUT POWER : 1.0 W
FREQUENCY RANGE : DAB 174 - 240 MHz
FM 87.5 - 108 MHz
UNIT DIMENSION : 181 (L) x 45 (W) x 105 (H) mm
WEIGHT: 0.4kg
FM radio
1. To select FM, press the MODE button, the display will show FM and the frequency.
2. To activate auto search, press and hold the ▲ or ▼ button until it starts to scan up or down the frequency band,
the display will show “Searching … > .” or “Searching … < .”, and it will stop automatically once a station has
been found. (F. 6)(F. 7)
3. To activate manual search, repeatedly press the ▲ or ▼ button.
4. To select audio mode, press the SELECT button to toggle between the “Auto” or “Mono” selection.
Note: The radio will automatically switch between stereo and mono mode, but you can override this and switch this
function manually which is helpful for poor signal reception.
STORING AND R ECALLING S TORED STATIONS
In either DAB or FM mode, you can store up to 10 stations to the favourite pres ets; this will en able you to get direct
access to your favourite stations.
1. To store a preset, fir st tune to your desired statio n, then press and hold the PRESET button, the display will
show “Empty preset 1”, and the preset number will flash. (F. 8)
2. Press the ▲ or ▼ button to select your desired station preset number.
3. Press the SELECT to confirm your selection, the display will show “Preset # saved” (F. 9)
4. To recall a preset station, first press the PRESET bu tton once, then press the ▲ or ▼ button to scroll up or
down the presets that you have stored. When the display shows your desired preset number, release the
buttons. If the preset hasn't been allocated a station, the display will show “Empty preset #”.
Time and date
The time and date will be automatically updated by the broadcasted information; it is no need to set the clock
manually. In the unlikely event that no clock information is received, the display will show “<TIME/DATE>”.
Frequency
The frequency of the present station will be displayed.
Audio bit rate
The display will show the digital audio bit rate being received.
Signal strength
The display will show a slide bar to indicate the signal strength, the stronger the signal, the longer the bar will be from
left to right.
DLS
DLS stands for Dynamic Label Segment which is a scrolling message that the broadcaster may include in their
transmissions. The message usually includes information such as programme details …etc.
Programme type
This describes the style of the programme that is being broadcast. If the information is not available, the display will
show “<Programme Type>”.
Ensemble/Multiplex (Group name)
The Ensemble/Multiplex is a collection of radio stations that are bundled and transmitted together in a single
frequency. There are national and local multiplexes, local ones contain stations that are specific to that area.
Note: Press and hold the INFO button for longer than 2 seconds, the software version number will be displayed.
Ensemble/Multiplex(Group name)
Time/Date Signal strength
DLS
Audio Bit Rate
Programme Type
Frequency
F.3 F.4 F.5
F.8
F.6 F.7
F.9
FACTORY RESET
When you move the radio to another part of the country, your pre-tuned and stored DAB stations
may no longer be available. If this is the case then you will need to reset your radio back to its
original factory settings; to perform a factory reset, please do the following:
1. Connect the radio to AC mains (via the AC/DC adaptor), then slide the POWER ON/OFF
switch to the “ON” position to turn the radio on.
2. PressandholdtheMENUbuttonuntilthedisplayshows“PressSELECTtoconrmreset”.
3. ReleasetheMENUbuttonandpresstheSELECTbuttononce,thedisplaywillrstshow
“Restarting …” and after the reset is completed, the radio will then automatically enter into
theDABmodeandperformautoscanfunction.Afterthescanhasnished,theradiowill
selectanddisplaytherstalphanumericallyfoundstation.
Note: All of your stored DAB & FM presets will be lost once the reset has taken place.
HEADPHONE JACK
A 3.5 mm type headphone jack is located at the back of the radio. Connect a set of headphones
(not included) to this jack for private listening without disturbing others. The speaker is automatically
disconnected when the headphones are in use.
IMPORTANT: When using headphones always set the volume to a low level before you put the
headphones on. Then insert the headphones and gradually increase the volume to a comfortable
listening level.
SPECIFICATION
POWER SUPPLY: AC/DC ADAPTOR
INPUT: 100 - 240 V ~ 60/50 Hz
OUTPUT: 6 V 0.8 A
DC (BATTERY) 6 V 1.5 V(UM3) x 4 1.0 W
DAB 174 - 240 MHz
OUTPUT POWER: FREQUENCY RANGE:
FM 87.5 - 108 MHz
UNIT DIMENSION: 81 (L) x 45 (W) x 105 (H) mm
WEIGHT: 0.4 kg
***SPECIFICATION SUBJECT TO CHANGE WITHOUT FURTHER NOTICE.

1
DA18
FM DAB+
DK Brugervejledning

2
DA18
FM DAB+
Indhold
2 Indhold
3 Information
4 Sikkerhedsforholdsregler
5 Funktioner og Knapper
6 Betjening af radioen
7 DAB
8 FM
9 Lagring og genkald af faste stationer

3
DA18
FM DAB+
Information
Tillykke med din nye radio.
Brug et øjeblik på at læse denne vejledning.
Sikkerhedsanvisninger
Gem venligst denne vejledning for fremtidig reference.
• Placerenhedenpåenrobustoverade.
• Udsæt ikke Scansonic DA18 FM/DAB+ for høj fugtighed, direkte
sollys, snavs, store vibrationer og ekstreme temperaturer.
• Åbnikkekabinettet.Kunkvaliceredeteknikerehartilladelsetilat
håndtere disse Scansonic radioers indvendige dele.
• Hvis service eller reparation er nødvendig, skal denne også udføres af
kvaliceredeteknikere.
• Brug en støveklud eller en let fugtig klud og fnugfri klud til at rengøre
kabinettet. Brug ikke ætsemiddel eller stærke rengøringsmidler.
• Sørg for at ingen væsker eller fugt trænger gennem radioen under
rengøring. Træk stikket ud til radioen før den rengøres.
Træk stikket ud til radioen i de følgende tilfælde:
• Fremmedlegemer eller væsket er trængt ind i radioen.
• Radioen kan ikke betjenes korrekt.
• Kabinettet er beskadiget.
• Stikket eller kablet er defekt.
• Hvis radioen ikke skal bruges over en længere periode.
Ansvarsfraskrivelse
På trods af vores bestræbelser, kan vi ikke garantere at de angivne tekniske data er korrekte,
komplette og opdaterede, vi, Scansonic, forbeholder os retten til at foretage tekniske
ændringer uden varsel.

4
DA18
FM DAB+
DAB+/DAB/FM Digital radio
DC (battery) operation
1. Ensure the AC/DC adaptor is disconnected from the radio and AC mains.
2. Installed the batteries (4X1.5V UM3/AA battery) into the battery compartment.
3. Slide the POWER ON/OFF switch to the “ON” position to turn the radio on.
Note: To obtain the best performance in DC operation, the use of alkaline batteries is highly recommended.
Display backlight
When the radio is switched to on (in both AC & DC battery operation), the display backlight will be turned on to full
brightness for around 10 seconds and then go to dim, it will then be turned on to full brightness again for 10 seconds
on every key press.
LISTENING TO YO UR RADI O
Hints for better reception
This radio is fitted with a single DAB/FM telescopic antenna, to obtain the best performance, you should fully extend
the antenna and this is highly recommended for DAB reception.
DAB mode
If the radio is switched on for the first time, it will automatically enter into the DAB mode and perform auto scan
function. During the scan the display will show “Scanning …” together with a slide bar that indicates the progress of
the scan and the amount of stations that have been found so far. (F. 1) (F. 2)
Once the scan has finished, the radio will select the first alphanumerically found station. You can now press the ▲ or
▼ button to explore the found stations followed by pressing the SELECT button to select listening to the station.
Note: If there is no stations found after auto scan, the radio will then enter into the Tune Select Menu, you can now
press the ▲ or ▼ button followed by pressing the SELECT button to select “Manual tune” or “Autoscan” for stations.
SWITCHING YOUR RADIO ON FOR THE FIRST T IME
AC operation
1. Ensure the POWER ON/OFF switch located at the back of the radio is in the “OFF” position.
2. Insert the DC power jack of the AC/DC adaptor to the DC input socket located at the back of the radio.
3. Plug the AC/DC Adaptor to the AC mains outlet.
4. Slide the POWER ON/OFF switch to the “ON” position to turn the radio on.
UK-3
UK-2
DAB+/DAB/FM Digital Radio
NE-6207
INSTRUCTION MANUAL
FEATURES AND CONTROLS
13. DC INPUT SOCKET
14. POWER ON/OFF SWITCH
15. HEADPHONE JACK
16. BATTERY DOOR
1. SPEAKER
2. INFO BUTTON
3. BUTTON
4. LCD DISPLAY
5. VOLUME + BUTTON
6. MENU BUTTON
▲
7. PRESET BUTTON
8. SELECT BUTTON
9. BUTTON
10. MODE BUTTON
11. VOLUME - BUTTON
12. ANTENNA
▼
UK-1
To achieve the utmost in enjoyment and performance, and in order to become familiar with its features, please read this manual carefully
before attempting to operate the unit.
Important Notes
This safety and operating instruction should be retained for future reference.
The apparatus shall not be exposed to dripping or splashing and no objects filled with liquids, such as vases, shall be placed on
apparatus. Avoid installing the unit in locations described below:
* - Places exposed to direct sunlight or close to heat radiating appliances such as electric heaters,
on top of other stereo equipment that radiate too much heat.
* - Places blocking ventilation or dusty places.
* - Places subject to constant vibration, humid or moist places.
No naked flame sources such as lighted candles should be placed on the unit.
Attention should be drawn to the environmental aspects of battery disposal.
Make sure not to obstruct the ventilation openings, a minimum of 10cm should be kept around the apparatus for ventilation.
The ventilation should not be impeded by covering the ventilation openings with items such as newspaper, table-cloths, curtains,
etc.Use apparatus in moderate climates only.
Operate tuning controls and switches as instructed in the manual.
The normal function of the product may be disturbed by Strong Electro Magnetic Interference. If so, simply reset the product to
resume normal operation by following the instruction manual. In case the function could not resume, please use the product in
other location.
Do not attempt to remove any screws, or open the casing of the unit; there are no user serviceable parts inside, refer all servicing
to qualified service personnel.
CAUTION : TO REDUCE THE RISK OF ELECTRIC SHOCK DO NOT REMOVE COVER(OR BACK), NO USER SERVICEABLE
PARTS INSIDE, REFER SERVICING TO QUALIFIED SERVICE PERSONNEL.
DANGEROUS VOLTAGE
Conductor dangerous voltage, that may be of sufficient magnitude to constitute a risk of electric shock to persons is
present within this product's enclosure.
ATTENTION
The owner's manual contains important operating and maintenance instructions, for your safety, it is necessary to refer
to the manual.
WARNING :TO PREVENT FIRE OR SHOCK HAZARD, DO NOT EXPOSE THIS APPLIANCE TO DRIPPING OR SPLASHING.
Note: This unit will become warm when used for a long period of time. This is normal and does not indicate a problem with the
unit.This unit includes micro-processors which may malfunction as a result of external electrical interference/ noise or electrostatic
discharge. If the unit is not working properly, disconnect the power source and then reconnect it.
The AC/DC adaptor is used as the disconnect device. It shall remain readily operable and should not be obstructed during intended use.
To be completely disconnected the apparatus from supply mains, the AC/DC adaptor of the apparatus shall be disconnected from the
mains socket outlet completely.
13 14 15 16
12
F.1 F.2
1 2 3 4 5
6 7 8 9 10 11
BETJENINGSVEJLEDNING
SIKKERHEDSFORHOLDSREGLER
For at få den størst mulige fornøjelse af din nye radio og sætte dig ind i radioens funktioner og
betjening, bør du læse denne manual omhyggeligt, inden du tager radioen i brug.
Vigtige bemærkninger
Disse sikkerheds og betjeningsvejledninger skal gemmes for fremtidig reference.
Apparatet må ikke udsættes for dryp eller plask og ingen genstande fyldt med væsker, som vaser,
må placeres på apparatet. Undgå at installere enheden på stederne beskrevet herunder:
* - Steder, der er udsat for direkte sollys eller tæt på andre varmeafgivende enheder, som f.eks.
elektriske varmeapparater, eller ovenpå andet stereoudstyr, som afgiver for megen varme.
* - Steder der blokerer ventilationen eller meget støvede steder.
* - Steder, der er udsat for konstante vibrationer, i fugtige eller våde omgivelser.
Undlad at placere åben ild i form af f.eks. tændte stearinlys oven på apparatet. Tænk på miljøet, når
du bortskaffer brugte batterier.
Undlad at tildække apparatets ventilationsåbninger og sørg for, at der altid er mindst 10 cm frirum
rundtomapparatet,såledesatventilationkanndested.
Luftcirkulationen må ikke hindres ved, at ventilationsåbningerne tildækkes med f.eks. aviser, duge,
gardiner osv. Apparatet er udelukkende beregnet til brug under moderate klimaforhold.
Betjene drejeknapper og kontakter som angivet i vejledningen.
AC/DC-adapteren fungerer som hovedafbryder. Sørg for, at der altid er let adgang til den stikkontakt,
apparatet er tilsluttet. Hvis du vil slukke apparatet helt, skal du tage stikket til AC/DC-adapteren ud af
stikkontakten, således at kontakten til lysnettet er afbrudt.
Den normale funktion af dette produkt kan blive forstyrret af en stærk elektromagnetisk interferens.

5
DA18
FM DAB+
1. HØJTTALER
2. INFO-KNAP
3. ▲KNAP
4. LCD-SKÆRM
5. LYDSTYRKE + KNAP
6. MENU-KNAP
7. FAST STATION KNAP
8. SELECT-KNAP
9. ▼KNAP
10. MODE-KNAP
11. LYDSTYRKE - KNAP
12. ANTENNE
13. DC STRØMINDTAG
14. POWER ON/OFF-
KONTAKT
15. HOVEDTELEFONSTIK
16. BATTERIDÆKSEL
Hvis dette er tilfældet, skal du blot nulstille produktet, som beskrevet i brugsanvisningen. Og hvis du
ikke kan få enheden til at virke igen, skal du stille den et andet sted.
Forsøgikkeatfjernenogleskruer,elleråbneenhedenskabinet,derndesingendeleindeni
enhedensombrugerenkanservicere,overladalservicetildetkvaliceredeservicepersonale.
FORSIGTIG
RISIKO FOR
ELEKTRISK STØD
FORSIGTIG: FOR AT REDUCERE RISIKOEN FOR ELEKTRISK STØD MÅ DÆKSLET IKKE
AFTAGES (ELLER BAGBEKLÆDNINGEN), DER FINDER INGEN DELE INDEN I ENHEDEN
SOM BRUGEREN KAN SERVICERE, OVERLAD SERVICE TIL DET KVALIFICEREDE
SERVICEPERSONALE.
DC (battery) operation
1. Ensure the AC/DC adaptor is disconnected from the radio and AC mains.
2. Installed the batteries (4X1.5V UM3/AA battery) into the battery compartment.
3. Slide the POWER ON/OFF switch to the “ON” position to turn the radio on.
Note: To obtain the best performance in DC operation, the use of alkaline batteries is highly recommended.
Display backlight
When the radio is switched to on (in both AC & DC battery operation), the display backlight will be turned on to full
brightness for around 10 seconds and then go to dim, it will then be turned on to full brightness again for 10 seconds
on every key press.
LISTENING TO YO UR RADI O
Hints for better reception
This radio is fitted with a single DAB/FM telescopic antenna, to obtain the best performance, you should fully extend
the antenna and this is highly recommended for DAB reception.
DAB mode
If the radio is switched on for the first time, it will automatically enter into the DAB mode and perform auto scan
function. During the scan the display will show “Scanning …” together with a slide bar that indicates the progress of
the scan and the amount of stations that have been found so far. (F. 1) (F. 2)
Once the scan has finished, the radio will select the first alphanumerically found station. You can now press the ▲ or
▼ button to explore the found stations followed by pressing the SELECT button to select listening to the station.
Note: If there is no stations found after auto scan, the radio will then enter into the Tune Select Menu, you can now
press the ▲ or ▼ button followed by pressing the SELECT button to select “Manual tune” or “Autoscan” for stations.
SWITCHING YOUR RADIO ON FOR THE FIRST T IME
AC operation
1. Ensure the POWER ON/OFF switch located at the back of the radio is in the “OFF” position.
2. Insert the DC power jack of the AC/DC adaptor to the DC input socket located at the back of the radio.
3. Plug the AC/DC Adaptor to the AC mains outlet.
4. Slide the POWER ON/OFF switch to the “ON” position to turn the radio on.
UK-3
UK-2
DAB+/DAB/FM Digital Radio
NE-6207
INSTRUCTION MANUAL
FEATURES AND CONTROLS
13. DC INPUT SOCKET
14. POWER ON/OFF SWITCH
15. HEADPHONE JACK
16. BATTERY DOOR
1. SPEAKER
2. INFO BUTTON
3. BUTTON
4. LCD DISPLAY
5. VOLUME + BUTTON
6. MENU BUTTON
▲
7. PRESET BUTTON
8. SELECT BUTTON
9. BUTTON
10. MODE BUTTON
11. VOLUME - BUTTON
12. ANTENNA
▼
UK-1
To achieve the utmost in enjoyment and performance, and in order to become familiar with its features, please read this manual carefully
before attempting to operate the unit.
Important Notes
This safety and operating instruction should be retained for future reference.
The apparatus shall not be exposed to dripping or splashing and no objects filled with liquids, such as vases, shall be placed on
apparatus. Avoid installing the unit in locations described below:
* - Places exposed to direct sunlight or close to heat radiating appliances such as electric heaters,
on top of other stereo equipment that radiate too much heat.
* - Places blocking ventilation or dusty places.
* - Places subject to constant vibration, humid or moist places.
No naked flame sources such as lighted candles should be placed on the unit.
Attention should be drawn to the environmental aspects of battery disposal.
Make sure not to obstruct the ventilation openings, a minimum of 10cm should be kept around the apparatus for ventilation.
The ventilation should not be impeded by covering the ventilation openings with items such as newspaper, table-cloths, curtains,
etc.Use apparatus in moderate climates only.
Operate tuning controls and switches as instructed in the manual.
The normal function of the product may be disturbed by Strong Electro Magnetic Interference. If so, simply reset the product to
resume normal operation by following the instruction manual. In case the function could not resume, please use the product in
other location.
Do not attempt to remove any screws, or open the casing of the unit; there are no user serviceable parts inside, refer all servicing
to qualified service personnel.
CAUTION : TO REDUCE THE RISK OF ELECTRIC SHOCK DO NOT REMOVE COVER(OR BACK), NO USER SERVICEABLE
PARTS INSIDE, REFER SERVICING TO QUALIFIED SERVICE PERSONNEL.
DANGEROUS VOLTAGE
Conductor dangerous voltage, that may be of sufficient magnitude to constitute a risk of electric shock to persons is
present within this product's enclosure.
ATTENTION
The owner's manual contains important operating and maintenance instructions, for your safety, it is necessary to refer
to the manual.
WARNING :TO PREVENT FIRE OR SHOCK HAZARD, DO NOT EXPOSE THIS APPLIANCE TO DRIPPING OR SPLASHING.
Note: This unit will become warm when used for a long period of time. This is normal and does not indicate a problem with the
unit.This unit includes micro-processors which may malfunction as a result of external electrical interference/ noise or electrostatic
discharge. If the unit is not working properly, disconnect the power source and then reconnect it.
The AC/DC adaptor is used as the disconnect device. It shall remain readily operable and should not be obstructed during intended use.
To be completely disconnected the apparatus from supply mains, the AC/DC adaptor of the apparatus shall be disconnected from the
mains socket outlet completely.
13 14 15 16
12
F.1 F.2
1 2 3 4 5
6 7 8 9 10 11
FARLIG SPÆNDING
Farlige spændinger, som kan være stærke nok til at udgøre en risiko for elektrisk stød
forpersonerderbendersigindenforproduktetsområde.
VIGTIGT
Brugervejledningen indeholder vigtige betjenings- og vedligeholdelsesvejledninger, af
sikkerhedsårsager er det nødvendigt at følge vejledningen.
ADVARSEL: FOR AT FORHINDRE FARE FOR BRAND ELLER STØD, MÅ DETTE APPARAT IKKE
UDSÆTTES FOR DRYP ELLER PLASK.
Bemærk: Denne enhed bliver varm når den bruges i en længere periode. Dette er normalt og
angiver ikke et problem med enheden. Denne enhed indeholder micro-processorer, som kan holde
opmedatvirkesomfølgeafeneksternelektriskinterferens/støjellerelektrostatiskaadning.Hvis
enheden ikke virker ordentlig, skal du frakoble strømforsyningen og derefter slutte den til igen.
FUNKTIONER OG KNAPPER
DC (battery) operation
1. Ensure the AC/DC adaptor is disconnected from the radio and AC mains.
2. Installed the batteries (4X1.5V UM3/AA battery) into the battery compartment.
3. Slide the POWER ON/OFF switch to the “ON” position to turn the radio on.
Note: To obtain the best performance in DC operation, the use of alkaline batteries is highly recommended.
Display backlight
When the radio is switched to on (in both AC & DC battery operation), the display backlight will be turned on to full
brightness for around 10 seconds and then go to dim, it will then be turned on to full brightness again for 10 seconds
on every key press.
LISTENING TO YO UR RADIO
Hints for better reception
This radio is fitted with a single DAB/FM telescopic antenna, to obtain the best performance, you should fully extend
the antenna and this is highly recommended for DAB reception.
DAB mode
If the radio is switche d on for the first time, it will automatically enter into the DAB mode and perform auto scan
function. During the scan the display will show “Scanning …” together with a slide bar that indicates the progress of
the scan and the amount of stations that have been found so far. (F. 1) (F. 2)
Once the scan has finished, the radio will select the first alphanumerically found station. You can now press the ▲ or
▼ button to explore the found stations followed by pressing the SELECT button to select listening to the station.
Note: If there is no stations found after auto scan, the radio will then ent er into the Tune Select Menu, you can now
press the ▲ or ▼ button followed by pressing the SELECT button to select “Manual tune” or “Autoscan” for stations.
SWITCHING YOUR R ADIO ON FOR THE FIRST TIME
AC operation
1. Ensure the POWER ON/OFF switch located at the back of the radio is in the “OFF” position.
2. Insert the DC power jack of the AC/DC adaptor to the DC input socket located at the back of the radio.
3. Plug the AC/DC Adaptor to the AC mains outlet.
4. Slide the POWER ON/OFF switch to the “ON” position to turn the radio on.
UK-3
UK-2
DAB+/DAB/FM Digital Radio
NE-6207
INSTRUCTION MANUAL
FEATURES AND CONTROLS
13. DC INPUT SOCKET
14. POWER ON/OFF SWITCH
15. HEADPHONE JACK
16. BATTERY DOOR
1. SPEAKER
2. INFO BUTTON
3. BUTTON
4. LCD DISPLAY
5. VOLUME + BUTTON
6. MENU BUTTON
▲
7. PRESET BUTTON
8. SELECT BUTTON
9. BUTTON
10. MODE BUTTON
11. VOLUME - BUTTON
12. ANTENNA
▼
UK-1
To achieve the utmost in enjoyment and performance, and in order to become familiar with its features, please read this manual carefully
before attempting to operate the unit.
Important Notes
This safety and operating instruction should be retained for future reference.
The apparatus shall not be exposed to dripping or splashing and no objects filled with liquids, such as vases, shall be placed on
apparatus. Avoid installing the unit in locations described below:
* - Places exposed to direct sunlight or close to heat radiating appliances such as electric heaters,
on top of other stereo equipment that radiate too much heat.
* - Places blocking ventilation or dusty places.
* - Places subject to constant vibration, humid or moist places.
No naked flame sources such as lighted candles should be placed on the unit.
Attention should be drawn to the environmental aspects of battery disposal.
Make sure not to obstruct the ventilation openings, a minimum of 10cm should be kept around the apparatus for ventilation.
The ventilation should not be impeded by covering the ventilation openings with items such as newspaper, table-cloths, curtains,
etc.Use apparatus in moderate climates only.
Operate tuning controls and switches as instructed in the manual.
The normal function of the product may be disturbed by Strong Electro Magnetic Interference. If so, simply reset the product to
resume normal operation by following the instruction manual. In case the function could not resume, please use the product in
other location.
Do not attempt to remove any screws, or open the casing of the unit; there are no user serviceable parts inside, refer all servicing
to qualified service personnel.
CAUTION : TO REDUCE THE RISK OF ELECTRIC SHOCK DO NOT REMOVE COVER(OR BACK), NO USER SERVICEABLE
PARTS INSIDE, REFER SERVICING TO QUALIFIED SERVICE PERSONNEL.
DANGEROUS VOLTAGE
Conductor dangerous voltage, that may be of sufficient magnitude to constitute a risk of electric shock to persons is
present within this product's enclosure.
ATTENTION
The owner's manual contains important operating and maintenance instructions, for your safety, it is necessary to refer
to the manual.
WARNING :TO PREVENT FIRE OR SHOCK HAZARD, DO NOT EXPOSE THIS APPLIANCE TO DRIPPING OR SPLASHING.
Note: This unit will become warm when used for a long period of time. This is normal and does not indicate a problem with the
unit.This unit includes micro-processors which may malfunction as a result of external electrical interference/ noise or electrostatic
discharge. If the unit is not working properly, disconnect the power source and then reconnect it.
The AC/DC adaptor is used as the disconnect device. It shall remain readily operable and should not be obstructed during intended use.
To be completely disconnected the apparatus from supply mains, the AC/DC adaptor of the apparatus shall be disconnected from the
mains socket outlet completely.
13 14 15 16
12
F.1 F.2
1 2 3 4 5
6 7 8 9 10 11

6
DA18
FM DAB+
NÅR DU TÆNDER RADIOEN FØRSTE GANG
Lysnetdrift
1. Sørg for, at kontakten POWER ON/OFF på radioens bagpanel står på “OFF”.
2. Forbind DC-stikket på AC/DC-adapteren til DC strømindtaget på radioens bagpanel.
3. Forbind AC/DC-adapteren til en stikkontakt.
4. Stil kontakten POWER ON/OFF over på “ON” for at tænde radioen.
DC (batteri)-drift
1. Sørg for, at AC/DC-adapteren er koblet fra radioen og fra lysnettet.
2. Læg batterierne (4 x 1,5 V UM3/AA-batterier) i batterirummet.
3. Stil kontakten POWER ON/OFF over på “ON” for at tænde radioen.
Bemærk: Du opnår den bedste ydeevne under batteridrift, hvis du anvender batterier af typen
Alkaline.
Displayets baggrundslys
Når du tænder radioen (uanset om den kører på lysnet eller batterier), vil displayets baggrundslys
tænde på fuld styrke i ca. 10 sekunder og dernæst dæmpes. Displayet lyser for fuld styrke igen i
10 sekunder hver gang, du trykker på en knap.
NÅR DU VIL LYTTE TIL RADIO
Tips til bedre modtagelse
Denne radio er udstyret med en enkelt DAB/FM teleskop-antenne. Du opnår den bedst mulige
modtagelse, når du strækker antennen helt ud. Dette anbefales især for modtagelse af DAB.
DAB-tilstanden
Når du tænder radioen første gang, starter den automatisk op i DAB-modus og gennemfører en
automatisk kanalsøgning. Under søgningen viser displayet meddelelsen “Scanning …” sammen med
en skydebjælke, der viser hvor langt søgningen er nået og antallet af fundne stationer indtil videre.
(Fig. 1) (Fig. 2)
Når søgningen er gennemført, stiller radioen automatisk ind på den først fundne station i
alfanumeriskrækkefølge.Dukannutrykkepåknappen▲eller▼foratbladregennemdefundne
stationer og trykke på knappen SELECT for at stille ind på en station, du vil lytte til.
Bemærk:Hvisderingenstationerndesunderautosøgningen,skifterradioentilmenuenTune
Select,ogdukannutrykkepåknappen▲eller▼fulgtafettrykpåknappenSELECTforatvælge
mellem “Manual tune” eller “Autoscan” til søgning efter stationer.
DC (battery) operation
1. Ensure the AC/DC adaptor is disconnected from the radio and AC mains.
2. Installed the batteries (4X1.5V UM3/AA battery) into the battery compartment.
3. Slide the POWER ON/OFF switch to the “ON” position to turn the radio on.
Note: To obtain the best performance in DC operation, the use of alkaline batteries is highly recommended.
Display backlight
When the radio is switched to on (in both AC & DC battery operation), the display backlight will be turned on to full
brightness for around 10 seconds and then go to dim, it will then be turned on to full brightness again for 10 seconds
on every key press.
LISTENING TO YO UR R A D I O
Hints for better reception
This radio is fitted with a single DAB/FM telescopic antenna, to obtain the best performance, you should fully extend
the antenna and this is highly recommended for DAB reception.
DAB mode
If the radio is switched on for the first time, it will automatically enter into the DAB mode and per form auto scan
function. During the scan the display will show “Scanning …” together with a slide bar that indicates the progress of
the scan and the amount of stations that have been found so far. (F. 1) (F. 2)
Once the scan has finished, the radio will select the first alphanumerically found station. You can now press the ▲ or
▼ button to explore the found stations followed by pressing the SELECT button to select listening to the station.
Note: If there is no stations found after auto s can, the radio will then ent er into the Tune Select Menu, you can now
press the ▲ or ▼ button followed by pressing the SELECT button to select “Manual tune” or “Autoscan” for stations.
SWITCHING YOUR R ADIO O N F OR T HE F IRST T I M E
AC operation
1. Ensure the POWER ON/OFF switch located at the back of the radio is in the “OFF” position.
2. Insert the DC power jack of the AC/DC adaptor to the DC input socket located at the back of the radio.
3. Plug the AC/DC Adaptor to the AC mains outlet.
4. Slide the POWER ON/OFF switch to the “ON” position to turn the radio on.
UK-3
UK-2
DAB+/DAB/FM Digital Radio
NE-6207
INSTRUCTION MANUAL
FEATURES AND CONTROLS
13. DC INPUT SOCKET
14. POWER ON/OFF SWITCH
15. HEADPHONE JACK
16. BATTERY DOOR
1. SPEAKER
2. INFO BUTTON
3. BUTTON
4. LCD DISPLAY
5. VOLUME + BUTTON
6. MENU BUTTON
▲
7. PRESET BUTTON
8. SELECT BUTTON
9. BUTTON
10. MODE BUTTON
11. VOLUME - BUTTON
12. ANTENNA
▼
UK-1
To achieve the utmost in enjoyment and performance, and in order to become familiar with its features, please read this manual carefully
before attempting to operate the unit.
Important Notes
This safety and operating instruction should be retained for future reference.
The apparatus shall not be exposed to dripping or splashing and no objects filled with liquids, such as vases, shall be placed on
apparatus. Avoid installing the unit in locations described below:
* - Places exposed to direct sunlight or close to heat radiating appliances such as electric heaters,
on top of other stereo equipment that radiate too much heat.
* - Places blocking ventilation or dusty places.
* - Places subject to constant vibration, humid or moist places.
No naked flame sources such as lighted candles should be placed on the unit.
Attention should be drawn to the environmental aspects of battery disposal.
Make sure not to obstruct the ventilation openings, a minimum of 10cm should be kept around the apparatus for ventilation.
The ventilation should not be impeded by covering the ventilation openings with items such as newspaper, table-cloths, curtains,
etc.Use apparatus in moderate climates only.
Operate tuning controls and switches as instructed in the manual.
The normal function of the product may be disturbed by Strong Electro Magnetic Interference. If so, simply reset the product to
resume normal operation by following the instruction manual. In case the function could not resume, please use the product in
other location.
Do not attempt to remove any screws, or open the casing of the unit; there are no user serviceable parts inside, refer all servicing
to qualified service personnel.
CAUTION : TO REDUCE THE RISK OF ELECTRIC SHOCK DO NOT REMOVE COVER(OR BACK), NO USER SERVICEABLE
PARTS INSIDE, REFER SERVICING TO QUALIFIED SERVICE PERSONNEL.
DANGEROUS VOLTAGE
Conductor dangerous voltage, that may be of sufficient magnitude to constitute a risk of electric shock to persons is
present within this product's enclosure.
ATTENTION
The owner's manual contains important operating and maintenance instructions, for your safety, it is necessary to refer
to the manual.
WARNING :TO PREVENT FIRE OR SHOCK HAZARD, DO NOT EXPOSE THIS APPLIANCE TO DRIPPING OR SPLASHING.
Note: This unit will become warm when used for a long period of time. This is normal and does not indicate a problem with the
unit.This unit includes micro-processors which may malfunction as a result of external electrical interference/ noise or electrostatic
discharge. If the unit is not working properly, disconnect the power source and then reconnect it.
The AC/DC adaptor is used as the disconnect device. It shall remain readily operable and should not be obstructed during intended use.
To be completely disconnected the apparatus from supply mains, the AC/DC adaptor of the apparatus shall be disconnected from the
mains socket outlet completely.
13 14 15 16
12
F.1 F.2
1 2 3 4 5
6 7 8 9 10 11

7
DA18
FM DAB+
DAB automatisk kanalsøgning
Den automatiske kanalsøgning gennemsøger hele DAB Bånd III for kanaler. Når søgningen er
gennemført, stiller radioen automatisk ind på den først fundne station i alfanumerisk rækkefølge.
1. Hvis du vil aktivere den automatiske kanalsøgning, skal du først trykke på knappen MENU
foratåbnemenuenTuneSelectogdernæsttrykkepå▲eller▼ogvælge“Autoscan”.Til
sidst skal du trykke på knappen SELECT for at bekræfte, hvorefter displayet viser
“Scanning …” samt en skydebjælke over søgningen. (Fig. 3)
2. Alle fundne stationer lagres automatisk i radioens hukommelse, og du kan bladre gennem
demoglyttetilstationernevedattrykkepåknappen▲eller▼.Nårdunderenstation,du
vil lytte til, skal du trykke på knappen SELECT.
DAB manuel kanalsøgning
1. Hvis du vil søge manuelt efter stationer, skal du først trykke på knappen MENU for at åbne
menuen Tune Select og dernæst trykke på knappen SELECT for at vælge punktet “Manual
tune”. (Fig. 4) (Fig. 5)
2. Trykpåknappen▲eller▼foratgennemgåDAB-kanalerne.Displayetviser“5Ato13F”og
de tilhørende frekvenser.
3. Når den ønskede frekvens vises på displayet, skal du trykke på knappen SELECT for at
bekræfte. Navnet på den gruppe stationer (ensemble/multiplex), stationen tilhører, vises på
displayet.
4. Tryk på knappen SELECT igen for at stille ind på den valgte station.
UK-4
UK-5
UK-6
UK-7
DAB auto scan
The auto scan will search for the entire DAB Band III channels. After the scan has finished, the first alphanumerically
found station will be automatically selected.
1. To activate auto scan, first press the MENU button to enter into the Tune Select Menu and then press the ▲ or
▼ button to select “Autoscan”, finally press the SELECT button to confirm, the display will show “Scanning …”
and a progressing slide bar. (F. 3)
2. All the stations that have been found will be stored automatically, to explore the stations that have been found,
press the ▲ or ▼ buttons and when you find a station that you would like to listen to, press the SELECT button.
DAB manual tune
1. To select manual tune, first press the MENU button to enter into the Tune Select Menu, then press the SELECT
button to select “Manual tune”. (F. 4) (F. 5)
2. Press the ▲ or ▼ button to move through the DAB channels, the display will show “5A to 13F” and their
associated frequencies.
3. When your desired frequency appears in the display, press the SELECT button to confirm. The name of the
station group (ensemble/multiplex) will be displayed.
4. To listen to the station selected, press the SELECT button again.
DAB secondary services
On some occasions you will see a “>” symbol directly after the name of the station, this indicates that there are
secondary services available to that station. These secondary services contain extra services that relate to the
primary station. E.g. a sports station may want to add extra commentaries. The secondary services are inserted
directly after the primary station. To select the secondary station, press on the SELECT control once.
DAB display modes
Every time you press the INFO button, the display will cycle through the following display modes:
FACTORY RESET
When you move the radio to another part of the country, your pre-tuned and stored DAB stations may no longer be
available. If this is the case then you will need to reset your radio back to its original factory settings; to perform a
factory reset, please do the following:
Note: All of your stored DAB & FM presets will be lost once the reset has taken place.
HEADPHONE JACK
A 3.5mm type headphone jack is located at the back of the radio. Connect a set of headphones (not included) to this
jack for private listening without disturbing others. The speaker is automatically disconnected when the headphones
are in use.
IMPORTANT: When using headphones always set the volume to a low level before you put the headphones on.
Then insert the headphones and gradually increase the volume to a comfortable listening level.
1. Connect the radio to AC mains (via the AC/DC adaptor), then slide the POWER ON/OFF switch to the “ON”
position to turn the radio on.
2. Press and hold the MENU button until the display shows “Press SELECT to confirm reset”.
3. Release the MENU button and press the SELECT button once, the display will first show “Restarting …” and
after the reset is completed, the radio will then automatically enter into the DAB mode and perform auto scan
function. After the scan has finished, the radio will select and display the first alphanumerically found station.
SPECIFICATION
***SPECIFICATION SUBJECT TO CHANGE WITHOUT FURTHER NOTICE.
POWER SUPPLY : AC/DC ADAPTOR INPUT: 100-240V~60/50Hz OUTPUT: 6V 0.8A
DC(BATTERY) 6V 1.5V(UM3) x 4
OUTPUT POWER : 1.0 W
FREQUENCY RANGE : DAB 174 - 240 MHz
FM 87.5 - 108 MHz
UNIT DIMENSION : 181 (L) x 45 (W) x 105 (H) mm
WEIGHT: 0.4kg
FM radio
1. To select FM, press the MODE button, the display will show FM and the frequency.
2. To activate auto search, press and hold the ▲ or ▼ button until it starts to scan up or down the frequency band,
the display will show “Searching … > .” or “Searching … < .”, and it will stop automatically once a station has
been found. (F. 6)(F. 7)
3. To activate manual search, repeatedly press the ▲ or ▼ button.
4. To select audio mode, press the SELECT button to toggle between the “Auto” or “Mono” selection.
Note: The radio will automatically switch between stereo and mono mode, but you can override this and switch this
function manually which is helpful for poor signal reception.
STORING AND R ECALLING S TORED STATIONS
In either DAB or FM mode, you can store up to 10 stations to the favourite pres ets; this will en able you to get direct
access to your favourite stations.
1. To store a preset, fir st tune to your desired statio n, then press and hold the PRESET button, the display will
show “Empty preset 1”, and the preset number will flash. (F. 8)
2. Press the ▲ or ▼ button to select your desired station preset number.
3. Press the SELECT to confirm your selection, the display will show “Preset # saved” (F. 9)
4. To recall a preset station, first press the PRESET bu tton once, then press the ▲ or ▼ button to scroll up or
down the presets that you have stored. When the display shows your desired preset number, release the
buttons. If the preset hasn't been allocated a station, the display will show “Empty preset #”.
Time and date
The time and date will be automatically updated by the broadcasted information; it is no need to set the clock
manually. In the unlikely event that no clock information is received, the display will show “<TIME/DATE>”.
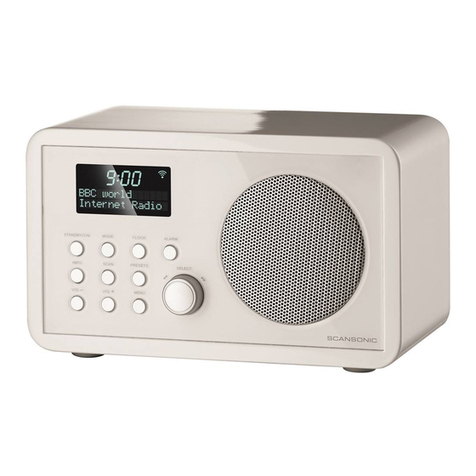
Frequency
The frequency of the present station will be displayed.
Audio bit rate
The display will show the digital audio bit rate being received.
Signal strength
The display will show a slide bar to indicate the signal strength, the stronger the signal, the longer the bar will be from
left to right.
DLS
DLS stands for Dynamic Label Segment which is a scrolling message that the broadcaster may include in their
transmissions. The message usually includes information such as programme details …etc.
Programme type
This describes the style of the programme that is being broadcast. If the information is not available, the display will
show “<Programme Type>”.
Ensemble/Multiplex (Group name)
The Ensemble/Multiplex is a collection of radio stations that are bundled and transmitted together in a single
frequency. There are national and local multiplexes, local ones contain stations that are specific to that area.
Note: Press and hold the INFO button for longer than 2 seconds, the software version number will be displayed.
Ensemble/Multiplex(Group name)
Time/Date Signal strength
DLS
Audio Bit Rate
Programme Type
Frequency
F.3 F.4 F.5
F.8
F.6 F.7
F.9
DAB sekundære services
Af og til vil du kunne se symbolet “>” direkte efter navnet på en station. Dette angiver, at stationen
tilbyder sekundære services. Disse sekundære services indeholder ekstra materiale, der har
forbindelse til den primære station. Det kan f.eks. være sportskanaler, der har tilføjet ekstra
kommentatorlyd. De sekundære services er indsat direkte efter den primære station. Hvis du vil
vælge en sekundær station, skal du trykke én gang på knappen SELECT.
DAB displayet
For hver gang, du trykker på knappen INFO, skifter displayet i den rækkefølge, der vises herunder:
UK-4
UK-5
UK-6
UK-7
DAB auto scan
The auto scan will search for the entire DAB Band III channels. After the scan has finished, the first alphanumerically
found station will be automatically selected.
1. To activate auto scan, first press the MENU button to enter into the Tune Select Menu and then press the ▲ or
▼ button to select “Autoscan”, finally press the SELECT button to confirm, the display will show “Scanning …”
and a progressing slide bar. (F. 3)
2. All the stations that have been found will be stored automatically, to explore the stations that have been found,
press the ▲ or ▼ buttons and when you find a station that you would like to listen to, press the SELECT button.
DAB manual tune
1. To select manual tune, first press the MENU button to enter into the Tune Select Menu, then press the SELECT
button to select “Manual tune”. (F. 4) (F. 5)
2. Press the ▲ or ▼ button to move through the DAB channels, the display will show “5A to 13F” and their
associated frequencies.
3. When your desired frequency appears in the display, press the SELECT button to confirm. The name of the
station group (ensemble/multiplex) will be displayed.
4. To listen to the station selected, press the SELECT button again.
DAB secondary services
On some occasions you will see a “>” symbol directly after the name of the station, this indicates that there a re
secondary services available to that station. These secondary services contain extra services that relate to the
primary station. E.g. a sports station may want to add extra commentaries. The secondary services are inserted
directly after the primary station. To select the secondary station, press on the SELECT control once.
DAB display modes
Every time you press the INFO button, the display will cycle through the following display modes:
FACTORY RESET
When you move the radio to another part of the country, your pre-tuned and stored DAB stations may no longer be
available. If this is the case then you will need to reset your radio back to its original factory settings; to perform a
factory reset, please do the following:
Note: All of your stored DAB & FM presets will be lost once the reset has taken place.
HEADPHONE JAC K
A 3.5mm type headphone jack is located at the back of the radio. Connect a set of headphones (not included) to this
jack for private listening without disturbing others. The speaker is automatically disconnected when the headphones
are in use.
IMPORTANT: When using headphones always set the volume to a low level before you put the headphones on.
Then insert the headphones and gradually increase the volume to a comfortable listening level.
1. Connect the radio to AC mains (via the AC/DC adaptor), then slide the POWER ON/OFF switch to the “ON”
position to turn the radio on.
2. Press and hold the MENU button until the display shows “Press SELECT to confirm reset”.
3. Release the MENU button and press the SELECT button once, the display will first show “Restarting …” and
after the reset is completed, the radio will then automatically enter into the DAB mode and perform auto scan
function. After the scan has finished, the radio will select and display the first alphanumerically found station.
SPECIFICATION
***SPECIFICATION SUBJECT TO CHANGE WITHOUT FURTHER NOTICE.
POWER SUPPLY : AC/DC ADAPTOR INPUT: 100-240V~60/50Hz OUTPUT: 6V 0.8A
DC(BATTERY) 6V 1.5V(UM3) x 4
OUTPUT POWER : 1.0 W
FREQUENCY RANGE : DAB 174 - 240 MHz
FM 87.5 - 108 MHz
UNIT DIMENSION : 181 (L) x 45 (W) x 105 (H) mm
WEIGHT: 0.4kg
FM radio
1. To select FM, press the MODE button, the display will show FM and the frequency.
2. To activate auto search, press and hold the ▲ or ▼ button until it starts to scan up or down the frequency band,
the display will show “Searching … > .” or “Searching … < .”, and it will stop automatically once a station has
been found. (F. 6)(F. 7)
3. To activate manual search, repeatedly press the ▲ or ▼ button.
4. To select audio mode, press the SELECT button to toggle between the “Auto” or “Mono” selection.
Note: The radio will automatically switch between stereo and mono mode, but you can override this and switch this
function manually which is helpful for poor signal reception.
STORING AND R ECALLING STO RED STATI ONS
In either DAB or FM mode, you can store up to 10 stations to the favourite presets; this will enable you to get direct
access to your favourite stations.
1. To store a preset, first tune to your desired station, then press and hold the PRESET button, the display will
show “Empty preset 1”, and the preset number will flash. (F. 8)
2. Press the ▲ or ▼ button to select your desired station preset number.
3. Press the SELECT to confirm your selection, the display will show “Preset # saved” (F. 9)
4. To recall a preset station, first press the PRESET button once, then press the ▲ or ▼ button to scroll up or
down the presets that you have stored. When the display shows your desired preset number, release the
buttons. If the preset hasn't been allocated a station, the display will show “Empty preset #”.
Time and date
The time and date will be automatically updated by the broadcasted information; it is no need to set the clock
manually. In the unlikely event that no clock information is received, the display will show “<TIME/DATE>”.
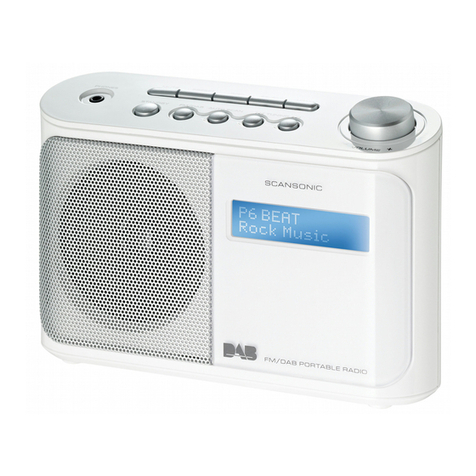
Frequency
The frequency of the present station will be displayed.
Audio bit rate
The display will show the digital audio bit rate being received.
Signal strength
The display will show a slide bar to indicate the signal strength, the stronger the signal, the longer the bar will be from
left to right.
DLS
DLS stands for Dynamic Label Segment which is a scrolling message that the broadcaster may include in their
transmissions. The message usually includes information such as programme details …etc.
Programme type
This describes the style of the programme that is being broadcast. If the information is not available, the display will
show “<Programme Type>”.
Ensemble/Multiplex (Group name)
The Ensemble/Multiplex is a collection of radio stations that are bundled and transmitted together in a single
frequency. There are national and local multiplexes, local ones contain stations that are specific to that area.
Note: Press and hold the INFO button for longer than 2 seconds, the software version number will be displayed.
Ensemble/Multiplex(Group name)
Time/Date Signal strength
DLS
Audio Bit Rate
Programme Type
Frequency
F.3 F.4 F.5
F.8
F.6 F.7
F.9
Ur og Dato
Uret og datoen opdateres automatisk ud fra de oplysninger, der modtages via radiosignalerne, det
er ikke nødvendigt at indstille uret manuelt. Skulle det alligevel forekomme, at der ikke modtages
tidsoplysninger, viser displayet i stedet “<TIME/DATE>”.

8
DA18
FM DAB+
Frekvens
Viser frekvensen for den aktuelle station.
Audio bitrate
Displayet viser den digitale audio bitrate for programmet, der modtages.
Signalstyrke
Displayet viser en skydebjælke, der angiver signalstyrken. Jo stærkere signalet er, jo længere er
skydebjælken fra venstre mod højre.
DLS
DLS står for Dynamisk Label Segment, som er en rulletekst, udbyderen kan udsende sammen med
udsendelsen. Rulleteksten vil som oftest indeholde oplysninger om det aktuelle program etc.
Programtype
Her kan du se typen på det program, der udsendes. Hvis denne oplysning ikke er tilgængelig, viser
displayet i stedet “<Programme Type>”.
Ensemble/Multiplex (Gruppenavn)
Ensemble/Multiplex dækker over en gruppe radiostationer, der er bundlet og sendes sammen på
enenkeltfrekvens.Derndesnationaleoglokalemultiplexer,delokaleindeholderstationer,der
udelukkende udsendes i det aktuelle lokalområde.
Bemærk: Tryk og hold knappen INFO i mindst 2 sekunder, hvis du vil have radioens software
versionsnummer vist på displayet.
FM-radio
1. Tryk på knappen MODE, hvis du vil vælge FM, hvorefter displayet viser FM og den aktuelle
frekvens.
2. Hvisduvilaktivereautomatiskkanalsøgning,skaldutrykkeogholdeknappen▲eller▼for
at vælge den ønskede faste programplads, indtil søgningen op eller ned ad frekvensbåndet
starter, og displayet viser “Searching...>” eller “Searching...<”. Søgningen afbrydes
automatisk,nårenstationndes.(Fig.6)(Fig.7)
3. Hvisduvilaktiveremanuelkanalsøgning,skaldutrykkegentagnegangepåknappen▲
eller▼.
4. Hvis du vil vælge audiomodus, skal du trykke på knappen SELECT for at skifte mellem
“Auto” eller “Mono”.
Bemærk: Radioen vil automatisk skifte mellem stereo- og mono-tilstanden, men du kan omgå dette
ved at skifte funktionen manuelt, hvilket er nyttigt ved dårlig signalmodtagelse.
UK-4
UK-5
UK-6
UK-7
DAB auto scan
The auto scan will search for the entire DAB Band III channels. After the scan has finished, the first alphanumerically
found station will be automatically selected.
1. To activate auto scan, first press the MENU button to enter into the Tune Select Menu and then press the ▲ or
▼ button to select “Autoscan”, finally press the SELECT button to confirm, the display will show “Scanning …”
and a progressing slide bar. (F. 3)
2. All the stations that have been found will be stored automatically, to explore the stations that have been found,
press the ▲ or ▼ buttons and when you find a station that you would like to listen to, press the SELECT button.
DAB manual tune
1. To select manual tune, first press the MENU button to enter into the Tune Select Menu, then press the SELECT
button to select “Manual tune”. (F. 4) (F. 5)
2. Press the ▲ or ▼ button to move through the DAB channels, the display will show “5A to 13F” and their
associated frequencies.
3. When your desired frequency appears in the display, press the SELECT button to confirm. The nam e of the
station group (ensemble/multiplex) will be displayed.
4. To listen to the station selected, press the SELECT button again.
DAB secondary services
On some occasions you will see a “>” symbol directly after the name of the station, this indicates that there are
secondary services available to that station. These secondary services contain extra services that relate to the
primary station. E.g. a sports station may want to add extra commentaries. The secondary services are inserted
directly after the primary station. To select the secondary station, press on the SELECT control once.
DAB display modes
Every time you press the INFO button, the display will cycle through the following display modes:
FACTORY RESET
When you move the radio to another part of the country, your pre-tuned and stored DAB stations may no longer be
available. If this is the case then you will need to reset your radio back to its original factory settings; to perform a
factory reset, please do the following:
Note: All of your stored DAB & FM presets will be lost once the reset has taken place.
HEADPHONE JACK
A 3.5mm type headphone jack is located at the back of the radio. Connect a set of headphones (not included) to this
jack for private listening without disturbing others. The speaker is automatically disconnected when the headphones
are in use.
IMPORTANT: When using headphones always set the volume to a low level before you put the headphones on.
Then insert the headphones and gradually increase the volume to a comfortable listening level.
1. Connect the radio to AC mains (via the AC/DC adaptor), then slide the POWER ON/OFF switch to the “ON”
position to turn the radio on.
2. Press and hold the MENU button until the display shows “Press SELECT to confirm reset”.
3. Release the MENU button and press the SELECT button once, the display will first show “Restarting …” and
after the reset is completed, the radio will then automatically enter into the DAB mode and perform auto scan
function. After the scan has finished, the radio will select and display the first alphanumerically found station.
SPECIFICATION
***SPECIFICATION SUBJECT TO CHANGE WITHOUT FURTHER NOTICE.
POWER SUPPLY : AC/DC ADAPTOR INPUT: 100-240V~60/50Hz OUTPUT: 6V 0.8A
DC(BATTERY) 6V 1.5V(UM3) x 4
OUTPUT POWER : 1.0 W
FREQUENCY RANGE : DAB 174 - 240 MHz
FM 87.5 - 108 MHz
UNIT DIMENSION : 181 (L) x 45 (W) x 105 (H) mm
WEIGHT: 0.4kg
FM radio
1. To select FM, press the MODE button, the display will show FM and the frequency.
2. To activate auto search, press and hold the ▲ or ▼ button until it starts to scan up or down the frequency band,
the display will show “Searching … > .” or “Searching … < .”, and it will stop automatically once a station has
been found. (F. 6)(F. 7)
3. To activate manual search, repeatedly press the ▲ or ▼ button.
4. To select audio mode, press the SELECT button to toggle between the “Auto” or “Mono” selection.
Note: The radio will automatically switch between stereo and mono mode, but you can override this and switch this
function manually which is helpful for poor signal reception.
STORING AND R ECALLING S TORED STATIONS
In either DAB or FM mode, you can store up to 10 stations to the favourite pres ets; this will en able you to get direct
access to your favourite stations.
1. To store a preset, fir st tune to your desired statio n, then press and hold the PRESET button, the display will
show “Empty preset 1”, and the preset number will flash. (F. 8)
2. Press the ▲ or ▼ button to select your desired station preset number.
3. Press the SELECT to confirm your selection, the display will show “Preset # saved” (F. 9)
4. To recall a preset station, first press the PRESET bu tton once, then press the ▲ or ▼ button to scroll up or
down the presets that you have stored. When the display shows your desired preset number, release the
buttons. If the preset hasn't been allocated a station, the display will show “Empty preset #”.
Time and date
The time and date will be automatically updated by the broadcasted information; it is no need to set the clock
manually. In the unlikely event that no clock information is received, the display will show “<TIME/DATE>”.
Frequency
The frequency of the present station will be displayed.
Audio bit rate
The display will show the digital audio bit rate being received.
Signal strength
The display will show a slide bar to indicate the signal strength, the stronger the signal, the longer the bar will be from
left to right.
DLS
DLS stands for Dynamic Label Segment which is a scrolling message that the broadcaster may include in their
transmissions. The message usually includes information such as programme details …etc.
Programme type
This describes the style of the programme that is being broadcast. If the information is not available, the display will
show “<Programme Type>”.
Ensemble/Multiplex (Group name)
The Ensemble/Multiplex is a collection of radio stations that are bundled and transmitted together in a single
frequency. There are national and local multiplexes, local ones contain stations that are specific to that area.
Note: Press and hold the INFO button for longer than 2 seconds, the software version number will be displayed.
Ensemble/Multiplex(Group name)
Time/Date Signal strength
DLS
Audio Bit Rate
Programme Type
Frequency
F.3 F.4 F.5
F.8
F.6 F.7
F.9

9
DA18
FM DAB+
LAGRING OG GENKALD AF FASTE STATIONER
I både DAB- og FM-modus kan du lagre op til 10 faste stationer. Dette gør det nemt at få direkte
adgang til dine yndlingsstationer.
1. Hvis du vil gemme en station som fast station, skal du først stille ind på stationen og
dernæst trykke og holde knappen PRESET, indtil displayet viser “Empty preset 1”,
og nummeret på den faste programplads blinker på displayet. (Fig. 8)
2. Trykpåknappen▲eller▼foratvælgedenønskedefasteprogramplads.
3. Tryk på knappen SELECT for at bekræfte dit valg, hvorefter displayet viser “Preset # saved”.
(Fig. 9)
4. Når du vil genkalde en fast station, skal du først trykke én gang på knappen PRESET og
dernæsttrykkepåknappen▲eller▼foratbladreopellernedgennemdefastestationer,
du har gemt i radioen. Når displayet viser nummeret på den ønskede station, skal du slippe
knappen. Hvis der ikke er gemt nogen station på den valgte programplads, viser displayet
“Empty preset #”.
UK-4
UK-5
UK-6
UK-7
DAB auto scan
The auto scan will search for the entire DAB Band III channels. After the scan has finished, the first alphanumerically
found station will be automatically selected.
1. To activate auto scan, first press the MENU button to enter into the Tune Select Menu and then press the ▲ or
▼ button to select “Autoscan”, finally press the SELECT button to confirm, the display will show “Scanning …”
and a progressing slide bar. (F. 3)
2. All the stations that have been found will be stored automatically, to explore the stations that have been found,
press the ▲ or ▼ buttons and when you find a station that you would like to listen to, press the SELECT button.
DAB manual tune
1. To select manual tune, first press the MENU button to enter into the Tune Select Menu, then press the SELECT
button to select “Manual tune”. (F. 4) (F. 5)
2. Press the ▲ or ▼ button to move through the DAB channels, the display will show “5A to 13F” and their
associated frequencies.
3. When your desired frequency appears in the display, press the SELECT button to confirm. The nam e of the
station group (ensemble/multiplex) will be displayed.
4. To listen to the station selected, press the SELECT button again.
DAB secondary services
On some occasions you will see a “>” symbol directly after the name of the station, this indicates that there are
secondary services available to that station. These secondary services contain extra services that relate to the
primary station. E.g. a sports station may want to add extra commentaries. The secondary services are inserted
directly after the primary station. To select the secondary station, press on the SELECT control once.
DAB display modes
Every time you press the INFO button, the display will cycle through the following display modes:
FACTORY RESET
When you move the radio to another part of the country, your pre-tuned and stored DAB stations may no longer be
available. If this is the case then you will need to reset your radio back to its original factory settings; to perform a
factory reset, please do the following:
Note: All of your stored DAB & FM presets will be lost once the reset has taken place.
HEADPHONE JACK
A 3.5mm type headphone jack is located at the back of the radio. Connect a set of headphones (not included) to this
jack for private listening without disturbing others. The speaker is automatically disconnected when the headphones
are in use.
IMPORTANT: When using headphones always set the volume to a low level before you put the headphones on.
Then insert the headphones and gradually increase the volume to a comfortable listening level.
1. Connect the radio to AC mains (via the AC/DC adaptor), then slide the POWER ON/OFF switch to the “ON”
position to turn the radio on.
2. Press and hold the MENU button until the display shows “Press SELECT to confirm reset”.
3. Release the MENU button and press the SELECT button once, the display will first show “Restarting …” and
after the reset is completed, the radio will then automatically enter into the DAB mode and perform auto scan
function. After the scan has finished, the radio will select and display the first alphanumerically found station.
SPECIFICATION
***SPECIFICATION SUBJECT TO CHANGE WITHOUT FURTHER NOTICE.
POWER SUPPLY : AC/DC ADAPTOR INPUT: 100-240V~60/50Hz OUTPUT: 6V 0.8A
DC(BATTERY) 6V 1.5V(UM3) x 4
OUTPUT POWER : 1.0 W
FREQUENCY RANGE : DAB 174 - 240 MHz
FM 87.5 - 108 MHz
UNIT DIMENSION : 181 (L) x 45 (W) x 105 (H) mm
WEIGHT: 0.4kg
FM radio
1. To select FM, press the MODE button, the display will show FM and the frequency.
2. To activate auto search, press and hold the ▲ or ▼ button until it starts to scan up or down the frequency band,
the display will show “Searching … > .” or “Searching … < .”, and it will stop automatically once a station has
been found. (F. 6)(F. 7)
3. To activate manual search, repeatedly press the ▲ or ▼ button.
4. To select audio mode, press the SELECT button to toggle between the “Auto” or “Mono” selection.
Note: The radio will automatically switch between stereo and mono mode, but you can override this and switch this
function manually which is helpful for poor signal reception.
STORING AND R ECALLING S TORED STATIONS
In either DAB or FM mode, you can store up to 10 stations to the favourite pres ets; this will en able you to get direct
access to your favourite stations.
1. To store a preset, fir st tune to your desired statio n, then press and hold the PRESET button, the display will
show “Empty preset 1”, and the preset number will flash. (F. 8)
2. Press the ▲ or ▼ button to select your desired station preset number.
3. Press the SELECT to confirm your selection, the display will show “Preset # saved” (F. 9)
4. To recall a preset station, first press the PRESET bu tton once, then press the ▲ or ▼ button to scroll up or
down the presets that you have stored. When the display shows your desired preset number, release the
buttons. If the preset hasn't been allocated a station, the display will show “Empty preset #”.
Time and date
The time and date will be automatically updated by the broadcasted information; it is no need to set the clock
manually. In the unlikely event that no clock information is received, the display will show “<TIME/DATE>”.
Frequency
The frequency of the present station will be displayed.
Audio bit rate
The display will show the digital audio bit rate being received.
Signal strength
The display will show a slide bar to indicate the signal strength, the stronger the signal, the longer the bar will be from
left to right.
DLS
DLS stands for Dynamic Label Segment which is a scrolling message that the broadcaster may include in their
transmissions. The message usually includes information such as programme details …etc.
Programme type
This describes the style of the programme that is being broadcast. If the information is not available, the display will
show “<Programme Type>”.
Ensemble/Multiplex (Group name)
The Ensemble/Multiplex is a collection of radio stations that are bundled and transmitted together in a single
frequency. There are national and local multiplexes, local ones contain stations that are specific to that area.
Note: Press and hold the INFO button for longer than 2 seconds, the software version number will be displayed.
Ensemble/Multiplex(Group name)
Time/Date Signal strength
DLS
Audio Bit Rate
Programme Type
Frequency
F.3 F.4 F.5
F.8
F.6 F.7
F.9
NULSTILLING TIL FABRIKSINDSTILLINGER
Hvisduytterradioentilenandendelaflandet,kandetvære,atdinefasteDAB-stationerikke
længere kan modtages. Hvis det sker, vil det være nødvendigt at gendanne radioens oprindelige
standardindstillinger. Dette gøres på følgende måde:
1. Forbind radioen til lysnettet (via AC/DC-adapteren) og stil kontakten POWER ON/OFF over
på “ON” for at tænde radioen.
2. TrykogholdknappenMENU,indtildisplayetviser“PressSELECTtoconrmreset”.
3. Slip knappen MENU og tryk én gang på knappen SELECT, hvorefter displayet nu viser
“Restarting …”. Når nulstillingen er gennemført, skifter radioen automatisk til DAB og
gennemfører en automatisk kanalsøgning. Når søgningen er gennemført, stiller radioen ind
på den først fundne station i alfanumerisk rækkefølge.
Bemærk: Alle faste DAB- og FM-stationer slettes, når du gennemfører en nulstilling.
HOVEDTELEFONSTIK
Dunderet3,5mmstereostiktilhovedtelefonerpåradioensbagpanel.Tilslutetsætstereo
hovedtelefoner (medfølger ikke) til dette stik, hvis du vil kunne høre radio uden at forstyrre andre.
Lyden i højttalerne slås automatisk fra, når du slutter hovedtelefonerne til.
VIGTIGT: Når du bruger hovedtelefoner, skal du altid stille lydstyrken på et lavt niveau, inden du
tager høretelefonerne på. Slut herefter hovedtelefonerne til, og skru gradvist op for lydstyrken til et
behageligt niveau.
SPECIFIKATION
STRØMFORSYNING: AC/DC-ADAPTER
INDGANGSSPÆNDING: 100 - 240 V ~ 60/50 Hz
UDGANGSSPÆNDING: 6 V 0,8 A
DC (BATTERI) 6 V 1,5 V(UM3) x 4 1,0 W
DAB 174 - 240 MHz
UDGANGSEFFEKT: FREKVENSOMRÅDE:
FM 87,5 - 108 MHz
MÅL: 81 (L) x 45 (B) x 105 (H) mm
VÆGT: 0,4 kg
*** RET TIL ÆNDRING I SPECIFIKATIONER FORBEHOLDES.

1
DA18
FM DAB+
DE Bedienungsanleitung

2
DA18
FM DAB+
Inhalt
2 Inhalt
3 Informationen
4 Sicherheitsvorkehrungen
5 Funktionen und Bedienelemente
6 Bedienungshinweise Radio
7 DAB
8 UKW
9 Sender speichern und aufrufen
Other Scansonic Radio manuals

Scansonic
Scansonic I101 BT User manual

Scansonic
Scansonic P2500 User manual

Scansonic
Scansonic R3 User manual

Scansonic
Scansonic D100 User manual

Scansonic
Scansonic D100 User manual

Scansonic
Scansonic D100 BT User manual

Scansonic
Scansonic P3000 User manual

Scansonic
Scansonic SKY User manual

Scansonic
Scansonic DA88 User manual

Scansonic
Scansonic R3 User manual

Scansonic
Scansonic DAB200 User manual

Scansonic
Scansonic PA680 User manual

Scansonic
Scansonic P4000 User manual

Scansonic
Scansonic R2 User manual

Scansonic
Scansonic DA300 User manual

Scansonic
Scansonic R4 User manual

Scansonic
Scansonic DA500 User manual

Scansonic
Scansonic R110 User manual

Scansonic
Scansonic IN300 User manual

Scansonic
Scansonic P3000 BT User manual