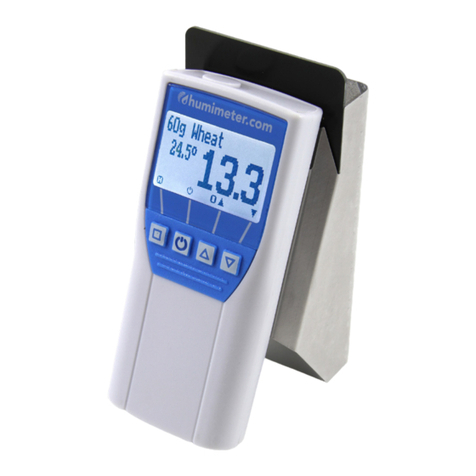
Schaller Messtechnik Humimeter AW3 User manual

Page | 1
User manual
Humimeter AW3 Meter
2019

Page | 2
Your Humimeter AW meter
at a glance
The main
unit
1
2
3
4
5
No.
Name
1
Connector
for
external
sensor
2
USB
port (optional)
3
Display
4
Keypad
5
Rubber
protectioncover

Page | 3
Rear
of the
main
unit
1
No.
Name
1
Battery
compartment

Page | 4
M
e
a
s
u
r
e
m
e
n
t
Measuring
r
ange
Resolution
A
ccur
acy
aw value
0 to
1
0.001aw
calibration:
0.00 to 0.98
see
"15.2
Technical
data"
temperature
°C
0
°C
to +50°C
0.1 °C
+/- 0.5
°C
(at25 °C)
temperature
°F
32
°F
to 122 °F
0.2 °F
+/- 0.5
°F
(at77
°F)
The
display
1
4
2
3
No.
Name
1
Sensor
type
2
Water activity (see
"7.1
Definition
product
types"
)
3
Display
symbols
4
Temperature
display

Page | 5
S
ymbol
Name
No
Change
input level
OK
Change
menu
Enter
data
Viewmeasurements
Delete
measurements
On/off button,
d
isplay
light
Save measured
value
Holdfunction
The display
symbols
S
ymbol
Name
Enter
Up
Down
Back
Enter
numbers
Enter
letters
Continue
/ go right
Left
Ye
s
Auto save
The
menus
The device has three
different
menus:
product
selection, Data Log
and
main
menu:
Sensor
selection
menu
1 2 3
No.
Name
1
Change
menu
2
Displayillumination
/
device
on/off
3
For changing
the sensor type

Page | 6
Data Log
menu
1 2 3
4
No.
Name
1
Change
menu
2
Displayillumination
/
device
on/off
3
Save measured
value
4
Show
the
last recorded
values
Main menu
The main menu comprises
the following
menu
items:
•
Edit
L
ogs:
Manual Logs,
Auto
Logs,Clear
L
ogs
•
Print
L
ogs:
Last Log,
All
Logs,Clear
L
ogs
•
Send
L
ogs:
Manual Logs,
Auto
Logs,Clear
L
ogs
•
Options:
Bluetooth, Date/Time, Log Time, Emission
ratio,
Language, Unlock, °C/°F, BL
On
Time,
Auto Off
Time, Calibrate, Materialcalib., Online Send, Password,
Reset
•
S
tatus

Page | 7
Table of contents
Your humimeter
RH2
at a glance 2
The
main unit ..........................................................................................................2
Rear
of the main unit ...............................................................................................3
The display ...........................................................................................................................
4
The display
symbols .................................................................................................5
The menus .......................................................................................................................….
6
1
Introduction 11
1.1 Information about this operatingmanual ..............................................11
1.2 Limitationof liability ..............................................................................11
1.3
Symbols used
in this manual .................................................................12
1.4
Customer service ..........................................................................................
12
2
For your safety 13
2.1
Proper
use ............................................................................................13
2.2
Improper
use ........................................................................................13
2.3
User qualifications ........................................................................................
13
2.4
General safety
information ....................................................................14
2.5 Warranty ..............................................................................................14
3
On receipt of your device 15
3.1
Taking
the
device
out of its
packaging .....................................................
15
3.2 Making
sure
that all of the
components have been
included .................15
3.2.1
Scope
of supply ....................................................................................15
3.3
Inserting
batteries .................................................................................16
4
Using the device
-
Basics 16
4.1
Switching
on the device........................................................................16
4.2
Selecting
the product type ....................................................................17
4.3
Exchanging
the
sensors .....................................................................................
17

Page | 8
4.4
Taking
a
measurement ................................................................................
17
4.5
Switching
the
device
off ........................................................................17
5
The measuring process
18
5.1
Preparing
a measurement.....................................................................18
5.2
Taking
a
measurement ................................................................................
19
5.3 Adjustment
behaviour
of the
sensor ..............................................................
21
6
Saving your readings 22
6.1 Hold function -
Freezing
the
displayed values ...............................................
22
6.1.1 Activating the Hold function in the
Options
menu .................................22
6.1.2
Using
the Hold function ........................................................................22
6.2
Saving
your
readings
manually ..............................................................23
6.2.1
Saving individual
readings.....................................................................23
6.2.2
Saving several readings (a measurement series)
at the
same
time ..........25
6.3 Auto
save
function
(time-based) ................................................................
26
6.3.1 Activatingthe Auto
save
function in the
Options
menu .........................26
6.3.2 Auto
save
function:
Saving measured
values.........................................26
6.4 Viewing
individual readings .......................................................................
27
6.5 Viewing
individual readings
from a
series
of
measurements .....................
28
6.6
Deleting
all
measured values (data
log) .................................................28
6.7
Deleting individual measurement series .....................................................
29
6.8
Deleting individual values
from a
single series
of
measurements .............
30
7
Product
types 31
7.1 Definition product
types ...............................................................................
31
7.2 Definition water activity ........................................................................32
7.3 Applicationrange .................................................................................34
8
Using the LogMemorizer program 35
8.1
Installing/opening
the program .............................................................35
8.2
Exporting measured values
to a computer .............................................35
9
Checking the device’s status 38

Page | 9
10. Configuring the device 39
10.1
Turning
on Bluetooth ............................................................................39
10.2 Adjustingthe date/time .......................................................................39
10.3
Setting
the
emission
ratio ......................................................................40
10.4
Selecting
a
language ..................................................................................
40
10.5 Activatingoptions .................................................................................41
10.6
Deactivating
options .............................................................................41
10.7
Selecting °C/°F ...............................................................................................
42
10.8
Reducing
the
device’s
power consumption ............................................42
10.8.1 Configuring the
display
illumination time ..............................................42
10.8.2 Configuring automaticswitch-off .........................................................43
10.9
Calibrating
the device ...........................................................................43
10.10 Configuring the
material calibration
function ........................................43
10.11
Online Send ..................................................................................................
43
10.12
Changing
the password........................................................................44
10.13
Resetting
the
device
to its factory settings.............................................45
11
Cleaning and maintenance 46
11.1
Changing
the batteries .........................................................................46
11.2
Care instructions ..........................................................................................
46
11.3
Cleaning
the device ..............................................................................46
12
2-point (optionally
3-point)
calibration 47
12.1
Preparing
the water
activity measuring
chamber ..................................47
12.2
Cross Verification using 0.754 Aw Standard
..........................................48
12.3
Performing
a
recalibration ........................................................................
49
12.3.1
Determination
of
calibration values ............................................................
49
12.3.2
Entering
the
calculated calibration values
into the
RH2 ...............................
51
13
Faults 53
14
Storage and disposal 54
14.1
Storing
the
device .........................................................................................
54
Page | 10
14.2
Disposing
of the
device ................................................................................
54

15
Device information 55
15.1
EC declaration
of conformity .................................................................55
15.2
Technical
data .......................................................................................56

Page | 11
1. Introduction
1.1 Informationaboutthis
operating
manual
This operating manual is designed
to
enable
youto
use
the
humimeter RH2 safely
and
effectively.
It
is
part of the
device, has
to be
stored nearby
and
must
be
easily
acces-
sible
to
users
at alltimes.
All
users are required
to
carefully read
and
make sure
that they
have understood
this
operating manual before using
the
humimeter RH2.
All of the
safety
andoperating
instructions detailed
in this
manual have
to be
observed
to
ensure
the
safety
of the
device.
1.2
Limitation
of liability
All of the information and
instructions provided
in this
operating manual have
been
compiled
on the
basis
of the
current standards
and
regulations,
the
state
of the art,
andthe
extensive expertise
and
experience
of
Schaller
GmbH.
Schaller GmbH does
not
accept any liability
for
damage associated
with the following,
which
also voids
the warranty:
•
Non-observance
of this
operating
manual
•
Improper
use
•
Inadequately qualified
users
•
Unauthorised
modifications
•
Technical
changes
•
Use
of
unapproved spare
parts
This
fast
measuring procedure can
be
affected
bya
range
of differentfactors.
We,
as
the
manufacturer,
do not
accept any liability
for
any incorrect measurements
and
associated consequential
damage.

Page | 12
1.3
S
ymbols
used
in thismanual
All of the
safety
information
provided
in this
manual is shown
with a
corr
espond
ing
symbol.
A
T
TENTION
It
is essential
to
observe
this
warning. Non-compliance can lead
to
damage
to
property
or equipment.
i Information
This symbol indicates
important informationthat
enables users
to
use
the de-
vice
more
efficiently
andcost-effectively.
1.4
Customer
service
For technical advice, please contact
our
customer servicedepartment
at:
Scigiene Corporation (Authorized Distributor)
Unit 16-18, 1295 Morningside Avenue, Toronto, M1B 4Z4, Canada
Telephone:
+1
–416-261-4865
E-Mail:
Website:
www.scigiene.com

Page | 13
2.
For
your
safety
The device complies
with the following
European
dir
ectives:
•
Restriction
of
Hazardous Substances
in
Electrical
and
Electronic
Equipment
(RoHS)
•
Electromagnetic compatibility
(EMC)
The device corresponds
to
state-of-the-art technology. However,
it
is
still
associated
with a
number
of
residual
hazards.
These hazards can
be
avoided
through strict
observance
of our
safety
information.
2.1
Proper use
•
Easy
to
use device
for
quickly measuring
the water
activity
of food
•
Easy
to
use device
for
climate
and
environmental
applications
2.2
Improper use
•
The device must
not be
used
in
A
TEX.
•
The device is
not waterproof and
must
be
protected
from water andfine dust.
2.3
User
qualifications
The device must
only be
operated
by
people
who
can
be
expected
to
reliably take
the
measurements. The device must
not be
operated
by
people whose reaction times
may
be
slowed
dueto, e.g.the
use
of
drugs, alcohol
or medication.
All
persons using
this
device must have read, understood
andfollow the instructions
provided
in the
operating
manual.

Page | 14
2.4
General safety
information
The
following
safety
information
has
to be
observed
at all
times
to
avoid damage
to
objects
and
injury
to people:
•
Remove
the
batteries
if the
device is
not
used
for a
prolonged period
of time
(4
weeks).
•
In
case
of
damages
or
loose parts
on the
device, remove
the
batteries
andcon-
tact
Schaller GmbH
or yourdealer
All of the
device’s technical features have been inspected
and
tested before
delivery.
Every device has
a
serial number.
Donot
remove
the tag with the
serial
number.
2.5 Warranty
The warranty does
not
apply
to:
•
Damage resulting
from
non-observance
of the
operating
manual
•
Damage resulting
from
third-party
interventions
•
Products
that
have been used improperly
or
modified
without authorisation
•
Products
with
missing
or
damaged warranty
seals
•
Damage resulting
from force
majeure, natural disasters,
etc.
•
Damage
from
improper
cleaning
•
Damage
dueto
leaking
batteries

Page | 15
3.
On receipt
of yourdevice
3.1
Taking
the
device
out of itspackaging
•
Take
the
device
out of itspackaging.
•
Next, make sure
that it
is
not
damaged
andthat no
parts are
missing.
3.2 Making
sure
that allof the
components have been
included
Make sure
that allof the
components have been included
by
checking
the package
contents against
the following list:
3.2.1
Scope
of supply
Three different water activity kit are offered: AW1, AW2 and AW3
Features
AW1
AW2
AW3
Humimeter RH2 (Basic Device)
Yes
Yes
Yes
Water Activity Measuring
Chamber and 2 Sample Cup
(Nalgene Jar)
Yes
Yes
Yes
Certified
Yes
Yes
Yes
Calibration Standards
NO
Yes
Yes
Thermal Barrier and Grinder
NO
NO
Yes
4 Pcs of Alkaline Batteries
Yes
Yes
Yes
Rubber Protection Cover
Yes
Yes
Yes
Plastic Case and Manual
Yes
Yes
Yes
Optional
accessories:
•
Humimeter USB data interface module –USB Flash drive with software and USB cable
included (Ask for KitB Option while ordering, software available to use with all models AW1,
AW2 and AW3)
•
Certified Calibration Standard set of 10 (0.500 or 0.800)
•
Sample Jar replacement set with twist off lid for Aw chamber (10 units)
•
Battery operated portable thermal
printer
(only possible
together with humimeter
USB
data
interface module)
-
Described
in a
separate
operating manual
•
Bluetooth module
-
Described
in a
separate operating
manual
•
Wall
holder, mounted
on
humimeter
RH2
•
Non-Contact IR temperature sensor 10:1 for RH2
•
Moisture and temperature sensor with 2 meter connection cable
•
Air humidity and temperature sensor (with no connection cable)

Page | 16
3.3
Inserting
batteries
1.
Remove
the
rubber
protection 1 2
cover. To
do
so,
hold the rubber
protection
cover
at the
upper
side
andpull it
over (figure
1 and2).In
case
of a
sensor being
connected,
disconnect
it
beforehand
and
if
your
device is provided
with an
optional
USB
port,
remove
the protection
cap
of the
USB
3
socket beforehand
too.
2.
Take
hold of the
device
with one
hand, press
yourthumb
onto the
engraved area
of the
battery compartment
(1)
anddrag
downwards (2) (figure
3).
3.
Insert
the
batteries
with
negative
and
positive
terminals 4
matching those indicated
on the
battery
compartment.
Press
down the
batteries so
that they
lay
flat on the bot
-
tom of the
housing (figure
4).
»
As soon as
all
batteries have been inserted,
the device
switches
on automatically.
5
4.
Push
the
battery cover
onto the
housing
until it
clicks
into
place (figure
5).
Then
mount the
rubber
protectioncover
onto the
housing, beginning
at the end
where
the battery
compartment is
situated.
4.
Using
the
device
- Basics
4.1
S
witching
on the device
•
Press
the button for 3
seconds.
»
The display
will then showthe
status indicator (figure
"9.
Checking
the
device’
s
status").
»
After
inserting
the
batteries,
the
device switches
on automatically.

Page | 17
4.2
Selecting
the producttype
To
do
so: The device has
to bein the product
selection
menu.
For
an
overview
of the differentproduct
types
andthe
criteria
for
selecting
them,
please refer
to "7.
Product
types".
1.
Press
the or button to
move
from one 6
productto the nextOr
2.
Press
the or button for 2
seconds
to
open
the producttype
overview (figure
6).
3.
Use
the arrow
keys
to
move
from oneproducttype
to the next
4. and
keep any
of them
pressed
to
scroll
through the types.
5.
Confirm
your
selection
by
pressing
.
»
The
producttypeyou
selected
will now be
shown
at the top of the display.
4.3
Exchanging
the sensors
•
If a
sensor is already connected, unscrew
it counterclock- 7
wise.
•
Then
plug the
desired sensor
into the
device
until both
threads make
contact.
»
Pay
attention to the
elevation
in the
connector
andits
correct positioning (figure
8).
»
Donot
use excessive
forceto plug in the
sensor,
which is 8
very easy
to operate.
•
Now tighten the thread.
4.4
Taking
ameasurement
•
For
informationon how to
take
a
measurement, see section
"5.
The measuring
process".
4.5
S
witching
the
device
off
To
do
so: The device has
to bein the product
selection
or
Data Log menu.
It
is
not pos-
sible
to
switch
off the
device
whenit
is
in the
main
menu.
•
Press
the button for 2 seconds.

Page | 18
5.
The measuring
pr
ocess
5.1 Preparing Measurement
Connect the sensor plug of the aw sensor to the basic device. Now the switched on
device shows the current temperature and activity of water value.
Fill the plastic container with material at least two thirds full (~50-60g). In
case of coarse, lumpy material the container should be filled at least half-way
so that the moisture conditioning can be guaranteed. The higher the filling,
the faster the conditioning. A too low material quantity may cause a deviation of the
measuring result.
The material to measure must not come into contact with the metal protective
grid (the red line on the picture below is the absolute maximum level)
The material must not enter the inside of the grid!!
After the filling, close the measuring chamber tightly.
The right measuring value can be read off when the displayed value does not
change any more over a longer period.
(Experience value for adjustment time: Change of aw value from 0.4 to 0.6 within 10
minutes).
With unpeeled materials such as nuts it may take longer until the sample releases
moisture in its surroundings for the measurement (see AW3).
For a rapid conditioning (see AW3), the water activity measuring chamber is
equipped with a ventilator. If the humimeter AW1 basic device is switched off, the
conditioning time is extended. In case of using the automatic datalog with a
datalog time of more than 30 seconds, the device switches off
automatically between the measurements.
The filled and closed measuring chamber must not be turned over. Otherwise
the measuring sensor positioned in the cap may be polluted by the sample
material, which leads to wrong measuring results.
Do not fill above this line

Page | 19
5.2 Taking a measurement: Steps To “Real”aw
Step 1: Insert Sample into AW Cup
Step 2: Grind / Homogenize Sample
Step 3: Close AW Cup
Step 4: Turn on to Log Readings To
Stability; typically < 5 minutes

Page | 20
A
T
TENTION
Pollution
of
t
he
sensor
with material
If the
screw-top
jar
is
filledtoo high,the
sensor can become
polluted,which
leads
to
incorrect
measurements.
►
Make sure
that the
metal protective
grid
does
not
come
into
contact
with
the
material being
measured.
A
T
TENTION
Pollution
of or damage to
t
he
sensor
By
tilting or turning
over
the filledwater
activity measuring chamber,
the
sensor
can become
pollutedor
damaged,
which
leads
to
incorrect
measurements.
►
Make sure
to onlylift the water
activity mearuing chamber straight
up into
the air.
i Information -
Measuring
accuracy
This
rapidand
non-destructive measuring procedure allows
youto
take
multi-
ple
moisture readings
of the
same sample material. When saving
the individual
readings,
the
device
will
automatically calculate
the
readings’ average
(see
"6.2.2
Saving several readings (a measurement series)
at the
same
time").
i Information -
Incorrect
readings
Always make sure
to
select
the
correct
producttypefor the
material
youare
measuring. This prevents
taking
incorrect readings (see
"13.
F
aults"
).
This manual suits for next models
1
Table of contents
Other Schaller Messtechnik Measuring Instrument manuals

Schaller Messtechnik
Schaller Messtechnik Humimeter BMA User manual

Schaller Messtechnik
Schaller Messtechnik humimeter.com PMSA User manual

Schaller Messtechnik
Schaller Messtechnik humimeter GE1 User manual

Schaller Messtechnik
Schaller Messtechnik Humimeter BM1 User manual

Schaller Messtechnik
Schaller Messtechnik humimeter FS1 User manual