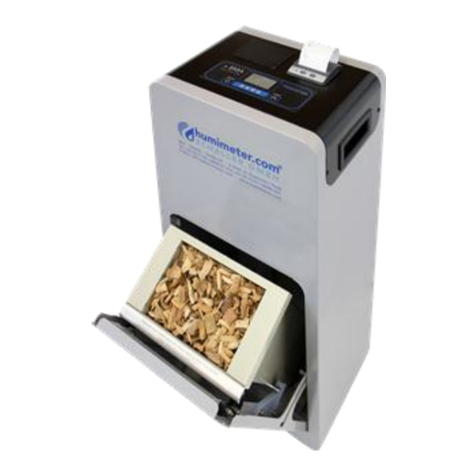
Schaller Messtechnik humimeter FS1 User manual

78,0°F | 6,16% | 456kg/m
3
| -27,3td | 0,64aw | 51,9%r.H. | 14,8%abs | 100,4g/m
2
| 09m/s | 4,90Ugl | 1
Operating Manual
Always read this operating manual before using the humimeter FS1 & FS1.1!
humimeter FS1 & FS1.1
Grain moisture meter
Moisture meter
Version 3.0

humimeter FS1 & FS1.1 Operating Manual
Page 2
Your humimeter FS1 & FS1.1 at a glance
The main unit
No. Name
1 Auxiliary plate for filling
2 Display
3 Keypad
4 Measuring chamber
2
3
1
4

Page 3
Rear of the main unit
No. Name
1 Battery compartment
1

humimeter FS1 & FS1.1 Operating Manual
Page 4
The display
No. Name
1 Product type
2 Moisture content in % ("6.2 How moisture
content is defined")
3 Display symbols
4 Temperature display
The display symbols
Symbol Name Symbol Name
Enter No
Up Change input
Level
Down OK
Back Change menu
Enter numbers On/off button, display
light
Enter letters Hold measured value
Continue / go right
Left
Yes
1
2
4
3

Page 5
The menus
The device has two different menus: product selection menu and main menu
Product selection menu
No. Name
1 Hold the measured value
(see "5.3 Hold function - Freezing the displayed values")
2 Display illumination / device on/off
3 For changing the product type
Main menu
The main menu comprises the following menu items:
• Options:
Language, Unlock, °C/°F, BL On Time, Auto Off Time, Materialcalibration, Pass-
word, Reset
• Status
21 3

humimeter FS1 & FS1.1 Operating Manual
Page 6
Table of contents
Your humimeter FS1 & FS1.1 at a glance .................................... 2
The main unit ..........................................................................................................2
Rear of the main unit ...............................................................................................3
The display ...............................................................................................................4
The display symbols .................................................................................................4
The menus ...............................................................................................................5
1. Introduction .................................................................... 9
1.1 Information about this operating manual ................................................ 9
1.2 Limitation of liability ................................................................................ 9
1.3 Symbols used in this manual .................................................................10
1.4 Customer service ..................................................................................10
2. For your safety .............................................................. 11
2.1 Proper use ............................................................................................11
2.2 Improper use ........................................................................................11
2.3 User qualications ................................................................................. 11
2.4 General safety information .................................................................... 12
2.5 Warranty .............................................................................................. 12
3. On receipt of your device ............................................ 12
3.1 Taking the device out of its packaging ...................................................12
3.2 Making sure that all of the components have been included ................. 13
3.2.1 FS1's scope of supply ............................................................................13
3.2.2 FS1.1's scope of supply .........................................................................13
3.3 Inserting batteries .................................................................................13
4. Using the device - Basics .............................................. 14
4.1 Switching the device on ........................................................................14
4.2 Automatic calibration ............................................................................ 14
4.3 Accessing the main menu .....................................................................14

Page 7
4.4 Selecting the product type ....................................................................15
4.5 Taking a measurement ..........................................................................15
4.6 Switching the device off ........................................................................ 15
5. The measuring process ................................................. 16
5.1 Preparing a measurement ..................................................................... 16
5.2 Taking a measurement ..........................................................................17
5.3 Hold function - Freezing the displayed values ........................................ 18
5.3.1 Using the Hold function ........................................................................18
6. Product types ................................................................ 18
6.1 Adaptation to other devices ..................................................................19
6.2 How moisture content is dened .......................................................... 20
7. Checking the device's status ........................................ 21
8. Conguringthedevice................................................. 22
8.1 Selecting a language ............................................................................. 22
8.2 Activating options ................................................................................. 22
8.3 Deactivating options .............................................................................23
8.4 Selecting °C/°F ......................................................................................23
8.5 Reducing the device's power consumption ............................................ 24
8.5.1 Conguring the display illumination time .............................................. 24
8.5.2 Conguring automatic switch-off ......................................................... 24
8.6 Conguring the material calibration function ........................................ 24
8.7 Changing the password ........................................................................25
8.8 Resetting the device to its factory settings ............................................. 26
9. Cleaning and maintenance .......................................... 26
9.1 Changing batteries ............................................................................... 26
9.2 Care instructions ................................................................................... 27
9.3 Cleaning the device .............................................................................. 27
10. Faults ............................................................................. 28

humimeter FS1 & FS1.1 Operating Manual
Page 8
11. Storage and disposal .................................................... 29
11.1 Storing the device .................................................................................29
11.2 Disposing of the device .........................................................................29
12. Device information ....................................................... 30
12.1 EC declaration of conformity ................................................................. 30
12.2 Technical data .......................................................................................31

Page 9
1. Introduction
1.1 Information about this operating manual
This operating manual is designed to enable you to use the humimeter FS1 & FS1.1
safely and effectively. It is part of the device, has to be stored nearby and must be eas-
ily accessible to users at all times.
All users are required to carefully read and make sure that they have understood this
operating manual before using the humimeter FS1 & FS1.1. All of the safety and oper-
ating instructions detailed in this manual have to be observed to ensure the safety of
the device.
1.2 Limitation of liability
All of the information and instructions provided in this operating manual have been
compiled on the basis of the current standards and regulations, the state of the art,
and the extensive expertise and experience of Schaller GmbH.
Schaller GmbH does not accept any liability for damage associated with the following,
which also voids the warranty:
• Non-observance of this operating manual
• Improper use
• Inadequately qualified users
• Unauthorised modifications
• Technical changes
• Use of unapproved spare parts
This fast measuring procedure can be affected by a range of different factors. For this
reason, we recommend periodically checking the device’s measurements with a stand-
ardised oven-drying method.
We, as the manufacturer, do not accept any liability for any incorrect measurements
and associated consequential damage.

humimeter FS1 & FS1.1 Operating Manual
Page 10
1.3 Symbols used in this manual
All of the safety information provided in this manual is shown with a corresponding
symbol.
ATTENTION
It is essential to observe this warning. Non-compliance can lead to damage to
property or equipment.
iInformation
This symbol indicates important information that enables users to use the de-
vice more efficiently and cost-effectively.
1.4 Customer service
For technical advice, please contact our customer service department at
Schaller GmbH
Max-Schaller-Straße 99
A - 8181 St.Ruprecht an der Raab
Telephone: +43 (0)3178 28899
Fax: +43 (0)3178 28899 - 901
E-mail: info@humimeter.com
Internet: www.humimeter.com
© Schaller GmbH 2018

Page 11
2. For your safety
The device complies with the following European directives:
• Restriction of Hazardous Substances in Electrical and Electronic Equipment
(RoHS)
• Electromagnetic compatibility (EMC)
The device corresponds to state-of-the-art technology. However, it is still associated
with a number of residual hazards.
These hazards can be avoided through strict observance of our safety information.
2.1 Proper use
• Easy to use device for quickly measuring the moisture content of grain.
• The device must only be used for taking measurements on the products defined
in the following sections of this manual (see "6. Product types").
2.2 Improper use
• The device is not suitable for measuring mouldy material.
• The device is not waterproof and must be protected from water and fine dust.
2.3 User qualifications
The device must only be operated by people who can be expected to reliably take the
measurements. The device must not be operated by people whose reaction times may
be slowed due to, e.g. the use of drugs, alcohol or medication.
All persons using this device must have read, understood and follow the instructions
provided in the operating manual.

humimeter FS1 & FS1.1 Operating Manual
Page 12
2.4 General safety information
The following safety information has to be observed at all times to avoid damage to
objects and injury to people:
• Remove the batteries if the device isn't used for a prolonged period of time
(4 weeks).
• In case of damages or loose parts on the device, remove the batteries and con-
tact Schaller GmbH or your dealer.
All of the device’s technical features have been inspected and tested before delivery.
Every device has a serial number. Do not remove the tag with the serial number.
2.5 Warranty
The warranty does not apply to:
• Damage resulting from non-observance of the operating manual
• Damage resulting from third-party interventions
• Products that have been used improperly or modified without authorisation
• Products with missing or damaged warranty seals
• Damage resulting from force majeure, natural disasters, etc.
• Damage from improper cleaning
• Batteries older than six months
3. On receipt of your device
3.1 Taking the device out of its packaging
• Take the device out of its packaging.
• Next, make sure that it is not damaged and that no parts are missing.

Page 13
3.2 Making sure that all of the components have been included
Make sure that all of the components have been included by checking the package
contents against the following list:
3.2.1 FS1's scope of supply
• humimeter FS1
• 4 pieces of AA Alkaline batteries
• Digital scale 150 grams
• Measuring cup 0.25 liter
• Plastic case
• Operating manual
3.2.2 FS1.1's scope of supply
• humimeter FS1.1
• 4 pieces of AA Alkaline batteries
• Digital scale 150 grams
• Measuring cup 0.25 liter
• Operating manual
3.3 Inserting batteries
1. Take hold of the device with one hand, press your thumb
onto the engraved area of the battery compartment (1)
and drag downwards(2) (figure 1).
2. Insert the batteries with negative and positive terminals
matching those indicated on the battery compartment.
Press down the batteries so that they lay flat on the bot-
tom of the housing (figure 2).
»As soon as all batteries have been inserted, the device
switches on automatically.
3. Push the battery cover onto the housing until it clicks into
place (figure 3).
1
2
3

humimeter FS1 & FS1.1 Operating Manual
Page 14
4. Using the device - Basics
4.1 Switching the device on
• Press the button for 3 seconds.
»The display will then show the status indicator
(figure4).
»After inserting the batteries, the device switches on
automatically.
4.2 Automatic calibration
»The display will show the message Adjust?
(figure 5).
1. Make sure that the measuring chamber of the de-
vice is empty and place the device on a level table.
2. Confirm by pressing .
»The display will now appear as shown in figure 6.
»The bar will run upwards. During this period, the
device must remain on the table without external
influence,
»which only takes a couple of seconds to complete.
»Once completed, the device will show the measuring window (see "Product
selection menu" page 5).
4.3 Accessing the main menu
To do so: The devices is switched off.
• Switch on the device (see "4.1 Switching the device on").
• While switching on, keep both the and buttons pressed.
• The display will then show the main menu.
4
5
6

Page 15
4.4 Selecting the product type
To do so: The device has to be in the product selection menu (figure ).
For an overview of the different product types and the criteria for selecting them,
please refer to "6. Product types".
1. Press the or button to move from one
product type to the next Or
1. Press the or button for 3 seconds to open
the product type overview (figure 8).
2. Use the arrow keys to move from one product type
to the next
3. and keep any of them pressed to scroll through the
types.
4. Confirm your selection by pressing .
»The product type you selected will now be shown at the top of the display.
4.5 Taking a measurement
• For information on how to take a measurement, see section "5. The measuring
process".
4.6 Switching the device off
To do so: The device has to be in the product selection menu. It is not possible to
switch off the device when it is in the main menu.
• Press the button for 3 seconds.
7
8

humimeter FS1 & FS1.1 Operating Manual
Page 16
5. The measuring process
5.1 Preparing a measurement
To do so: The device has to have nearly the same temperature than the product being
measured. It is recommended to let your humimeter device adjust to the surrounding
temperature of the material being measured for at least 30 minutes.
1. Place the empty and clean measuring cup (0.25 liter)
on the switched-off scale (figure 9). Then switch on the
scale.
»The scale must display 0.0 g with the empty measuring
cup on it. The measuring cup must not be weighed.
2. Check whether the measuring chamber of the device is
empty. When the device is switched on, there must not
be any material in it.
»Empty the instrument and clean the measur-
ing chamber if necessary (see "9.3 Cleaning the
device").
3. Switch on the device (see "4.1 Switching the device
on").
4. Perform the automatic calibration (see "4.2 Auto-
matic calibration").
5. Select the required product type (see "6. Product
types") by pressing the or button (see "4.4
Selecting the product type").
9
10
11

Page 17
5.2 Taking a measurement
To do so: The device has to have nearly the same temperature
than the product being measured.
1. Fill the measuring cup with the filling quantity displayed
in the product type name (+/- 1.0 g) (figure 12)
(see "6. Product types").
2. Now slowly and evenly fill the measuring chamber of
the device with the material being measured (figure 13).
»For the filling, no funnel or similar device may be used.
3. The device will now display the moisture content
(figure 14).
»The displayed value flashes when the moisture
content exceeds the measuring range of the se-
lected product type (figure 15). A flashing value
signals a decreasing accuracy of the measure-
ment. The measuring range is dependent on the
product type (see "6. Product types").
»Once the reading has been taken, the measuring
values can be frozen on the display (see "5.3 Hold
function - Freezing the displayed values").
4. Empty the device and make sure that there are no
residues in the measuring chamber.
»Clean the measuring chamber if necessary (see "9.3
Cleaning the device").
iInformation - Measuring accuracy
Benefit from this rapid and non-destructive measuring procedure and take
several moisture readings of the same sample material.
iInformation - Incorrect readings
Always make sure to select the correct product type and the correct filling
quantity for the material you are measuring. This prevents taking incorrect read-
ings (see "10. Faults").
12
13
14
15

humimeter FS1 & FS1.1 Operating Manual
Page 18
5.3 Hold function - Freezing the displayed values
The device is configured in such a way that the information being shown on the
display will freeze at the touch of a button until a new button is pressed. This function
can be used if the measured value should remain on the display.
5.3.1 Using the Hold function
To do so: The device has to be switched on and be in the product selection menu.
• Press .
»The current reading will be frozen. All of the four
symbols will now be displayed as (figure 16).
• To reactivate the frozen display, simply press any
button.
6. Product types
50g Corn
8 % - 30 %
60g Rye
8 % - 23 %
60g Triticale
8 % - 23 %
60g Wheat
8 % - 23 %
50g Barley
8 % - 23 %
30g Oats
8 % - 23 %
55g Rape
4 % - 15 %
60g Soybeans
6 % - 18 %
16

Page 19
60g Horse Beans
8 % - 18 %
35g Sunflower
5 % - 18 %
65g Rice peeled
8 % - 18 %
40g Rice unpeeled
5 % - 22 %
50g Buckwheat
8 % - 18 %
60g Mustard Seeds
5 % - 18 %
60g Sorghum Millet
8 % - 18 %
30g Coffee roasted
1 % - 10 %
50g Raw Coffee
peeled
5 % - 18 %
Reference
! Only for testing the
moisture meter !
6.1 Adaptation to other devices
The measured value can be adjusted to other devices by changing the filling quantity.
By increasing the filling quantity, the device shows a higher measuring value, by de-
creasing the filling quantity, the device shows a lower measuring value.
.

humimeter FS1 & FS1.1 Operating Manual
Page 20
product type filling
quantity change in
weight
filling quantity
display + 1 %
50g Corn 50 g + 2.4 g 52.4 g
60g Rye 60 g + 3.2 g 63.2 g
60g Triticale 60 g + 2.8 g 62.8 g
60g Wheat 60 g + 3.3 g 63.3 g
50g Barley 50 g + 3.3 g 53.3 g
30g Oats 30 g + 5.0 g 40.0 g
55g Rape 55 g + 3.9 g 58.9 g
60g Soybeans 60 g + 4.0 g 64.0 g
60g Horse Beans 60 g + 3.8 g 63.8 g
35g Sunflower 35 g + 4.7 g 39.7 g
65g Rice peeled 65 g + 4.5 g 69.5 g
40g Rice unpeeled 40 g + 2.8 g 42.8 g
50g Buckwheat 50 g + 3.3 g 53.3 g
60g Mustard Seeds 60 g + 3.7 g 63.7 g
60g Sorghum Millet 60 g + 3.2 g 63.2 g
Example: Increasing the filling quantity of wheat by 3 grams (filling weight of 63 g
wheat), the measuring value is 1% higher. That way the filling quantity can be modi-
fied to the extent that the displayed value corresponds to an other measuring device.
6.2 How moisture content is defined
The device measures and shows a material’s moisture content. The moisture content
readings it displays are calculated in relation to the material’s overall mass:
Mn: Mass of the sample with average moisture content
Mt: Mass of the sample with zero moisture content
%WG: Moisture content (in accordance with the corresponding product norms)
This manual suits for next models
1
Table of contents
Other Schaller Messtechnik Measuring Instrument manuals

Schaller Messtechnik
Schaller Messtechnik Humimeter BM1 User manual

Schaller Messtechnik
Schaller Messtechnik humimeter.com PMSA User manual

Schaller Messtechnik
Schaller Messtechnik humimeter GE1 User manual

Schaller Messtechnik
Schaller Messtechnik Humimeter BMA User manual

Schaller Messtechnik
Schaller Messtechnik Humimeter AW3 User manual