Schlage keypad entry with built-in alarm User manual

USER’S GUIDE
Keypad Entry with
Built-in Alarm
Para el idioma español,
consulte la página 13.
Pour la version française,
consultez la page 25.

2
LOCK PARTS
Keypad
•Located on the outside of the door.
•Used to enter codes for programming and unlocking.
Lever
•The inside lever can be rotated at any time to retract the latch.
•The outside lever can be rotated at any time, but will only retract
the latch when the lock is unlocked.
Cylinder
•Located on the outside of the lock.
•Used only in emergency situations to unlock the lock. See
Emergency Key Override on page 5.
Inside Schlage Button
•Located on the inside of the door.
•Has three distinct lights and used to set and program the alarm.
See Alarm Operation on page 6.
Alarm
•Sounds alerts based on the chosen settings. See Alarm
Operation on page 6.
CONTENTS
Lock Parts .......................................................................2
Security You Hear Instantly .............................................3
Using the Keypad ............................................................4
User Codes and Keypad Programming........................4
Locking and Unlocking ..............................................4
Emergency Key Override ............................................5
Terms You Should Know .............................................5
Restore Keypad Factory Settings ................................5
Alarm Operation ..............................................................6
Choosing the Alert Setting .........................................6
Powering On the Alarm ..............................................7
Powering Off the Alarm .............................................7
Programming the Alert Setting...................................7
Sensitivity Level .........................................................7
Replacing the Keypad Batteries .......................................8
Troubleshooting ..............................................................8
Replacing the Alarm Batteries .........................................9
My Codes ......................................................................10
Cylinder
Keypad
Lever
Inside
Schlage
Button
Alarm
DOOR EXTERIOR
DOOR INTERIOR
Latch

3
SECURITY YOU HEAR INSTANTLY
When you choose Schlage, you choose a product backed
by nearly a century of total dedication to security, quality
and innovation. And, today, products like the Keypad
Entry with Built-in Alarm offer you another key advantage:
convenience and control. The Keypad Entry with Built-in
Alarm combines proven Schlage security with the added
safeguard of a sensor alarm. Specically engineered to
detect vibration and motion, it sounds an alarm—based
on the alert setting you choose—to alert you to activity
at the door on rst contact with the door or handle. Best
of all, the alarm is easily adjusted as your needs change—
either day to day or over the years.
Security
•Tested and rated to meet ANSI lock security and
durability standards
•Only audible residential alarm lock to alert you to
activity upon rst contact at lock handle—not just
when door is opened
Quality
•Rugged, all-metal construction
•Lifetime limited warranty on mechanical components
and nish
•One-year electronics warranty
Convenience
•Easy to use—press the Inside Schlage Button to
program the alarm
•Various mode and sensitivity level options to meet
different needs
•Installed with just a screwdriver in minutes
•Uses two AAA and one 9-volt batteries (included)—
3-year battery life with low battery indicator
»DID YOU KNOW? Schlage is the most
preferred residential door lock brand by
consumers* and most used by builders.**
* Nooro Research Report, independent research funded by
Ingersoll Rand Co., 2011.
** Builder Magazine, April 2011
The Keypad Entry with Built-in Alarm was designed
with you in mind. It provides a more sophisticated
security option to the standard lockset—but without
the complexity that often accompanies electronic alarm
systems.
IMPORTANT!
If you have questions about installation or programming,
don’t return the Keypad Entry with Built-in Alarm to the
store, contact Schlage Customer Service.
This owner’s guide provides easy step-by-step
instructions. If you have other questions, we’re simply a
call—or a live chat—away.
Toll-Free Calling From:
U.S.A.: (888) 805-9837
Canada: (800) 997-4734
Mexico: 018005067866
Live Chat: schlage.com
Visit our web site for videos, FAQs and more.
keypad.schlage.com
alarm.schlage.com
Register Your Product
Document your purchase and register your
warranty at RegisterMySchlage.com.

4
User Codes and Keypad Programming
The Keypad Locks Programming Guide (see separate
document included in this package) contains the following
information:
•Factory Preset Programming Code
•Factory Preset User Codes
•Instructions for adding and deleting User Codes and
changing the Programming Code
Locking and Unlocking
•The lock is always locked from the outside. It is not
necessary to lock the lock from the inside; if the door is
shut then the lock is locked and secure.
•To temporarily unlock the door from the outside, enter
a User Code. There is no way to leave the lock
permanently unlocked.
•The lock is always unlocked from the inside. To open the
door from the inside, simply turn the lever and exit.
Temporary Unlocking Using the Keypad
1. Enter a User Code into the
keypad. The lock comes
with two factory preset User
Codes. See the Keypad Locks
Programming Guide.
2. Watch the Schlage button. If it
lights green, a valid code was
entered and the lock is temporarily
unlocked. If it lights red, then an
invalid code was entered.
3. Rotate the lever to open the
door. Door will automatically re-
lock after a few seconds..
Find the yellow Programming Sticker on the
Keypad Locks Programming Guide
Programming Code XXXXXX
User Code A xxxx
User Code B xxxx S/N x-xxxxxxxx
Model xxxxx
»It is recommended that you change your User
Codes on a periodic basis so buttons wear evenly.
»If lighting is low, press the Schlage button to
illuminate the keypad before beginning.
»To program User Codes and the Programming
Code, see the Keypad Locks Programming Guide.
USING THE KEYPAD

5
Emergency Key Override
Emergency Key Override can be used when the battery is completely dead, or when no valid User Code is known.
1. Insert key. 2. Rotate key 270° to unlock.
3. Rotate knob/lever to open
door.*
* Rotate the key back to starting position to relock. The key cannot be removed from the cylinder while the lock is unlocked. See Replacing
the Keypad Batteries on page 8.
Terms You Should Know
User Code
Any combination of four (4) digits entered into the keypad to unlock the lock. These four digits must be different
from the rst four digits of the Programming Code. Two User Codes are programmed into the lock by default. These
two codes can be found on the yellow stickers, one on the back of the keypad assembly and one on the Keypad
Locks Programming Guide.
Programming Code
Any combination of six (6) digits entered into the keypad to put the lock in programming mode. The rst four digits
must be different from all of the User Codes currently in the lock. One Programming Code is programmed into the
lock by default. This code can be found on the yellow stickers, one on the back of the keypad assembly and one on
the Keypad Locks Programming Guide.
Vacation Mode
When enabled, no User Codes will unlock the lock. This feature prevents unauthorized access attempts when the
property is unattended for a long period of time. See the Keypad Locks Programming Guide for more information.
Restore Keypad Factory Settings
WARNING
Locate the default programming and User Codes on the front of the Keypad Locks Programming Guide or the back of
the keypad before beginning! Default programming and User Codes will be restored. All existing User Codes and current
Programming Code will be erased. CUSTOMER SERVICE CANNOT RETRIEVE LOST DEFAULT CODES! DO NOT
RESTORE FACTORY SETTINGS UNLESS YOU CAN LOCATE THE DEFAULT CODES.
1. Disconnect the battery. See Replacing the Keypad Batteries on page 8.
2. Press and release .
3. Reconnect the battery and wait until is no longer lit (about one second).
4. Within 10 seconds, press and hold until lights green and the lock beeps.

6
Choosing the Alert Setting
Activity Alert
Your little one is now able to reach door handles and loves to explore…you’re caring
for an elderly parent or a child with special needs…or maybe you simply feel more
secure knowing every time there’s activity at your door. Whatever your reason or
season of life, the Activity Alert setting is perfect for monitoring doors while you’re
at home.
•Alarm beeps twice every time a door opens or closes
•Middle LED light ashes
•Sound: Two short beeps
Tamper Alert
If you’re home alone during the day or evening, or want to monitor a secondary entry
door, the Tamper Alert is the ideal setting. As the most sensitive alert setting, the
Tamper Alert senses even subtle activity at the handle lock – not just when the door
opens – notifying you immediately of any tampering.
•Alarm sounds for about 15 seconds when the door
knob/lever is disturbed
•Left and right LED lights ash alternately
•Built-in 60-second delay before device alarms
to allow you to exit and lock the door
•Sound: Longer alarm sound (90 dB = the sound of
your smoke alarm)
Forced Entry Alert
Daily opening and closing of doors may no longer be a worry for you… but you may
be concerned about protecting against break-ins. The Forced Entry Alert is perfect for
nighttime or when you’re away from home.
•Three-minute alarm sounds when signicant force
pushes against the door—like when someone tries
to kick it in
•Acts as an effective deterrent by instantly alerting
you – and others nearby – at rst impact against
your door
•Least sensitive mode – many choose to program this
alert setting all the time
•All lights on the LED track ash
•Sound: Shrill, steady siren (90 dB=the sound of your smoke alarm)
»When the alarm is
triggered, there is a built-in
3 second delay for it to reset.
»If the alarm sounds,
you can silence it early
by pressing down on the
Schlage button until the
alarm sound stops.
»If the alarm sounds,
you can silence it early
by pressing down on the
Schlage button until the
alarm sound stops.
ALARM OPERATION

7
Powering On the Alarm
1. Press the inside Schlage button for 5 seconds, until any light ashes around the Schlage button.
2. Release the inside Schlage button. The alarm is now turned on.
»Not sure your alarm is activated? Simply press the Schlage button and it will
beep and light up to conrm it is activated. If it does not, conrm new batteries
are installed properly. See Replacing the Alarm Batteries on page 9.
Powering Off the Alarm
1. Press and hold the inside Schlage button until second LED ash.
2. Release the inside Schlage button. The alarm is now turned off.
Programming the Alert Setting
The alarm comes pre-set to the Forced Entry setting and is
ready to use. If you want to change it from Forced Entry to
another alert setting, follow these simple steps:
1. Press the inside Schlage button for 2 seconds, until it
ashes.
2. Release the button. The alarm will beep. Immediately
continue to press and release the inside Schlage button
to cycle through the three alert settings. Stop pressing
the button when the setting light that matches your
desired alert setting is lit.
Sensitivity Level
The sensitivity level indicates the level of touch or activity needed to set off the alarm.
There are ve levels of sensitivity, with one (1) being the most sensitive and ve (5)
being the least sensitive. The lock comes pre-set to level 3.
1. Press and hold the Inside Schlage Button until the third LED ash. This will take
about 10 seconds.
2. Tab the Inside Schlage Button to cycle through the ve sensitivity levels. Stop
tabbing to select the sensitivity level you prefer.
Level/Beeps
1
2
3
4
5
LOW • • • • • • • Sensitivity • • • • • • • HIGH
»If you want to check which alert setting the alarm
is currently activated to, press and release the Schlage
button once. The alarm will light up on the left, middle or
right of the LED track to indicate the alert setting.
Activity Alert Tamper Alert Forced Entry
Alert
»As you cycle through the
ve levels, the alarm will
beep the same number of
times as each setting level.
ALARM OPERATION

8
REPLACING THE KEYPAD BATTERIES
1. Remove the lock from the door. 2. Open the battery compartment and
replace the 9V battery.
3. Replace the lock
on the door.
PROBLEM SOUNDS* LIGHTS SOLUTION
INSIDE
Alarm sounds too frequently
or false alarm
Alarm — Sensitivity level is too high (at 1 or 2) and should
be adjusted to a less sensitive level (3, 4 or 5). See
Sensitivity Level on page 7.
Outside lights on inside
Schlage button are blinking
— Left and
Right
Batteries are low and should be replaced. See Replacing
the Alarm Batteries on page 9.
The tamper alert is not
sounding.
— — There is a 60-second delay before device alarms to allow
you to exit and lock the door.
OUTSIDE (KEYPAD)
I forgot my Programming Code. Check front of Keypad Locks Programming Guide or back
of keypad assembly for default Programming Code.
If needed, restore lock to factory settings. Terms You
Should Know on page 5
I need to delete a User Code that I don’t remember. Delete all User Codes. Then add all needed User Codes
back into the lock. See the Keypad Locks Programming
Guide.
User code does not unlock
lock.
2Red User Code entered is not a valid User Code.
1 High,
1 Low
Green
then Red
Vacation Mode is enabled. See the Keypad Locks
Programming Guide to disable Vacation Mode.
does not light when numbers are pressed. Too many incorrect User Codes have been entered. Wait
30 seconds and try again.
If keypad does not respond after 30 seconds, then replace
battery. Replacing the Keypad Batteries on page 8.
TROUBLESHOOTING

9
1. Remove the lock from the door. 2. Replace the AAA batteries in the lever. 3. Replace the lock
on the door.
TROUBLESHOOTING
PROBLEM SOUNDS* LIGHTS SOLUTION
There is a delay before unlock
after a valid User Code is
entered.
High/Low,
then 1
Red then
Green
Battery is low and should be replaced. See Replacing the
Keypad Batteries on page 8.
blinking red but no
codes have been entered.
— Quick Red
Blinking
Battery is dead and MUST be replaced. See Replacing the
Keypad Batteries on page 8.
Cannot add a new User Code. High/Low Red 19 User Codes already exist. Delete a User Code before
adding a new one. See the Keypad Locks Programming
Guide.
2Red Second User Code entered did not match rst User Code
entered.
The User Code matches the rst four digits of the existing
Programming Code.
Cannot delete a User Code. 2 Red Second User Code entered did not match rst User Code
entered.
Cannot change Programming
Code.
2Red Second Programming Code entered did not match rst
Programming Code entered.
First four digits of new Programming Code match an
existing User Code.
Cannot delete all User Codes. 2 Red Programming code entered second time is incorrect.
Lock will not stay in
programming mode.
2Red Any key other than was pressed immediately after
programming mode was entered.
An incorrect entry was made during the programming
process. See the Keypad Locks Programming Guide.
* Beeps sound on keypad only when beeper is enabled.
REPLACING THE ALARM BATTERIES

10
MY CODES
Use these tables to record programming and User Codes that you program into the lock. For programming instructions
and default codes, see the Keypad Locks Programming Guide.
Programming Code
Any combination of six (6) digits entered into the keypad to put the lock
in programming mode. The rst four digits must be different from all of the
User Codes currently in the lock. One Programming Code is programmed
into the lock by default. This code can be found on the yellow stickers,
one on the back of the keypad assembly and one on the Keypad Locks
Programming Guide.
Date Programming Code
User Codes
Any combination of four (4) digits entered into the keypad to unlock the
lock. These four digits must be different from the rst four digits of the
Programming Code. Two User Codes are programmed into the lock by
default. These two codes can be found on the yellow stickers, one on the
back of the keypad assembly and one on the Keypad Locks Programming
Guide.
»Use a pencil to enter the codes in
the boxes so you can easily change
them later.
»Up to 19 User Codes can be stored
in the lock at one time. Consider
changing your User Codes on a
periodic basis so buttons wear evenly.
To learn more about this
product, scan the code with
your smartphone.
Download the app at
scanlife.com.

11
MY CODES
User Name User Code
Example: John Smith 1 2 3 4
1.
2.
3.
4.
5.
6.
7.
8.
9.
10.
11.
12.
13.
14.
15.
16.
17.
18.
19.

Ingersoll Rand Residential Solutions, a business comprised of well-
known brands like Schlage® and Trane®, delivers safety, comfort and
efciency to homeowners throughout North America. Our quality
products, services and solutions include mechanical and electronic
locks, heating and air conditioning systems, indoor air quality
solutions, advanced controls, portable security systems and remote
home management.
800-847-1864 www.ingersollrand.com
www.schlage.com
www.trane.com
If you have questions about any part of
installation or programming, don’t return the
Keypad Entry with Built-in Alarm to the store.
Our Schlage Customer Service representatives
are ready to help.
Toll-Free: 1.888.805.9837
Live Chat: schlage.com

13
GUÍA DE USUARIO
Entrada por
Teclado con Alarma
Incorporada

14
PIEZAS DE LA CERRADURA
Teclado
•Ubicado en la parte externa de la puerta.
•Se utiliza para introducir códigos de programación y desbloqueo.
Manija
•La manija interior puede girarse en cualquier momento para hacer
que el pestillo se retraiga.
•La manija exterior puede girarse en cualquier momento, pero
solamente hará que el pestillo se retraiga cuando la cerradura esté
desbloqueada.
Cilindro
•Ubicado en la parte externa de la cerradura.
•Se utiliza solamente en situaciones de emergencia para
desbloquear la cerradura. Consulte Anulación con llave de
emergencia en la página 17.
Botón Schlage interior
•Ubicado en la parte interna de la puerta.
•Tiene tres luces distintas y se utiliza para congurar y programar la
alarma. Consulte Funcionamiento de la alarma en la página 18.
Alarma
•Las alertas suenan de acuerdo con la conguración elegida.
Consulte Funcionamiento de la alarma en la página 18.
CONTENIDO
Piezas de la cerradura ....................................................14
Seguridad que se oye al instante ...................................15
Uso del teclado .............................................................16
Códigos de usuario y programación del teclado .......16
Bloqueo y desbloqueo..............................................16
Anulación con llave de emergencia ..........................17
Términos que debe conocer .....................................17
Restablecimiento de la conguración de fábrica del
teclado .....................................................................17
Funcionamiento de la alarma.........................................18
Selección del ajuste de alerta ...................................18
Encendido de la alarma ............................................19
Apagado de la alarma ...............................................19
Programación del ajuste de alerta ............................19
Nivel de sensibilidad ................................................19
Remplazo de las baterías del teclado .............................20
Troubleshooting ............................................................20
Remplazo de las baterías de la alarma ...........................21
Mis códigos ...................................................................22
Cilindro
Teclado
Manija
Botón
Schlage
interior
Alarma
EXTERIOR DE LA
PUERTA
INTERIOR DE LA
PUERTA
Pestillo

15
SEGURIDAD QUE SE OYE AL INSTANTE
Cuando elige Schlage, elige un producto respaldado por
casi un siglo de dedicación completa a la seguridad, la
calidad y la innovación. Y hoy, los productos como la
Entrada por Teclado con Alarma Incorporada le ofrecen
otras ventajas clave: comodidad y control. La Entrada por
Teclado con Alarma Incorporada combina la seguridad
comprobada de Schlage con la protección adicional
de una alarma de sensor. Especialmente diseñada para
detectar vibraciones y movimiento, hace sonar una alarma
de acuerdo con el ajuste de alerta que usted elija, para
advertirlo sobre cualquier actividad en la puerta al primer
contacto con la puerta o la manija. Lo mejor de todo es
que la alarma se puede ajustar fácilmente según cambien
sus necesidades, de un día a otro o con los años.
Seguridad
•Probada y clasicada para cumplir con las normas
ANSI de durabilidad y seguridad para cerraduras
•Única cerradura para el hogar con alarma audible
que le advierte sobre cualquier actividad al primer
contacto con la manija de la cerradura, no solo
cuando se abre la puerta
Calidad
•Construcción completamente metálica, resistente
•Garantía limitada de por vida sobre los componentes
mecánicos y el acabado
•Garantía de un año para los componentes
electrónicos
Comodidad
•Fácil de usar; presione el botón Schlage interior para
programar la alarma
•Diferentes modos y opciones de nivel de sensibilidad
para satisfacer diferentes necesidades
•Se instala en pocos minutos con apenas un
destornillador
•Utiliza dos baterías AAA y una de 9 voltios
(incluidas), 3 años de vida útil e indicador de batería
baja
»¿SABÍA QUE...? Schlage es la marca
de cerraduras para el hogar más elegida
por los clientes* y la más usada por los
constructores**.
* Informe de Nooro Research basado en una investigación
independiente nanciada por Ingersoll Rand Co., 2011.
** Builder Magazine, abril de 2011
La Entrada por Teclado con Alarma Incorporada
se diseñó pensando en usted. Ofrece una opción de
seguridad más sosticada que el mecanismo de cerradura
estándar, pero sin la complejidad que a menudo tienen los
sistemas de alarma electrónica.
¡IMPORTANTE!
Si tiene dudas sobre alguna parte de la instalación o la
programación, no devuelva la Entrada por Teclado con
Alarma Incorporada a la tienda; comuníquese con el
Departamento de servicio a clientes de Schlage.
Esta guía de propietario proporciona instrucciones
sencillas paso a paso. Si tiene alguna duda, estamos a tan
solo una llamada, o a un chat en vivo, de distancia.
Línea gratuita de
llamada en:
EE. UU.: (888) 805-9837
Canadá: (800) 997-4734
México: 018005067866
Chat en vivo: schlage.com
Visite nuestro sitio web para ver los videos, las preguntas
frecuentes y más.
keypad.schlage.com
alarm.schlage.com
Registre el producto
Informe de la compra y registre la garantía
en RegisterMySchlage.com.

16
USO DEL TECLADO
Códigos de usuario y programación del teclado
La Guía de programación de las cerraduras con teclado
(consulte el documento separado incluido en este paquete)
contiene la información siguiente:
•Código de programación predeterminado de fábrica
•Códigos de usuario predeterminados de fábrica
•Instrucciones para agregar o eliminar los códigos de usuario y
cambiar el código de programación
Bloqueo y desbloqueo
•La cerradura siempre se bloquea desde afuera. No es necesario bloquear la cerradura desde adentro; si la puerta se
cierra, la cerradura queda bloqueada y segura.
•Para desbloquear temporalmente la puerta desde afuera, ingrese un código de usuario. No hay manera de que la
cerradura quede permanentemente desbloqueada.
•La cerradura siempre queda desbloqueada desde adentro. Para abrir la puerta desde adentro, simplemente gire la
manija y salga.
Desbloqueo temporal con el uso del teclado
1. Ingrese un código de usuario
en el teclado. La cerradura
viene con dos códigos de
usuario predeterminados de la
fábrica. Consulte la Guía de
programación de cerraduras
con teclado.
2. Preste atención al botón Schlage.
Si se ilumina de verde, se ingresó
un código válido, y la cerradura
se desbloquea temporalmente.
Si se ilumina de rojo, el código
ingresado no es válido.
3. Gire la manija para abrir la
puerta. La puerta se vuelve
a bloquear automáticamente
después de unos segundos.
Busque el adhesivo de programación
amarillo en la Guía de programación de
cerraduras con teclado
Programming Code XXXXXX
User Code A xxxx
User Code B xxxx S/N x-xxxxxxxx
Model xxxxx

17
Anulación con llave de emergencia
La anulación con llave de emergencia se puede utilizar en caso de que la batería esté totalmente agotada o si no se
conoce ningún código de usuario válido.
1. Introduzca la llave. 2. Gire la llave 270° para
desbloquear.
3. Gire el pomo/manija para abrir
la puerta.*
* Vuelva a girar la llave hacia la posición inicial para volver a bloquear. No se puede retirar la llave del cilindro si la cerradura está
desbloqueada. Consulte Remplazo de las baterías del teclado en la página 20.
Términos que debe conocer
Código de usuario
Cualquier combinación de cuatro (4) dígitos ingresada en el teclado para desbloquear la cerradura. Estos cuatro dígitos
deben ser diferentes a los primeros cuatro dígitos del código de programación. En la cerradura vienen programados
dos códigos de usuario predeterminados. Estos dos códigos pueden encontrarse en los adhesivos amarillos, uno
ubicado detrás del conjunto del teclado y otro en la Guía de programación de cerraduras con teclado.
Código de programación
Cualquier combinación de seis (6) dígitos ingresada en el teclado para poner la cerradura en modo de programación.
Los primeros cuatro dígitos deben ser diferentes de todos los códigos de usuario que hay actualmente en la cerradura.
En la cerradura viene programado un código de programación predeterminado. Estos dos códigos pueden encontrarse
en los adhesivos amarillos, uno ubicado detrás del conjunto del teclado y otro en la Guía de programación de
cerraduras con teclado.
Modo de vacaciones
Cuando se activa, ningún código de usuario desbloquea la cerradura. Esta función previene los intentos de ingreso sin
autorización cuando la propiedad permanece vacía durante un largo período de tiempo. Para obtener más información,
consulte la Guía de programación de cerraduras con teclado.
Restablecimiento de la conguración de fábrica del teclado
ADVERTENCIA
¡Antes de comenzar, busque los códigos de programación y de usuario predeterminados en el frente de la Guía
de programación de cerraduras con teclado o detrás del teclado! Los códigos de programación y de usuario
predeterminados se restablecen. Se eliminan todos los códigos de usuario existentes y el código de programación actual.
¡EL SERVICIO DE ATENCIÓN AL CLIENTE NO PUEDE RECUPERAR LOS CÓDIGOS PREDETERMINADOS
PERDIDOS! DO NOT RESTORE NO RESTABLEZCA LA CONFIGURACIÓN DE FÁBRICA A MENOS QUE
ENCUENTRE LOS CÓDIGOS PREDETERMINADOS.
1. Desconecte la batería. Consulte Remplazo de las baterías del teclado en la página 20.
2. Presione y suelte .
3. Vuelva a conectar la batería y espere hasta que ya no se encienda (cerca de un segundo).
4. En los siguientes 10 segundos, mantenga presionado hasta que se encienda la luz verde y haya un
pitido de la cerradura.

18
Selección del ajuste de alerta
Alerta de actividad
Su hijo pequeño ahora alcanza las manijas de las puertas y le encanta explorar… está
cuidando a su madre o padre ancianos, o a un niño con necesidades especiales… o
quizá simplemente se siente más seguro al enterarse cada vez que hay actividad en su
puerta. Cualquiera sea el motivo o cualquiera sea la etapa de la vida, el ajuste de Alerta
de actividad es perfecto para vigilar las puertas cuando se encuentre en el hogar.
•La alarma emite dos pitidos cada vez que
una puerta se abre o cierra
•La luz de LED central parpadea
•Sonido: Dos pitidos breves
Alerta de sabotaje
Si está solo en casa durante el día o la noche, o desea vigilar una puerta de entrada
secundaria, la Alerta de sabotaje es lo ideal. Dado que es el ajuste de alerta más
sensible, la Alerta de sabotaje detecta incluso actividad sutil en la manija o la
cerradura, no solo cuando la puerta se abre, y le advierte
inmediatamente sobre cualquier intento de sabotaje.
•La alarma suena durante aproximadamente 15
segundos cuando se tocan el pomo o la manija de
la puerta
•Las luces LED izquierda y derecha parpadean
alternadamente
•Hay una demora programada de fábrica de 60
segundos antes de que el dispositivo emita la advertencia para permitirle
salir y bloquear la puerta
•Sonido: Sonido de alarma más largo (90 dB = el sonido de la alarma contra incendios)
Alerta de entrada a la fuerza
Puede ser que abrir y cerrar puertas diariamente ya no sea una preocupación para
usted… pero puede estar preocupado sobre cómo protegerse contra los ingresos
forzados. La Alerta de entrada a la fuerza es perfecta para la noche o cuando esté
fuera del hogar.
•Suena una alarma de tres minutos cuando se ejerce
una fuerza signicativa contra la puerta, como
cuando alguien intenta abrirla de una patada
•Funciona como una disuasión muy ecaz al alertarlo
a usted inmediatamente, y a otras personas cercanas,
ante el primer impacto sobre la puerta
•Modo menos sensible: muchos eligen programar este
ajuste de alerta todo el tiempo
•Todas las luces LED, izquierda, central y derecha, parpadean
•Sonido: Sirena constante y aguda (90 dB = el sonido de la alarma contra incendios)
»Cuando se dispare la alarma,
existe una demora de 3 segundos
predeterminada para restablecerla.
»Si suena la alarma,
puede desactivarla
rápidamente presionado el
botón Schlage hasta que la
alarma deje de sonar.
»Si suena la alarma,
puede desactivarla
rápidamente presionado el
botón Schlage hasta que la
alarma deje de sonar.
FUNCIONAMIENTO DE LA ALARMA

19
Encendido de la alarma
1. Presione el botón Schlage interior durante 5 segundos, hasta que una luz se encienda alrededor del botón Schlage.
2. Suelte el botón Schlage interior. Ahora, la alarma está activada.
»¿No está seguro de si su alarma está activada? Solo presione el botón
Schlage, que emitirá un pitido y se iluminará para conrmar que está activada.
Si no lo hace, verique que las baterías nuevas estén correctamente instaladas.
ConsulteConsulte Remplazo de las baterías de la alarma en la página 21.
Apagado de la alarma
1. Mantenga presionado el botón Schlage interior hasta que el segundo LED
parpadee.
2. Suelte el botón Schlage interior. Ahora, la alarma está desactivada.
Programación del ajuste de alerta
La alarma viene precongurada en el ajuste de Entrada a la
fuerza y está lista para usar. Si desea cambiar de Entrada a
la fuerza a otro ajuste de alerta, siga estos simples pasos:
1. Presione el botón Schlage interior durante 2 segundos
hasta que parpadee.
2. Suelte el botón. La alarma emite un pitido. De
inmediato, continúe presionando y liberando el botón
Schlage interior para pasar por los tres ajustes de alerta.
Deje de presionar el botón cuando la luz de ajuste
coincida con el ajuste de alerta que desee seleccionar.
Nivel de sensibilidad
El nivel de sensibilidad indica el nivel de toque o actividad necesario para activar
la alarma. Hay cinco niveles de sensibilidad, en donde el número uno (1) es el más
sensible y el número cinco (5) es el menos sensible. La cerradura viene programada en
el nivel 3.
1. Mantenga presionado el botón Schlage interior hasta que el tercer LED parpadee.
Esto tardará aproximadamente 10 segundos.
2. Toque el botón Schlage interior para pasar por los cinco niveles de sensibilidad. Pare de tocar para seleccionar el nivel
de sensibilidad que preera.
Nivel/Pitidos
1
2
3
4
5
BAJO • • • • • • SENSIBILIDAD • • • • • • ALTO
»Si desea comprobar cuál ajuste de alerta está
activado en la alarma, presione y suelte el botón Schlage
una vez. La alarma se iluminará con la luz LED izquierda,
central o derecha para indicar el ajuste de alerta.
Alerta de
actividad
Alerta de
sabotaje
Alerta de
entrada a la
fuerza
»Al pasar de un nivel a
otro entre los cinco niveles,
la alarma emitirá la cantidad
de pitidos equivalente al
nivel de ajuste.
FUNCIONAMIENTO DE LA ALARMA

20
REMPLAZO DE LAS BATERÍAS DEL TECLADO
1. Retire la cerradura de la puerta. 2. Abra el compartimiento de la batería y
remplace la batería de 9 V.
3. Vuelva a colocar
la cerradura en
la puerta.
PROBLEMA SONIDOS* LUCES SOLUCIÓN
INTERIOR
La alarma suena con
demasiada frecuencia o es
falsa alarma
Alarma — El nivel de sensibilidad está demasiado alto (en 1 o 2) y
debe ajustarse a un nivel de sensibilidad menor (3, 4 o 5).
ConsulteConsulte Nivel de sensibilidad en la página 19.
Las luces externas en el
botón Schlage interior están
parpadeando
— Izquierda y
derecha
Las baterías están bajas y deben remplazarse.
ConsulteConsulte Remplazo de las baterías de la alarma
en la página 21.
The tamper alert is not
sounding.
— — Hay una demora de 60 segundos antes de que el
dispositivo emita la advertencia para permitirle salir y
bloquear la puerta.
AFUERA (TECLADO)
Olvidé mi código de programación. Verique el frente de la Guía de programación de
cerraduras con teclado o detrás del conjunto del teclado
para obtener el código de programación predeterminado.
Si es necesario, restablezca la conguración de fábrica
de la cerradura. Términos que debe conocer en la
páginaTérminos que debe conocer on page 17
Necesito eliminar un código de usuario que no recuerdo. Elimine todos los códigos de usuario. Luego vuelva a
agregar en la cerradura todos los códigos de usuario
necesarios. Consulte la Guía de programación de
cerraduras con teclado.
El código de usuario no abre
la cerradura.
2 Roja El código de usuario ingresado no es un código de usuario
válido.
1 Alto,
1 Bajo
Verde then
Roja
El modo de vacaciones está activado. Consulte la Guía de
programación de cerraduras con teclado para desactivar
el modo de vacaciones.
no se ilumina cuando se presionan los números. Se han ingresado demasiados códigos de usuario
incorrectos. Espere 30 segundos y vuelva a intentarlo.
Si el teclado no responde luego de 30 segundos,
reemplace la batería. Consulte Remplazo de las baterías
del teclado en la página 20..
TROUBLESHOOTING
Table of contents
Languages:
Other Schlage Security System manuals
Popular Security System manuals by other brands

Toyota
Toyota TVSS IIIB installation instructions
Swann
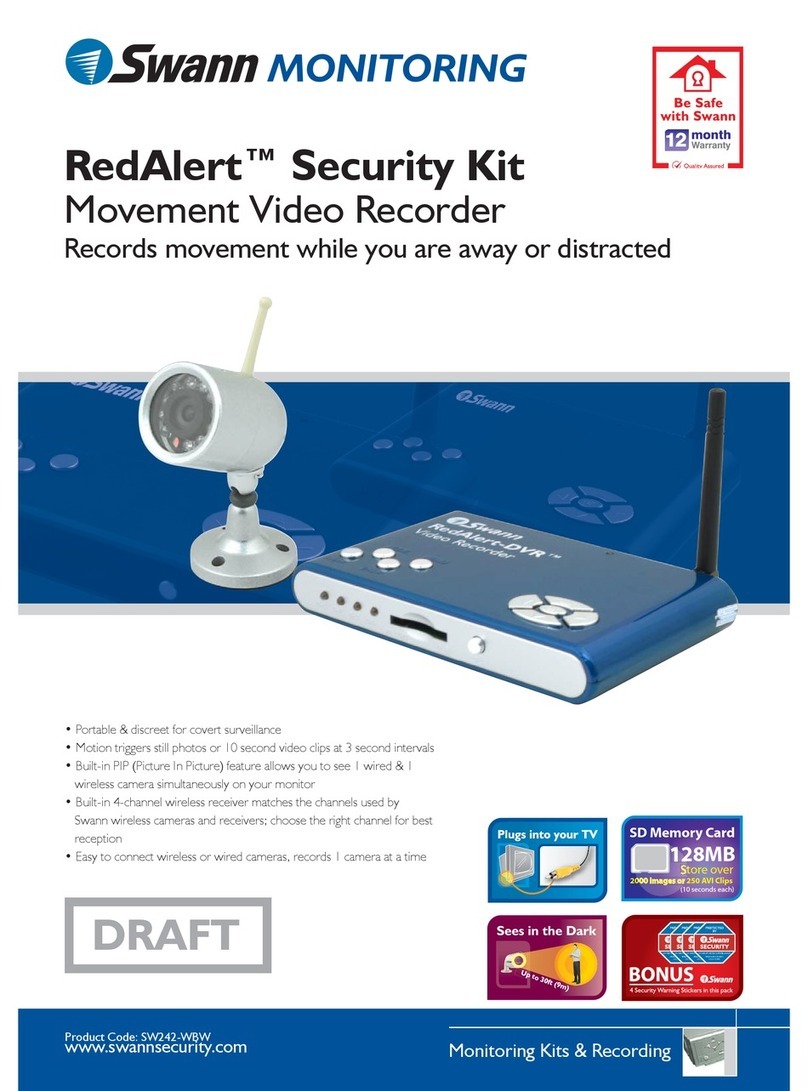
Swann RedAlert SW242-WBW Specifications
Test Equipment Depot
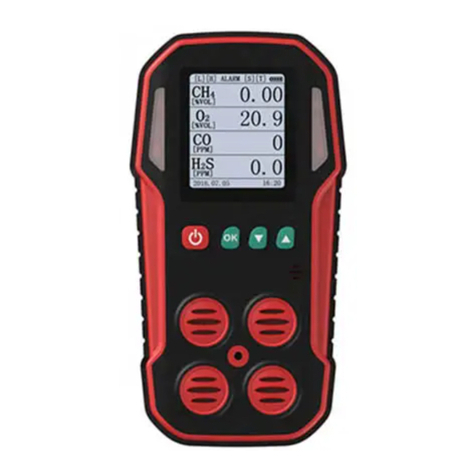
Test Equipment Depot BST-MG08 Manual instruction
ADEMCO
ADEMCO Security System VISTA-15 user guide
LogicMark
LogicMark 30911 operating instructions

Lorex
Lorex SILVANIA SY15F6584 instruction manual

