Schrader EZ-sensor PAD Safety guide

P. 1
Starter Guide
Pa
d

P. 2
If you are not registered at
www.ez-sensor.com/pad, please,
register yourself. Only with these cre-
dentials, you will be able to control your
EZ-sensor Pad.
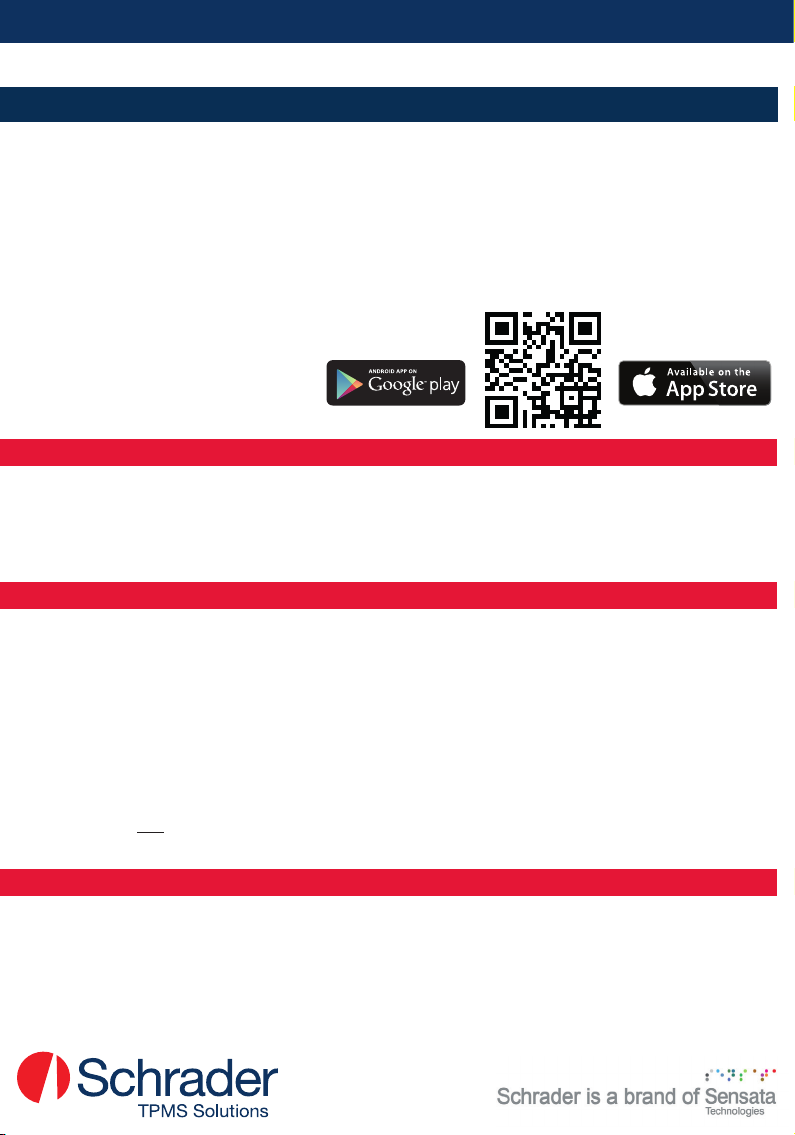
Download the Application.
Read the QR-Code, access
www.ez-sensor.com/pad or go to the
Google PlayStore or App Store to
download the application that controls
your EZ-sensor Pad.
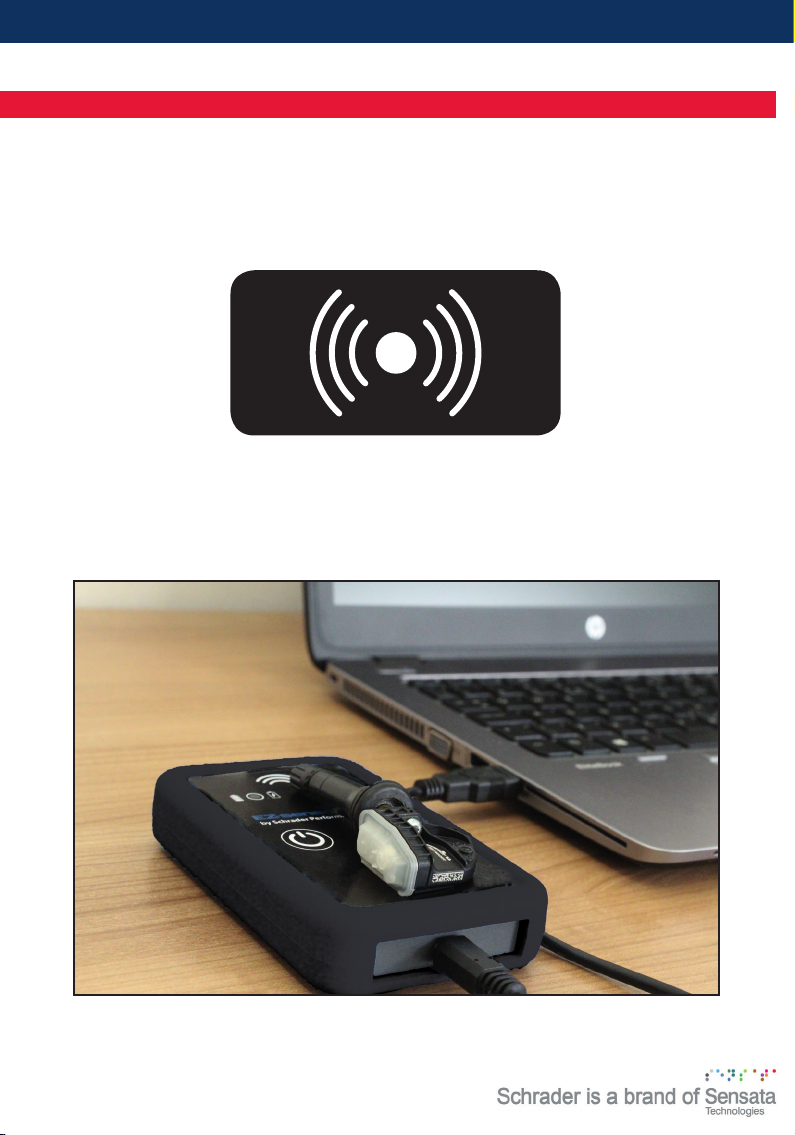
Connect your EZ-sensor Pad to
the Application. Inside the
Application or on the website you can nd
the Tutorial Video section, where you can
learn how to connect your device.
Program EZ-Sensors. Now that
everything is setup, start triggering
and programming your EZ-Sensors .
What is included in the Box:
• EZ-sensor Pad, Part-Number: #7028
• USB Cable
• Manual
If required, the Bluetooth PIN is ‘0000’. To nd the
serial number of your EZ-sensor Pad, please,
remove the silicon rubber and look at the label on
the back of the device. The nal 4 digits will also
identify the device in your Bluetooth device list.
Bitte registrieren Sie sich auf
www.ez-sensor.com/pad um das
EZ-sensor Pad benutzen zu können.
Laden Sie die app über den QR
code auf www.ez-sensor.com/pad
oder im Google playstore oder App Store
herunter um das EZ-sensor Pad benutzen
zu können.
Verbinden Sie das EZ-sensor Pad
mit der app. In der app oder auf der
Website nden Sie unter der Sektion
„Lernvideo“ ein Video wie Sie die app mit
dem EZ-sensor Pad verbinden können.
Programmieren der EZ-Sensoren.
Jetzt nachdem alles eingerichtet ist,
können Sie beginnen Ihre EZ-sensoren zu
programmieren.
Im Lieferumfang enthalten:
• EZ-sensor Pad, Ref.Nr.: #7028
• USB Kabel
• Benutzerhandbuch
Falls erforderlich, Ihr Bluetooth PIN lautet 0000.
Die Seriennummer Ihres Gerätes nden Sie auf der
Rückseite des Gerätes. Dazu müssen Sie gege-
benenfalls die Schutzhülle entfernen. Die Letzen
4 Ziffern dieser Nummer dienen auch der Identi-
zierung für ihre Bluetooth Verbindung.
English / Quick Start Deutsch / Kurzanleitung
1 1
22
33
44

P. 3
Veuillez-vous enregistrer sous
www.ez-sensor.com/pad an de
pouvoir utiliser l’EZ-sensor Pad.
Téléchargez l’appli via le code QR
à l’adresse www.ez-sensor.com/pad
ou dans le Google Playstore / App Store
an de pouvoir utiliser l‘EZ-sensor Pad.
Connectez l’EZ-sensor Pad à
l’appli.
Dans l’appli ou sur le site Internet, à la sec-
tion « Vidéo d’apprentissage », vous trou-
verez une vidéo vous montrant comment
connecter l’appli avec l’EZ-sensor Pad.
Programmation des capteurs
EZ-Sensor. Maintenant que tout
est conguré, vous pouvez commencer à
programmer vos capteurs EZ-sensor .
Contenu de la boite:
• EZ-sensor Pad, Part-Number: #7028
• USB Cable
• Manual
Votre code PIN Bluetooth est 0000. Le numéro de
série de votre EZ-sensor Pad se trouve au dos de
l’appareil. Vous devez retirer la housse.
Les 4 derniers chiffres de ce numéro servent à
l’identication pour votre connexion Bluetooth.
Per utilizzare l’ EZ-sensor Pad è
necessario registrarsi all’indirizzo
www.ez-sensor.com/pad.
Per utilizzare l’ EZ-sensor Pad è
necessario scaricare l’app tramite
il codice QR, all’indirizzo www.ez-sensor.
com/pad oppure dal Google Playstore®/
App Store.
Connettere l’ EZ-sensor Pad
all’app.Nell’app o nel sito web, alla
sezione “Video esplicativo”, è disponibile
un video che illustra come connettere l’app
all’ EZ-sensor Pad.
Programmazione degli EZ-sensor.
Una volta congurato ogni aspe-
to, potrete iniziare a programmare i vostri
EZ-sensor .
LA DOTAZIONE COMPRENDE:
• EZ-sensor Pad, Ref. Nr.: #7028
• cavo-USB & Manuale d’uso
Nel caso sia richiesto, il PIN per la connessione
Bluetooth è 0000. Il numero di serie dell’ EZ-sensor
PAD è riportato sul retro del dispositivo stesso.
Per accedere al numero, potrà essere necessario
rimuovere la guaina protettiva.Le ultime 4 cifre di
tale numero fungono anche da codice identicativo
per la connessione Bluetooth.
Français / Guide de lancement Italiano / Istruzioni brevi
1 1
2 2
3 3
4 4

P. 4
Regístrese en
www.ez-sensor.com/pad para poder
utilizar el EZ-sensor Pad.
Descargue la aplicación a través del
QR-Code, o en
www.ez-sensor.com/pad, o a través de la
Google PlayStore / App Store para poder
utilizar el EZ-sensor Pad.
Conecte el EZ-sensor Pad con la
aplicación.En la aplicación o en la
página web hay un vídeo introductorio don-
de se explica cómo conectar la aplicación
con el EZ-sensor Pad.
Programación de los EZ-Sensors.
Una vez que todo esté congurado
podrá comenzar a programar los
EZ-Sensors .
En el suministro se incluyen:
• EZ-sensor Pad. Part-Number: #7028
• USB Cable
• Instrucciones breves
Si lo necesita, el PIN para Bluetooth es 0000. Con-
sulte el número de serie del EZ-sensor Pad en la
parte posterior del mismo. Para ello deberá quitar
la funda protectora.Las últimas 4 cifras de este
número sirven también como identicación para la
conexión Bluetooth.
Español / Instrucciones breves
1
2
3
4

EZ-sensor PAD Manual
P. 5
English
1. Contents
1. Contents............................................p.5
1. Introduction and Internet Connectionp.6
1.1. Included in the box............................p.6
1.2. Intended Use.....................................p.6
1.3. For Your Safety..................................p.6
1.4. Registration.......................................p.6
2. Tool Functions...................................p.7
2.1. Power Button.....................................p.7
2.2. LEDs..................................................p.8
2.3. RF Positioning...................................p.9-10
3. How to?.............................................p.11
3.1. Download the App.............................p.11
3.2. Program and Diagnose Sensors.......p.11
3.3. Charge your Device...........................p.11
4. Tool Overview....................................p.12
4.1. Battery Information............................p.12
4.2. Mechanical Characteristics...............p.12
4.3. USB Interface....................................p.12
4.4. Bluetooth...........................................p.13
5. Environmental notes..........................p.13
6. Warranty............................................p.13

EZ-sensor PAD Manual
P. 6
English
1. Introduction and Internet Connection
Congratulations! You are a user of the EZ-sensor Pad. This innovative device enables the
user to easily program and diagnose sensors.
As you can see, your EZ-sensor Pad has no screen. So how are you going to control it?
The EZ-sensor PAD is controlled using an application installed on your computer, iOS
device or android device through the Schrader TPMS software application. Bluetooth
capability is required for smartphones and tablets. To download both applications, please,
access:
www.ez-sensor.com/pad or use your
mobile device to scan the QR-Code:
1.1. Included in the box
• EZ-sensor Pad. Part-Number: #7028
• USB cable
• User Manual
1.2. Intended Use
The EZ-sensor PAD is intended to:
• Diagnose all TPMS Original Equipment (OE) sensors
• Diagnose Schrader EZ-Sensors
• Program an EZ-Sensor from blank to the specic Make, Model, Year required (MMY)
Can be used as a desktop programming pad or a hand-held device as an extension of
your mobile smartphone.
Any operation not included in this manual can damage the tool or lead to injury. Such
usage will also void the user’s guarantee and warranty claims.
This device is not waterproof.
1.3. For Your Safety
Read this user manual in its entirety before using the device for the rst time and follow
its instructions. This manual can be accessed online at www.Catalogue.SchraderSensors.
com

EZ-sensor PAD Manual
P. 7
English
2. Tool Functions
Before using the EZ-sensor PAD please go to www.ez-sensor.com/pad to complete your
registration. If you are already a user, use your current login credentials to start using the
EZ-sensor PAD.
Tool Functions
2.1. Power Buon
Press and hold the power button for 2 seconds to turn the device ON or OFF.
1.4. Registration

EZ-sensor PAD Manual
P. 8
English
2.2. LEDs
There are two LEDs in your programming tool. Each LED will display specic information,
as shown below:
2.2.1. Power LED panel
The Power LED indicates if the tool is ON and the charging status.
• Solid red – charging
• Solid green – fully charged
• Flashing red – battery empty – charging required
• Flashing green – battery OK
2.2.2. Status LED
The Status LED indicates whether the diagnosis or programming functions are in pro-
gress, have failed or have been successfully completed.
• Solid red – diagnosis or programming error
• Solid green – diagnosis or programming OK
• Flashing green – diagnosis or programming in progress

EZ-sensor PAD Manual
P. 9
2. 3. RF Positioning
Preferred method:
The EZ-sensor Pad is primarily designed to be used as a desktop tool. When the device is
laid at, place the sensor on top of the programming icon:
Proceed with diagnosis/programming as shown:

EZ-sensor PAD Manual
P.10
English
Alternative method:
Place the sensor in front of the EZ-sensor PAD as shown below. The RF transmission is
emitted by the EZ-sensor PAD from the area near this symbol.
Proceed with diagnosis/programming as shown:

EZ-sensor PAD Manual
P. 11
3. How to?
This section will answer questions you may have before using your new EZ-sensor Pad.
3.1 Download the App
To use the EZ-sensor PAD with a desktop computer, please access
www.ez-sensor.com/pad and download the Desktop Application. An internet connection
is required.
To use your EZ-sensor PAD with a smartphone, please access the Google Play Store®
and download the Schrader TPMS application.
3.2 Program and Diagnose Sensors
To control the EZ-sensor PAD an external device, such as a computer or a smartphone, is
needed. See the “download the app” section. If you have already downloaded this applica-
tion, be sure to position the sensor correctly. See “RF Positioning” section.
Follow the instructions within the application
manual to perform the operation.
Select the correct vehicle MMY in order to
correctly diagnose and/or program sensors.
3.3 Charge your Device
The EZ-sensor PAD is fully charged when shipped.To charge the device, plug it into a
USB port on any computer using the USB cable provided. The LEDs will indicate the
charging status. Refer to section 2.3.The battery inside the tool is not replaceable.
The device can be used while it is being charged. Use only the USB cable provided to
charge the EZ-sensor PAD. We do not recommend using any other USB charger apart
from a standard computer port.

EZ-sensor PAD Manual
P.12
English
4. Tool overview
4.1 Baery information
4.2. Mechanical Characteristics
4.3. USB Interface
The EZ-sensor Pad is supplied with a USB connector that can be used for charging or
controlling the tool. Most computers have a USB interface.
The USB interface follows an international standard and is compliant with the USB 1.1
specication.
To check if your computer is compatible with this device, refer to the computer owner’s
manual. The USB connector is intended to be used only with a computer. This shall not be
connected to smartphones, tablets, etc.
Battery type Li-ion/ Li-polymer
Typical charging time 2h
Battery life (full
charge)
Approx. 120 EZ-sen-
sor programming
operations
Operating temperature 0 - 45°
Storage temperature -10 - 55°C
Silicon size 1.2 x 7.4 x 2.6 cm
Connector Micro-USB type B

EZ-sensor PAD Manual
P.13
4.4 Bluetooth
In addition to the USB connector, the EZ-sensor PAD can be controlled using a Bluetooth
connection. A smartphone, tablet or Android device can be used.
The Bluetooth interface is compliant with the international standard. This device operates
at Bluetooth class 1.5 and is approved by expert agencies.
The PIN used to pair your Bluetooth device with the EZ-sensor PAD is “0000”.
FCC ID:2AFXK
5. Environmental notes
In accordance with European Directive 2002/96/EC, electric tools that can no longer be
used must be collected separately and recycled in an environmentally friendly manner.
In accordance with Directive 2006/66/EC, defective or old batteries must be recycled in an
environmentally friendly manner.
Do not expose the battery to re or high temperatures.
6. Warranty
The EZ-sensor PAD must be handled with care. The warranty is offered in accordance
with national regulation from the date of purchase (invoice or delivery date). Schrader re-
cords the activation date and reserves the right to analyse any returned part, as improper
handling will not be covered by this warranty.

P.14
Deutsch
EZ-sensor PAD Manual
1. Inhalt
1. Inhalt...........................................................p.14
1. Einleitung....................................................p.15
1.1. Verbindung mit dem Internet..............................p.15
1.2. Bestimmungsgemäße Verwendung...................p.15
1.3. Zu Ihrer Sicherheit.............................................p.15
1.4. Registrierung......................................................p.15
2. Vorstellung Ihres Geräts ............................p.16
2.1. Ein/Aus-Taste.....................................................p.16
2.2. LEDs..................................................................p.17
2.3. Funkwellenübertragung...................................p.18-19
3. Wie wird’s gemacht?..................................p.20
3.1. Herunterladen der App.......................................p.20
3.2. Programmierung und Diagnose von Sensoren..p.20
3.3. Laden des Geräts...............................................p.20
4. Technische Angaben zum Gerät.................p.21
4.1. Elektrische Eigenschaften..................................p.21
4.2. Mechanische Eigenschaften..............................p.21
4.3. USB-Anschluss..................................................p.21
4.4. Bluetooth............................................................p.22
5. Lieferumfang...............................................p.22
6. Hinweise zum Umweltschutz......................p.22
7. Gewährleistung...........................................p.22

P.15
Deutsch
EZ-sensor PAD Manual
1. Einleitung
Herzlichen Glückwunsch! Sie sind Besitzer des EZ-sensor Pad. Dieses intelligente Gerät
ermöglicht Ihnen, auf einfache Weise EZ-Sensoren zu diagnostizieren und programmier-
en. Wie Sie sehen, hat das EZ-sensor Pad keinen Bildschirm. Wie bedienen Sie es?
Sie bedienen das Gerät mit einer auf Ihrem Computer installierten Desktop-Anwendung
oder mit einem Smartphone über die Anwendung Schrader TPMS App. Das Smartphone
muss mit dem Android oder iOS Betriebssystem ausgestattet sein und Bluetooth unter-
stützen. Zum Herunterladen beider Anwendungen gehen Sie bitte auf die Internetseite
www.ez-sensor.com/pad oder scannen Sie mit Ihrem mobilen Gerät den unten stehenden
QR-Code:
1.1. Verbindung mit dem Internet
Ihr EZ-sensor Pad wird über das Internet gesteuert. Dies garantiert, dass Sie immer über
die neuesten Informationen und Funktionen verfügen. Das Internet hilft Ihnen bei der
Arbeit.
1.2. Bestimmungsgemäße Verwendung
Das EZ-sensor Pad ist als RDKS-Diagnosegerät für alle OE-Sensoren und für den
EZ-sensor vorgesehen und dient als Programmiergerät für den EZ-sensor. Es kann als
Gerät auf Ihrem Schreibtisch genutzt werden oder fungiert in Ihrer Hand als Erweiterung
für Ihr Smartphone. Die bestimmungsgemäße Verwendung dieses Geräts wird in diesem
Handbuch beschrieben. Jeder in diesem Handbuch nicht beschriebene
Betrieb kann das Gerät beschädigen oder Unfälle verursachen. Bei solchen Verwendun-
gen erlöschen auch die Garantie- und Gewährleistungsansprüche des Benutzers.
Dieses Gerät ist nicht wasserfest.
1.3 Zu Ihrer Sicherheit
Lesen Sie diese Bedienungsanleitung vor dem erstmaligen Gebrauch des Geräts und
handeln Sie entsprechend. Ziehen Sie im Zweifelsfall diese Anleitung zu Rate.
Auf diese Anleitung können Sie auch online zugreifen: www.ez-sensor.com/pad.
1.4. Registrierung
Für die effektive Arbeit mit dem EZ-sensor Pad muss der Benutzer auf Schrader Online-
Plattform registriert sein. Bitte gehen Sie auf die Internetseite www.ez-sensor.com/pad
und nehmen Sie die Registrierung vor. Wenn Sie bereits als Benutzer registriert sind,
verwenden Sie einfach Ihre Anmeldedaten, um mit dem Gerät zu arbeiten.

P.16
Deutsch
EZ-sensor PAD Manual
2. Vorstellung Ihres Geräts
Dieser Abschnitt hilft Ihnen, die verschiedenen Funktionen des EZ-sensor Pad
kennenzulernen. Das Bild unten zeigt die Oberseite des Geräts.
Das EZ-sensor Pad hat zwei Tasten, zwei LEDs und zwei Aktivierungspunkte. In den
folgenden Abschnitten werden alle diese Elemente erläutert:
2.1. Ein/Aus-Taste
2.1.1. Ein/Aus-Taste
Die Hauptfunktion der Ein/Aus-Taste ist das Ein- und Ausschalten Ihres EZ-sensor Pad.
Im eingeschalteten Zustand bewirkt ein mehr als 2 Sekunden langes Drücken dieser Taste
das Ausschalten des Geräts. Im ausgeschalteten Zustand bewirkt ein kurzer Tastendruck
das Einschalten des Geräts.

P.17
Deutsch
EZ-sensor PAD Manual
2.2. LEDs
Ihr Programmiergerät besitzt zwei LEDs. Jede davon zeigt bestimmte Informationen an,
wie unten dargestellt:
2.2.1.Betriebsanzeige-LED
Diese Betriebsanzeige-LED zeigt hauptsächlich an, ob das Gerät eingeschaltet ist.
Die Zustände dieser LED sind unten erläutert:
• Dauerleuchten in Rot – Akku wird geladen
• Dauerleuchten in Grün – Akku ist voll
• Blinken in Rot – Akku ist fast leer
• Blinken in Grün – Akku ist OK
2.2.2 Status LED
Die Status-LED zeigt an, ob die Diagnose oder Programmierung entweder in Arbeit oder
fehlgeschlagen ist oder erfolgreich abgeschlossen wurde.
• Dauerleuchten in Rot – Fehler bei Diagnose
oder Programmierung
• Dauerleuchten in Grün – Diagnose
oder Programmierung OK
• Blinken in Grün – Diagnose oder Programmierung in Arbeit

P.18
Deutsch
EZ-sensor PAD Manual
2. 3. Funkwellenübertragung
Das EZ-sensor Pad ist für den Einsatz auf Ihrem Schreibtisch ausgelegt.
Wenn Sie am Tisch sitzen, können Sie den RDKS-Sensor direkt auf das unten
dargestellte Symbol legen:
Jetzt können Sie mit der Diagnose/Programmierung beginnen.
Das Bild unten gibt Ihnen einen besseren Eindruck:

P.19
Deutsch
EZ-sensor PAD Manual
Sie können den Sensor auch direkt vor das EZ-sensor Pad auf den Schreibtisch legen
und die Sensoren an der Vorderseite aktivieren.
Richten Sie dazu das Sensorventil an dem unten dargestellten Funkwellensymbol aus.
Hier werden die Funkwellen vom EZ-sensor Pad ausgesendet, deshalb müssen Sensor
und Ventil in dieser Richtung angeordnet sein.
Zum besseren Verständnis siehe Bild unten:

P.20
Deutsch
EZ-sensor PAD Manual
3. Wie wird’s gemacht?
Vor dem Einsatz Ihres neuen EZ-sensor Pad beantwortet dieser Abschnitt die
wesentlichen Fragen, die Sie möglicherweise haben.
3.1 Herunterladen der App
Wenn Sie beabsichtigen, das EZ-sensor Pad mit einem Desktop-PC zu nutzen, gehen
Sie bitte auf die Internetseite www.ez-sensor.com/pad und laden die Desktop-
Anwendung herunter. Auch für den Betrieb dieser Software benötigen Sie eine
Internet Verbindung. Wenn Sie beabsichtigen, das EZ-sensor Pad mit einem Smartphone
zu nutzen, rufen Sie bitte den Google Play Store®oder den Apple App Store auf und laden
die Schrader TPMS App herunter.
3.2 Programmierung und Diagnose von Sensoren
EZ-sensor Pad benötigen Sie eine externe Anwendung, die auf einem PC oder einem
Smartphone läuft. Näheres hierzu siehe „Herunterladen der App“. Wenn Sie diese
Anwendung bereits heruntergeladen haben, prüfen Sie, ob der Sensor
an der richtigen Stelle liegt. Bitte sehen Sie
im Abschnitt „Funkwellenübertragung“ nach.
Danach befolgen Sie für den Betrieb den
Anweisungen im Handbuch der Anwendung.
Für eine ordnungsgemäße Programmierung
und Diagnose der Sensoren müssen Sie
das richtige Fahrzeugmodell und
Baujahr auswählen.
3.3 Laden des Geräts
Zum Laden des Geräts verbinden Sie es einfach mit dem USB-Anschluss eines
beliebigen Computers. Die LEDs zeigen den Ladezustand an.
Die grüne LED zeigt an, dass der Akku voll ist. Bitte sehen Sie im Abschnitt 2.2 nach,
um die verschiedenen LED-Zustände zu verstehen.
Der Akku im Gerät kann nicht getauscht werden.
Table of contents
Languages: