Sci-High viper mark II User manual

©SCI-HIGH,version 1.2
Page
1
of
7
VIper MARK II
COLONIAL FLEET FIGHTER -1/72 SCALE
The Viper Mark II was the second model of Viper introduced during the Cylon War. It became the main fighter craft for the Colonial
Fleet in the latter part of the war,quickly replacing the Viper Mark I. It proved to be faster and more maneuverable than the Mark I
with a sleeker design and more powerful engines. TheMark II gave the Colonial Fleet fighter supremacy, which eventually led to the
Colonial victoryagainst theCylons.
After the CylonWar, the Viper Mark II stayed in service until it was eventually replaced by the Mark III. However, the Mark II is the
most remembered fighter craft of the Cylon War and holds the legendary status as the best fighter in the Colonial history.
Length: 8.4 meters(27.6 ft.); Width: 4.7 meters (15.5 ft.); Height: 2.7 meters (9 ft.)
Special thanks to Gabriel C. Koerner for the use of his imagesfor this project (©Universal Studios).

©SCI-HIGH,version 1.2
Page
2
of
7
WORKING WITH RESIN
§Resin dust isharmful to your lungs so wear a protective mask when sanding.Wetsanding is recommended.
§Before handling resin parts wash them in warm (not hot) soapy water andlet them dry.This step is necessary to remove the
mold release agent used during casting.
§Resin must be glued with "super glue" (cyano acrylate glue) or alternatively epoxyglue.
§To glue parts together you may want to hold them in place and drip thin glue along the seam instead of trying to align the pieces
with glue on them.
§If warping (distortions) occurs in some parts, use hot water or a hand held hair dryerto soften the area. Hold the piece in place
and cool it with cold water. You may have to repeat this process more than once to correct the shape.
§Always usean appropriate primer before painting your resin model.
PREPARATION
1Verify that all partsare present by referring to the picture below -Kit contains 33 parts:
§29resin parts
§1clear canopy
§1stripeof self-adhesive gray tape (not shown)
§1 square piece of styrene (not shown)
§Color decals (partiallyshown)
2Carefully cut the parts from their tree and remove flash, mold seams and imperfections.
3Fill any apparentholes,seams and scratches with hobby putty.Thicker super glue also works welltofillsmallscratches.

©SCI-HIGH,version 1.2
Page
3
of
7
ASSEMBLY
§Refer to the originalart(CGI’s )in this document as a guide for parts and decals placement,as well as a color guide for painting
and finishing.
§For ease of assembly it is recommendednot to glue the following parts until after painting.
§Top engine andtopengine cover
§Engine nozzles
§Pilot and seat
1Gluethe nosecone to the fuselage and the instruments panel inside the cockpit.
2Glue the underside enginesupportsand side engine intakes to the fuselage.Try to leave apaper thinspace between the
intakes and the fuselage (see last image on this page).
3Glue the wings to theengines. You may need to sand the area where the wings attached to the engines to ensure perfect fit.
Use some clay (or putty) to temporarilyhold the wings in place and let some thin super glue get into the joints (not the clay!).
The art onpage5 will help you determine the exact angle and position.
4Install the cannonsupports(steps 1 and 2) to each wing and the cannons to theirsupports (step 3), although it is recommended
to waitafter paintingto glue the cannons in place.

©SCI-HIGH,version 1.2
Page
4
of
7
5Using asharphobby knife carefully cut the canopy directly on its molding form. Cutprogressively and test fit often. Cut 1mm
width stripes from the silver self-adhesive tape supplied with thekit. Try to apply the tapemostly on each side,as the window
will appear toonarrow on topif not done correctly. For a great shiny look, dip the canopy inFuture Floor Wax two or three times,
let the excess drip off and let dry for a couple of hours.
6Cut the landing gear panels (doors) in the styrene piece supplied with the kit. Use the landing bay openings to define the
dimensions of each panel to cut. Scribe a thin line in the middle of the front panel to simulate two doors.
7If not installing landing gear, install styrene panels in the closed position. Don’tforget to drill a hole if you are planning on
using a base to display your model.
If installing landing gear,carefully cut each of the three landing struts to correct fit. Temporarily fix the struts to the fuselage
and glue the landing pads. Use the images below to determine the length and angle of each strut. Cut the landing bay panels
fromthe styrenepart suppliedwith thekitand glue them in the opened position. To enhance details usesmall rods of styrene
(or plastic)to make the swing arms on each strut.Once complete, remove the landing gear assembly for painting.

©SCI-HIGH,version 1.2
Page
5
of
7
8Glue the rear fin to the top engine cover.
9Apply a thin coat of primer and correct the imperfections that may still be visible.Apply another coat of and lightly sand with400
(or more) grit sandpaper. Test fit every section one more time to ensure that everything will fit together properly once painted.
Since the Viper is mostly white,it is recommended to use a white primer for the fuselage.

©SCI-HIGH,version 1.2
Page
6
of
7
PAINTING & REFERENCES
80% FlatWhite (FS37875), 20% Light Gray(FS36622)
Insignia Red(FS31136)
Gunship Gray(FS36118)
Euro Gray(FS36081)
Viper art on this pageis reduced to the same size as thekit(1/72 scale).
Latest detailed assembly instructions are available for download atwww.geocities.com/adumas02/vipermark2.pdf

©SCI-HIGH,version 1.2
Page
7
of
7
DECALS
§Before applying decals give your model a coat or two of a gloss clear. Decalssettle down much better on a glossy surface. A
good and cheap gloss finish isFuture Floor Wax thinned with 40% isopropyl (rubbing)alcohol.
1Carefully cut out each individual decal using asharp hobby knife or scissors.
2Soak decal in a small cup of warm water for about 10 to 15 seconds and lay the decal on your work surface for about 15 to 30
seconds.
3Pre-wet the surface (using a setting solutionisrecommended) then slide or push the decal off the paper backinginto position
on your model -DO NOT peel or pull.
4Smooth decal surface,expelling any air bubbles and blot dry with a cloth or Q-Tip.
5Allow decalsto dry overnight then apply a coat of flat or semi-gloss clear over the model to seal decals.
Corresponding pilot’s names, call-signs and serial numbers:
CPT LEE ADAMA "APOLLO" 2220NC
CPT LEE STRINGER "VALKYRIE" 0223NC
CPT RAYMOND LAI "RAYGUN" 8547NC
CPT WILLIAM ADAMA "HUSKER" N7242C
LT KARA THRACE "STARBUCK" 7242NC
LT PETE HICHEY "JOKER" 1104NC
Althoughdecals for the above markingsare already included with this
kit, custom decals can be ordered from JBOT at www.jbot.ca
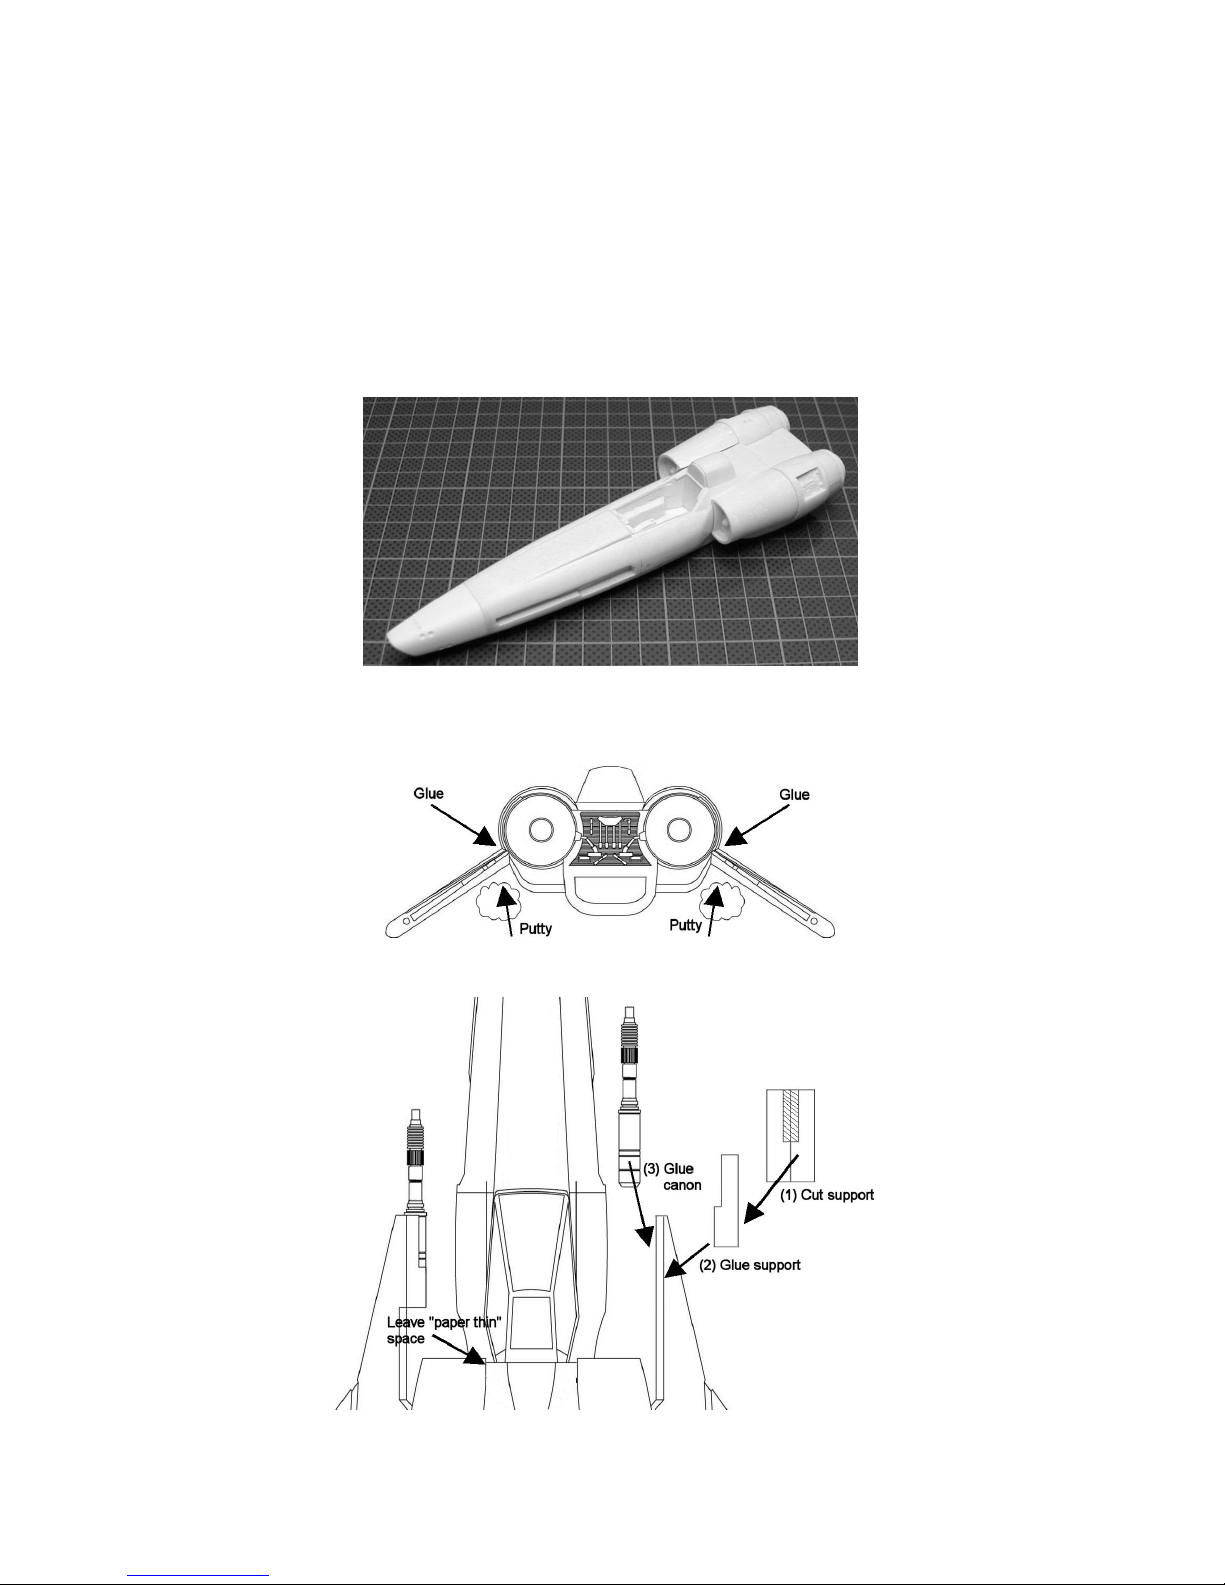
Cockpit details
FINISHING
1To enhance appearance apply a black or graywash. Typically, mix 4 parts of thinner with 1 part of paint.
2Gluethe remaining parts (or sub-assemblies)together.DO NOT use super glue to fix the canopy as it might become clouded.
3You can enhance the weathering even further by applying pastels in some areas like nozzles, thrusters , canons and intakes.
Artist’s oilsare also very useful to simulatedamage and engine abuse.
4Applya coat or two of semi gloss clear to seal the final finish. Don’t forget to mask the canopy first to preserve its glossy finish.
Special thanks to Alfred Wong for having built the test kit pictured above.
Table of contents
Popular Toy manuals by other brands

Associated Electrics
Associated Electrics RC10TC6.2 Assembly manual

Startright
Startright Trilingual Laptop Plus User instruction guide

marklin
marklin 29271 manual

Taigen Tanks
Taigen Tanks TAG13040/Airsoft M4A3 Sherman 75MM instruction manual

Lionel
Lionel 470 owner's manual

MTHTrains
MTHTrains Rail King O-31 operating instructions

Fisher-Price
Fisher-Price Loving Family Sweet Melodies Bedroom 75107 instructions

Top RC Model
Top RC Model Hurricane MKIIB User's operation manual

Smoby
Smoby 110414 quick start guide

Turnigy
Turnigy FW-190 Assemble manual

THUNDER TIGER
THUNDER TIGER MINI TITAN V2 - 2 instruction manual

Mattel
Mattel HOT WHEELS COLOR SHIFTERS PIRANHA PERIL... instructions