SciCan STATIM 2000S User manual

www.scican.com
• Rev. 7.0 Service Manual
Rev. 7.0 Service Guide 06-TSB-236
Copyright 2006 SciCan. All rights reserved.
STAT
IM
2000/S & 5000/S
C a s s e t t e A u t o c l a v e ™
Statim 7.0 2000_5000 Cover 1/9/07 10:04 AM Page 1

Manufactured by:
SciCan
1440 Don Mills Road,
Toronto ON M3B 3P9
CANADA
Phone: (416) 445-1600
Fax: (416) 445-2727
Toll free: 1-800-667-7733
EU Representative:
BHT Hygienetechnik GmbH
Messerschmittstr. 11
D-86368 Gersthofen
GERMANY
For all service and repair inquiries:
Canada: 1-800-870-7777
United States: 1-800-572-1211
International: (416) 446-4500
Email: [email protected]
My.SciCan is the private access information network for SciCan employees,
SciCan technicians and associated dealers. My.SciCan.com is the one-stop
information outlet for all your technical service and overall SciCan product needs.
On the site you will find technical and operator manuals, technical bulletins,
product artwork, and brochures. As a registered user, you will receive frequent
product updates to make sure you have all the latest news and information from
SciCan.
Join by registering at: http://my.scican.com/
Table Of Contents
1. Statim non-S Rev 6xx Calibration Instruction . . . . . . . . . . . . . . . . . . . . . 1
2. Statim S-Class Rev 6xx Calibration Instruction. . . . . . . . . . . . . . . . . . . . 4
3. Statim USB Adapter Quick Setup Guide. . . . . . . . . . . . . . . . . . . . . . . . . . 8
4. PCB Rev. 7.0 Assembly Instructions . . . . . . . . . . . . . . . . . . . . . . . . . . . 10
5. PCB 7 Kits ST5000 Service . . . . . . . . . . . . . . . . . . . . . . . . . . . . . . . . . . . 11
6. PCB 7 Kits ST2000 Service . . . . . . . . . . . . . . . . . . . . . . . . . . . . . . . . . . . 13
7. Conductivity Calibration . . . . . . . . . . . . . . . . . . . . . . . . . . . . . . . . . . . . . 14
8. Statim Rev. 7 PCB User and Service Setup . . . . . . . . . . . . . . . . . . . . . . 15
9. 2000 Troubleshooting Guide . . . . . . . . . . . . . . . . . . . . . . . . . . . . . . . . . 32
10. 5000 Troubleshooting Guide . . . . . . . . . . . . . . . . . . . . . . . . . . . . . . . . 42
11. S-Class Troubleshooting Guide . . . . . . . . . . . . . . . . . . . . . . . . . . . . . . 49
12. SciCan Data Logger troubleshooting. . . . . . . . . . . . . . . . . . . . . . . . . . 55
13. Printer Interface Board Rev. 4.X Installation Instructions. . . . . . . . . . 57
STATIM Cassette Autoclave is a registered trademark of SciCan Ltd.
STAT-DRI is a trademark of SciCan Ltd. All other trademarks referred to in this manual
are the property of their respective owners.
SciCan Medtech
Alpenstrasse 16,
6300 Zug
SWITZERLAND
Phone: (41-41) 727-7027
Fax: (41-41) 727-70-29
SciCan Inc.
500 Business Center Drive
Pittsburgh, PA 15205
USA
Phone: (412) 494-0181
Fax: (412) 494-4794
Toll free: 1-800-572-1211

1
1. Statim Non-S Calibration - Software revision 6.00 and higher
Instructions for the Calibration of Statim Autoclave thermocouples
Warning
Incorrect or inaccurate calibration may cause unsuccessful sterilization of
instruments.
Statim units contain electronic components which may be damaged or
destroyed by electro-static discharge (ESD). Observe appropriate
safeguards when calibrating.
Always wear a static strap when working with or near printed wiring
boards. In addition, use static foot-straps, grounding mats and grounded
work surfaces when calibrating.
Make sure that there is sufficient steam-process distilled water in the unit
prior to starting calibration.
The chamber and validation thermocouples must be calibrated to ensure the correct
operation of the Statim Autoclave. Always recalibrate the system thermocouples
following a software upgrade, when the steam generator is serviced, when the
P.C. board is replaced, or when either of the thermocouples is replaced.
The AlEx steam generator thermocouple doesn't require calibration, Validation
Thermocouple however has to be calibrated and is done automatically by running a
special calibration cycle.
New! The chamber thermocouple is calibrated by adjusting the Chamber Thermocouple
Offset by using the Unwrapped and Wrapped keys while comparing a temperature on
the display with a temperature measured by a reference thermometer.
To calibrate a Statim unit, follow these steps:
SETUP:
1. Turn the unit off and fill the reservoir with steam-distilled water.
2. New! There is no need to remove the cover from the Statim in order to perform the
calibration.
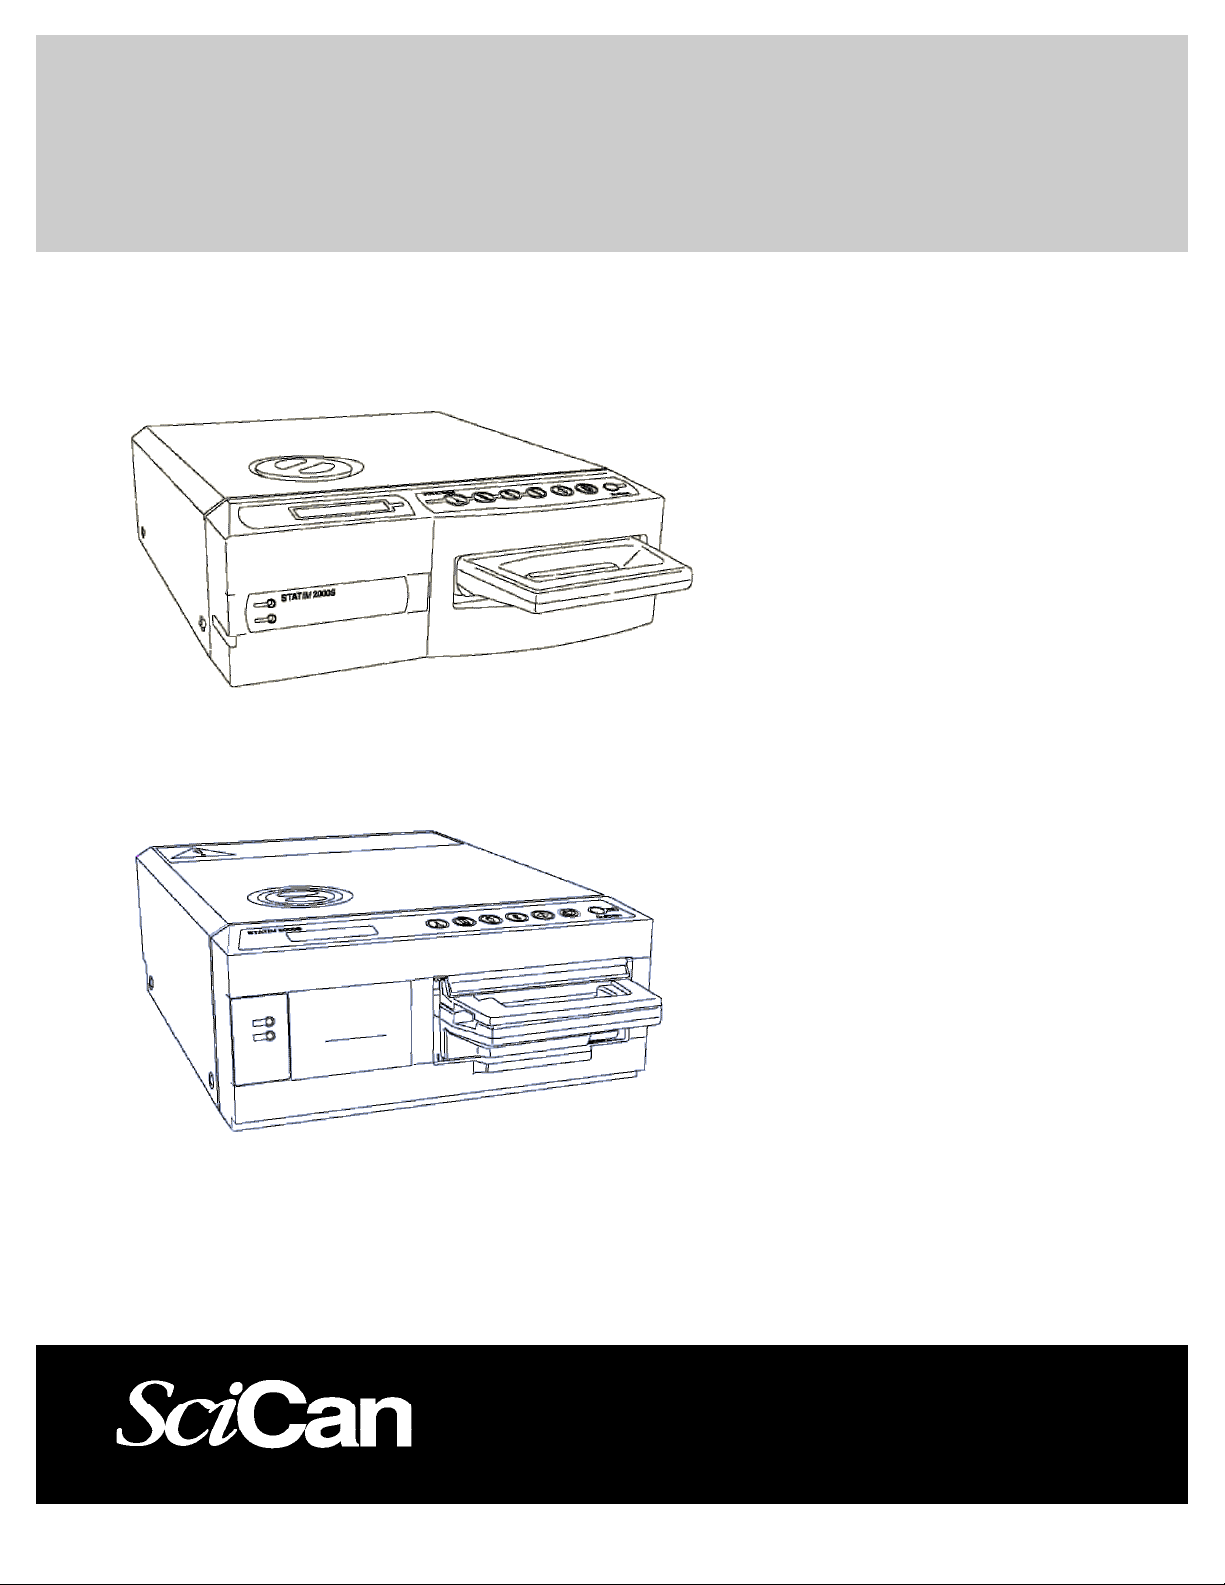
3. Install a calibration cassette with the reference thermocouple inserted into the hole in
the front of the chamber.
4. New! Power up unit while keeping Unwrapped and Wrapped button pressed to enter
Statim Service Mode. This Service Mode is password protected, enter password to
continue (default password is: Unwrapped, Wrapped, R&P and Stop keys pressed in
this order).
Keypad functions at this time:
Unwrapped Key: Select next item in the menu.
Wrapped Key: Select previous item in the menu.
Rubber and Plastic Key: Enter current selection
Toggle using keypad through the menu selection to reach Calibration option and
press R&P key.

2
5. Confirm that the display appears similar to the example above.
The value in the lower right-hand corner (DDD) is the difference between the Chamber
and Validation thermocouple readings. The value in the upper right corner is the
Chamber Temperature (TTT). The value in the upper left-hand corner (VVV) is the
Validation Thermocouple temperature. The 2 digits in the upper left-hand corner (CVO)
represent the offset between Chamber thermocouple and Validation Thermocouple
Offset in hexadecimal. The 2 digits in the upper right-hand corner (TO) are the
Chamber Temperature Offset value in hexadecimal.
CHAMBER CALIBRATION:
6. Press the Unwrapped cycle button (first from the left) and after that press START
button to activate a chamber thermocouple calibration cycle. The system will run a
normal sterilization cycle. However, the LCD will continue to show the calibration
display as shown above. (Note: No “∗” will appear in this mode as it does for the
Validation Thermocouple calibration).
7. Wait for the chamber to reach the sterilization temperature of 134 °C.
New! Keypad functions at this time:
Unwrapped Key: increment current selected offset
Wrapped Key: decrement current selected offset
Stop Key: end chamber thermocouple calibration
8. Observe the chamber temperature as displayed on the reference thermometer and on
the upper right of the Statim LCD (TTT value). New! Adjust the TO value by using
the Unwrapped and Wrapped keys until the displayed temperatures match to within
+/- 0.2 °C. Please note that Chamber Temperature Offset TO flashes when it is
allowed to be adjusted.
9. When the adjustment is complete, press the STOP button to end the chamber
thermocouple calibration cycle.
10. Move to the Validation Thermocouple calibration procedure.
VVV CVO TTT TO
DDD
Chamber
thermocouple
hexadecimal offset
Chamber
temperature in ºC
Difference between
Validation TC and chamber
temperatures in ºC
Validation thermocouple
hexadecimal offset compared
with chamber reading
Validation
thermocouple
reading

3
Validation Thermocouple Calibration:
11. New! Turn the machine off and back on, while keeping Unwrapped and Wrapped
button pressed to go back to Service Mode. Enter password to continue. Toggle
using keypad through the menu selection to reach Calibration option and press R&P
key. The display should show the calibration screen.
12. Check that there is sufficient water in the water reservoir before proceeding.
13. Start a Validation Assy. self-calibration cycle. To do this, press and hold the
UNWRAPPED button and in the same time press START button. The character “∗”
will appear immediately to the right of the Validation thermocouple hexadecimal
offset on the display to indicate that a Validation Assy. calibration cycle is running.
This calibration will take approximately 6 minutes.
14. Allow the Validation Assy. self-calibration to complete. The temperature within the
chamber will rise to the sterilization temperature. Wait until sterilization phase of the
calibration cycle ends automatically. The offset value in the upper left-hand corner
of the display (CVO) may have changed to a new offset value.
15. Press the STOP button to end the Validation TC self-calibration cycle.
16. Power off the Statim.
Calibration of the Statim autoclave thermocouples is now complete.

4
2. Statim S-Class Calibration - Software Revision 6.00 & Higher
Instructions for the Calibration of Statim S-Class Autoclave
Warning
Incorrect or inaccurate calibration may cause unsuccessful sterilization of
instruments.
Always recalibrate the thermocouples and pressure transducer after
replacing a steam generator, probe bracket, pressure transducer,
controller board, pressure interface board, or microprocessor / EEPROM.
In addition, after the thermocouple is bent or reconnected to the controller
board, recalibration is recommended.
S-Class units contain electronic components which may be damaged or
destroyed by electro-static discharge (ESD). Observe appropriate
safeguards when calibrating.
Always wear a static strap when working with or near printed wiring
boards. In addition, use static footstraps, grounding mats and grounded
work surfaces when calibrating.
Make sure that there is sufficient steam-process distilled water in the unit
prior to starting calibration.
The AlEx steam generator thermocouple doesn't require calibration. The chamber
thermocouple and pressure transducer however must be calibrated to ensure the correct
operation of the unit.
New! The chamber thermocouple is calibrated by adjusting the Chamber Thermocouple
Offset by using the UNWRAPPED and WRAPPED keys (see instructions below) while
comparing a temperature on the display with a temperature measured by a reference
thermometer.
The pressure transducer is calibrated by using the same UNWRAPPED and WRAPPED
(see instructions below) to adjust the measured chamber pressure reading on the LCD
to match the reference pressure meter attached to the cassette. The calibration is then
verified by comparing the measured chamber pressure to the calculated chamber
pressure and making a fine adjustment, if necessary.
To calibrate a Statim unit, follow these steps:
SETUP:
NOTE: Only the chamber thermocouple and pressure sensor need to be
calibrated. No boiler calibration is required on units with software revision above
R410.
1. Turn the unit off and fill the reservoir with steam-distilled water.
2. New! There is no need to remove the cover from the Statim in order to perform the
calibration.
3. Insert a calibration cassette and connect the external temperature and pressure
probe.

5
4. New! Power up unit while keeping Unwrapped and Wrapped button pressed to enter
Statim Service Mode. This Service Mode is password protected, enter password to
continue (default password is: Unwrapped, Wrapped, R&P and Stop keys pressed in
this order).
Keypad functions at this time:
Unwrapped Key: Select next item in the menu.
Wrapped Key: Select previous item in the menu.
Rubber and Plastic Key: Enter current selection
Toggle using keypad through the menu selection to reach Calibration option and
press R&P key.
5. Confirm that the display appears similar to the example above.
The value in the lower right-hand corner of the display (CCC.C) represents Chamber
Temperature. The value in the upper left corner (PPP.P) is the Chamber Pressure. The
following two digits in the upper left corner of the display (PO) represent the Pressure
Sensor Offset value in hexadecimal followed by the theoretical chamber Temperature
calculated from pressure (TTT.T). The two digits in the upper right corner of the display
(CO) represent the Chamber Offset value in hexadecimal.
NOTE: For software revisions higher than 4.15 (R415), in order to account for the
temperature drift of the pressure sensor, the field PO has two functions:
1. When chamber pressure is below 115kPa the offset will have one
value POA – Pressure Offset Atmospheric.
2. When chamber pressure is higher than 115kPa the PO field will
switch to indicate the POS – Pressure Offset Sterilization.
PPP.P PO TTT.T TO
CCC.C
Chamber
thermocouple
hexadecimal offset
Chamber theoretical
temperature [ºC] calculated
from pressure
Chamber temperature in ºC
Pressure
offset in
hexadecimal
Chamber
pressure in
kPa

6
CHAMBER CALIBRATION:
(Temperature and Pressure)
6. To start a chamber calibration cycle press and release the Unwrapped cycle button
and then press START button. The system will run a normal sterilization cycle, but the
LCD will continue to show the calibration display as shown in the example above.
7. By using the Unwrapped key (+) and Wrapped Key (-) adjust pressure offset (at
atmospheric pressure) until the internal sensor pressure reading (as displayed in the
PPP.P field) matches the pressure reading on the external pressure meter within
±0.5Kpa. The PO field will show the new pressure offset. For software revisions
higher than 4.15 (R415) PO will represent POA (Pressure Offset Atmospheric). This
has to be done within 30 seconds (see screen below):
8. After 30 seconds, the calibration cycle will continue by entering the heating up phase.
Allow the chamber to reach the sterilization temperature. As pressure builds in the
chamber check for leaks in the cassette, associated piping and fittings. A steam leak
in the system will introduce errors in the measurement and will result in improper
calibration and non-sterile instruments.
New! Keypad functions at this time:
Unwrapped Key: increment current selected offset
Wrapped Key: decrement current selected offset
Rubber and Plastic Key: select between PO and TO
Stop Key: end chamber thermocouple calibration
9. During calibration the unit will run a normal cycle except the beginning of the holding
phase (sterilization phase) when for ten consecutive times all the devices are turned
off for approximately 10 seconds to facilitate the calibration process. During these
periods chamber temperature could go down to 131°C. After these ten “calm” periods
the unit will resume normal operation (see the TIP below for checking the calibration
during normal operation).
10. During these “calm” periods observe the chamber temperature as displayed on the
reference thermometer and on the lower right side of the Statim LCD (CCC.C value).
New! Adjust the TO value by using the Unwrapped and Wrapped keys until the
displayed temperatures match to within +/- 0.2 °C. Please note that Chamber
Temperature Offset TO flashes when it is allowed to be adjusted. If PO flashes press
R&P key to select TO field. Adjust TO when the display shows:
PPP.P PO TTT.T TO
Adjust Press! CCC.C
PPP.P PO TTT.T TO
Adjust Temp! CCC.C

7
11.For software revisions higher than 4.15 (R415) when chamber pressure is higher
than 115kPa the PO field will switch to indicate the POS – Pressure Offset
Sterilization. During the sterilization phase, after adjusting the temperature, press
R&P key to select the PO field (PO field will be flashing) and using the keypad, adjust
the pressure offset POS to match the external meter pressure indication within 1 kPa.
NOTE: POS should not be more than 14 counts (7kPa) away in any direction from
POA.
TIP: To make sure the calibration has been done correctly, look at the external
meter. When it shows 136.5°C you should hear the valve clicking (the valve opens at
136.5°C).
12. Verify that for the rest of the calibration cycle the temperature and pressure
readings (internal and external) are the same.
13. When the adjustment is complete, press the STOP button to end the chamber
calibration cycle. Calibration cycle will end automatically after 5 min of holding the
temperature above 134°C. Press the Stop button again to reset the unit.
NOTE: for software revisions higher than 4.15 (R415): If during recalibration POA
is changed, the value of POS will be automatically reset to the new value of POA,
therefore when chamber pressure is higher than 115kPa, POS has to be readjusted.
14. Power off the Statim.
Calibration of the Statim S-Class autoclave is now complete.

8
3. Statim Data Logger Quick Setup Guide
For units with Rev. 7 Printed Circuit Board Only
Note: Please do not connect Statim Data Logger. Follow instruction below
first.
Step 1: Selection of the USB Flash/MSD Option.
a) Selection of the USB Flash/MSD Option
i. Power up unit while holding the Stop button pressed. The
user menu is going to be displayed.
ii. By using Unwrapped and Wrapped keys scroll down to
RS232. Press Rubber and Plastic key.
iii. The RS232 configuration menu is displayed. By using
Unwrapped and Wrapped keys scroll down to the
USB/Flash MSD option. Press Rubber and Plastic Key.
b) Selection of the Serial port Bitrate to 9600
i. By using Unwrapped and Wrapped keys scroll down to
Serial Port Bitrate.
ii. The Serial Port Bitrate is going to be displayed. By using
Unwrapped and Wrapped keys scroll down to 9600. Press
Rubber and Plastic Key.
c) Selection of Printer user ° Char
i. By using Unwrapped and Wrapped keys scroll down to
Printer user ° Char.
ii. Use Unwrapped Key to increment value by one, Wrapped
Key to increment value by ten. Select value 32 [0x20]. Press
Rubber and Plastic Key.
d) Save and Exit
i. By using Unwrapped and Wrapped keys scroll down to Save
and Exit. Select by pressing Rubber and Plastic key.
ii. The following screen is going to be displayed:
HH:MM DD/MM/YYYY
“MSD NOT DETECTED”/”INSERT FLASH/MSD”/”SELECT A CYCLE”
Step 2: Setup Date / Time.
a) Power up unit while holding the Stop button pressed. The user
menu is going to be displayed.
b) By using Unwrapped and Wrapped keys scroll down to Time/Date
Setup. Press Rubber and Plastic key.
c) Setup Time and Date by pressing Unwrapped, Wrapped, and
Rubber and Plastic Keys. Press stop when done.
HH:MM DD/MM/YYYY
“MSD NOT DETECTED”/”INSERT FLASH/MSD”/”SELECT A CYCLE”

9
Step 3: Setup Unit ID.
a) Power up unit while holding the Stop button pressed. The user
menu is going to be displayed.
b) By using Unwrapped and Wrapped keys scroll down to Unit ID
Setup. Press Rubber and Plastic key.
c) Setup Unit ID by pressing Unwrapped, Wrapped, and Rubber and
Plastic Keys. Press stop when done.
Step 4: Attach Statim USB adapter
a) Make sure that both Statim and Statim USB adapter are Off.
b) Connect Statim USB adapter to Statim unit by using the serial
cable.
c) Power up the USB Data Logger
d) Power up Statim unit.
e) LCD Display will show:
f) Insert USB memory
g) After a few seconds the LCD display changes to
HH:MM DD/MM/YYYY
“MSD NOT DETECTED”/”INSERT FLASH/MSD”/”SELECT A CYCLE”
HH:MM DD/MM/YYYY
USB/FLASH DETECTED/SAFELY REMOVE MSD/SELECT A CYCLE

10
4. PCB Rev. 7.0 Assembly Instructions
All the connections remain the same as per previous PCB revisions with the exception of the thermocouple
connection. In order to attach the thermocouple to the PCB, the thermocouple has to be attached to a TC
connector as per following instructions:
TC connector & Thermocouple assembly
Detach wire cover with
Screws 1 and 2.
Cut Ground wire.
Trim wires at 0.2 inches (5mm).
Insert wires through the TC
connector’s rubber o-ring.
Attach Yellow wire at the “+” sign of the TC connector and Red
wire at the “-“ sign of the TC connector using Screws 3 and 4.
Position the rubber o-ring into its groove.
Reattach wire cover.
If serial cable is required (external printer cable replacement), attach adapter bracket, DB25 to DB9, to the
printer connector opening on chassis using 2x screws. Attach DB9 connector from the serial cable to the
adapter bracket and the 14-pin connector to Rev 7 PCB at connector J107.
Step 5
Pin 1
DB9 connector
DB25 to DB9 adapter
Screw 1
Screw 2
Ground wire
Screw 3
Screw 4
Rubber o-ring groove
Wire cover
Step 1
Step 2
Step 3
Step 4
0.2’ (5mm)

5.PCB 7 Replacement Kits ST5000/S
11
1.
01-109370S
PCB SEVEN 100V/110V ST5000 NA, Japan
•PCB Seven + Software
2.
01-109746S
PCB 7 Repl. Kit ST5000 110V, NA, P
•PCB Seven + Software + Printer + Serial Cable
•Instructions
3.
01-109747S
Alex Boiler/PCB7 ST5000 NA 110V, P.
•PCB Seven + Software + Printer + Serial Cable
•Alex Kit
•Instructions
4.
01-109816S
PCB 7 Repl.Kit ST5000 110V NA No P.
•PCB Seven + Software + Serial Cable
•Instructions
5.
01-109820S
Alex/PCB7 ST5000 NA 110V, No P.
•PCB Seven + Software + Serial Cable
•Alex Kit
•Instructions
6.
01-109395S
PCB SEVEN 110V, ST5000 US, C
•PCB Seven + Software
7.
01-109823S
PCB 7 Repl. Kit ST5000 110V, US, P.
•PCB Seven + Software + Printer + Serial Cable
•Instructions
8.
01-109824S
Alex Boiler/PCB7 ST5000 US 110V, P.
•PCB Seven + Software + Printer + Serial Cable
•Alex Kit
•Instructions
9.
01-109826S
PCB 7 Repl.Kit ST5000 110V US No P.
•PCB Seven + Software + Serial Cable
•Instructions
10.
01-109827S
Alex/PCB7 ST5000 US 110V, No Print.
•PCB Seven + Software + Serial Cable
•Alex Kit
•Instructions
11.
01-109829S
Alex/PCB7 ST5000 100V, No Print.
•PCB Seven + Software + Serial Cable
•Alex Kit
•Instructions
12.
01-109830S
Alex Boiler/PCB7 ST5000 100V, P.
•PCB Seven + Software + Printer + Serial Cable
•Alex Kit
•Instructions
13.
01-109396S
PCB SEVEN ST5000 230V, C
•PCB Seven + Software
14.
01-109839S
PCB 7 Repl. Kit ST5000 230V, P.
•PCB Seven + Software + Printer + Serial Cable
•Instructions
15.
01-109840S
Alex Boiler/PCB7 ST5000 230V, P.
•PCB Seven + Software + Printer + Serial Cable
•Alex Kit
•Instructions

5.PCB 7 Replacement Kits ST5000/S
12
16.
01-109842S
PCB 7 Repl. Kit ST5000 230V, No Pr.
•PCB Seven + Software + Serial Cable
•Instructions
17.
01-109843S
Alex Boiler/PCB7 ST5000 230V, No Pr.
•PCB Seven + Software + Serial Cable
•Alex Kit
•Instructions
18.
01-109368S
PCB SEVEN 220/240V ST5000S, C
•PCB Seven + Software
19.
01-109846S
PCB 7 Repl. Kit ST5000S, Pr.
•PCB Seven + Software + Printer + Serial Cable
•Instructions
20.
01-109847S
Alex Boiler/PCB7 ST5000S, Pr.
•PCB Seven + Software + Printer + Serial Cable
•Alex Kit
•Instructions
21.
01-109849S
PCB 7 Repl. Kit ST5000S, No Pr.
•PCB Seven + Software + Serial Cable
•Instructions
22.
01-109850S
Alex Boiler/PCB7 ST5000S, No Pr.
•PCB Seven + Software + Serial Cable
•Alex Kit
•Instructions
23.
01-109369S
PCB SEVEN Czech 230V ST5000S, C
•PCB Seven + Software
24.
01-109851S
PCB 7 Repl. Kit ST5000SCzech, Pr.
•PCB Seven + Software + Printer + Serial Cable
•Instructions
25.
01-109852S
PCB 7 Repl. Kit ST5000SCzech, NoPr.
•PCB Seven + Software + Serial Cable
•Instructions
26.
01-109398S
PCB SEVEN 230V ST5000S 60PSI, C
•PCB Seven + Software
27.
01-109855S
PCB 7 Repl. Kit ST5000S 60PSI, Pr.
•PCB Seven + Software + Printer + Serial Cable
•Instructions
28.
01-109856S
Alex Boiler/PCB7 ST5000S 60PSI, Pr.
•PCB Seven + Software + Printer
•Alex Kit
•Instructions
29.
01-109858S
PCB 7 Repl. Kit ST5000S 60PSI No P.
•PCB Seven + Software
•Instructions
30.
01-109859S
Alex/PCB7 ST5000S, 60PSI No Pr.
•PCB Seven + Software + Serial Cable
•Alex Kit
•Instructions

6. PCB 7 Replacement Kits ST2000/S
13
1.
01-109365S
PCB SEVEN Alex 110V 2000 B
•PCB Seven + Software
2.
01-109690S
PCB 7 Repl. Kit, ST2000 110V, B
•PCB Seven + Software + Serial Cable
•Instructions
3.
01-109716S
Alex Boiler/PCB7 Kit ST2000 110V, B
•PCB Seven + Software + Serial Cable
•Alex Kit
•Instructions
4.
01-109722S
Alex Boiler/PCB7 Kit ST2000 100V, B
•PCB Seven + Software + Serial Cable
•Alex Kit
•Instructions
5.
01-109366S
PCB SEVEN, 230V, ST2000, B
•PCB Seven + Software
6.
01-109692S
PCB 7 Repl. Kit, ST2000 230V, B
•PCB Seven + Software + Serial Cable
•Instructions
7.
01-109717S
Alex Boiler/PCB7 Kit ST2000 230V, B
•PCB Seven + Software + Serial Cable
•Alex Kit
•Instructions
8.
01-109363S
PCB SEVEN 220/240V ST2000S Alex,B
•PCB Seven + Software
9.
01-109642S
PCB 7 Repl. Kit, ST2000S 230V, B
•PCB Seven + Software + Serial Cable
•Instructions
10.
01-109718S
Alex Boiler/PCB7 Kit ST2000S 230V,B
•PCB Seven + Software + Serial Cable
•Alex Kit
•Instructions
11.
01-109397S
PCB SEVEN 230V ST2000S Alex 60PSI
•PCB Seven + Software
12.
01-109696S
PCB 7 Repl. Kit ST2000S 230V, 60 PSI
•PCB Seven + Software + Serial Cable
•Instructions
13.
01-109734S
Alex Boiler/PCB7 ST2000S 60PSI, B
•PCB Seven + Software + Serial Cable
•Alex Kit
•Instructions
14.
01-109364S
PCB SEVEN Czech 230V ST2000S Alex, B
•PCB Seven + Software
15.
01-109640S
PCB 7 Repl. Kit, ST2000S Czech, B
•PCB Seven + Software + Serial Cable
•Instructions
16.
01-109736S
Alex Boiler/PCB7 ST2000S Czech, B
•PCB Seven + Software + Serial Cable
•Alex Kit
•Instructions

14
7. Statim Autoclave Conductivity Circuit Calibration Instructions
Statim Autoclave equipped with PCB rev 7.x requires Conductivity Circuit Calibration
1. Disconnect conductivity sensors wires
2. Using a wire, make a short on the FLOAT pins (J4-5 and J4-6)
3. Enter Service Mode (Power up unit while holding Unwrapped and Wrapped button
pressed.)
4. Use Unwrapped Key to select next item in the menu or Wrapped Key to select previous
item in the menu until Conductivity Setup is displayed.
5. Press Rubber and Plastic Key to enter Conductivity Setup selection.
Display:
CND=xx.xuS/NNN
L=LL.L H=HH.H G=G.GG
Where
xx.x water conductivity in µS
NNN conductivity measurement in ADC (Analog to Digital) counts (0…255)
LL.L Lower value threshold in µS (No water threshold), default 0.3µS
Values lower than this triggers “No Water, Refill reservoir” error.
HH.H High value threshold (Bad water threshold), default 10µS.
Values larger than this triggers “Bad Water Quality” error.
G.GG Water conductivity circuit gain. Default 1.00
Note: Distilled water readings should be between Low and High thresholds.
6. Check/adjust Low and High threshold values to the default ones.
7. By pressing the Rubber and Plastic Key the selection moves between LO, HI and G
8. Select “G”, Water conductivity circuit gain (flashing value on the display), by pressing
Rubber and Plastic Key
9. Adjust G.GG value so that the conductivity in ADC counts (NNN) shows 186 ±1 count.
10. Press Stop key to exit Water conductivity mode and save displayed thresholds “HH.H”,
“LL.L” and “G.GG” and enter normal mode of operation, “Select cycle” screen.
Note: Keypad functions in Conductivity Setup screen:
Unwrapped Key: increment current field (the flashing value on the display)
Wrapped Key: decrement current field (the flashing value on the display)
Rubber and Plastics: move to next field
Stop key: exit

15
8. Statim Rev. 7 PCB User and Service Menus
1. User setup menu ...........................................................................................................16
1.1 Time/Date Setup Mode........................................................................................... 16
1.2 Language Setup .....................................................................................................17
1.3 Unit ID Setup .......................................................................................................... 17
1.4 Water Quality.......................................................................................................... 18
1.5 Last Printout ...........................................................................................................18
1.6 RS232 .................................................................................................................... 18
1.7 End of Line CR/LF .................................................................................................. 19
1.8 Serial Port Bit Rate .................................................................................................20
1.9 Printer user °char...................................................................................................20
1.10 Save and Exit ......................................................................................................... 20
1.11 Exit .........................................................................................................................20
2. Service Menu................................................................................................................. 21
2.1. Calibration .............................................................................................................. 22
2.2. Set cycle counter ....................................................................................................24
2.3. Lock cycles ............................................................................................................. 24
2.4. Conductivity Setup.................................................................................................. 25
2.5. Water.Cnd Tmp. Comp........................................................................................... 26
2.6. Stored CF Printouts ................................................................................................26
2.7. Clear CF Printouts ..................................................................................................26
2.8. Display last CF# .....................................................................................................27
2.9. Devices Test On/Off ...............................................................................................27
2.10. Temperature Offset.............................................................................................27
2.11. Press. Atm. Offset...............................................................................................28
2.12. Press. Ster. Offset............................................................................................... 28
2.13. Press. Sensor Type............................................................................................. 28
2.14. Validation Offset.................................................................................................. 29
2.15. Voltage Calibration..............................................................................................29
2.16. Voltage setup ......................................................................................................29
2.17. Repeater mode ...................................................................................................30
2.18. Factory default ....................................................................................................30
2.19. Change Password...............................................................................................30
2.20. Backup NVRAM ..................................................................................................31
2.21. Restore NVRAM.................................................................................................. 31

16
1. User setup menu
Note: To enter User Setup Menu power up Statim while Stop key is pressed
To initially setup your Statim
>Time/Date Setup
Language Setup
Unit ID Setup
Water Quality
Last Printout
RS232
End Of Line CR/LF
Serial Port Bitrate
Printer user ß char
Save and Exit
Exit
Keypad
Unwrapped Select next item in the menu
Wrapped Select previous item in the menu
Rubber and Plastics Enter the indicated sub menu selection
Stop Exit menu to normal mode of operation
1.1 Time/Date Setup Mode
Set the proper time and date
18:00 20/09/2005
HH:MM DD/MM/YYYY
Keypad
Unwrapped Increase current field
Wrapped Decrease current field
Rubber and Plastics Select next field
Stop Save and exit to normal mode of operation

17
1.2 Language Setup
Display information in your desired language
Display
N.A ENGLISH
Available Languages
N.A ENGLISH
JAPANESE
U.K.ENGLISH
SVENSKA
FRANCAIS
POLSKI
DEUTSCH
MAGYAR
ESPANOL
CESKY
ITALIANO
NORSK
DANSK
ISLENSKA
PORTUGUES
SLOVENCINA
NEDERLANDS
EESTI
Japanese (Sterimaster)
Keypad
Unwrapped Select next language
Wrapped Select previous language
Rubber and Plastics If Repeater mode is on, this key will scroll through all the
available display messages of the chosen language.
Stop Save and exit to normal mode of operation
1.3 Unit ID Setup
Associate unit with an ID number
Unit#
000
Keypad
Unwrapped Decrease current field
Wrapped Increase current field
Rubber and Plastics Select next digit
Stop Save and exit to normal mode of operation

18
1.4 Water Quality
Display detected water quality
Water Quality
CD=xx.xuS/NNN/y.yppm
Screen Representation
xx.x Water conductivity in uS (micro-Siemens)
NNN Water conductivity in ADC (Analog to Digital converter)
counts (0…255)
y.y Water quality in ppm (parts per million)
Keypad
Rubber and Plastics Return to main menu
Stop Exit to normal mode of operation
1.5 Last Printout
To reprint the last cycle
Keypad
Stop Print the previous cycle data and exit to normal mode of
operation
1.6 RS232
Select which serial device to attach
>RS232
USB FLASH/MSD
Debug Mode
N/A
Serial Printer
XML
Keypad
Unwrapped Select next option. Second line shows the new value
Wrapped Select previous option. Second line shows the new value
Rubber and Plastics Select and return to main menu
Stop Exit, without saving, to normal mode of operation
This manual suits for next models
1
Table of contents
Other SciCan Cassette Player manuals