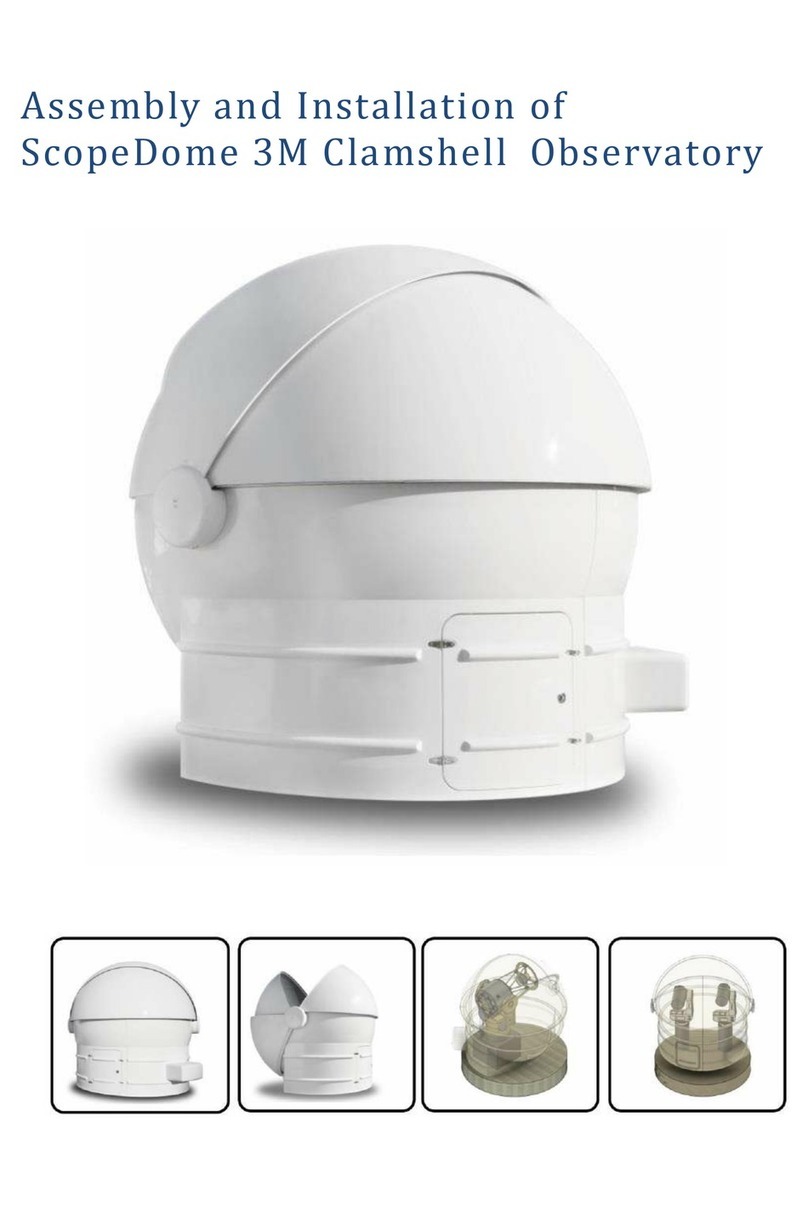
ScopeDome 4M User manual

ScopeDome.com
2011 Slupsk - Poland
sky observatory
Assembly
Manual
ver. 1.0
Hereby user guide describes, step by step, all the operations
to be accomplished for ScopeDome proper assembling.
The manufacturer recommends to set-up the dome according
to the procedure hereby referred. Mounting the dome
in recommended sequence ensures efficient dome's operation
and - at the same time - allows avoiding unnecessary steps
and waste of time when fitting-up the dome.
ScopeDome 4M

ScopeDome.com
2011 Slupsk - Poland
Preliminaries
The main stages of assembly
Necessary tools
The time needed to perform
assembly
Before assembling you should:
- drill
- a set of screwdrivers
- a set of drills with diameters from 4 to 15 mm
- a set of ordinary keys and sockets
- automatic screwdriver
- a set of hex keys
- electronic spirit level
- laser rangefinder
Installation of the dome should take no more than 8
hours. Effective building team assemble the dome in 4
hours, the next four hours will be needed for the
automatics installation. For the dome's installation there
is a need of assistance of five people or three people
and the crane.
a) carefully read this manual and even before the
assembly try to thoroughly understand and imagine
the various stages of construction
b) check that all dome's components were delivered
c) carefully examine all the parts and make sure that
you can identify and name them as they are called in
the manual
d) schedule work and allocate tasks for all people in
various stages of assembly, so as to know what to
do and what is their role in every stage
e) obtain the necessary tools
S1 Embedding, mounting and adjustment
of rotating ring
S2. Assembly and sealing of the outer casing
S3. Embedding and assembly of the panels
of the dome base
S4. Assembly and sealing of the side panels
S5. Installation of the rear panel
S6. Installation of the shutter's drive
S7. The shutter and its handles assembly
S8. Installation of the dome's automatics devices
S9. Installation of the inner casing panels
Check out the pictures on the CD-ROM
attached to the manual.
G H
E
K
J
page 2
Fig. 2. Diagram of the dome – top/rear view
EN
How to start ?
U
Fig. 1. Diagram of the dome - front view
Naming and components symbols
A. The lower part of the rotating ring
B. The upper part of the rotating ring
C. The left panel of the base of the dome
D. The right panel of the dome base
E. The front panel of the base of the dome
F. The top front panel of the dome
G. The upper left side of the dome
H. The upper right side of the dome
J. The rear panel of the dome
K. The shutter
L. Outer casing panel of the dome
M. Inner casing panel of the dome
N. Motor of the rotation drive
O. Motor of the shutter's drive
P. The main rolls of the dome's rotation
mechanism
R. Side rolls of the dome's rotation mechanism
S. Cog rim of the dome's rotation mechanism
T. Cog rim of the shutter's drive mechanism
U. The shutter's security handles
W. Side support of the dome's rotation
mechanism
Q. Power contacts of the dome's movable
section
B
A
L
F
CD
P
L
G
H
K
J
D
C
T

ScopeDome.com
2011 Slupsk - Poland
Installation of the dome rotating ring
1. Assemble the bottom of the rotating ring on the
observatory's crown. To combine elements of the
ring, use the side supports of the dome rotation
mechanism. Center the ring on the observatory's
crown.
2. Attach the bottom of the rotating ring of the dome
the observatory's crown using at least 16 x M12
bolts. The more mounting screws the better. First,
use the holes next to the side supports. Note that
these bolts are the only security elements protecting
against removing the dome from the observatory's
building in the case of very high winds. For fixing the
rotation ring to the the observatory's crown, you can
also also use Hilti anchors.
3. Assemble the upper part of the dome rotating ring
on the bottom part of the rotating ring. For
connecting the upper ring segments, use
countersunk screws. Please note that the ends of
the bolts should not touch the side supports. Use a
rubber hammer to align the joints of segments.
Connections should be as smooth as possible.
Uneven joints will cause rapid wear of the main rolls
of the rotation mechanism. For connecting the
segments, use the connectors mounted on their
ends.
4. During the installation, please pay attention to the
wires of the power contacts system between
stationary and movable part of the dome's drive.
Their failure will then be very troublesome to repair.
5. Adjust the height and location of the power contacts
of the movable part so as to slightly touch the brass
rolls supplying the power. Check the power supply
contacts if they completely overlap with brass rolls
and do not cause a short circuit between the rolls.
6. After this stage, the rotation drive mechanism is
completely assembled.
The entire dome will be built on the rotation ring. At
subsequent stages of assembly access to it will be
very difficult. Before the next stages of assembling
you should very carefully adjust it and test its
performance.
Installation of the dome rotating ring
Fig. 3. The lower part of the rotating ring
A. Segment of the ring base
W. Ring's connection place
P. The main roll of the base ring
Fig. 4. Side support of the rotation mechanism
1. The power cord of the movable part of the dome
page 3
M10
M10
M10
M10
M10
M10
M8 M8
M8
M10
M10
M10
M10
M10
M10
M8 M8
M8
M10
M10
M10
M10
M10
M10
M8 M8
M8
M10
M10
M10
M10
M10
M10
M8 M8
M8
M10
M10
M10
M10
M10
M10
M8 M8
M8
M10
M10
M10
M10
M10
M10
M8 M8
M8
M10
M10
M10
M10
M10
M10
M8 M8
M8
M10
M10
M10
M10
M10
M10
M8 M8
M8
M10
M10
M10
M10
M10
M10
M8 M8
M8
M10
M10
M10
M10
M10
M10
M8 M8
M8
M10
M10
M10
M10
M10
M10
M8 M8
M8
M10
M10
M10
M10
M10
M10
M8 M8
M8
M10
M10
M10
M10
M10
M10
M8 M8
M8
M10
M10
M10
M10
M10
M10
M8 M8
M8
M10
M10
M10
M10
M10
M10
M8 M8
M8
M10
M10
M10
M10
M10
M10
M8 M8
M8
fasolka35x100
fasolka35x100
fi35mm
fi35mm
fasolka35x100
fasolka35x100
fi35mm
fi35mm
fasolka35x100
fasolka35x100
fi35mm
fi35mm
fasolka35x100
fasolka35x100
fi35mm
fi35mm
fasolka35x100
fasolka35x100
fi35mm
fi35mm
fasolka35x100
fasolka35x100
fi35mm
fi35mm
fasolka35x100
fasolka35x100
fi35mm
fi35mm
fasolka35x100
fasolka35x100
fi35mm
fi35mm
fasolka35x100
fasolka35x100
fi35mm
fi35mm
fasolka35x100
fasolka35x100
fi35mm
fi35mm
fasolka35x100
fasolka35x100
fi35mm
fi35mm
fasolka35x100
fasolka35x100
fi35mm
fi35mm
fasolka35x100
fasolka35x100
fi35mm
fi35mm
fasolka35x100
fasolka35x100
fi35mm
fi35mm
fasolka35x100
fasolka35x100
fi35mm
fi35mm
fasolka35x100
fasolka35x100
fi35mm
fi35mm
M10
M10
M10
M10
M10
M10
M8 M8
M8
M10
M10
M10
M10
M10
M10
M8 M8
M8
M10
M10
M10
M10
M10
M10
M8 M8
M8
M10
M10
M10
M10
M10
M10
M8 M8
M8
M10
M10
M10
M10
M10
M10
M8 M8
M8
M10
M10
M10
M10
M10
M10
M8 M8
M8
M10
M10
M10
M10
M10
M10
M8 M8
M8
M10
M10
M10
M10
M10
M10
M8 M8
M8
A
Fig. 5. Power contacts of the movable part of the
dome
1. Mobile contacts set
2. Stationary contacts set
3. Resilient power contact
4. Brass contact roll
P
W
B
A
2
1
Holes for screws to attach
the ring to the observatory's
crown
W
A
B
P
S
R
3
4
Q
Q
1
1 1
2
2
3 3
4
4
S1
EN

ScopeDome.com
2011 Slupsk - Poland
The sequence of the dome's elements assembly
page 4
Testing the rotating ring assembly
a) In a few places measure the diameter of the rotating
ring using the laser. The deviation of individual
measurements should not be greater than + / - 3 mm.
b) Check that all the main rolls are well pressed into the
upper ring of the drive. If not - it is necessary at this
point, adjust their height.
c) Check that the upprer ring is well leveled. Electronic
spirit level should show 0 degrees + / - 0.1 degrees at
every place of the ring. Measurements should be
done at each of the eight puds of the lower ring.
If the rotating upper ring is not well leveled, adjust the
height of the rolls so that the ring was perfectly
horizontal, while not wiped on the side supports. The
distance between the ring and side handles should be
about 5 mm. During the adjustment you should pay
attention to whether the cog rim of the rotation
mechanism fits the cog wheel of the motor.
d) Check that the side rolls of rotation mechanism are
not unduly pressed against the cog rim. Between the
side roll and the cog rim there should be a slight gap
ofabout 0.5mm. If the rolls are squeezed too tight,
adjust the position of the side supports.
e) A well adjusted ring should be able to rotate freely
and effortlessly with the force of one hand.
f) Before further installation stages you should
repeatedly rotate the upper ring left and right, noting
that it does not touch anywhere on the elements of
the lower ring and the rotation takes place smoothly
and without resistance.
g) If the motor blocks the movement of the base ring, try
to loosen the bolt mounting the cog wheel and move
it slightly to the center of the ring so that the cog
wheel will not be in contact with the cog rim.
h) If the ring drive works properly, you are ready for
further stage of the dome's assembly.
Fig. 6. Side casings and the rotating ring
1. Observatory's crown
2. The space for the power cord exit of the
movable part of the dome
W
A
B
P
S
R
L
M
5cm
21
20cm
D
Fig. 7. The upper part of the rotating ring
1. Ring connectors
2. Connectors holes
3. Holes for fastening the outer casing
4. Holes for fastening the the dome base panels
B
B
1
3
4
2
1 1
2
2
3 3
4
4
S1
2
EN

ScopeDome.com
2011 Slupsk - Poland
Assembly and sealing of the outer
casing panels
Embedding and assembly of the dome
base panels
Installation of the dome we start from installing four
panels the outer casing on the top of the rotating ring.
You should seal:
- the connector between the casing and the upper ring
- joints between sections of the outer casing
Each of the four parts of the outer casing should be
tighten by the countersunk screws M8x20 into the upper
part of the ring. The holes - previously prepared in the
manufacture should be used to do it. Screw heads should
not protrude above the plane of the outer casing. During
the assembly of the casing you should pay attention
whether it is centrally mounted on the ring. At the end, the
inner edges of the outer casing you should tighten by the
M6x25 screws.
On the ring with mounted and sealed outer casing we put
the dome base panels and screw them on together.
Installation is best to start from the left panel of the base.
Then we combine the left side of the base panel with the
front panel of the base. At the end attach to them, right
panel base.
These three elements together we screw on into the
upper ring of the drive using the prepared holes and the
hex bolts M10x25. Under the bolts that connect the base
panels with the upper drive ring, please use washers
M10.
During installation you should use the markings on the
elements and the upper part of the base ring, matching
them to each other in such way: 1-1, 2-2, 3-3, etc.
The key issue for the integrity of the dome and its
protection from the rain is to seal all threaded outer
casings. This casings help to drain the water out of
the dome.
When installing panels and the outer casings you
should pay attention to the power cord connected to
the movable contacts. The cable should be piped to
the inside of the dome. Route the cable using the
prepared holes.
Assembly and sealing of the outer casings
page 5
Fig. 8. The outer casing panel - sealings
1. Seals or silicone
2. Rain or moisture
A
B
1
L
1
1
2
P
Fig. 9. The outer casing panels – sealings and
segment numbering
1. Seal or silicone
B
L
1
1 1
2
2
3 3
4
4
S2
S3
EN

ScopeDome.com
2011 Slupsk - Poland
S4 Assembly and sealing of the side
panels
Installation of the rear panel of the
dome
Installation of the
shutter drive
Embedding the shutter and the
shutter handles assembly
Appropriate panels of the dome we screwed on to the
panels of the base. We screwed on the left panel of the
dome to the left panel of the base, and the right panel of
the base to the right panel of the dome. At the end, the
upper front panel of the dome should be screwed on to
the front panel.
During installation you should use the markings on the
elements matching them to each other in such way: 1-1,
2-2, 3-3, etc.
The edge connecting the panels with the main base of the
dome panels should be sealed around the perimeter by
the rubber seal.
After this stage, we will have screwed on all the panels
except the rear panel of the dome and the shutter. The
next step is to screw on the rear panel of the dome which
crowns this building phase of a sphere of the dome. Then
we should just install the shutter drive and mount it on the
dome.
The shutter drive we screwed on the top of the dome to
its sides using five hex screws M10x30 on each side of
the dome. The steel bar of the drive should be additionaly
screw on to the gutter of the dome on each side using two
countersunk screws. Distance between the outermost
edges of the shutter must be adjusted so that was 140 cm
(+ / - 1 cm) around the entire perimeter of the dome
windows.
Before mounting the shutter we should declutched the
cog wheel of the drive by screwing off the four screws
fixing it to the flange mounted on the drive axle. If he will
mount the shutter with a crane, we can skip this step.
Disengaged the gear helps in mounting the flap. This
makes it easier to match the holes in the cog rim with the
cog wheel of the shutter drive.
Note the correct front-rear orientation of the shutter.
Embed it in accordance with the ribbing on the sides of
the dome.
S5
S6
S7
K
3
F
Fig. 12. Location of the limit switches
1. Limit switch Close
2. Limit switch Open
3. Pressure plate of the limit switches
H
Assembly of the shutter
1
2J
K
F
Fig. 11. The shutter drive
1. Cog rin of the shutter drive
2. Cog wheel of the shutter drive
3. Steel bar fixing the shutter drive
H
J
1 (T)
2
1
CDE
Fig. 10. Sealing of the side panels
1. Seal or silicone
3
page 6
EN

ScopeDome.com
2011 Slupsk - Poland
The easiest way to install the shutter is to do it manually
by applying the shutter from the back of the dome. It can
also be installed by crane by embedding it on the top of
the dome.
To hold the shutter in the back end position there will be
need of support at least three persons, becouse the
shutter is quite heavy. Doing it manually there will be a
need of support at least five people - two on each side
and one with long enough bracket to sustain the shutter
on the center.
After embedding of the shutter we screw on its side
handles. We screwed them on from the outside of the
side panels. The handle on the top of the dome must be
screwed on using the screws fixing the shutter drive.
Handles should be installed in such a position to slightly
tighten the aluminum strip with leading shutter rolls.
Mounting screw heads of the handles should be placed
on the outside of the dome in such way to avoid their
rubbing on the shutter leading mechanism.
Side handles of the shutter have two functions in the
dome's functionality:
All adjustments of the shutter drive (motoreducer's
height, handles location) should be done in such way to
have the cog wheel heavily pressed to the cog rim of the
shutter.
While applying the shutter we should pay attention to
the shutter side rolls. We can easily damaged them
during assembly by hitting them on the side panels
of the dome.
Note: When you place the shutter on the dome it
could be unstable. It should be locked on the teeth of
the cog wheel. The cog wheel must be secured by
screwing it on to the flange mounted on the drive
axle using the four screws.
When mounting the drive we should pay special
attention to the cog rim and the cog wheel of the
drive. The cog rim around the entire perimeter of the
dome should be closely pressed against the cog
wheel. In particular, note the extreme (open-closed)
position of the shutter.
1. They provide the necessary up/down pressure for the
cog rim of the shutter
2. They protect the shutter before removing it from the
dome by strong wind
Left/right rolls help to correct positioning of the
shutter during its the opening and closing.
S7
Installation of the shutter drive
page 7
K
F
Fig. 13. Location of the shutter handles
1. Handles mounted on the rear panel of the
dome
G
J
U
1
Fig. 14. The shutter drive scheme
1. The shutter main security rolls
2. The shutter side security rolls
3. The cog wheel of the drive
4. Screws fixing the steel bar of the shutter
drive
K
GH
T
U
32
1
4
EN

ScopeDome.com
2011 Slupsk - Poland
Fig. 16. Automatics devices and ScopeDome USB
Card V2.0 powering scheme
A. ScopeDome v2.0 Card Main Part
B. ScopeDome v2.0 Card Dome Part
C. Radio connection
D. Optional powering movable part of the card
E. Rotation drive motor
F. The shutter drive motor
Q. Power contact powering the movable part of the
dome
1. The main slot of power supply (230/110VAC)
2. UPS 230V input on the card
3. Line 230V input on the card (powering failure
sensor)
4. Inverter L/N/PE output on the card - powering
230V/3Phase inverter
5. Inverter Com/CW/CCW output on the card –
movement direction control
6. UVW inverters output - rotation drive motor
control
7. Slot of stationary part of power contacts
powering the dome
8. Slot of movable part of power contacts powering
the dome
9. UPS 230V input on the stationary part of the card
10. Inverter L/N/PE output on the card – powering
230V/3Phase inverter
11. Inverter Com/Open/Close output on the card –
the shutter movement direction control
12. UVW inverter output – the shutter drive motor
control
9
10
Installation of the inner casing of the drive and the dome control electronics
Installing the inner
casing panels
Assembly of ScopeDome USB Card
ver 2.0 automatics
At the end (after the installation of automatics), we screw
on the inner casing panels to the side supports of the
lower drive ring.
During the assembly it should be noted that the inner
casing do not wipeth anywhere on elements of the dome.
The inner edges of the casing we screw on using screws
M6x25. And this is the end of the dome assembly. Please
follow only the final test to see if the dome continues to
rotate freely.
Complete ScopeDome automation system consists of
following components:
Optionally, the card can be connected to:
Properly assembled dome should be able to be
rotated by hand with little effort in both directions
around the entire perimeter, with no audible effects
of friction and jams.
To verify the correctness of the dome assembly
please (manually or by using the rotary drive motor)
rotate it several times in both directions.
1. main part of the card (Main)
2. movable part of the card (Rotate)
3. dome's position encoder
4. home sensor
5. rotation drive inverter
6. rotation drive motor
7. the shutter drive inverter
8. the shutter drive motor
9. two limit switches (Open-Close)
10. power contact suplying the movable part of the dome
- hygrometer
- two thermometers (internal and external)
- the shutter's position encoder
- the second set of the shutter drive
To be able to take full advantage of the
opportunities ScopeDome 2.0 card
it be equipped with:
- VRLA battery of 12V/60 Ah
- integrated 12V/230VAC inverter and battery charge
(to maintain the power of a moving part of the dome
at a time when it is not in the Home position)
- UPS of 2200 Watt
- cloud cover sensor, eg. Boltwood Cloud Sensor or
AAG Cloud Sensor
- rain sensor
S9
S8
Fig. 15. Side casings and the rotation ring
1. Observatory's crown
2. Screw fixing the inner casing panel
W
A
P
L
M
1
2
Main Power
UPS
2200W
Inverter
230/3P
M
ScopeDome
USB Card
Main
230VAC
Inverter
230/3P
M
ScopeDome
USB Card
Rotate
Battery
12V/60Ah
Inverter
12V/230V
1
2
8
5
3
4
Q
A B
C
D
E F
Base Ring
Part
Rotate
Part
6
7
11
0
page 8
EN

ScopeDome.com
2011 Slupsk - Poland
page 9
Automatics installation
sequence
A. Controlling the rotation
drive motor
B. Installation of encoder
- attach the stationary part of the ScopeDome USB
card to the pier
- attach the rotation motor inverter close to the motor
- connect the card with the rotation motor inverter
according to the scheme
- connect the inverter with the dome rotation motor
- connect the power (230VAC) paying attention to the
order of the wires L / N / PE.
- turn on 230VAC power on the card
- press the CW and CCW buttons to check the dome
drive.
- on one of the dome side supports attach the dome
position encoder so that the cog rim passes through
the fork of the encoder.
- adjust the encoder's position so that the end of its
fork was in the middle of the cog rim teeth
- connect the encoder and the card
- very slowly rotate the dome and make sure that the
encoder does not touch the cog rim teeth during the
dome's rotation
From 2011, we introduced for sale a new encoder
module, mounted on the rotation drive cog wheel
axis (shaft) (behind the motoreducer). It allows you
to avoid the difficulty of adjustment of the sensor and
is much more resistant to inaccuracies in assembly
and dust. It is slightly more expensive than the
standard solution - but we believe its benefits and
durability compensates slightly higher price for the
item.
Proper connection of the phase (hot) power supply
wire is crucial for the correct functioning of the
automation. Due to security reasons, do not forget
under any circumstances connect the security
cable PE.
The speed of the dome can be adjusted by a
potentiometer on the front panel of the inverter.
The encoder is a very delicate and easy to be
damaged during assembly and adjusting the drive.
S8
Fig. 17. Installation and positioning the encoder
1. Encoder
2. Encoder's bracket
W
A
P
L
1
2
S
Fig. 18. Rotation drive
1. Rotation drive motor
2. Rotation drive cog wheel
3. Motoreducer (gear)
4. Rotation drive axis (shaft)
W
A
P
S
1
2
3
4
Installation of automatics EN

ScopeDome.com
2011 Slupsk - Poland
C. Installation of Home Sensor
D. Controlling the shutter drive motor
E. Connecting the card to PC
- Put the dome in such position to make the power
contacts (on stationary and movable part of the
dome) connected. Starionary power contacts should
be on the middle position regarding to movable
power contacts mounting on the rotation ring.
- Attach the Home Sensod to one of dome side
supports
- Mount the Home Sensor diaphragm in such way to
let its end passes through the Home Sensors' fork.
Mounting position of this device should be choosen
to have the power contacts connected when the
diaphragm covers the Home Sensor.
- Connect the Home sensor to the ScopeDome card
according to the scheme.
- attach the movable part of the card to the dome's
side wall
- attach the shutter inverter close to the movable part
of the card
- install the shutter limit switches
- install the limit switches pressure plates
- connect the inverter with the card, the limit switches
and motor according to the scheme
- connect powering the movable part of the card with
power contacts on the drive ring
- connect 230VAC to the stationary part of the power
contacts
- put the dome in such position to make all the power
contacts (stationary and movable) connected
- reduce to a minimum the speed of the shutter motor
- test and adjust the limit switches so that the shutter
would stop by about 1.5 cm before the complete
closing or opening
- limit switch arm has a small hex screw on the axis
which allows you to adjust its angle
We reccomend to connect some voltage sensor (eg.
LED light) which indicates when the power contacts
are connected.
To connect the card to the computer use a
with a length of about 1.5m. Before
connecting the card to the computer make sure it is
properly 230VAC powered.
Tracking the position of the telescope dome is made
via a PC running the telescope control software
based on the ASCOM platform.
Install the software controlling the card - ScopeDome
USB Driver. Set up it and configure in accordance
with the software installation instructions.
shielded
USB cable
Pay attention to the L / N / PE wiring - reversal of
their order can damage the computer.
S8
Fig. 19. Installation and positioning the Home
Sensor
1. Home Sensor
2. Home Sensor bracket
3. Home Sensor diaphragm
W
A
P
L
S
D
1
2
3
M
page 10
Fig. 20. Example localization of the Home Sensor
1. Home Sensor
2. Home Sensor diaphragm
3. Power contacts powering the movable part of the
dome connected
4. Rotation drive motor
5. ScopeDome USB ver. 2.0 card
6. Pier
W
L
2
1
3 (Q)
4
6
5
EN
Installation of automatics
Table of contents
Other ScopeDome Telescope manuals
