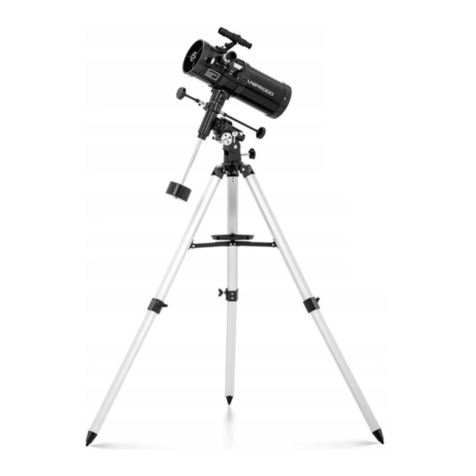
UNIPRODO UNI TELESCOPE 06 User manual

TELESCOPE
UNI_TELESCOPE_06
USER MANUAL
BEDIENUNGSANLEITUNG
INSTRUKCJA OBSŁUGI
NÁVOD K POUŽITÍ
MANUEL D´UTILISATION
ISTRUZIONI PER L‘USO
MANUAL DE INSTRUCCIONES

3
01.10.2019
3
4
5
6
7
8
9
DEUTSCH
ENGLISH
POLSKI
ČESKY
FRANÇAIS
ITALIANO
ESPAÑOL
INHALT | CONTENT | TREŚĆ | OBSAH | CONTENU | CONTENUTO | CONTENIDO
PRODUKTNAME TELESKOP
PRODUCT NAME TELESCOPE
NAZWA PRODUKTU LUNETA
NÁZEV VÝROBKU TELESKOP
NOM DU PRODUIT TÉLESCOPE
NOME DEL PRODOTTO TELESCOPIO
NOMBRE DEL PRODUCTO TELESCOPIO
MODELL
UNI_TELESCOPE_06
PRODUCT MODEL
MODEL PRODUKTU
MODEL VÝROBKU
MODÈLE
MODELLO
MODELO
IMPORTEUR
EXPONDO POLSKA SP. Z O.O. SP. K.
IMPORTER
IMPORTER
DOVOZCE
IMPORTATEUR
IMPORTATORE
IMPORTADOR
ADRESSE VON IMPORTEUR
UL. NOWY KISIELIN-INNOWACYJNA 7, 66-002 ZIELONA GÓRA | POLAND, EU
IMPORTER ADDRESS
ADRES IMPORTERA
ADRESA DOVOZCE
ADRESSE DE L'IMPORTATEUR
INDIRIZZO DELL'IMPORTATORE
DIRECCIÓN DEL IMPORTADOR
BEDIENUNGSANLEITUNG
DE
TECHNISCHE DATEN
Parameter Werte
Produktname Teleskop
Modell UNI_TELESCOPE_06
Blende [mm] 76
Brennweite 700
Sucher 5x24
Abmessungen [mm] 835x840x1530 (vertikal)
Gewicht [kg] 3,70
a) Es ist verboten, unmittelbar oder durch die Linse
auf die Lichtquelle zu schauen. Dies kann zu
Augenschäden und epileptischen Anfällen führen.
b) Es ist verboten, die Lupe an Orten mit direktem
Sonnenlicht unbeaufsichtigt zu lassen, da dies
eine Brandgefahr darstellt. Denken Sie nach
Abschluss der Arbeit daran, die Linsenabdeckung
zu schließen.
c) Es ist verboten, den fokussierten Lichtstrahl
auf Menschen oder Tiere zu richten. Dies kann
Verbrennungen verursachen.
d) Verwenden Sie das Produkt nicht an Orten,
an denen Erschütterungen auftreten, um
Augenschäden zu vermeiden.
NUTZUNGSBEDINGUNGEN
Das Produkt ist zur Beobachtung von weit vom
Benutzer entfernten Objekten sowie astronomischen
Beobachtungen bestimmt.
Für alle Schäden bei nicht sachgemäßer Verwendung
haftet allein der Betreiber.
GERÄTEBESCHREIBUNG
1. Haupthalterung
2. Hilfsdrehgriff
3. Kippgriffschraube
4. Einstelldrehgriff
5. Okulartubus
6. Suchermutter
7. Sucherstütze
8. Sucher
9. Okular
10. Spannschraube
11. Lager
12. Kippgriff
13. Haupttubus
14. Horizontale Verriegelungsschraube
15. Stativkopf
16. Stativ
17. Zubehörablage
MONTAGEANLEITUNG
ACHTUNG! Die Zeichnung von diesem
Produkt bendet sich auf der letzte Seite der
Bedienungsanleitung S. 10.
1. Packen Sie die Stativbeine [16] aus der Verpackung
aus und ziehen Sie sie dann auf die entsprechende
Länge. Verriegeln Sie sie in der gewünschten
Position mit der Spannschraube (Abb. 1).
2. Verbinden Sie die Stativbeine [16] mit dem
Montagegestell [15] mit Hilfe von Flügelschrauben
(Abb. 2A).
3. Stellen Sie das zusammengeklappte Stativ [16]
auf, befestigen Sie die Zubehörablage [17] mit
Flügelschrauben (Abb. 3).
4. Befestigen Sie den Kippgriff [12] mit den
Kippgriffschrauben [3] am Haupttubus [13] (Abb.
2B).
5. Die Lager [11] am Haupttubus [13] lösen,
den Haupttubus auf der Haupthalterung [1]
montieren. Ziehen Sie die Lager [11] und die
Spannschraube [10] wieder an (Abb. 2c,d).
6. Entfernen Sie die Suchmuttern [6], stecken Sie die
Einbauschrauben in die Sucherstütze [7]. Ziehen
Sie die Suchmuttern [6] an (Abb. 4a).
7. Das ausgewählte Okular auf das Okulartubus [5]
aufsetzen und die Feststellschrauben anziehen
(Abb. 4b).
OKULAR UND VERGRÖSSERUNG
Das Teleskop ist mit verschiedenen Okulartypen
ausgestattet. Die Leistung jedes Okulars hängt von der
Brennweite des Hauptspiegels ab.
ACHTUNG: Die Explosionszeichnungen von diesem
Produkt benden sich auf den letzten Seiten der
Bedienungsanleitung S. 11.
P= A
B
P. Teleskopvergrößerung
A. Brennweite des Hauptspiegels
B. Brennweite des Okulars
FUNKTIONEN UND ZUBEHÖR
1. Mondfilter - dient zur Zusammenarbeit mit dem
Okular des Teleskops, reduziert die Lichtmenge,
die durch das optische System durch die
Polarisationsfilter gelangt.
2. Aufrichtendes Okular - dient zum Erhöhen der
Vergrößerung mit einem gegebenen Okular
während Bodenbeobachtungen und stellt die
korrekte Ausrichtung des Bildes des beobachteten
Objekts wieder her.
Achtung: Linsen und Filter sind im Okular auf
der dem Auge gegenüberliegenden Seite zu
installieren.
REINIGUNG UND WARTUNG
a) Verwenden Sie zur Reinigung der Oberfläche
ausschließlich Mittel ohne ätzende Inhaltsstoffe.
b) Bewahren Sie das Gerät an einem trockenen,
kühlen, vor Feuchtigkeit und direkter
Sonneneinstrahlung geschütztem Ort auf.
c) Verwenden Sie zur Reinigung ein weiches,
staubfreies und fusselfreies Tuch.
d) Lagern Sie das Produkt an einem Ort, der keinen
hohen oder niedrigen Temperaturen, Staub und
chemischen Mitteln ausgesetzt ist.

4 5
01.10.2019
USER MANUAL
EN
INSTRUKCJA OBSŁUGI
PL
TECHNICAL DATA
Parameter
description
Parameter
value
Product name Telescope
Model UNI_TELESCOPE_06
Aperture [mm] 76
Focal length 700
Finder 5x24
Dimensions [mm] 835x840x1530 (vertically)
Weight [kg] 3,70
a) Do not look directly or through the lens on the
light source. This can cause eye damage and
epileptic seizures.
b) Do not leave the magnifying lens unattended in
places with direct sunlight as this creates a fire
hazard. After finishing work, remember to close
the lens cover.
c) It is forbidden to direct the focused light beam
towards people or animals. It may cause burns.
d) To avoid eye damage, do not use the product in
places where shocks can occur.
USE GUIDELINES
The product is intended for observing objects located
at a considerable distance from the user and for
astronomical observations.
The user is liable for any damage resulting from
unintended use of the device.
DEVICE DESCRIPTION
1. Main handle
2. Auxiliary knob
3. Tilt shaft screw
4. Adjustment knob
5. Eyepiece tube
6. Finder nut
7. Finder bracket
8. Finder
9. Eyepiece
10. Clamping screw
11. Bearing
12. Tilt shaft
13. Main tube
14. Horizontal locking screw
15. Tripod head
16. Tripod
17. Accessories shelf
ASSEMBLY
ATTENTION! This product‘s view can be found on the
last pages of the operating instructions (pp. 10).
1. Unpack the tripod legs [16] from the packaging
and extend them to the appropriate length. Lock
in the desired position with the clamping screw
(fig. 1).
2. Connect the legs of the tripod [16] with the
mounting base [15] using wing screws (Fig. 2a).
3. Set up the tripod [16], fasten the accessories shelf
[17] with the wing screws (fig. 3).
4. Mount the tilt shaft [12] at the main tube [13]
using the tilt shaft screws [3] (Fig. 2b).
5. Loosen the bearings [11] at the main tube [13],
install the main tube on the main handle [1].
Retighten the bearings [11] and the clamping
screw [10] (fig. 2c, d).
6. Remove the finder nuts [6], slide the mounting
screws into the finder handle [7]. Tighten the
finder nuts [6] (Fig. 4a).
7. Install the selected eyepiece on the eyepiece tube
[5], tighten the locking screws (Fig. 4b).
EYEPIECE AND MAGNIFICATION
The telescope is equipped with several types of
eyepieces. The power of each eyepiece depends on the
focal length of the main mirror.
ATTENTION! This product’s exploded view can be
found on the last pages of the operating instructions
(pp. 11).
P= A
B
P. Telescope magnification
A. Focal length of the main mirror
B. Focal length of the eyepiece
FUNCTIONS AND ACCESSORIES
1. Moon filter. Used with the telescope eyepiece
it reduces the light passing through the optical
system by means of polarizing filters.
2. Correcting eyepiece - serves to increase
magnification together with a given eyepiece
during ground observations and restores the
correct orientation of the image of the observed
object.
Note: The lenses and filters should be installed in
the eyepiece on the side opposite the eye.
CLEANING AND MAINTENANCE
a) Use only non-corrosive cleaners to clean the
surface.
b) Store the unit in a dry, cool place, free from
moisture and direct exposure to sunlight.
c) Use a soft, dust-free and lint-free cloth to clean the
telescope.
d) Store the product in a place not exposed to high or
low temperatures, dust and/or chemical agents.
DANE TECHNICZNE
Opis parametru Wartość parametru
Nazwa produktu Luneta
Model UNI_TELESCOPE_06
Apertura [mm] 76
Ogniskowa 700
Szukacz 5x24
Wymiary [mm] 835x840x1530 (w pionie)
Ciężar [kg] 3,70
a) Zabrania się spoglądania bezpośrednio oraz przez
soczewkę na źródło światła. Może to być przyczyną
uszkodzenia wzroku oraz ataku epilepsji.
b) Zabrania się pozostawiać soczewkę powiększającą
bez nadzoru w miejscach o bezpośrednim
nasłonecznieniu, gdyż stwarza to zagrożenie
pożarowe. Po zakończeniu pracy należy pamiętać
o zamknięciu osłony soczewki.
c) Zabrania się kierować skupioną przez soczewkę
wiązkę światła w kierunku osób lub zwierząt. Może
to spowodować oparzenia.
d) Zabrania się korzystania z produktu w miejscach
występowania wstrząsów, aby uniknąć
uszkodzenia oczu.
ZASADY UŻYTKOWANIA
Produkt przeznaczony jest do obserwacji obiektów
znajdujących się w znacznej odległości od użytkownika
oraz obserwacji astronomicznych.
Odpowiedzialność za wszelkie szkody
powstałe w wyniku użytkowania niezgodnego
z przeznaczeniem ponosi użytkownik.
OPIS URZĄDZENIA
1. Uchwyt główny
2. Pokrętło pomocnicze
3. Śruba trzonka pochyłu
4. Pokrętło regulacji
5. Tubus okularu
6. Nakrętka szukacza
7. Wspornik szukacza
8. Szukacz
9. Okular
10. Śruba zaciskowa
11. Łożysko
12. Trzonek pochyłu
13. Tubus główny
14. Pozioma śruba blokująca
15. Głowica trójnogu
16. Trójnóg
17. Półka na akcesoria
MONTAŻ
UWAGA: Rysunek produktu znajduje się na końcu
instrukcji na stronie: 10.
1. Wypakować nogi trójnogu [16] z opakowania, a
następnie rozciągnąć je do odpowiedniej długości.
Zablokować w pożądanym ustawieniu przy
pomocy śruby zaciskowej (rys. 1).
2. Połączyć nogi trójnogu [16] z podstawą
montażową [15] przy pomocy śrub motylkowych
(rys. 2a).
3. Rozstawić złożony trójnóg [16], zamocować półkę
na akcesoria [17] przy pomocy śrub motylkowych
(rys. 3).
4. Zamocować trzonek pochyłu [12] przy tubusie
głównym [13] przy pomocy śrub trzonka pochyłu
[3] (rys. 2b).
5. Poluzować łożyska [11] przy tubusie głównym [13],
zainstalować tubus główny na uchwycie głównym
[1]. Zacisnąć ponownie łożyska [11] oraz śrubę
zaciskową [10] (rys. 2c,d).
6. Usunąć nakrętki szukacza [6], wsunąć śruby
montażowe w uchwyt szukacza [7]. Dokręcić
nakrętki szukacza [6] (rys. 4a).
7. Zainstalować wybrany okular na tubusie okularu
[5], docisnąć śruby blokujące (rys. 4b).
OKULAR I POWIĘKSZENIE
Teleskop wyposażony jest w kilka rodzajów okularów.
Moc każdego okularu jest zależna od ogniskowej
zwierciadła głównego.
UWAGA: Rysunki złożeniowe produktu znajdują się
na końcu instrukcji na stronach: 11.
P= A
B
P. Powiększenie teleskopu
A. Ogniskowa zwierciadła głównego
B. Ogniskowa okularu
FUNKCJE I WYPOSAŻENIE DODATKOWE
1. Filtr księżycowy – służy do współpracy z okularem
teleskopu, powoduje redukcję ilości światła
przechodzącego przez układ optyczny poprzez
filtry polaryzacyjne.
2. Okular prostujący – służy do zwiększenia
powiększenia z danym okularem podczas
obserwacji naziemnych oraz przywraca właściwą
orientację obrazu obserwowanego obiektu.
Uwaga: Soczewki i filtry należy zainstalować w
okularze po stronie przeciwnej niż przykłada się
oko.
CZYSZCZENIE I KONSERWACJA
a) Do czyszczenia powierzchni należy stosować
wyłącznie środki niezawierające substancji
żrących.
b) Urządzenie należy przechowywać w suchym
i chłodnym miejscu chronionym przed wilgocią
i bezpośrednim promieniowaniem słonecznym.
c) Do czyszczenia należy używać miękkiej, wolnej od
kurzu i niestrzępiącej się ściereczki.
d) Przechowywać produkt w miejscu nie będącym
narażonym na występowanie wysokich lub niskich
temperatur, pyłów oraz czynników chemicznych.

6 7
01.10.2019
NÁVOD K POUŽITÍ
CZ
MANUEL D´UTILISATION
FR
TECHNICKÉ ÚDAJE
Popis parametru Hodnota parametru
Název výrobku Teleskop
Model UNI_TELESCOPE_06
Clona [mm] 76
Ohnisková vzdálenost 700
Hledáček 5x24
Rozměry [mm] 835x840x1530 (vertikálně)
Hmotnost [kg] 3,70
a) Nedívejte se přímo, ani přes čočku na světelný
zdroj. Může to způsobit poškození zraku nebo
vyvolat epileptický záchvat.
b) Nenechávejte zvětšovací čočku bez dozoru
na místech s přímým slunečním zářením,
hrozí nebezpečí požáru. Po dokončení práce
nezapomeňte zavřít kryt čočky.
c) Nikdy nesměřujte světelný paprsek na lidi nebo
zvítata, může způsobit popáleniny.
d) Nepoužívejte výrobek na místě, kde se vyskytují
otřesy, aby nedošlo k poškození očí.
ZÁSADY POUŽÍVÁNÍ
Výrobek je určen pro pozorování objektů umístěných
ve značné vzdálenosti od uživatele a astronomická
pozorování.
Odpovědnost za veškeré škody vzniklé v důsledku
použití zařízení v rozporu s určením nese uživatel.
POPIS ZAŘÍZENÍ
1. Hlavní rukojeť
2. Pomocný knoflík
3. Šroub se sklopnou hřídelí
4. Nastavovací knoflík
5. Trubice okuláru
6. Matice hledáčku
7. Držák hledáčku
8. Hledáček
9. Okulár
10. Upínací šroub
11. Ložisko
12. Šikmá rukojeť
13. Hlavní trubice
14. Vodorovný zajišťovací šroub
15. Hlavice trojnožky
16. Stativ
17. Police na příslušenství
INSTALACE
POZNÁMKA! Nákres tohoto produktu naleznete na
konci návodu na str. 10.
1. Vybalte nožičky stativu [16] z obalu a poté jej
protáhněte na odpovídající délku. Zajišťovacím
šroubem zajistěte v požadované poloze (obr. 1).
2. Připojte nohy stativu [16] k montážní základně
[15] pomocí křídlových šroubů (obr. 2a).
3. Postavte sklopený stativ [16] a odkládací polici
pro příslušenství [17] upevněte křídlovými šrouby
(obr. 3).
4. Namontujte sklopnou hřídel [12] na hlavní trubici
[13] pomocí šroubů se sklopným hřídelem [3]
(obr. 2b).
5. Uvolněte ložiska [11] na hlavní trubici [13],
namontujte hlavní trubici na hlavní rukojeť [1].
Ložiska [11] a upínací šroub [10] znovu utáhněte
(obr. 2c,d).
6. Odstraňte matice hledáčku [6], zasuňte montážní
šrouby do rukojeti hledáčku [7]. Utáhněte matice
hledáčku [6] (obr. 4a).
7. Namontujte vybraný okulár do tubusu okuláru [5]
a utáhněte zajišťovací šrouby (obr. 4b).
OKULÁR A ZVĚTŠENÍ
Dalekohled je vybaven několika druha okulárů. Síla
každého okuláru závisí na ohniskové délce hlavního
zrcadla.
POZNÁMKA! Výkresy sestavení produktu jsou na
konci příručky na str. 11.
P= A
B
P. Zvětšení dalekohledu
A. Ohnisková vzdálenost hlavního zrcadla
B. Ohnisková vzdálenost okuláru
FUNKCE A PŘÍSLUŠENSTVÍ
1. Měsíční filtr – používá se s okulárem dalekohledu,
snižuje množství světla procházejícího optickým
systémem polarizačními filtry.
2. Vyrovnávací okulár – používá se k většímu
zvětšení daným okulárem při pozorování objektů
na zemi a obnovuje správnou orientaci obrazu
pozorovaného objektu.
Poznámka: Čočky a filtry by měly být instalovány
do okuláru na protější straně. Tedy ne tam, kam
přikládáme oko
ČIŠTĚNÍ A ÚDRŽBA
a) K čištění povrchu zařízení používejte výhradně
prostředky neobsahující žíravé látky.
b) Zařízení skladujte na suchém a chladném místě,
chráněném proti vlhkosti a přímému slunečnímu
svitu.
c) Pro čištění použijte čistý měkký a bezprašný
hadřík, který nepouští vlákna nebo chlupy.
d) Výrobek skladujte na místě, které není vystaveno
vysokým nebo nízkým teplotám, prachu a
chemickým látkám.
DÉTAILS TECHNIQUES
Description des
paramètres
Valeur des paramètres
Nom du produit Télescope
Modèle UNI_TELESCOPE_06
Ouverture [mm] 76
Distance focale 700
Chercheur 5x24
Dimensions [mm] 835x840x1530 (verticalement)
Poids [kg] 3,70
a) Il est interdit de regarder directement et à travers
la lentille sur la source de lumière. Cela peut
provoquer des lésions oculaires et des crises
d'épilepsie.
b) Il est interdit de laisser la loupe sans surveillance
dans des endroits exposés à la lumière directe
du soleil car cela crée un risque d'incendie. Une
fois le travail terminé, n'oubliez pas de fermer la
couverture de la lentille.
c) Il est interdit de diriger le faisceau de lumière
focalisé vers des personnes ou des animaux. Cela
peut causer des brûlures.
d) Il est interdit d'utiliser le produit dans des
lieux soumis à des secousses afin d'éviter tout
dommage aux yeux.
CONDITIONS D’UTILISATION
Le produit est destiné à l'observation d'éléments situés
à une distance considérable de l'utilisateur et aux
observations astronomiques.
L’utilisateur porte l’entière responsabilité pour
l’ensemble des dommages attribuables à un usage
inapproprié.
DESCRIPTION DE L'APPAREIL
1. Support principal
2. Molette auxiliaire
3. Boulon de la tige d'inclinaison
4. Molette de mise au point
5. Tube de l'oculaire
6. Écrou du chercheur
7. Support du chercheur
8. Chercheur
9. Oculaire
10. Boulon de serrage
11. Roulement
12. Tige d'inclinaison
13. Tube du télescope
14. Boulon de blocage horizontal
15. Tête du trépied
16. Trépied
17. Étagère à accessoires
MONTURE
ATTENTION! Le plan de ce produit se trouve à la
dernière page du manuel d‘utilisation, p. 10.
1. Déballez les jambes du trépied [16] de l'emballage,
puis étirez-les à la longueur appropriée. Verrouillez
la position souhaitée à l'aide du boulon de serrage
(fig. 1).
2. Assemblez les jambes du trépied [16] à la tête du
trépied [15] à l'aide de boulon à ailettes (Fig. 2a).
3. Écartez le trépied assemblé [16], fixez l'étagère à
accessoires [17] à l'aide de boulon à ailettes (fig.
3).
4. Montez la tige d'inclinaison [12] sur le tube du
télescope [13] à l'aide des boulons de la tige
d'inclinaison [3] (Fig. 2b).
5. Desserrez les roulements [11] sur le tube du
télescope [13], positionnez le tube du télescope
sur le support principal [1]. Resserrez les
roulements [11] et le boulon de serrage [10] (fig.
2c, d)
6. Retirez les écrous du chercheur [6], faites glisser
les boulons de montage dans la poignée du
chercheur [7]. Serrez les écrous du chercheur [6]
(Fig. 4a).
7. Installez l'oculaire sélectionné sur le tube de
l'oculaire [5] et serrez les boulons de blocage (Fig.
4b).
OCULAIRE ET GROSSISSEMENT
Le télescope est équipé de plusieurs types d'oculaires.
La puissance de chaque oculaire dépend de la distance
focale du miroir principal.
ATTENTION! Les vues éclatées de ce produit se
trouvent aux dernières pages du manuel d‘utilisation
p. 11.
P= A
B
P. Grossissement du télescope
A. Distance focale du miroir principal
B. Distance focale de l'oculaire
FONCTIONS ET ACCESSOIRES
1. Filtre lunaire – utilisé avec l'oculaire du télescope,
réduit la quantité de lumière traversant le système
optique à travers les filtres polarisants.
2. Oculaire de redressement – sert à augmenter
le grossissement avec un oculaire donné lors
des observations au sol et rétablis l'orientation
correcte de l'image de l'objet observé.
Attention: Les lentilles et les filtres doivent être
installés dans l'oculaire du côté opposé au
positionnement de l'œil.
NETTOYAGE ET ENTRETIEN
a) Pour nettoyer les différentes surfaces, n'utilisez
que des produits sans agents corrosifs.
b) Conservez l'appareil dans un endroit propre, frais
et sec, à l'abri de l'humidité et des rayons directs
du soleil.
c) Pour le nettoyage, utilisez un chiffon doux, sans
poussière ni peluche.
d) Stockez le produit dans un endroit non exposé
à des températures élevées ou basses, à la
poussière et aux agents chimiques.

8 9
01.10.2019
ISTRUZIONI PER L’USO
IT
MANUAL DE INSTRUCCIONES
ES
DATI TECNICI
Parametri
-Descrizione
Parametri - Valore
Nome del prodotto Telescopio
Modello UNI_TELESCOPE_06
Apertura [mm] 76
Focale 700
Cercatore 5x24
Dimensioni [mm] 835x840x1530 (verticalmente)
Peso [kg] 3,70
a) È vietato guardare direttamente una sorgente
luminosa attraverso la lente. Questo può causare
danni agli occhi e crisi epilettiche.
b) È vietato lasciare la lente d'ingrandimento
incustodita in luoghi esposti alla luce solare
diretta, poiché ciò crea un pericolo d'incendio.
Dopo aver terminato il lavoro, è necessario
ricordarsi di chiudere la copertura della lente.
c) È vietato dirigere il raggio di luce focalizzato verso
persone o animali. Ciò potrebbe causare ustioni.
d) Non utilizzare il prodotto in un ambiente instabile
al fine di evitare eventuali danni agli occhi.
CONDIZIONI D'USO
Il prodotto è progettato per l'osservazione di oggetti
situati ad un' ampia distanza dall'utente e per le
osservazioni astronomiche.
L'operatore è responsabile di tutti i danni derivanti
da un uso improprio.
DESCRIZIONE DEL DISPOSITIVO
1. Manico
2. Manopola ausiliare
3. Vite della manopola flessibile
4. Manopola di regolazione
5. Tubo dell’oculare
6. Dado del cercatore
7. Supporto del cercatore
8. Cercatore
9. Oculare
10. Vite di serraggio
11. Cuscinetto
12. Manopola flessibile
13. Tubo principale
14. Vite di bloccaggio orizzontale
15. Testa del treppiede
16. Treppiede
17. Ripiano per accessori
MONTATURA
ATTENZIONE: L´esploso di questo prodotto si trova
nell´ultima pagina del manuale d´uso, p. 10.
1. Disimballare i piedi del treppiede [16] dalla
confezione e allungarle fino ad una lunghezza
adeguata. Bloccarlo nella posizione desiderata
utilizzando la vite di bloccaggio (fig. 1).
2. Fissare le gambe del treppiede [16] alla base della
montatura [15] con le viti ad alette (fig. 2a).
3. Distanziare il treppiede piegato [16], fissare il
ripiano per accessori [17] con viti ad alette (fig. 3).
4. Fissare la manopola flessibile [12] al tubo
principale [13] con le viti della manopola flessibile
[3] (fig. 2b).
5. Allentare i cuscinetti [11] sul tubo principale [13],
installare il tubo principale sul supporto principale
[1]. Serrare nuovamente i cuscinetti [11] e la vite
di serraggio [10] (Fig. 2c,d).
6. Rimuovere i dadi del cercatore [6], inserire le viti di
montaggio nel manico del cercatore [7]. Serrare i
dadi del cercatore [6] (Fig. 4a).
7. Installare l'oculare selezionato sul tubo
dell'oculare [5], stringere le viti di bloccaggio (fig.
4b).
OCULARE E INGRANDIMENTO
Il telescopio è dotato di diversi tipi di oculari. La potenza
di ogni oculare dipende dalla lunghezza focale dello
specchio primario.
ATTENZIONE! Le viste esplose di questo prodotto
sono disponibili nell‘ultima pagina (11) del manuale
d´uso.
P= A
B
P. Ingrandimento del telescopio
A. Lunghezza focale dello specchio primario
B. Lunghezza focale dell'oculare
FUNZIONI E ACCESSORI SUPPLEMENTARI
1. Filtro lunare - viene utilizzato insieme all'oculare
del telescopio, riduce la quantità di luce che
attraversa il sistema ottico mediante filtri
polarizzatori.
2. Oculare di raddrizzamento - utilizzato per
aumentare l'ingrandimento dell'oculare durante
le osservazioni terrestri e ripristina il corretto
orientamento dell'immagine dell'oggetto
osservato.
Nota: lenti e filtri devono essere installati
nell'oculare sul lato opposto a quello dove si vuole
posizionare l'occhio.
PULIZIA E MANUTENZIONE
a) Per pulire la superficie utilizzare solo detergenti
senza ingredienti corrosivi.
b) Tenere l'apparecchio in un luogo asciutto, fresco,
protetto dall'umidità e dalla luce diretta del sole.
c) Per la pulizia, utilizzare un panno morbido, privo
di polvere, non sfilacciante.
d) Conservare il prodotto in un luogo non esposto
alle alte o basse temperature, alla polvere e agli
agenti chimici.
DATOS TÉCNICOS
Parámetro
-Descripción
Parámetro - Valor
Nombre del producto Telescopio
Modelo UNI_TELESCOPE_06
Apertura [mm] 76
Focal 700
Buscador 5x24
Dimensiones [mm] 835x840x1530 (verticalmente)
Peso [kg] 3,70
a) Se prohíbe mirar directamente y a través de la
lente a una fuente luminosa, ya que puede causar
daños en la vista y ataques de epilepsia.
b) Se prohíbe dejar la lente de aumento sin
supervisión en lugares con radiación solar directa
debido al riesgo de provocar un incendio. Al
finalizar el trabajo, recuerde cubrir la lente con el
protector.
c) Se prohíbe apuntar el haz luminoso concentrado
por la lente a animales o personas, puesto que
puede provocar quemaduras.
d) Se prohíbe utilizar el producto en lugares donde
puedan darse temblores para evitar daños en el
ojo.
INSTRUCCIONES DE USO
El producto está indicado para observar objetos que
se encuentren a gran distancia y para observaciones
astronómicas.
El usuario es responsable de los daños derivados de
un uso inadecuado del aparato.
DESCRIPCIÓN DEL APARATO
1. Soporte principal
2. Perilla auxiliar
3. Tornillo de mástil de inclinación
4. Perilla de regulación
5. Tubo del ocular
6. Tuerca del buscador
7. Soporte del buscador
8. Buscador
9. Ocular
10. Tornillo de fijación
11. Cojinete
12. Mástil de inclinación
13. Tubo principal
14. Tornillo de bloqueo horizontal
15. Cabezal del trípode
16. Trípode
17. Balda para accesorios
INSTALACIÓN
¡ATENCIÓN! La ilustración de este producto se
encuentra en la última página de las instrucciones p.
10.
1. Saque las patas del trípode [16] del embalaje
y extiéndalas hasta que lleguen a longitud
adecuada. Bloquéelas en la posición que desee
mediante el tornillo de fijación (imagen 1).
2. Conecte las patas del trípode [16] a la base de
instalación [15] mediante los tornillos de mariposa
(imagen 2a).
3. Extienda el trípode [16] y ajuste la balda para
accesorios [17] mediante los tornillos de mariposa
(imagen 3).
4. Instale el mástil de inclinación [12] en el tubo
principal [13] mediante los tornillos del mástil de
inclinación [3] (imagen 2b).
5. Afloje los cojinetes [11] del tubo principal [13] e
instale el tubo principal en el soporte principal [1].
Vuelva a apretar los cojinetes [11] y el tornillo de
fijación [10] (imágenes 2c, d).
6. Retire las tuercas del buscador [6] e introduzca los
tornillos de instalación en el soporte del buscador
[7]. Apriete las tuercas del buscador [6] (imagen
4a).
7. Instale el ocular en el tubo del ocular [5] y apriete
las tuercas de bloqueo (imagen 4b).
OCULAR Y AMPLIACIÓN
El telescopio está equipado con distintos tipos de
oculares. La potencia de cada uno de ellos depende de
la distancia focal del espejo principal.
¡ATENCIÓN! El despiece de este producto se
encuentra en las últimas páginas de las instrucciones
p. 11.
P= A
B
P. Ampliación del telescopio
A. Distancia focal del espejo principal
B. Distancia focal del ocular
FUNCIONES Y EQUIPAMIENTO ADICIONAL
1. Filtro lunar – elemento auxiliar al ocular del
telescopio. Reduce la cantidad de luz que pasa
por el sistema óptico a través de los filtros de
polarización.
2. Ocular enderezador – sirve para incrementar el
aumento de un ocular durante las observaciones
terrestres y para restaurar la orientación
adecuada de la imagen del objeto observado.
Atención: Las lentes y los filtros se deben instalar
en el ocular en el extremo contrario al ojo.
LIMPIEZA Y MANTENIMIENTO
a) Para limpiar la superficie, utilice solo productos
que no contengan sustancias corrosivas.
b) Guarde el aparato en un lugar seco, fresco y
protegido de la humedad y la radiación solar
directa.
c) Para la limpieza, use un paño suave, sin polvo y sin
pelusa.
d) Almacene el producto en un lugar que no esté
expuesto a temperaturas altas o bajas, polvo o
agentes químicos.
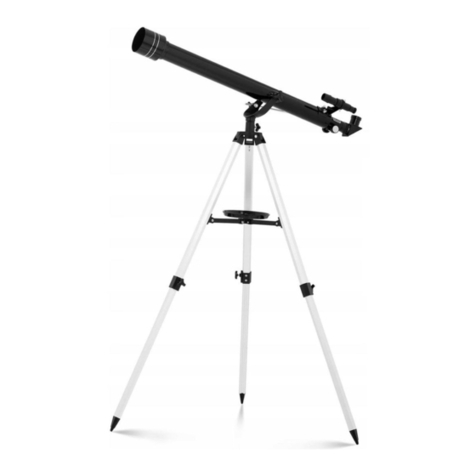
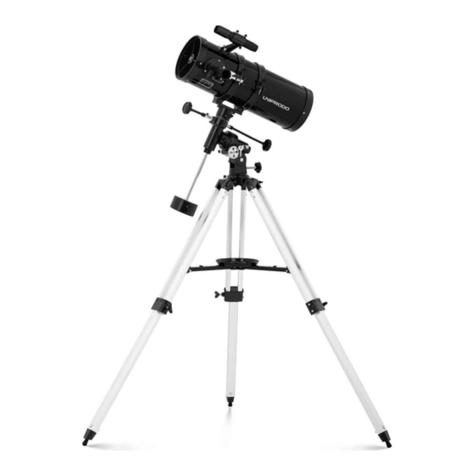
10 11
01.10.2019
ZUSAMMENBAUEN DES PRODUKTS | ASSEMBLING THE EQUIPMENT | SKŁADANIE SPRZĘTU | SKLÁDÁNÍ ZAŘÍZENÍ
ASSEMBLAGE DU PRODUIT | MONTAGGIO DEL PRODOTTO | MONTAJE DEL PRODUCTO
d
c
b
a
a
b
1
2
3
4
PRODUKTZEICHNUNGEN | PRODUCT’S VIEW | RYSUNKI PRODUKTU | NÁKRESY PRODUKTU SCHÉMAS DU PRODUIT
LE ILLUSTRAZIONI DI PRODOTTO | LAS ILUSTRACIONES DE PRODUCTO
1
2
3
4
5
6
9
7
8
10
11
12
13
14
15
16
17

expondo.de
Our customers‘ satisfaction is our main goal!
Please contact us with questions AT:
Unser Hauptziel ist die Zuredenheit unserer Kunden!
bei fragen kontaktieren Sie uns bitte unter:
Naszym głównym celem jest satysfakcja klientów
W przypadku pytań prosimy o kontakt z przedstawicielem w danym kraju:
Naším hlavním cílem je spokojenost našich zákazníků!
V případě otázek nás prosím kontaktujte na:
Notre but premier est votre satisfaction!
pour toute question, contactez nous sur:
Nuestro objetivo principal es la satisfacción de nuestros clientes!
si tiene preguntas, por favor pónganse en contacto con nostros en:
I nostro principale obiettivo è la soddisfazione dei nostri clienti!
per eventuali domande per favore, ci contattino sotto:
CONTACT
expondo Polska sp. z o.o. sp. k.
ul. Nowy Kisielin-Innowacyjna 7
66-002 Zielona Góra | Poland, EU
e-mail: [email protected]
Table of contents
Other UNIPRODO Telescope manuals

UNIPRODO
UNIPRODO UNI TELESCOPE 01 User manual

UNIPRODO
UNIPRODO UNI TELESCOPE 11 User manual

UNIPRODO
UNIPRODO UNI TELESCOPE 02 User manual

UNIPRODO
UNIPRODO UNI TELESCOPE 04 User manual

UNIPRODO
UNIPRODO UNI TELESCOPE 08 User manual

UNIPRODO
UNIPRODO UNI TELESCOPE 03 User manual

UNIPRODO
UNIPRODO UNI TELESCOPE 10 User manual

UNIPRODO
UNIPRODO TELESCOPE UNI TELESCOPE 07 User manual