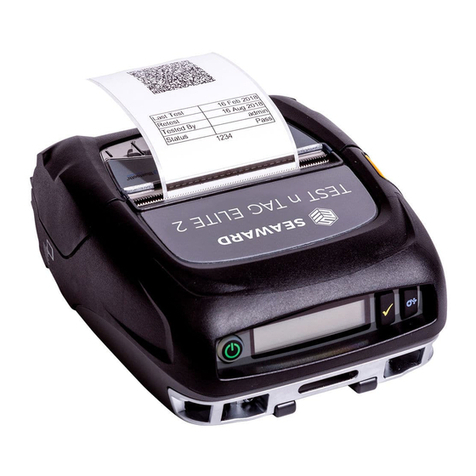
Seaward Test 'n' Tag User manual

Test ‘n' Tag
Label Printing System
Instruction Manual
Bracken Hill, South West Industrial Estate, Peterlee, Co.
Durham SR8 2SW. En land.
Tel: +44 (0)191-586 3511 Fax: +44 (0)191-586 0227
www.seaward.co.uk
sales @ seaward.co.uk
calibration @ seaward.co.uk

Test `n' Tag
Label Printing System
Instruction Manual
308A550
April 2009
© 2008 Seaward Electronic Ltd.
Issue 6

2
Limited Warranty & Limitation of Liability
SEAWARD Electronic Limited uarantees this product for a period of 1
year. The period of warranty will be effective from the day of delivery.
© Copyri ht 2008
All ri hts reserved. Nothin from this edition may be multiplied, or
made public in any form or manner, either electronically, mechanically,
by photocopyin , recordin , or in any manner, without prior written
consent from SEAWARD Electronic Limited. This also applies to
accompanyin drawin s and dia rams.
Due to a policy of continuous development SEAWARD Electronic
Limited reserves the ri ht to alter the equipment specification and
description outlined in this publication without prior notice and no part
of this publication shall be deemed to be part of any contract for the
equipment unless specifically referred to as an inclusion within such
contract.

3
Disposal of Old Product
This product has been desi ned and manufactured with hi h quality
materials and components that can be recycled and reused.
When the crossed out wheelie bin symbol is attached to a product it
means the product is covered by the European Directive 2002/96/EC.
Please familiarise yourself with the appropriate local separate collection
system for electrical and electronic products.
Please dispose of this product accordin to local re ulations. Do not
dispose of this product alon with normal waste material. The correct
disposal of this product will help prevent potential ne ative
consequences for the environment and human health.

4
Table of ontents
Before Startin ....................................................................................... 5
1. Introduction ....................................................................................... 6
2. Installing the Supply Cartridge .......................................................... 7
3. Printing a Test Label .......................................................................... 8
4. Printing Labels ( PrimeTest Rigel ) ................................................. 9
Bluetooth Favourites ......................................................................... 9
Printin labels.................................................................................. 11
Load Test’n’Ta Lo o ..................................................................... 12
5. Printing Labels ( Supernova Europa ) ........................................... 15
Re –Test Period............................................................................... 16
Download to Transfer Printer .......................................................... 17
Automatic Printin of Labels........................................................... 19
Chan in the label title ................................................................... 21
Addin a lo o to the label ............................................................... 23
Label Title ........................................................................................ 24
Test `N’ Ta Lo o............................................................................ 25
Transfer ........................................................................................... 26
6. Trouble Shooting ............................................................................. 27
7. Parts List .......................................................................................... 30

5
Before Starting
1. Check that all the component parts are present: -
•Portable Printer
•AC Adaptor
•Printer Lead
•Supply Cartrid e
•Peel Stick
•Peel Stick Instruction sheet
•Instruction Manual (with Warranty Card)
•PATGuard 2 evaluation disc
•Download Lead
2. Read the operatin instructions fully before usin the Test 'N'
Ta system.
3. Contact Seaward Electronic if you need information on
trainin for Portable Appliance Testin .
4. Data may be lost or altered in virtually any electronic memory
under certain circumstances. Therefore Seaward Electronic
assumes no responsibility for financial losses or claims due to
data lost or otherwise rendered unusable whether as a result
of abuse, improper use, defects, disre ard of operatin
instructions or procedures, or any other allied causes.
5. Seaward Electronic Limited can be contacted at:
Bracken Hill
South West Industrial Estate
Peterlee
Co. Durham
SR8 2SW
Tel : +44 (0)191 586 3511
Fax: +44 (0)191 586 0227

6
1. Introduction
Test 'N' Ta is the label printin system exclusive to the Seaward
Group. It enables users of Seaward and Ri el testers to print thermal
transfer labels directly to the Test 'N' Ta portable printer.
Note
The Test 'N' Tag system can be used with a range of Seaward
and Rigel test equipment including:-
Seaward SuperNova
Seaward Europa
Seaward PrimeTest 300 and 350
Rigel 288
.. and others…
The industrial vinyl labels created by the Test 'N' Ta printer are scuff
proof, water proof, tamper proof and unlike direct thermal labels, the
print will not fade in sunli ht.
Two types of label can be printed; a panel label - to attach direct to
the appliance panel, a cable wrap label - to wrap around the power
cord.
Note:
The PatGuard 2 evaluation disc also contains the logo transfer
program for SuperNova Europa testers. The DataTransfer.exe
program for Handheld testers is supplied with the tester itself.

7
2. Installing the Supply Cartridge
1. Lift the unit's dust cover.
2. Make sure the lockin spindle is in the counter-clockwise
(unlocked) position.
3. On the bottom of the cartrid e, turn the ribbon advance one
full turn counter clockwise (follow arrows on cartrid e) or until
any slack in the ribbon is removed. THIS IS VERY
IMPORTANT.
4. Load the supply into the printer makin sure the cartrid e is
properly seated.
5. Turn the lockin spindle one-quarter turn clockwise to lock
the cartrid e into place.

8
3. Printing a Test Label
Connect the supplied AC adapter to the back of the Printer.
Connect the AC Adapter to the power outlet.
Note
Each of the Printer AC Adapters is unique to, and will only operate
with the appropriate K3000-PC K3110-PC Printer. They are NOT
interchangeable, misuse will cause damage to the printer and or
adapter.
1. Press the POWER button to turn the unit off. The power li ht
LED will o out.
2. Press and hold down the FEED button, then press the POWER
button to turn the unit's power back on. The unit will print a
test label similar to the one shown below.
K3110-PC
Ver. X
.Xx
3. Examine the test label. The printin should be dark and
uniform with no distortion. If the self-test results differ
markedly from those expected, refer to the troubleshootin
section of this document.

9
. Printing Labels ( PrimeTest / Rigel )
Note
This section should be read with reference to the tester's
Instruction Manual
The Test’n’Ta printer can be used with the followin handheld
test instruments:-
Primetest 300, Primetest 350, Ri el 288, Ri el 388
In this case the printer must be used to ether with the bluetooth
adapter (part number 342A914 )
Labels can be printed either at the end of a test or at any other
time from test results stored in the memory.
Bluetooth Favourites
Before use, the bluetooth adapter needs to be paired with the
tester.
The followin shows how to add a Printer to Bluetooth Favourites.
Use the up/down arrow keys to hi hli ht the device type (in this case
Printer) then press Setup (F3).

10
If your printer is not already in the “New” list then you need to search
for it now by pressin Search (F1).
Note:
If the required Test’n’Tag adapter is not shown, check that it is
powered on then repeat the search.
Use the arrow keys to hi hli ht the required device and press Select
(F4). The TnT adapter is now placed in the “New” field.
Press Add New (F3) and this will transfer the newly found device into
the printer list.
Now you need to specify what type of printer this device is. Use the
up/down arrow keys to hi hli ht the Printer Type, then press the Ri ht
arrow key to brin up the list of available printers.

11
Hi hli ht Test’n’Tag and press Select (F4)
Press OK (F4) to return to the previous screen.
Note:
Not all the printer types show above will be in your list. The tester
is undergoing continuous development and some printer types
may be added or deleted as necessary .
Printing labels
Labels can be printed either from the ViewData screen or at the
end of the test. Select the menu option Print Label.
When selected, the ima e that will be transferred to the Test ‘n’ Ta
label will be shown on the display.

12
Note:
The maximum number of characters that can be displayed in a
Test ‘n’ Tag barcode is 12. If this limit is exceeded, the barcode
will not appear on the display and will not be printed on the label.
A number of pre-confi ured label formats are available. Pressin
hange Format (F1) will cycle throu h the available formats.
The appearance of the Test ‘n’ Ta labels can be altered by pressin
Setup (F3).
The text in the banner line can be edited to show up to 29 chosen
characters.
You can turn the lo o on or off from this screen.
Note:
The default Pre Feed and Post Feed values are 0.25” and 1.50”
respectively. You can change these values as necessary, or simply
use the “Label Size” field to select “Cable Wrap Panel” which will
give preferred values.
Load Test’n’Tag Logo
A bitmap lo o can be transferred to the PrimeTest for use with the
Seaward Test ‘n’ Ta print system.

13
The lo o must be monochrome in .BMP format with a maximum size
of 320 pixels by 240 pixels.
Press Menu (F4), select Data Transfer usin the arrow keys, select
load T ‘n’ T logo and press OK (F4).
The PrimeTest will now attempt to connect to the Bluetooth
Favourite PC. When a connection has been established the display
will be as shown below.
Note:
If you are using a Primetest 350 with an RS-232 port, then make
sure that the “Computer” field is set correctly. Use the left right
arrow keys to set for “RS-232” or “<your computer>” as desired.
The PrimeTest is now ready to receive data. The amount of data
received is shown numerically on the top left of the display ( 0 in the
screen shot above ).
On the PC start the DataTransfer.exe pro ram and set for the correct
com port. From the File menu, select “Send File”. Navi ate to the
desired lo o file and click on “Open”.

14
The file will be transferred to the tester. On the tester screen you will
see the amount of data received ( shown on the top left of the display).
This value will count up as the data is received. A typical lo o will be
no more than 9700 bytes.
When all the data has been received, the tester will display as much of
the lo o as it can.
If the correct lo o is not displayed, then the Reset button (F3) can be
used to clear the screen. You can then send a different lo o.
If the lo o is correct, then press OK to save the lo o. This lo o will be
saved even if the tester is turned off.
Note:
You can turn the logo on off from the printer set up screen
without having to delete it.

15
5. Printing Labels ( Supernova / Europa )
Note
This section should be read with reference to the tester’s Instruction
Manual
Labels can be printed either at the end of test or at any other time
from test results stored in the memory.
Note
When printing labels from a newly installed Supply Cartridge the first
label to be printed will not have a logo – even if a logo has been
added to the label (see section “Adding a Logo to the Label” ).
Note
There is an option in the System Configuration, Aplnce & Cmnts,
which allows the Appliance ID length to be limited to 10 digits, it is
recommended that this option be set. Appliance ID’s which are
greater than 12 digits in length will not produce barcodes on the Test
‘n’ Tag printout.

16
Set the TnT PRINTER confi uration to “K3110”
With the Printer powered on (Green Li ht illuminated) throu h its AC
Adaptor, connect the Printer Lead RJ12 connector into the Printer
and the serial connector into the serial port of the tester.
Re –Test Period
As the labels require a Next Test due, re-test period will now need to
be defined at the start of the test. On selectin NEW TEST or enterin
CREATE APPLIANCE in MANUAL MODE this screen appears:
Use the cursor keys to select RE-TEST PERIOD and then press the
ENTER key to choose a re-test period.

17
Complete the rest of ENTER APPLIANCE DETAILS as normal (refer to
your Tester Manual) and move on to the next sta e in the test
process.
Note for PATGuard Program Users
Re-test periods are downloaded with test results and are compared
with re-test periods of existing Assets already in your PATGuard
program or used as the re-test period for new Assets. This is to
ensure that re-test periods are ‘synchronized’ across the PAT
system.
Asset Upload from PATGuard Plus will also include the re-test period.
Download to Transfer Printer
To print labels from the DOWNLOAD RESULTS menu make the
followin selection:
Select the fast key OK.
If DOWNLOAD TEST RESULTS was selected from the MAIN MENU
then use SEARCH FOR DOWNLOAD DATA screen as normal (see
Tester Instruction Manual) to select the required data.
If DOWNLOAD TEST RESULTS was selected from OPTIONS at the
end of a test no SEARCH FOR DOWNLOAD DATA appears as it is will
download the test just completed.
In both cases the followin screen will be displayed next if the test
passed:

18
A failed test will be displayed as follows:
If you hi hli ht CHANGE LABEL FORMAT and press the Enter key,
then a variety of different label formats will be displayed.
Use the cursor keys to choose a print option. A PANEL LABEL is for
attachin directly to the Appliance. A CABLE WRAP LABEL is lar er
and is wrapped around the power cord.
If no label is to be printed select LABEL IS NOT REQUIRED.
If more than one label is to be printed the above screens will be
displayed prior to printin each label. This is necessary as each label
is required to be cut from the Printer before the next label is printed.

19
After the label is printed press the on-board cutter at the front of
printer (where the label appears).
To remove the backin from the label use the Peel Stick provided. A
separate Instruction sheet is included to show you how the Peel Stick
is used.Automatic Printin of Labels
Note
This is feature is only available with Supernova Plus or Europa Plus
testers
It is possible to set up the tester such that it prints a label
automatically at the end of each test. To do this it is necessary to
make chan es to the SYSTEM CONFIGURATION menu. From the
MAIN MENU select SETUP then SYSTEM CONFIGURATION to
display the followin menu:
Use the cursor keys to select the AFTER TEST option. Repeatedly
Press the ENTER key until the followin selection appears:
Table of contents
Other Seaward Label Maker manuals
