Secufirst SAPP-T1A User manual

Version 1.5
SCOPE OF DELIVERY
SAPP-T1A
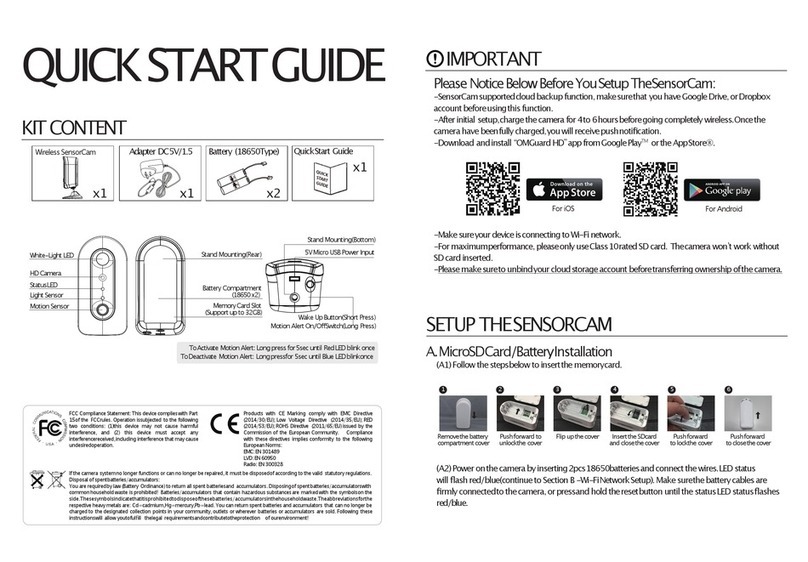
QUICK START GUIDE
Screw Pack
USB
Charglng Cable
Wireless
Battery Camera Bracket
Wireless Hub
X1X1
X1X1
X1
Quick Start
Guide
X1

HARDWARE OVERVIEW
LED status indicator
Microphone
Reset Button
Pairing Button
Micro SD Card (TF card)
Heat emission hole
Built in Speaker
CONNECTION DIAGRAM_BATTERY CAMERA
W/ WIRELESS HUB
HARDWARE OVERVIEW_BATTERY CAMERA
FHD Camera
(1) LED Light for
Night Vision Enhancement
(2) LED Status Indicator
EDS Sensor for
Day/Night Mode Switch
Composite
function Key
(1) Power ON/OFF
(2) Pair
5V/1A USB charger
Two-Way Audio
Speaker
Two-Way Audio
Microphone
PIR Detection
WiFi
Push notification to
he mobile device
PIR Trigger
Inform Wireless Hub Recorde and
it will send notification out
Router will passthrough
the notification
Cloud
2.4GHz
Proprietary
WiFi
Video Streaming Video Recording
2.4GHz
Proprietary
PIR Trigger

SETUP THE APP_IOS
Download and
install the
"O.Connect" APP
to your device.
(Please follow
QUICK START
GUIDE "SETUP
THE APP" step
1.1.)
1.1 1.2
Download APP Install APP
Select “Battery
Camera Kit” and
follow the wizard to
compete setup.
1.6
Wireless Hub
Setup
Plug in the Wireless
Hub to USB power
adaptor which support
5V/1A power output.
When the Wireles Hub
is booted The Blue
status indicator will
flash slowly. And you
will hear a voice
prompt “Ready for
Router Setup”.
1.3
Power on
Wireless Hub
To connect
wireless hub to
your home Wi-Fi
router by
O-Connect APP.
Please follow QSG
Step 1.5 to 1.14.
1.4
Connect
to Router
Open the app, and
the press ”+” button
to add new system.
1.5
Add System
Ensure to setup
the device at the
less noisy
environment and
keep the phone to
the Wireless Hub
/devices 2M, then
swipe left.
Please turn up the
volume at least
70% above of your
mobile phone. then
swipe left.
1.8
1.9
Ensure the router you
wish to connect is
2.4GHz. Wireless Hub
/devices does not
support 5G network,
then press “OK”.
1.10
Add System
Add System Add System
If you are the first
time to add wireless
hub to your device
list, please slect
“New Device”. To
add the wireless hub
you’ve been setup
before, please select
“Existing Device” to
add it in to your list
by entering DID and
securty code
information.
1.7
Add System
If your mobile
phone is not on the
Wi-Fi, please follow
the instruction in
the pop-up window.
Please scan the
QR code label
which be placed on
the back of
wireless hub.
1.11 1.12
Scan QR Code WiFi Setup

SETUP THE APP_IOS
Please check the
Wi-Fi SSID is correct
and enter the
password, then press
“OK”.
After pressing OK,
your mobile phone will
transfer the Wi-Fi
setup information to
your wireless hub via
ultrasonic. You will
hear a voice prompt
“Receive Router
Setup Information”.
Please slect the Wi-Fi
router you’d like to
connect to. SSID and
Password information
is necessary.
1.13 1.14
It takes approximately
2 mins for wireless
hub to connect to your
home router. You will
hear a voice prompt
“Router Connection
Successful” once it’s
connected.
1.15
WiFi Setup
WiFi Setup WiFi Setup
Charge the Battery
Camera before
pairing. During the
charging the LED will
remain on and will
turn off once
charging is
complete. Unplug
the micro USB cable
and turn on the
power to start the
pairing.
1.16
Wireless
Battery Camera Setup
Press and hold the
pair button for 3
seconds. Wireless
Hub will enter to
pairing mode. You
will hear a voice
prompt “Waiting for
Device Pairing”. The
LED status light will
quicky flash.
1.17
Wireless
Battery Camera Setup
Please press the pair
button on the back of
camera 3 times.
Battery camera will
enter pairing mode
and status light will
flash quickly.
1.18
Wireless
Battery Camera Setup
Once pairing
complted, you will
hear a voice prompt
“Device Pairing
Successful”. The
wireless hub status
indicator will turn to
solid light.
1.19
Wireless
Battery Camera Setup
Please modify your
security code.
Default password
“123456” is NOT
recommended.
For you own
security concern,
please modify the
sucurity code of
your new added
device. Please
press “OK” for
processing.
1.20
1.21
Note:
You are not able to
use switch function
while threre is only
one camera be
purchased and paired
to your wireless
router.
1.22
Modify
Security Code
Modify
Security Code
Connect the
Device

SETUP THE APP_ANDROID
Select “Battery
Camera Kit” and
follow the wizard to
compete setup.
Open the app, and
the press ”+” button
to add new system.
2.1
2.5 2.6
Download APP
Add System
Download and
install the
"O.Connect" APP
to your device.
(Please follow
QUICK START
GUIDE "SETUP
THE APP" step
2.1.)
2.2
Install APP
Wireless Hub
Setup
Plug in the Wireless
Hub to USB power
adaptor which support
5V/1A power output.
When the Wireles Hub
is booted The Blue
status indicator will
flash slowly. And you
will hear a voice
prompt “Ready for
Router Setup”.
To connect
wireless hub to
your home Wi-Fi
router by
O-Connect APP.
Please follow QSG
Step 2.5 to 2.15.
2.3 2.4
Ensure to setup
the device at the
less noisy
environment and
keep the phone to
the Wireless
Hub/devices 2M,
then swipe left.
If you are the first
time to add wireless
hub to your device
list please slect “New
Device”. To add the
wireless hub you’ve
been setup before.
Please select
“Existing Device” to
add it in to your list
by entering DID and
securty code
information.
2.7
2.9
Please scan the QR
code label which be
placed on the back
of wireless hub.
Check the WiFi
SSID is correct, and
input the password,
then press “OK”.
Ensure the router you
wish to connect is
2.4GHz. Wireless
Hub/devices does not
support 5G network.
Please, then press
“OK”.
2.10
2.11 2.12
Add System
Add System
WiFi Setup
Scan QR Code
Add System
Power on
Wireless Hub
Connected
router
Please turn up the
volume at least
70% above of your
mobile phone. then
swipe left.
2.8
Add System

Please slect the your
Wi-Fi router you’d like
to connect to. SSID
and Password
information is
necessary.
2.13
WiFi Setup
SETUP THE APP_ANDROID
Check the WiFi
SSID is correct,
and input the
password, then
press “OK”.
2.14
It takes
approximately 2
mins for wireless
hub to connect to
your home router.
You will hear a voice
prompt “Router
Connection
Successful” once it’s
connected.
After you press
“OK”, the smart
mobile phone will
send ultrasonic with
the WiFi information
to the Wireless Hub,
and you will hear a
voice prompts
“Receive router setup
information”.
2.15 2.16
Wi-Fi Setup
Wi-Fi Setup
WiFi Setup
Charge the Battery
Camera before
pairing. During the
charging the LED will
remain on and will
turn off once
charging is
complete. Unplug
the micro USB cable
and turn on the
power to start the
pairing.
2.17
Wireless
Battery Camera Setup
Press and hold the
Pair button for 3
seconds. Wireless
Hub will enter to
pairing mode. You
will hear a voice
prompt “Waiting for
Device Pairing”. The
LED status light will
quicky flash.
2.18
Wireless
Battery Camera Setup
Please press the pair
button on the back of
camera 3 times.
Battery camera will
enter pairing mode
and status light will
flash quickly.
2.19
Wireless
Battery Camera Setup
Once pairing
complted, you will
hear a voice prompt
“Device Pairing
Successful”. The
wireless hub status
indicator will turn to
solid light.
2.20
Wireless
Battery Camera Setup
For you own security
concern, please
modify the sucurity
code of your new
added device. Please
press “OK” for
processing.
2.21
Modify
Security Code
Note:
You are not able to
use switch function
while threre is only
one camera be
purchased and
paired to your
wireless router.
2.23
Please modify your
security code.
Default password
“123456” is NOT
recommended.
2.22
Modify
Security Code
Connect the
Device

Products with CE Marking comply with EMC Directive (2014/30/EU); Low Voltage Directive (2014/35/EU); RED (2014/53/EU);
ROHS Directive (2011/65/EU) issued by the Commission of the European Community. Compliance with these directives
implies conformity to the following European Norms:
EMC: EN 301 489
LVD: EN 60950
Radio: EN 300 328
If the camera system no longer functions or can no longer be repaired, it must be disposed of according to the valid statutory
regulations. Disposal of spent batteries/accumulators:
You are required by law (Battery Ordinance) to return all spent batteries and accumulators. Disposing of spent
batteries/accumulators with common household waste is prohibited! Batteries/accumulators that contain hazardous
substances are marked with the symbols on the side. These symbols indicate that it is prohibited to dispose of these
batteries/accumulators in the household waste. The abbreviations for the respective heavy metals are: Cd=cadmium,
Hg=mercury, Pb=lead. You can return spent batteries and accumulators that can no longer be charged to the designated
collection points in your community, outlets or wherever batteries or accumulators are sold. Following these instructions will
allow you to fulfill the legal requirements and contribute to the protection of our environment!
BATTERY CAMERA INSTALLATION
Battery Camera
Installation
Bracket
Installation Stand Installation
Confirm the
position and mount
the camera to the
bracket clockwise.
Install the stand to
the bracket.
Mount the bracket
with the screws
provided.
12
3
If you have changed
your Wi-Fi router,
please reset the
device by pressing
the reset button for 3
seconds to restore
to factory default.
Follow the Quick
Start Guide “SETUP
THE APP” step
(iOS1.2~1.15/An-
droid 2.2~2.15) to
setup the device
again.
NOTE
2
NOTE
How to Reset Wireless Hub.
Please make sure wireless hub is power on and follow below steps:
Press and hold the Reset button for 3 seconds until RED status indicator quickly flash.
NOTE
1
Mobile application support system:
Android: 5 or later
IOS: 10 or later
NOTE
3
How to Modify
the Password
For your own security reason, modifing your password
regularly is recommended.
1. Press “Edit Setting” icon on the bottom of device list page.
2. Press “Setting” icon which be above on the device.
3. Press “Advanced” icon and enter admin password in the
pop-up window for verifying.
Default Admin Password is “123456”.
4. You will be able to modify Security and Admin password in
the advance setting page.
4
Table of contents
Other Secufirst Security Camera manuals

