SEEYING TT-918 User manual

1
TURNTABLE SYSTEM
TT-918
Owner Manual
2
WARNING
TO PREVENT FIRE OR SHOCK HAZARD, DO NOT USE THIS PLUG WITH AN EXTENSION
CORD, RECEPTACLE OR OTHER OUTLET UNLESS THE BLADES CAN BE FULLY
INSERTED TO PREVENT BLADE EXPOSURE. TO PREVENT FIRE OR SHOCK HAZARD, DO
NOT EXPOSE THIS APPLIANCE TO RAIN OR MOISTURE.
THE CAUTION MARKING AND RATING LABEL ARE LOCATED AT THE BOTTOM OF THE
UNIT
IMPORTANT SAFETY INSTRUCTIONS
1. Read these instructions.
2. Keep these instructions.
3. Heed all warnings.
4. Follow all instructions.
5. Do not use this apparatus near water.
6. Clean only with dry cloth.
7. Do not block any ventilation openings. Install in accordance with the manufacturer’s
instructions.
8. Do not install near any heat sources such as radiators, heat registers, stoves, or other
apparatus (including amplifiers) that product heat.
9. Do not defeat the safety purpose of the polarized or grounding-type plug. A polarized plug
has two blades with one wider than the other. A grounding type plug has two blades and a
third grounding prong. The wide blade or the third prong is provided for your safety. If the
provided plug does not fit into your outlet, consult an electrician for replacement of the
obsolete outlet.
10. Protect the power cord from being walked on or pinched particularly at plugs, convenience
receptacles, and the point where they exit from the apparatus.
11. Only use attachments/accessories specified by the manufacturer.
12. Use only with a cart, stand, tripod, bracket, or table recommended by the
manufacturer, or sold with the product. When a cart is used, use caution
when moving the cart/apparatus combination to avoid injury from tip-over.
13. Unplug this apparatus during lightning storms or when unused for a long
periods of time.
14. Refer all servicing to qualified service personnel. Servicing is required
when the apparatus has been damaged in any way, such as power-supply
cord or plug is damaged, liquid has been spilled or objects have fallen into the apparatus, the
apparatus has been exposed to rain or moisture, does not operate normally, or has been
dropped.
15. This appliance shall not be exposed to dripping or splashing water and that no object filled
with liquids such as vases shall be placed on the apparatus.
16. Do not overload wall outlet. Use only power source as indicated.
17. Use replacement part as specified by the manufacturer.
18. Upon completion of any service or repairs to this product, ask the service technician to
perform safety checks.
19. Power Sources - This product should be operated only from the type of power source

3
indicated on the marking label. If you are not sure of the type of power supply to your home,
consult your product dealer or local power company. For products intended to operate from
battery power, or other sources, refer to the operating instruction.
20. Object and Liquid Entry - Never push objects of any kind into this product through openings
as they may touch dangerous voltage points or short-out parts that could result in a fire or
electric shock. Never spill liquid of any kind on the product.
21. Damage Requiring Service - Unplug this product from the wall outlet and refer servicing to
qualified service personnel under the following conditions:
a) When the power-supply cord or plug is damaged,
b) If liquid has been spilled, or objects have fallen into the product,
c) If the product has been exposed to rain or water,
d) If the product does not operate normally by following the operating instructions. Adjust
only those controls that are covered by the operating instructions as an improper
adjustment of other controls may result in damage and will often require extensive work
by a qualified technician to restore the product to its normal operation.
e) If the product has been dropped or damaged in any way, and
f) When the product exhibits a distinct change in performance - this indicates a need for
service.
22. Mains plug is used as disconnect device and it should remain readily operable during
intended use. In order to disconnect the apparatus from the mains completely, the mains
plug should be disconnected from the mains socket outlet completely.
23. Excessive sound pressure from earphones and headphone can cause hearing loss.
24. Minimum distances of 10 cm around the apparatus for sufficient ventilation
25. The ventilation should not be impeded by covering the ventilation openings with items, such
as newspapers, table-cloths, curtains, etc.
26. No naked flame sources, such as lighted candles, should be placed on the apparatus.
27. The use of apparatus in moderate climates.
This symbol indicates that this product incorporates
d
o
ub
le
insulation between
hazardous mains voltage and
us
er
accessible
p
a
r
ts.
CAUTION
TO PREVENT ELECTRIC SHOCK, MATCH WIDE BLADE OF PLUG
TO WIDE SLOT. FULLY INSERT THE PLUG TO MAIN POWER
SOCKET.
SAVE THESE INSTRUCTIONS
IMPORTANT NOTES
Avoid installing the unit in locations described below:
Places exposed to direct sunlight or close to heat radiating appliances such as electric
heaters.
Places subject to constant vibration.
Dusty, humid or moist places.
Unplug the unit from the electrical power outlet immediately in case of malfunction.
This device complies with Part 15 of the FCC Rules. Operation is subject to the following
two conditions:
(1) This device may not cause harmful interference.
(2) This device must accept any interference received, including interference that
may cause undesired operation.
ACOutlet
ACPlug

4
Location of controls
1) Dust cover
2) Left speaker
3) 3.5mm headphone jack
4) Phono LED indicator (Red) /
Bluetooth LED indicator (Blue)
5) Power on/off/ volume knobs
6) Right speaker
7) Spindle adaptor
8) Turntable speed selector
9) Tone arm rest
10) Line out socket
11) Auto stop switch
12) AC cord
Caution:
Usage of controls or adjustments or performance of procedures other than those specified herein
may result in hazardous radiation exposure.
This unit should not be adjusted or repaired by anyone except qualified service personnel.
Precautions for use
Installation
Unpack all parts and remove protective material.
Do not connect the unit to the mains before checking the mains voltage and before all other
connections have been made.
Do not cover any vents and make sure that there is a space of several centimeters around
the unit for ventilation.
Top cover assembly
1. Push the bracket to rear side.
2. Connect the bracket to the top cover
3. Connect the hinge of the top cover to the main unit
Connection
1. Connect the power cord (12) to AC outlet
2. Turn the volume knob (5) to switch on the system and if the Bluetooth LED indicator (4) is on
with flashing blue light, it means the power supply is normal. Now your system is ready to
play the music.
5
Bluetooth Connection
1. Turn the volume knob (5) to switch on the system and the Bluetooth LED indicator (4) is on
with flashing blue light. The unit will go into Pairing/Discoverable mode.
2. Turn on the Bluetooth function for the device you want to link to, and enable the search or
scan function to find the unit.
3. Select "TT-918" from the device list when it appears on your device screen.
4. After successfully pairing the unit with your Bluetooth device, the Bluetooth LED Indicator (4)
will stop flashing and remain lit in blue color.
5. If you want to connect the unit to another Bluetooth enabled device after you’ve already
successfully paired to another device, turn off the Bluetooth on the device that was
previously paired with the unit. The Bluetooth LED indicator will begin flashing, repeat step
2-4 above.
Note: The unit may automatically reconnect to a previously linked device that is in range, so
you may need to turn off the Bluetooth on any paired device first before going
through the above steps.
PLAY MUSIC FROM YOUR BLUETOOTH DEVICE WIRELESSLY TO THE UNIT
1. Select your favorite song, press the Play/Pause on your Bluetooth device to play or pause
the song from your Bluetooth device.
2. Press the skip forward/skip backward on your Bluetooth device to select the Next or
Previous track.
3. Slowly adjust both the volume controls (5) of the unit and your Bluetooth device until you
reach a comfortable listening level.
Notes:
1. Refer to the manual of your cell phone, tablet PC, computer or other Bluetooth enabled
devices for Bluetooth operation since it may vary from model to model.
2. If your Bluetooth enabled device does not support A2DP profile, it will not play the music
through the speaker, even if paired (linked).
3. Remember to turn off the unit when you have finished listening,
4. Don't forget to switch off the power of your Bluetooth device as well.
5. The music playback will automatically be paused when you have an incoming call. When
the call is ended, the unit will start playing again.
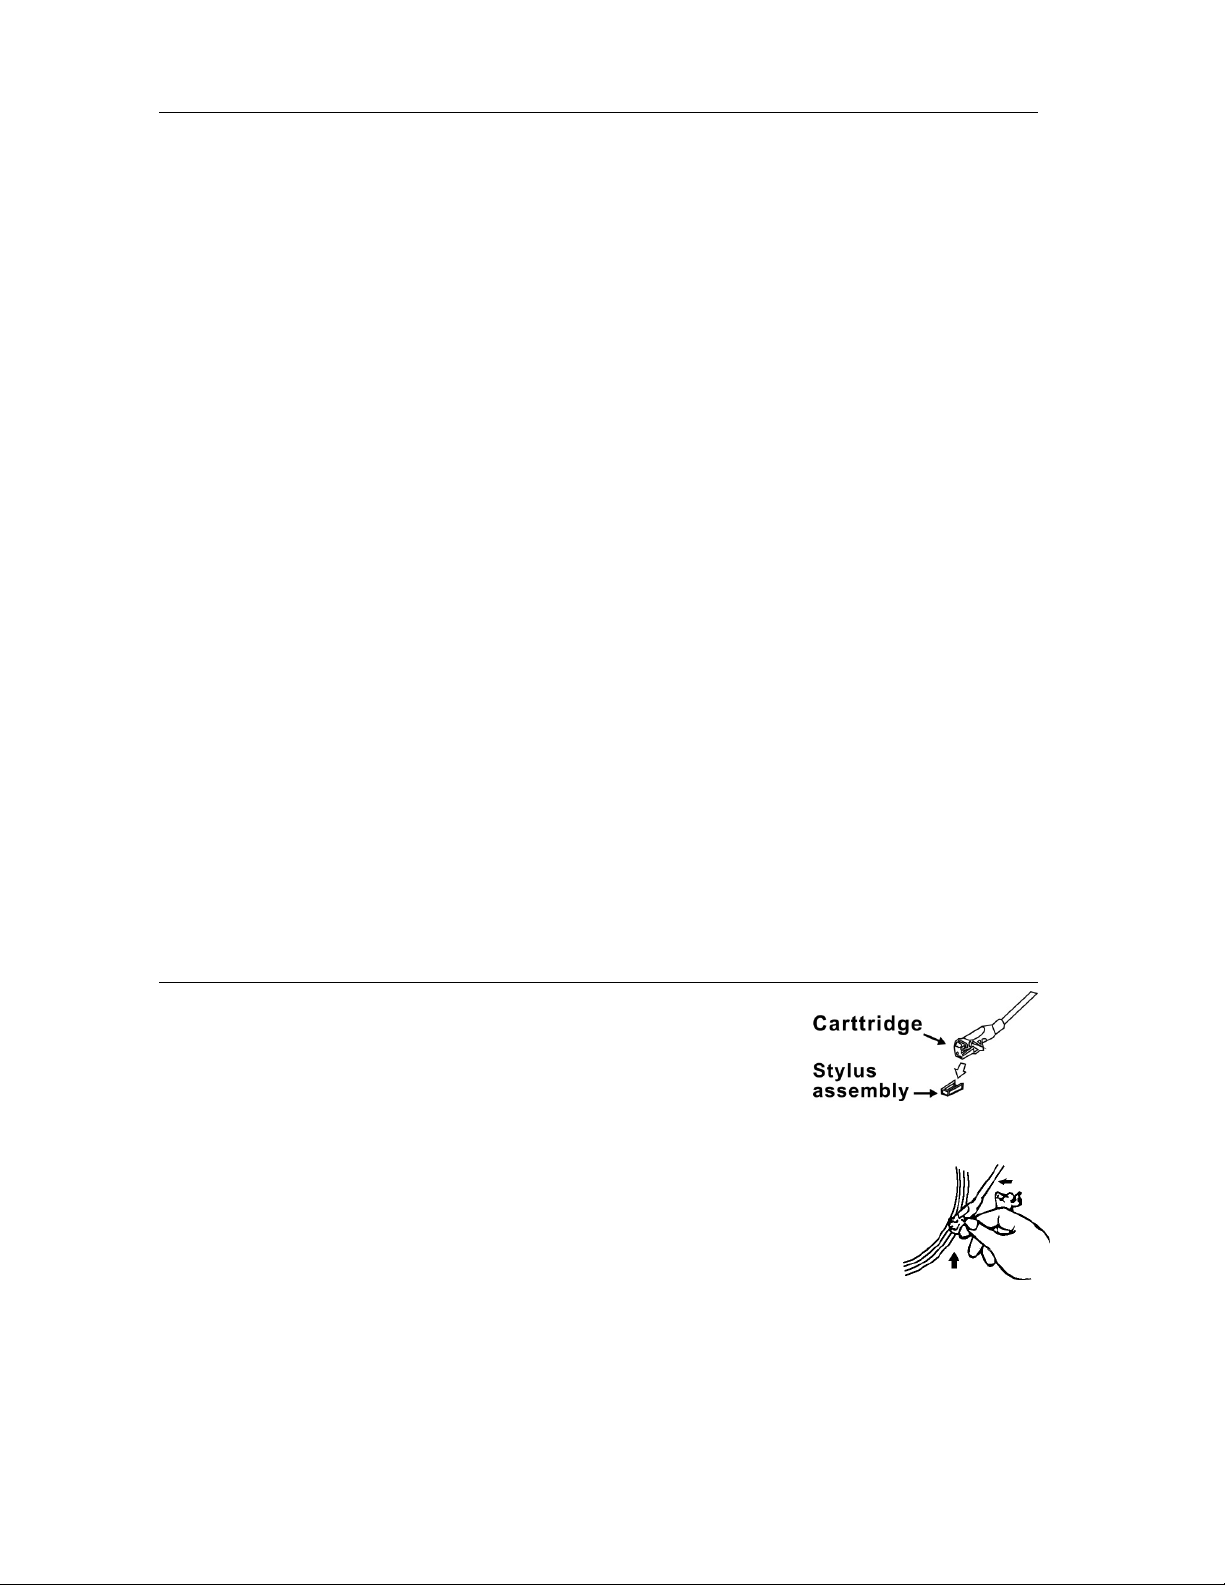
Phono
Noted:
-Remove the stylus protector.
-Be sure that the tone arm is being detached from the tone arm rest
before operating and re-secured again afterwards.
1. Turn the volume knob (5) to switch on the system and the Bluetooth/Power LED indicator (4)
is on with flashing blue light.
2. Set the speed selector (8) to the proper position depending on the record to
be played.
3. Place the record on the platter (use the spindle adaptor (7) if required).
4. Lift the tone arm from the rest and slowly move it to the record side. The
platter will start to rotate and the Power LED indicator (4) will change to red
color.
5. Place the tone arm to the desired position of the record.
6. Adjust the volume (5) to the desired level.
7. At the end of record, the platter will automatically stop rotating. Lift the tone arm from the
record and return it to the rest (9).
8. To stop manually, lift the tone arm from the record and return it to the rest (9)

6
Remark :
1. As some kind of record the auto-stop area was out of the unit setting, so it will stop before the
last rack finish. In this case, select the auto-stop switch (11) to “ off “ position, then it will run
to the end of the record but will not stop automatically (turn off the unit by power button or
switch back the auto-stop switch (11) to “ on “ position to stop the platter rotate). Then put
back the tone arm to the rest position.
2. Remember to disconnect all the Bluetooth device with the unit when you operate the phono.
Line out connection
You can connect the system to your whole hi-fi system by connecting the line out socket (10) to
the auxiliary input socket with a RCA cable (not included).
Care and Maintenance
1. Avoid operating your unit under direct sunlight or in hot, humid or dusty places.
2. Keep your unit away from heating appliances and sources of electrical noise such as
fluorescent lamps or motors.
3. Unplug the unit from the electrical power outlet immediately in case of malfunction.
CLEANING THE UNIT
To prevent fire or shock hazard, disconnect your unit from the AC power source when
cleaning.
The finish on the unit may be cleaned with a dust cloth and cared for as other furniture, Use
caution when cleaning and wiping the plastic parts.
If the cabinet becomes dusty wipe it with a soft dry dust cloth. Do not use any wax or polish
sprays on the cabinet.
If the front panel becomes dirty or smudged with fingerprints it may be cleaned with a soft
cloth slightly dampened with a mild soap and water solution. Never use abrasive cloths or
polishes as these will damage the finish of your unit.
CAUTION: Never allow any water or other liquids to get inside the unit while cleaning.
SPECIFICATIONS
AC Power: AC 120V ~ 60Hz
Bluetooth
Maximun communication range: Line of sight approx. 10m (30 feet)
7

8
Table of contents
Other SEEYING Turntable manuals


