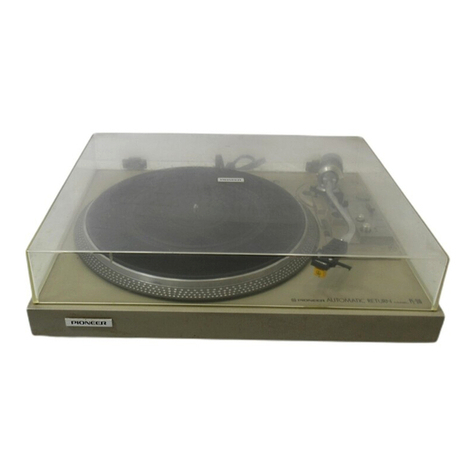
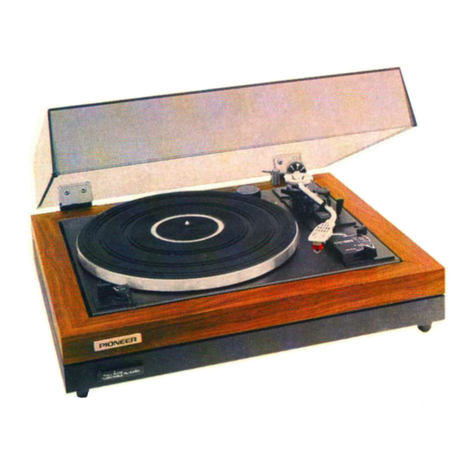
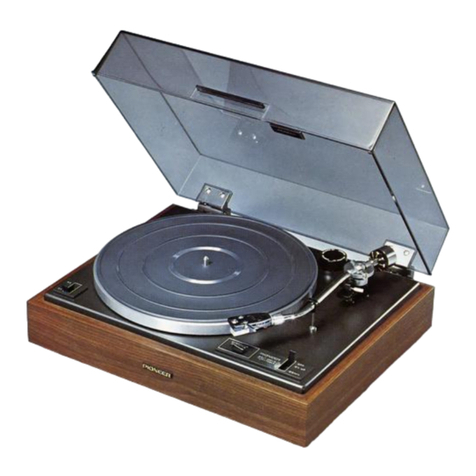
Pioneer PL-15D-II User manual

STEREO
TURNTABLE
PLrlSD-r
OPERATINGINSTRU
CTIONS KLT
KUT
WARNING:
T0 PREVENT
FIRE
0RSHOCK
HAZARD,
DO
NOT
EXPOSE
THIS
APPLIANCETORAIN
OR
MOISTURE.

Thank
you very
muchfor your
purchase
of Pioneer
modelPL-1
5D.n.
You will get man),
ycars
of plcasurc
from this quality
stereoturn-
uble. To gct thc nrostfiom this
easy-to-use
turntable,
please
read
thcopcratinginstructions
andfollowthe
directionsindicated.For
thc psvchological
bcnclit ol thoscwho still want to use their
option.rl
phono
cartridgcs,no
phono
cartridgeisequipped
withthis
turntablc.
Thc first thingyou havc
t<-t
d<-r
is to attach
your option
to a hcadshcll
rcfcrringto "Attaching
a phono
cartridge"in the
|lt\trLlc|L)n\.
FEATURES
POPULAR
BELT.DRIVE
SYSTEM
lhe Ptr.rnrcrbclt-clrivc \ystcm
built into this
unit owes
jts
popul.rr
it_v
to thc supcrior
rotation spccd
stability
and
inrprovr'clsign.rl-to-noisc
ratio
providcd
by thc
pr-rlyurcthanc
bclt.This
\y\tom is
unallcctccl
by changcs
in tcmpcrlturc
.rndhumiditv.Ih.rtisonc ol lhe rcasons
lor thcoutstand-
ing
performance
of thePL-15D.rr.
HIGH.QUALITYMOTOR
The4-polc
synchronous
motor
which
drives
thePL-l5D.u's
ptccision-lornrcd
djc-c,rst,rlurilinumall()y
pl.rttcr
a\surc\
t-tcwlcvels ol smrxrth,runtble
-f
rcc pcrf
ormancc
with no
spccdv.rriations.
ANTI.SKATINGDEVICEENSURES
PERFECTTRACKING
.[o kecp
thcstylurtrackirrg
pcrlcct
atong
the
ccntcr
o{ thc
rccord
groovc (in othcr words,to compcnsatc
for thc in-
w.rrd
thrust of thc toncarm),.rspcciallydcvclopedspring
ar-tivatcdanti-skatingde
vicc is providcd.
lts clfcct is to
g,u,rr.rntcc
Iinc ch,rnncl scp.rr.rtionwhcn pl.rying stcrc()
rccords.
DIRECTLY
READABLETRACKINGFORCE
ADJUSTMENT
'fhc tracking
forcc is adjust;rblcover
praclically any cartridge
(Cartridge
can bc accommodatcd.
S.SHAPEDTONEARM
a widc rangcso
Wcight: 49 -
The light-wr.ight
andlight-trackingtoncdf
m isshapcd
1'or
almost
pcrfectgeomctry
andminimum
tracking
error.
GOODDESTGN
- A .f
OYTO LOOKAT
The main
panel's
mattedfinishlends
asoft,subduedtouch
to the overalldesign,
it is complementcdby thc smoked
dust
cover.
I;ta ,5D,n is a smart,
modernaddition to any
listening
Before using this
lubricate the oil
..LUBRICATION''.
Becausethis unit mav
duringtheshipments.
turntable,
you should
holes wh
ile readins
short of
t
th
at
Ioe)
2
3
3
4
5
6
o
7
7
8
9
9
10
DustCover
to StereoAmpiifier
10
11
CONTENTS
Features
Typical
Stereo
Setup
Installation
PartsIdentification
Assembly
Attachinga Phono
Cartridge
Tonearm
Adjustment
Attach the
Conneclion
Operation
Howto Operate
theTurntable
................
Important: Observe
Carefully
Lubrication
Troubleshooting
........
Specifications
.............

ProNEefil
TYPICALSTEREO
SETUP
The PL-15D-u is a first-quality stereo turntable and
can provide its full performance only when com-
bined with other components of equal quality, so
you should select other quality components com-
parable to this turntable. Set up the system as
shown in Fig. 1 or Fig. 2.
A WORD
ABOUTCOMPONENTS
Besureto selecttherest
of yoursystemwith an
eye to achieving sufficient performance and re-
sponse so that you can make the most of your
PL-15D rr.
The Amplifier
There are many types available: Integrated
stereo amplifiers, AM/FM Receiver, Stereo pre-
amplifiers and Stereo power amplifiers. You can
take your choice of systems,making sure the one
you choose will blend well with the speakers
you
select. Look for high performance and stability in
an amplifier.
The Speakers
Here there are also many possibilities. You have a
choice of bass-reflex type of fully-enclosed type
cabinets, full-range, 2-way, 3-way, and other type
of speaker component combinations, and book-
shelf, floor type or omnidirectional, etc. styling.
With all these choices,your main guide should be
how well the speakers
sound with the rest of your
system.
The Phono Cartridge
There are magnetic (moving coil, moving magnet
and induced magnet types) cartridge as well as
semi-conductor types and optical types.
If you use a moving coil (MC) type cartridge with
the PL-15D-n, make sure your amplifier has the
capability of acceptingthis type of input signal.
NOTE:
Thistonearm
iscompatible
withcartridges
weighing
from
4 - l0 grams.
INSTALLATION
o The place must be well-ventilated and
humidity and dust.
o The unit should not be exposed
free from
to direct
sunlight.
o The unit should not be placed near any source
of heat.
r The unit should be placed as far from the
speaker
system as
possible.
PL-,I5D
N
STER
EO
RECEIVER
(AMPLIFIER
)
SPEAKER
SYSTEMS
PL-1SD-tl
STEREO
PREAMPLIFIER
STEREO
POWER
AMPLIFIER
SPEAKER
SYSTEMS
Fis.1
@OEE@
Fis.2

PARTS IDENTIFICATION
ST COVER
RUBBER
MAT
TURNTABLE
PLATTER
DRIVE BELT
MAIN COUNTERWEIGHT
ANTI-SKATING FORCE
CONTROL KNOB
ARM REST
TONEARM
LOCKINGCOLLAR
HEAD
SHELL
ARM
ELEVATION
LEVER
,,CUT"
BUTTON
OVERHANG
CHECKER
SPEEDSELECT
LEVER
HINGE
GROUND
LEAD_._
OUTPUT LEADS-
AC COBD
CENTERSHAFT
HINGE
MOTORPULLEY
BELT o- 0\
.....\
'a\
N
WOODEN
BASE

l'
ASSEMBLY
To prevent possibledamagein transit, precision
parts and the tumtable platter are packed separate-
ly from the wooden base
in the same
packingcase.
After unpackingall parts carefully, assemblythem
into one unit by referring to the following steps
helpedwith eachillustration.
REMOVE THE TONEARM PACKING
Check and remove the accessoriesstored in the
polystyrol packing on the tonearm (Fig. 3). Then
removethe packing.Accessories
stored there (Fig.
4).
CLAMP SCREWS
Remove the 4 clamping
screws,as
shown in Fig.5.
After removing
the screw
2, fit the suppliedrubber
bushinto the hole ( Fig. 5 ).
TURNTABLE PLATTER
'lhe turntable platter is packedseparately.
Take it
out and put it on the center shaft. (Fig. 6). Place
the rubber mat on the platter after the drive belt
hasbeenset
on the motor pulley.
DRIVE BELT
Set the SPEED SELECT LEVER to 33 rpm
position. Put the drive belt through the belt guide
by pulling the ribbon attachedto the belt. Then set
the belt on the smallerportion (the upper portion)
of the motor pulley, using the ribbon. Then
removetheribbon (Fig.
7).
BELT
TAKE
OFF
h4, Fig.
3
NUflsrzscnews
ou-'o-fotot%?.
wAsH
ERs-\*'{---- RuBBE
RBusH
TJIONEEfiI
Fis.4
SUBWEIGHT --\ \-/St/: r-LUBRICATOR
\ -1@
SCREWDRIVEB
SCREWDRIVER\
f)
'-v(
, C{.*DRIVER
-y ."p';'"
Fig.5
TONEARM PACKING
4 CLAMPING
SCREWS
RI
BBON
HOW TO SET THE DRIVE BELT Fis.7 PLACE
THE TURNTAELE
PLATTER Fiq.6

ATTACHING
A PHONO
CARTRIDGE
Before attaching a phono cartridge, you should
untighten the locking collar, and remove the head
shell.
Thc color-coded pin connc'ctors ir-rthe head shell
conform to the intemational BIA starrdarcl.
Attach
the cartridge according to drawing (t'ig. 8). After
connection of pin connectors, plug tl-rc
head shell
into lhe tonearm aud tightt n firmly locking collar.
When attaching thercartridge Lo the head sheil, we
recommend the Pioneerhead
shi.lls
PP-304.PP-305
to be used.
NOTE:
This tonearm is compatible with cartridges
weighing
front
4 - l0 grams.
OVBRHANG ADJUSTMENT
After motrnting cartridg('. yoLl must adjust over-
hanglength.
First, tighteu Lhe scr('ws
onlv lightly, then move
the heaclshcll ovt'r tht' ovelhang checker ar-rd
slide
the. cartridgc until tht' slylus is directly over the
groovo. 'l'cinrake cht'crking
easier,
the checker post
pulls u1"rto rlri:t'ttl-rcstvlus. After the adjustment is
complete, ftrlly tighlen the screws(Fig. 9).
TONEARMADJUSTMENT
HORIZONTAL
BALANCE
1. Set the anti-skating
force control knob to "0"
(Fig.
13).
2. Remove tl-restylus protection cover from the
cartridge.
3. Free the tonearm clampe.r, then remove the
tonearm from the arm rest.
4. N{ove the main counteru,eight slightly to make
horizonlal
balant'e.
'fhen, make sure to keep the balancehorizontal
without tilting in eithe'rclirection.
5. After confirming perfect adjustment in step 4,
with care taken not to move the main counter-
weight, turn the tracking force dial ring until the
"0" reading aligrs with the white index line
engravedon the tonearm (Fig 10).
6. Clamp the tonearm with the tonearm clamper of
the arm rest.
TRACKINGFORCE
ADJUSTMENT
After the horizontal balance
adjustment (the track-
ing force: aligned with the 0 reading), turn the
main coullterweight together with tracking force
dial ring (wl"rich
is direct reading up to 4 grams in
0.5 increments). Set the proper tracking force to
the index line on the tonearm (Fig. 11).
T-7-- S.REWS WHITE (+)
RED (+)
BLUE { )
GREEN
(-
)
R
L
B
9-*----r- WASHERS
*-w_
t.:.={ neio ,nr..
CARTRIDGE . , .
'-,try
Yt'v')
t9-*-T NUTS
6)
SCREWDRIVER
Fis.8
ADJUST
POSITION
BACK AND
FORTH
Fig.
9
F
is.10
MAIN
COUNTERWEIGHT
Fig.
11
OV
ERHANG
CHECKER
INDEX
LINE
MAIN COUNTERWEIGHT

IN CASE OF USING SUB WEIGHT
If youroptional phono cartridge is too heavy to
keep balance horizontal, add the supplied sub
weight to the rear end of the tonearm (Fig. 12),
then adjust horizontal balance and tracking force
adjustment.
ANTI.SKATINGADJUSTMENT
The anti-skating force control knob should be
adjusted to the same setting as that required for
the trackingforce(Fig. 13).
For example, if the tracking force of the cartridge
is2 pJrams,
setthe anti-skating knob to 2.
What is "Anti-skating"?
As the record groove moves irr relation to the
stylus it exerts a force on the stylus which pushes
it toward the center of the record. This is called
"skating force" and will actually causethe styius
to jump out of the groove and "skate" if it is too
strong. Even when this does not occur, the force
distorts the sound response.
The anti-skating device
isdesigned
to cancelthis force.
1.Hold dustcover
2.Slip cut-outsirr
hinges.
vertically(F'ig.
1.1A).
cover hinges over pegson base
3. Push dust cclvur
itbout Smm to the left (as seen
from the front) to secure
hinges
( Fig. 14-B ).
The phono inputs or-r
the amplifier to which the
turntable should be connected must be chosen in
accordance with type of phono c:utridge to be
used.
r With moving rnagnet or induced magnet type
cartridge:
Connect to the PHONO MAG inputs on ampli-
fier
(Fig.
15).
o With low-output rnoving coil type cartridge:
Connect to the PHONO MC inputs. If these are
not provided on your amplifier, a step-uptrans-
former will be required.
In either case,connect the red output plug from
the turntable to the amplifier's right channel input,
the white plug to the left channel input. The third
black wire (the ground wire) with the split lug on
its end can be connected to the GROUND or GND
terminal of your amplifier. Do not forget to make
this conncetiou, because
it isvital for avoiding hum
and noise
(Fig. 15).
lf the employed cartridge weight
exceeds 8.5 grams, install the
subweight to the tonearm and
adjust the balance-
rJION€ER
Fis.
12
ANTI-SKATING
FORCE
CONTROL
KNOB
INDEX
LINE
r
rg.rJ
ATTACHTHE DUST COVER
CONNECTION
TO STEREOAMPLIFIER
AC
CORD
G
ROUN
D
LEAD
GROUND
TERMI
NAL
STEREOAIVIPLIFIEF
OR RECEIV
ER
CONN
ECTION
CORD
tr cHr
Pfl
(R-CH
)AC OUTLET
PHONO
MAG
INPUT
JACKS F
is.
15

OPERATION
SpeedSelect Lever
ThePL-15D
n
is
atwo-speed
model
:33-1
l3 rpmand
45
rpm.
Se
tting
thelever
to either
spced
position
willautomatically
sc1thcturntablc
foroperation
atthat
spced.
45 rpm
33-
1
/3 rpm
Arm Rest
-fhc.rrm
rcslsupp()rts
thc loncarm
usually
fastcnccl
with
thc arm clampcr.
Whcn
using
lhc toncarm,
do not Iail
tri
lrcc
thc
t()ncarm
lrom
thc
clampcr.
ARM REST
E2 ARM CLAMPER
\
"Cut" Butt<ln
Wrth
thc
l)Lltlon
prcssud
l.)\lop rccord
pl.tying
lr:nrpor.rrily,
ll.tt'1one,trm
rclLlrns
onlo tltt.
;trn)
rcsl
.rulonr,rlicirlly,
and
lhL
rr
llrt
l)(,\vr'l
i\rrtlol
l.
^a^r
ELtvATtoN
CUI BUi.I
ON r.
r've c
Arm Elevaticln
Lever
Thisis.r
lt'vor
firrconlrolling
thc movement
of thetonearm.
Sctting
thc lcvcrto "DOWN" will quietlyput thetonearm
down on thc rccord,
and setting
it to "UP" will raisethe
toncarmfrom thc rccord.
This is a convenienldevicefor
cueing in any portion of the record withou
t fear of
scratchingthe rccord
surlace.
45 rpm Adaptor
A 4-5rprnrccorcl
.rd.rp1or
issupplied
inthe
accessorygroup,
which
pcrmits
45rprn
EPrecords
withlarge
ccnter
holcs
to
be
playcd.

HOW TO OPERATE
THETURNTABLE
The operation is hardly anything difficult about
playing records on the PL-15D-[once you are
accustomed
to the operation.
Simply follow these
steps:
1.Put the record to be plaved on the turntable
platter.
2.Removethe stylus protection cover from the
cartridge and free the tonearm from the rest
clamp.
3.Bring the tonearm by hand above the cueing
position on the record. This operation will
simultaneouslycausethe turntable platter to
rotate.
4.
Set
the SPEED
SELECT
LEVER at the correct
position:
33
or 45
rpm.
5.Move the ARM ELEVATION LEVER to
"DOWN." The tonearmwill quietly float down
onto the recordand play will start
6.When
record
playing
isover,
thetonearmreturns
onto the arm rest automaticallv.and then the
power
is
cut off.
7.
Change
"DOWN" position of ARM ELEVA-
TION LEVERinto "UP" nosition.
PION€GR
NOTE:
Careshould be tahen to auoidthe following point uthen
a
record is played again: The tonearm wiII keep lowering if
the A]lM ELEVATION LEVER does
not be
chanped
into
"UP" position.
o If you wish to stop play in the middle, simply
pushthe Cut Button (STOP).
(Then the tonearm
will return onto the arm rest. and then the
power iscut off).
HOW
TO USETHE ARM ELEVATION
LEVER
BEST
'fhe ARM ELEVATIONLEVER is particularly
convenient when you wish to chooseyour favoribe
music or songsonly from among the severalsongs
recorded on the sameside of an LP record.
o If you move the tonearm with the ARM ELE-
VATION LEVER set to "DOWN", be surenot
to harm the stylus point.
IMPORTANT:
OBSERVECAREFULLY
1.Nevertouch
the
SPEEDSELECTLEVERunless
the turntable isrotating.
The speed
can be changedonly while the turn-
tableisrotating.
2.Neverobstructthe turntablebv hand whileit is
rotabing.
Thismaycause
damage.
3.Always keepthe stylusclean.Removedustwith
asoftbrush.
4.Always keep your recordsscrupulously
clean,
too. Clean
them with a commercially
available
recordcleaneror cloth.
5.Never touch the stylus with your finger. Hands
off.

LUBRICATION
Before applying oil to the turr-rtable,
remove the
turntable platter by r,rsing
the following procedure:
1. Return the toneann onto the arm rest with the
Lottearr.n
clamper. by which bhe tonearm is
fzrstened,then protect the stylus tip with the
stylus
protection cover.
2. Remove the drive belt with fingers from the
motor pulley.
3.Pull the turntable platter straightup with
fingersinserted
into the turntableplatter's
operrings
t
!'ig.
I
ti
).
lf the turntable platter shor-rld
not be removed
casily, pull it up rvith stronger force, with care
taken not to damagcany part of the turntable.
wHnNLUBRTCATIONIS REQUTRED...
Mecharrical noises ancl r,*,olvand flutter usually
rcsrrltfrom the lack of lubricant in rotating parts.
Lultric:atc the specified spots at least once every
two months if your turntable is used for home
entertainmer-rt,and two to three if nsed very fre-
tltrcnt1.1'.
Apply one or two drops to the bascof the center
shafl (Fig. 17). When lubricating,
be carefulnot to
let oil adhere to parts such asthe motor pulley, belt,
or inner rim. If oil should adhere to these
parts, wipe
it off with a cloth moistened with pure alcohol.
WHEN
LUBRICATIONIS OVER
...
Rt'place the turntablc' trllatteron the cer.rter
shaft,
tht'n re-setthe drive belt around the rnotor nullev.
TROU
BLESHOOTING
WOWAND FLUTTER
Wow and flutter usirally result from oil on the
motor pulley or inner turntable rim. Check the
surfacesof the motor pulley and belt, and wipe
lhem clean with a sofl cloth dampened with
alcolr
ol.
Catrtior-r:
Never
useother solvents.
HOWLING
"Howlir-rg," high-pitchcd audio tone, is acoustical
feedbzrck from spealiers to the tun-rtable unit.
Increasingthe distance between the speakers
and
the turntable, or even better, laying a soft cushion
beneath the turntable will nrobablv eliminate
howlins.
r
rg.ro
CENTE
R
HUM
"Hum" is
alow-pitched droning noise,
often 60 Hz
or 50H2, resulting from a loose connection of the
pgound
lead. If hnm occurs:
o Check the connection of the PL-15D.r ground
lead (the black lead with a split lug) to your
amplifier. If it is loose, connect it firmly.
o Check if the output lead of the PL-15D u is
running near the power transformer of your
amplifier. Changing the position of thePL-15D-u
in relation to the amplifier will often eliminate
hum.
o Reversing of the AC cord may occasionally
eliminate hum.
two
two
17
W

SPECIFICATIONS
MOTOR
ANDTURNTABLE
Motor:
TurntableDrive:
Speed:
Wowand
Flutter:
S/N:
Turntable
Platter:
4-polesynchronous
motor
Belt-drlve
n
Two speeds;
33-1
13 rpm, 45
rpm
0.08%
(WRMS)
orless
48dBor more
(in
case
ofusing
Pioneercartridgemodel
PC-30)
30cmdiameter
Aluminum-diecastalloy
TONEARM
Tonearm
type: Static
balance,
S-shaped
pipe
arm
Effective
ArmLength: 221mm
Usablecartridgeweight: ag
(MlN)
to 10g
(MAX)
Overhang: 15.5mm
SUBFUNCTIONS
Anti-skatingForceControl
Head
Shell
Plug-in
Type
Viscour-d.rmpcdarm
clcvation
AutomaticReturnTonearmSystem
Wooden
BasewithAnti-acousticFeedback
Suspension
Overhang
Checker
ACCESSORIES
Lubricator 1
45rpmrecord
adaptor 1
Screwdrivers 2
Rubber
bush 1
Subweight 1
Cartridgcmounting
screws 6
Cartridgemountingnuts 2
Cartridgemountingwashcrs
'2
Operatinginstructions I
MISCELLANEOUS
Power
rcquiremcnt:
Powcrconsumplion:
Dimensions:
Wcight:
ACl20V60Hz
1]W
430(W)x3ss(D)x 166(H)mm
7.5
kg
PION€ER
NOTE:
Specifications
and the designsubjectto possible
modifica-
tion without noticedue to imorouements.

<75CO7F74F>
Printedin Japan
<PRB-017-0>
PIONEEFI ELECTFIGINIC CclFIPclFIATIc|N
4-1 , 1-Chorne, Meguro, Meguro-ku, Tokyo 'l
53, Japan
L.|.S. PIGINEEFI ELECTFIONICS CC'FIPOFIATION
75 Oxfond Dnive, Moonachie, New Jensey O7D74,l-).5.4.
trIONEEFI ELECTFIONIC (EIJFIGIPE' N.V.
Mein-Centen Mein 21 , ?OOO Antwenp, Belgium
trIONEEFT ELECTFIONICE; AI,JS;TFIALIA trTY. LTD.
256-A Citv Fload, South Melbounne, Victonia 3205, Austnalia
Table of contents
Other Pioneer Turntable manuals

Pioneer
Pioneer PL-560 BK User manual

Pioneer
Pioneer PL-516 KCT User manual

Pioneer
Pioneer PL-Z93 User manual

Pioneer
Pioneer PL-430 WE User manual

Pioneer
Pioneer PL-12D User manual

Pioneer
Pioneer PL-51 User manual

Pioneer
Pioneer pl-x50 User manual

Pioneer
Pioneer PL-112D User manual

Pioneer
Pioneer PL-115D User manual

Pioneer
Pioneer C-5600DFV User manual

Pioneer
Pioneer PL-51 User manual

Pioneer
Pioneer PL-41 User manual

Pioneer
Pioneer CDJ-2000nexus Instruction Manual

Pioneer
Pioneer PL-514 User manual

Pioneer
Pioneer PL-71 User manual

Pioneer
Pioneer PL-05 User manual

Pioneer
Pioneer PL-J2500 User manual

Pioneer
Pioneer LD-V4300D User manual

Pioneer
Pioneer DEH-P7550MP User manual

Pioneer
Pioneer PL-570 User manual