Seguin AutopilotIHS User manual

User manual
for FIREBOXES

2
IHS system stands for "Intelligent Heating System", it regulates the
combustion in your new firebox. The purpose of the Autopilot IHS™ is to
provide greener, more economic combustion for the environment, which
is more comfortable for you.
Autopilot IHS™ is the product of a brand new patented technology that
adjusts the volume of combustion air in the firebox. Your new firebox
regularly measures the temperature and oxygen content of the gases
and is programmed to have an optimum oxygen supply through 2 major
air inlets. The remote control is used to set the required temperature
and displays the room temperature, it makes it possible to optimise
combustion in terms of the environment and cost.
Your new Autopilot IHS™ automatically controlled firebox guarantees the
cleanest and most economic wood combustion, whatever type of wood
is used, whatever the chimney, whatever your experience or any other
factors.
Components of the Autopilot IHS™ automated system:
- Airbox: the Airbox contains a circuit board/software and 2 motors
that manage the primary and secondary combustion air. The fresh
air supply must be connected to the Airbox, either at the back or
underneath.
- 2 sensors: a temperature sensor and an oxygen analyser send their
data to the Airbox.
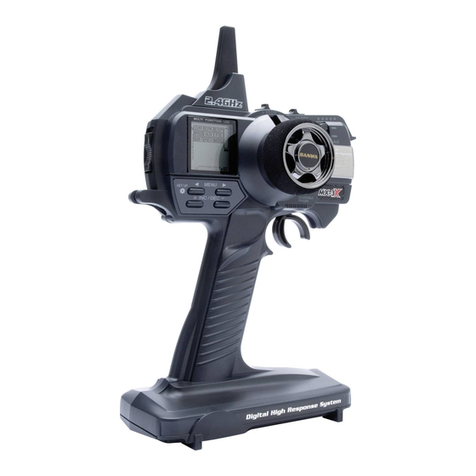
- Remote control with a wall holder: place the remote control
(remember to insert batteries) 2 metres away from the firebox. The
remote control measures the room temperature and sends its data
directly to the Airbox.
- Electricity supply: from the Airbox to the closest power outlet.
Assembly and installation guide
Statutory requirements
Make sure you comply with statutory and technical requirements when
you install your SEGUIN DUTERIEZ firebox. Ask your SEGUIN DUTERIEZ
reseller for advice on assembling your firebox.
Connecting and preparing the Autopilot IHS™
1. Connect
a) To a standard 230V power outlet
b) A mark on the Airbox shows where to plug in the socket. Refer to
our photos of the Airbox connection.
Airbox without an electric connection Airbox with an electric connection
2. Install 3 AA batteries in the remote control. When the IHS logo is no
longer displayed on the screen, the remote control is ready to use.
3. The remote control and the firebox must be linked (link configured in
our factory)
If the line at the bottom of the screen is blank ( )
and divided into three parts, the firebox and remote control are linked.
If the status line shows dashes, the firebox and the remote control are
not linked ( ). Make the link (when the screen is
not lit) by pressing on the button until the advanced menu is displayed.
Press the button several times until you find "Link to firebox". Highlight it
and wait for it to show on the menu. Briefly press the button until you find
"Connect", highlight it and wait again. Once the screen displays "Please
cycle firebox power", power off the Airbox for 3 seconds and then power
it back on. Press the button again. If "Connected to firebox" is displayed
on the screen, the firebox and the remote control are linked. Pressing the
button again returns you to the main menu. If you do not press the button
again, the remote control exits from the menu automatically and returns
to the initial display.
4. Run the Autopilot IHS™ self test.
The electronic control self test is carried out before lighting the firebox
for the first time (carried out in our factory). The self test is not run
until the firebox is cold and on standby ( ) (status
line not shown).
Make sure that the display is not active, i.e. that it is not lit
(). If the screen lights before a long press on the
button, the firebox is preparing itself for lighting (matchbox on the screen)
and the self test cannot be run. Press on the remote control button for
about 5 seconds to display the menu. Press the button until "Selftest" is
displayed. Wait for a few seconds until the remote control displays the
"Selftest" menu. Press the button until "Engage" is displayed. The self test
starts within a few seconds.
Running the self test guarantees that all the basic functions are in working
order.
The Self test is composed of four types of test:
- Software test
- Temperature sensor test and calibration if necessary.
Primary air
IHS Airbox
Secondary air
Airbox external air
intake
Fresh air system
CAUTION:
The installation and
sizing must follow
the indications fea-
tured in the firebox
manual.
IHS remote control
2.4 GHz RF link
Oxygen analyser
Temperature sensor
USB Connection
(technical
department
only)
CAUTION: CORRECTLY SIZED ACCESS HATCHES ARE
MANDATORY FOR MAINTENANCE
(top part for the sensors + bottom part for the Airbox)

3
- Oxygen analyser test and calibration if necessary
- Test of the two motor dampers and calibration if necessary.
The remote control indicates "Pass" if everything is correct, and "Failed"
when there is a problem. The "Failed" message may also be displayed if
you have prepared the firebox for lighting (matchbox on the dial) before
the self test. If you power off and then back on again, the programme
switches to standby mode and the self test is run. The "Not completed"
message on the screen indicates that the self test was not able to complete
because the firebox is not completely cool, and is not in standby mode.
5. The remote control must be in the same room as the firebox but not
directly exposed to the firebox's heat or to direct sunlight. In fact, the
remote control also acts as a thermometer. The room temperature,
which is directly sent to the electronic firebox controller, contributes to
the smart combustion regulation. You can fix the holder provided with
the remote control to a wall.
The chimney
The chimney draws because of the temperature difference between the
inside and outside of the chimney. The higher the temperature inside
the chimney, the more it will draw. A masonry chimney takes longer to
heat than a steel chimney. If the chimney is not drawing properly due to
weather conditions it is essential to warm up the chimney as quickly as
possible. This means obtaining flames quickly. Use very thin split wood
or use an extra firelighter.
In the event of a chimney fire or of overheating, Autopilot IHS™ places
the system in safety mode and automatically adjusts all the dampers to
put the fire out quickly. Do not open the door to avoid restarting the fire.
Call the fire brigade. Before using the firebox again ask a chimney sweep
to check the chimney.
Remote control
The remote control is the Autopilot IHSTM. user interface.
The remote control permanently measures the room
temperature. Place it away from strong heat sources such
as the direct heat from the firebox or direct sunlight.
Set the required temperature on the remote control in
the same way as on a radiator thermostat. The remote
control emits room temperature data and the required
temperature to the firebox airbox (controlling system)
using radio waves.
The remote control functions are described below. The
normal remote control display shows 4 basic items:
1) The room temperature
2) The remote control battery charge level
3) The thermostat setting (required temperature)
4) The status line (indicates the combustion steps)
Button:
Long press - only when the screen is not lit = advanced
menu
Short press - during the start up or combustion phases =
thermostat regulation (required heating value)
Short press - in standby or in the combustion phase =
starting up the firebox, i.e. preparing the firebox to be lit.
Symbol description
IHS IHS Logo
Appears as soon as you turn on the remote control,
for example when you have just replaced the
batteries.
21°C Room temperature
The room temperature is displayed at the centre
of the screen. The surrounding temperature is
measured where the remote control is located. The
room temperature measurement is used to drive the
combustion and manage the alarm indicating that
firewood should be added. Do not place the remote
control near the firebox or in direct sunlight in order
not to have incorrect room temperature data.
Battery level
Remote control battery charge level. When the
batteries are at the minimum level they must be
replaced. The normal battery life is from six months
to one year.
Thermostat setting
The Autopilot IHSTM maintains room temperature
at the required value. The thermostat operates just
like a radiator. Use the remote control to choose the
required heating depending on the room size and
other parameters. The thermostat has six settings:
(Level 0 - 5 where level 3 is an average of 22-24°C).
Level 0: Combustion regulated to its lowest level
(3-4 kW), no room temperature management
Level 1 -2: Room temperature regulation, low level
(about 18-22°C)
Level 3: Room temperature regulation, medium
level (about 22-24°C)
Level 4: Room temperature regulation, high level
(about 24-26°C)
Level 5: Room temperature maximum regulation
(about 27-29°C) Level 5 is used to reach the highest
possible room temperature as quickly as possible,
recommended if you want to heat a cold room
quickly. Once the room temperature comes close to
the required value, choose the required value on the
remote control.
Status line
The status line is at the bottom of the screen. It
indicates the system's combustion status.
No contact with the airbox.
In contact - but on standby.
Initial combustion phase.
Combustion operating phase.
Final combustion phase.
20° C

4
Lighting the fire:
The firebox is ready to light a fire and the flaps open.
This symbol appears by pressing the remote control
twice in standby mode or in final combustion mode.
This symbol is also displayed in the combustion
phase if you press the remote control twice. In this
case it does not mean you want to re-light, but that
you have requested the opening of the firebox flaps
to ignite the wood quickly.
Fire fuel supply alarm
As soon as the combustion produces embers, the
alarm warns of the need to feed the fire. The alarm
is triggered three times at 10 second intervals
accompanied by a sound signal.
Wood supply, three possible levels:
Small quantity (700 – 1 200 g)
Medium quantity (1,000 - 2,000 g)
Large quantity (1,800 - 3,000 g)
Always add two logs at a time, even when only
adding a small quantity. The temperature ignites
the wood. 2 logs retain the heat better and their
temperature rises faster.
Reminder of the fire feeding alarm
If a fire feeding alarm has triggered and the fire has
not been fed, this symbol displays at the top right
corner.
If the symbol has been displayed for a long time,
the gas temperature may be so low that the fire may
have to be re-lit to bring enough combustion air
into the firebox (to do this, press the remote control
twice to display the lighting symbol on the dial).
After having fed the fire, make sure the status line
passes from the combustion to the running phase.
You thereby make sure that the firebox has recorded
the new supply of logs and that the combustion has
the correct air supply. The firebox records the wood
supply when the oxygen level increases due to the
door being opened. At the end of the combustion
phase, the oxygen level in the combustion chamber
and that of the room may be so close to each other
that the opening of the door does not result in an
increased oxygen level. If the status line does not
pass from the combustion to the running phase
soon after the fire has been fed, press on the
remote control twice to display the lighting symbol
(matchbox).
Updating Refresh
Each time the Airbox is refreshed (by a technician),
this symbol is displayed.
Advanced menu
The remote control has a menu from which you
can change the advanced settings. Press the
remote control button for 5 seconds to display the
advanced menu:
Main menus:
- Sound (activated or mute)
- Self test (to launch the self test, for example after
a refresh by the technical department)
- System information (Airbox and remote control
software versions)
- Link to firebox (useful to link the remote control
with the Airbox, carried out in our workshops).
Servicing alarms
If a servicing alarm is triggered you can continue
lighting the firebox but you should contact your
distributor as quickly as possible. Remember to
indicate the error code displayed on the screen.
Your firebox may be burning incorrectly.
Safety alarms
If a safety alarm is triggered, do not light your
firebox. Contact your distributor as quickly as
possible. Remember to indicate the error code
displayed on the screen
Disposal and salvage
When you dispose of the remote control batteries, do not put them in the
household waste, and comply with national regulations.
Regulatory compliance
Compliant with European Directives 72/23/EEC and 2004/108/EEC.
Thermostat operation
A a starting point the Autopilot IHS™ provides optimum combustion
for the environment and adapts to the required room temperature. The
thermostat operates similarly to a radiator thermostat. Set the required
temperature for the room in which the firebox is installed. Once the
thermostat is set to the required temperature, the control adapts to the
target temperature as far as is possible.
When the room temperature is lower than the required temperature, the
control raises the gas temperature in order to increase the firebox's heat
emission.
When the room temperature is higher than the required temperature,
the control lowers the gas temperature to keep the embers alive as long
as possible before feeding the fire. This is to reduce the firebox's heat
emission, but also to allow the fire to be fed without re-lighting it. If the room
temperature drops below the required temperature, the ember phase is
shortened and the system triggers a fire feeding alarm. The system triggers
a fire feeding alarm as soon as the gas temperature is around 180°C; at
100°C the system switches to standby position and all the dampers close.
If the room temperature is significantly lower than the required level, the
control increases the gas temperature. If this temperature increase is not
sufficient, the control triggers a fire feeding alarm while awaiting a new
load of wood to reach the required temperature in the room.
If, after the fire has been fed, the temperature is still not high enough, this
may be due to the wood being damp or the chimney not drawing enough.
The gas temperature must always be at least 350°C in order to protect
the environment.

5
Feeding the fire
When the fire feeding alarm triggers, the firebox is ready for more wood.
The remote control recommends how much wood to add.
Small quantity of wood (700 - 1200 g)
Medium quantity of wood (1000 - 2000 g)
Large quantity of wood (1800 - 3000 g)
For combustion, always feed at least two logs at a time, even if you only
add a small quantity of wood. You can also decide not to feed the fire. The
fire will go out automatically after a certain period of time.
In some rare cases, the system does not record the new logs. For example
when the oxygen level in the combustion chamber is so high, due to the low
gas temperature, that it fails to record the increased oxygen level despite
the doors being open. Each time you add wood, check the status line on the
remote control. A short time after wood is added, the line lights at the centre
(), in the box that indicates the combustion
phase. If combustion is on standby, press the remote control twice to
display the matchbox.
General
To get the best possible combustion
Autopilot IHS™ is designed to guarantee the cleanest and most economic
combustion possible. To achieve good combustion the fire must receive
the correct volume of oxygen at the correct location in the combustion
chamber at the right time. The Autopilot IHS™ takes into account variable
external factors, but it is important to burn clean, dry wood.
Types of fuel
The firebox can suffer damage at high temperatures, for example the
whitening of the window. To avoid this, also close the ash box during
combustion. Also be very careful when using a fuel that emits a large
amount of heat, such as wood blocks for example. If the gas temperature
exceeds 580°C, Autopilot IHS™ switches to the safety position and
automatically closes the air damper to avoid overheating. As soon as the
temperature falls back to 450°C, normal combustion resumes.
Recommendations for lighting a
firebox fitted with the IHS system
The so-called "reversed lighting" method makes it possible to start up
gradually while reducing the formation of gases.
Check before lighting: The ash box grate must not be obstructed by ash,
(the 9 air passages must be clear)
Place the wood on 3 levels:
Level 1: 4 crossed rows of 3 or 4 small logs (10 to 12 cm² cross section)
Level 2: 3 to 4 rows of 3 or 4 even smaller logs (6 to 8 cm²) + place the
firelighter on the top
Level 3: Place some easily inflammable kindling
NB: Crossing the logs allows gradual ignition in order to avoid
condensation phenomena (formation of "tar" on the window)

6
- Open the damper:
- Open the ashbox air slide:
- Press the remote control twice: The "matchbox" lighting symbol is
displayed, you then have about ten minutes to light the firebox
- Light the firelighter
- The firebox door can be left ajar for a few minutes to encourage the
starting phase.
CAUTION: Check that there is no smoke, otherwise keep the door closed
- When the complete load has ignited
- Gradually close the damper:
- Gradually close the ashbox:
CAUTION: OUTSIDE THE STARTING PHASE, THE
AIR FLAP ON THE ASHBOX DOOR SHOULD ALWAYS
REMAIN CLOSED
Reloading once the firebox is running:
- About twenty minutes after lighting the firebox, the remote control will
indicate that fuel needs to be added.
Fuel can also be added earlier if ignition is complete and the bed of
embers is even
- Open the damper
- Refuel by spacing the logs a few centimetres apart so that the flames
can engulf them evenly
To encourage correct ignition, always add fuel to an even bed of embers
- Close the damper
- Follow the instructions on the remote control for the successive statuses
Open in the
horizontal
position
Aire slide pushed to the left/to the right
Ashbox air slide towards
the right
Flap closed = control in
the vertical position

7
Operating faults
SMOKE COMES OUT OF THE FIREBOX THROUGH THE DOOR WHEN IT IS
OPENED
- The chimney is not drawing sufficiently. Please refer to the section on
the chimney or contact a chimney sweep.
- The chimney sweep hatch is no longer sealed or is missing. Replace or
install the chimney sweeping hatch.
UNCONTROLLED COMBUSTION
- The door or ash box seal is no longer airtight. Replace the seal.
SAFETY ALARMS
Do not use the firebox. Contact your distributor as quickly as possible.
If you are unable to solve an operating fault, contact your reseller.
BLACKENING OF THE WINDOW - TAR DEPOSITS
Possible causes:
- Incorrect wood quality - Humidity level greater than 15% causing a
temperature defect in the combustion chamber
Use quality wood with an even humidity level of 15% max.
- Operating cycle at too low speed: Soot deposits because combustion is
incomplete and the gas temperature too low
Increase the combustion speed to achieve the correct temperature in
the combustion chamber
-
Incorrectly sized outdoor fresh air connection, (and/or) room depressurised
by disruptive elements of the mechanically controlled ventilation type…
Check that the installation conditions in the instructions have been
followed
- On the door, air passages n°1, 2 and 3 are partially blocked (see
illustration below)
NB: These passages allow a film of air to pass in order to prevent the
window from getting dirty.
Diagram showing the assembly of the window on the door (top horizontal section):
CAUTION: It is recommended to carry out this cleaning operation twice
per season.
Removal of the window and inspection of the air passages +
cleaning if necessary in order to remove soot and tar deposits (see
illustrations below)
Remove the 2 x (3 screws) on either side of the door
Caution: hold the window in place so that it does not fall
Air passage n°1: Zone to clean for a continuous 4 mm space between
the top horizontal part of the window and the outside cast iron moulding
Air passage n° 2: Zone to be cleaned for a 1 mm air passage between the
cast iron frame and the window
Air passage n° 3: Zone to be cleaned for a 1 mm air passage between the
steel angle part and the window
Reassemble the unit after inspection and cleaning
Do not alter the air passages without first consulting cheminées
SEGUIN
Air passage n°1: 4 mm gap
Top part of the cast iron door
Door seal
Ø 7 mm
"L" profile steel
angle bar
Window
Air passage n° 3:
Approx. 1 mm gap
Air passage n° 2:
Approx. 1 mm gap
3 screws3 screws

8
Fault detection
When the remote control displays a fault
The remote control can trigger 2 types of alarm. Servicing alarms and safety alarms. Safety alarms are more serious than servicing alarms. The following
diagram indicates the meaning of the alarms that are displayed on the remote control.
Servicing alarms on the remote control
You can continue using the firebox but the fault must be found because the firebox requires technical servicing. Your firebox may be burning incorrectly.
Servicing alarm Alarm description How to eliminate the cause of the alarm
No1 O2 sensor failure
Lambda sensor operating fault
Push the pins in correctly. If this does not work, eventually change the cord. The
firebox can run with reduced functions. The firebox is not receiving primary air,
leave the door ajar while you are lighting the fire, until all the wood is alight.
No2 O2 sensor failure
Defective link on the Lambda sensor
Disconnect the sensor from the box and reconnect it. Launch a self test.
If this is not sufficient, replace the Lambda sensor (oxymeter) and its cable.
The firebox can run but not optimally; replace the Lambda sensor as soon as
possible.
No3 Chimney sensor failure
Defective temperature measurement.
Replace the temperature sensor.
The firebox can run with reduced functions. The firebox is not receiving primary
air, leave the door ajar while you are lighting the fire, until all the wood is alight.
No4 Room sensor failure
Defective room temperature
measurement.
Replace the remote control.
No5 Firebox comm. failure
Communications between the firebox
and the remote control are defective.
Place the remote control nearer to the firebox. Make sure it is powered on. If this
is not sufficient, the defect is either in the Airbox or in the radio part of the remote
control. Replace the Airbox or the remote control.
No6
Remote battery low
The remote control batteries are run
down.
Change the remote control batteries.
Safety alarms on the remote control
Do not use the firebox. The defect must be eliminated before lighting the firebox again*.
Safety alarms Alarm description How to eliminate the cause of the alarm
No3 System error
System fault.
Firebox configuration fault. Download the new Airbox software.
No7 Mechanical error
Defective primary motor and piston
Replace the Airbox.
No8 Mechanical error
Defective secondary motor and piston
Replace the Airbox.
No9 Mechanical error
Defective tertiary motor and piston
Replace the Airbox.
No10* Overheated
The firebox is overheating.
The gas temperature is higher than 580°C
The system switches to "Safety mode", i.e. the primary and secondary
flaps close slowly. As soon as the temperature drops back down to
450°C, the system resumes normal operation.
No13** Sensor errors
Defective oxymeter and/or temperature
measurement.
Replace both sensors.
* In the event of fault n° 10, you can carry on using the firebox while reducing the load since the firebox will resume normal operation automatically.

9
temperature sensor
oxygen sensor
** In the event of fault n° 1-2-3 and 13, proceed as follows:
PROCEDURE TO REPLACE THE SENSOR OR SENSORS
1 - Remove the firebox Airbox support plate (4 hexagonal screws)
2 - Remove the Airbox from the support plate
3 - Disconnect the
connectors:
A temperature sensor
B oxygen sensor
Caution: operation to
carry out carefully to
avoid damaging the
contacts
4 - Remove the top cover
5 - Raise the cable or cables to the top
6 - Unscrew the sensor or sensors
7 - Replace the sensors
8 - Proceed in reverse order to refit the unit
A
B

10
NOTES
............................................................................................................................................................................................................................................
............................................................................................................................................................................................................................................
............................................................................................................................................................................................................................................
............................................................................................................................................................................................................................................
............................................................................................................................................................................................................................................
............................................................................................................................................................................................................................................
............................................................................................................................................................................................................................................
............................................................................................................................................................................................................................................
............................................................................................................................................................................................................................................
............................................................................................................................................................................................................................................
............................................................................................................................................................................................................................................
............................................................................................................................................................................................................................................
............................................................................................................................................................................................................................................
............................................................................................................................................................................................................................................
............................................................................................................................................................................................................................................
............................................................................................................................................................................................................................................
............................................................................................................................................................................................................................................
............................................................................................................................................................................................................................................
............................................................................................................................................................................................................................................
............................................................................................................................................................................................................................................
............................................................................................................................................................................................................................................
............................................................................................................................................................................................................................................
............................................................................................................................................................................................................................................
............................................................................................................................................................................................................................................
............................................................................................................................................................................................................................................
............................................................................................................................................................................................................................................
............................................................................................................................................................................................................................................
............................................................................................................................................................................................................................................
............................................................................................................................................................................................................................................
............................................................................................................................................................................................................................................
............................................................................................................................................................................................................................................
............................................................................................................................................................................................................................................
............................................................................................................................................................................................................................................
............................................................................................................................................................................................................................................
............................................................................................................................................................................................................................................
............................................................................................................................................................................................................................................
............................................................................................................................................................................................................................................


CHEMINEES SEGUIN DUTERIEZ
Z.I. de Lhérat - 63310 RANDAN (France)
Tel: +33 (0) 4 70 56 16 00 - Fax: +33 (0) 4 70 56 16 09
www.seguin.fr
Table of contents
