Selecline 600107632 User manual
600107632
600109008
DD1-21N-4
USER MANUAL
Freezer upright (P.03)
MANUAL DE UTILIZACIÓN
Congelador vertical (P.35)
INSTRUKCJA OBSŁUGI
Zamrazarka pionowa (S.69)
MANUAL DE UTILIZARE
Congelator vertical (P.102)
ІНСТРУКЦІЯ З ЕКСПЛУАТАЦІЇ
Вертикальна морозильна
камера (C.137)
MANUEL D’UTILISATION
Congélateur vertical (P.18)
MANUAL DE UTILIZAÇÃO
Arcacongeladoravertical(P.52)
HASZNÁLATI ÚTMUTATÓ
Álló fagyasztószekrény (86.O.)
РУКОВОДСТВО
ПОЛЬЗОВАТЕЛЯ
Вертикальная морозильная
камера (C.119)

4
5
6
2
1
3
2

1/ SAFETY INSTRUCTIONS
Before using this electrical appliance, read the instructions
below carefully. Keep them for future reference and pass
them on to any subsequent owners of the product:
1. This appliance can be used by children aged from 8
years and above and persons with reduced physical, sensory
or mental capabilities or lack of experience and knowledge if
they have been given supervision or instruction concerning
useoftheapplianceinasafewayandunderstandthehazards
involved. Children aged from 3 to 8 years are allowed to load
and unload refrigerating appliances.
2. Children shall not play with the appliance.
3. Cleaning and user maintenance shall not be made by
children without supervision.
4. Keep all packaging far away from children. There is a risk
of suocation.
5. WARNING: Keep ventilation openings, in the appliance
enclosure or in the built-in structure, clear of obstruction.
6. WARNING! Do not use mechanical devices or other
means to accelerate the defrosting process, other than those
recommended by the manufacturer.
7. WARNING! Do not damage the refrigerant circuit.
8. WARNING: When positioning the appliance, ensure the
supply cord is not trapped or damaged.
TABLE OF CONTENTS:
1/SAFETY INSTRUCTIONS ______________________________ P. 3
2/TECHNICAL SPECIFICATIONS__________________________ P. 7
3/PRODUCT DESCRIPTION______________________________ P. 8
4/ BEFORE FIRST USE __________________________________ P. 8
5/USE _______________________________________________ P. 12
6/CLEANING AND CARE _______________________________ P. 15
7/WARRANTY AND LIMITATION OF LIABILITY ____________ P. 17
3

9. WARNING!Donotlocatemultipleportablesocketoutlets
or portable power-suppliers at the rear of the appliance.
10. Do not store explosive substances such as aerosol cans
with a ammable propellant in this appliance.
11. During the transportation and installation of the
appliance, be certain that none of the components of the
refrigerant circuit have become damaged.
– Avoid open ames and sources of ignition.
– Thoroughly ventilate the room in which the appliance is
situated.
12. It is dangerous to alter the specications or modify this
product in any way.
13. WARNING! Any damage to the power supply cord may
cause a short-circuit, re, and/or electric shock.
14. This appliance is intended to be used in a household and
similar applications, such as:
– Sta kitchen areas in shops, oces, and other work
environments;
– Farmhouses and by clients in hotels, motels, and other
residential-type environments;
– Bed and breakfast type environments;
– Catering and similar non-retail applications.
15. WARNING! Any electrical components, such as the plug,
power supply cord and compressor, must be replaced by a
certied service agent or qualied service personnel.
16. The power supply cord must not be lengthened.
17. Make sure the power plug is not squashed or damaged
by the back of the appliance. A squashed or damaged power
plug may overheat and cause a re.
18. Make sure that you can reach the mains plug of the
appliance.
19. Do not pull on the mains power cord.
20. If the power plug socket is loose do not insert the power
plug. There is a risk of electrical shock or re.
4

21. This appliance is heavy. Take care when moving it.
22. Do not remove or touch frozen items in the freezer if your
hands are damp or wet as this could cause skin abrasions or
frost burns.
23. Avoid exposing the appliance to prolonged or direct
sunlight.
24. Do not put hot items on the plastic parts of the appliance.
25. Never re-freeze food that has thawed.
26. Store pre-packed frozen food in accordance with the
frozen food manufacturer’s instructions.
27. Appliance manufacturer’s storage recommendations
should be strictly adhered to. Refer to relevant instructions.
28. Do not place carbonated or zzy drinks in the freezer as
they will expand when freezing and could explode damaging
the appliance.
29. Ice lollipops can cause frost burns if consumed straight
from the appliance.
30. To avoid contamination of food, please respect the
following instructions:
– Opening the door for long periods can cause a signicant
increase of the temperature in the compartments of the
appliance.
– Clean regularly surfaces that can come in contact with
food and accessible drainage systems.
– Store raw meat and sh in suitable containers in the
refrigerator, so that it is not in contact with or drip onto
other food.
– Two-star frozen-food compartments are suitable for
storing pre-frozen food, storing or making ice-cream and
making ice cubes.
– One-, two- and three-star compartments are not suitable
for the freezing of fresh food.
– If the refrigerating appliance is left empty for long
periods, switch o, defrost, clean, dry, and leave the door
open to prevent mould developing within the appliance.
5
31. If the supply cord is damaged, it must be replaced by the
manufacturer, its service agent or similarly qualied persons
in order to avoid a hazard.
32. This appliance does not contain gases which could
damage the ozone layer, in either its refrigerant
circuit or insulation materials. The appliance shall not be
discarded together with the urban refuse and rubbish. The
insulation foam contains ammable gases. The appliance
shall be disposed of according to the appliance regulations
in your locality. Contact your local authorities to obtain a
copy of the regulations. Avoid damaging the cooling unit,
especially the heat exchanger. The materials used on this
appliance marked by the symbol are recyclable. Dispose
of the packaging materials in a suitable collection container
to recycle it.
33. Do not use electrical appliances inside the food storage
compartments of the appliance, unless they are of the type
recommended by the manufacturer.
Disposing of the Appliance
1. Disconnect the appliance mains plug from the mains
socket.
2. Cut o the mains power cord as close to the appliance
cabinet as possible.
3. Remove the door to prevent children from suering
an electrical shock or closing themselves into the
decommissioned appliance.
4. If your new appliance with magnetic door seals is
replacing an older appliance with a spring lock/latch on
the door or lid, be sure to make the door spring lock/latch
unusable before you discard the old appliance. This prevents
it from becoming a death trap for a child.
5. WARNING! During use, service, and disposal of the
appliance, pay attention to this symbol, located at
the rear of the appliance, on the rear panel or the compressor.
6

It is a yellow or orange colour to make it stand out and draw
your attention. This symbol warns of a re risk. There are
ammable materials in the refrigerant pipes and the
compressor. Stay far away from any ame or re source when
using, servicing, or disposing of the appliance.
6. All accessories, such as drawers, shelves, balconies
should be kept there for lower energy consumption.
7. This symbol on the appliance or on its packaging
indicates that this appliance may not be treated as
household waste. Instead, it should be taken to the
appropriate collection point for the recycling of electrical
and electronic equipment. By ensuring that this product is
disposed of correctly, you will help prevent potential
negative consequences for the environment and human
health,whicharerisksshouldthisappliancebeinappropriately
disposed of. For more detailed information about recycling
this appliance, contact your local council, your household
waste disposal service, or the retailer where you purchased
the appliance.
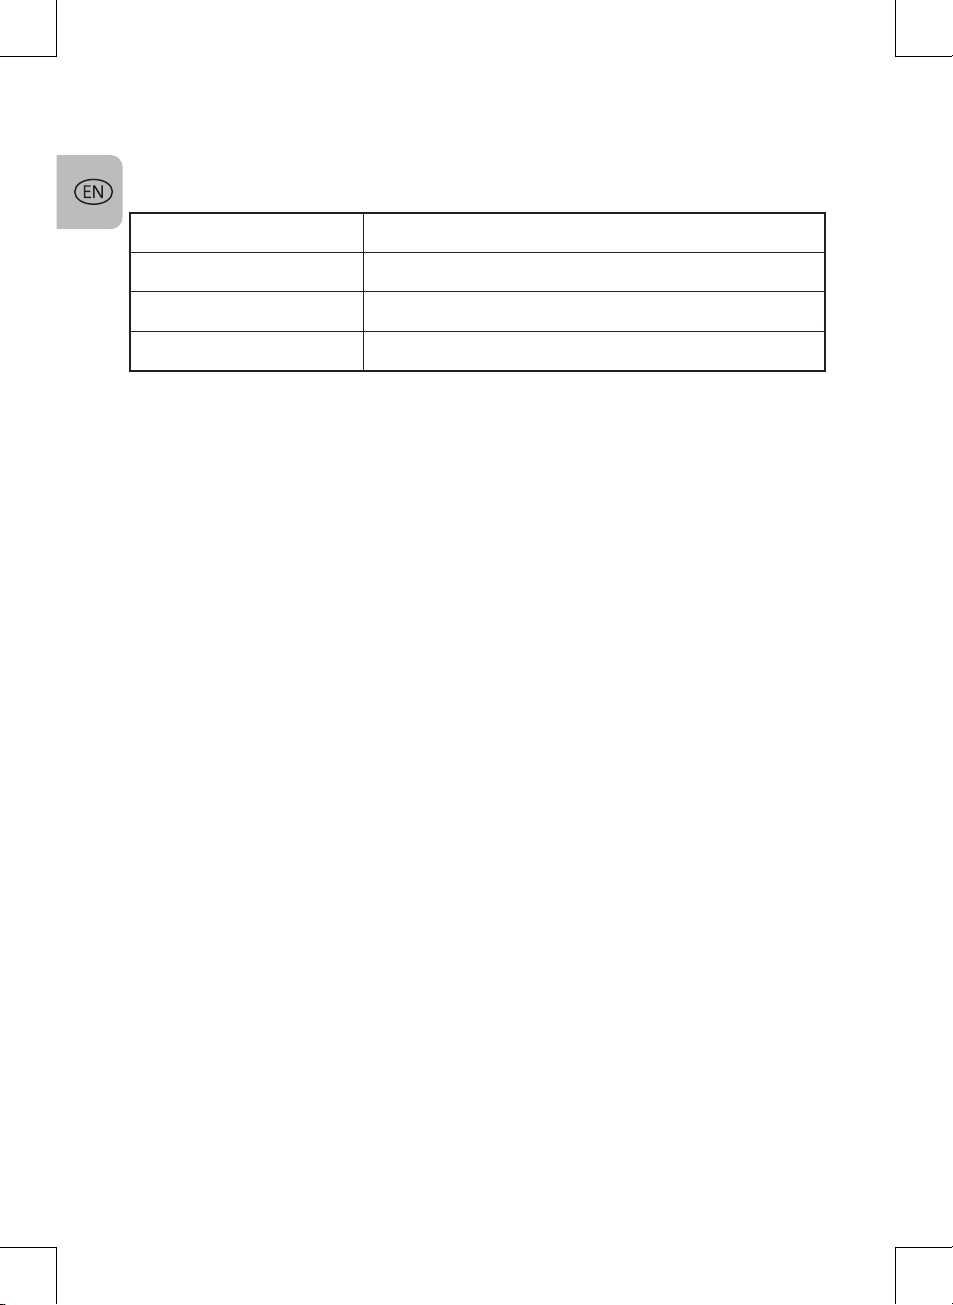
2/ TECHNICAL SPECIFICATIONS
Power Supply 220-240 V~, 50 Hz
Annual Energy Consumption 238 kWh
Total Input Power 100 W
Storage Capacity 168 L
Climate Classication N, ST
Temperature Rise Time 16.5 hours
Freezing Capacity 7.8 kg per 24 hours
Exterior Dimensions (W x D x H) 544 x 571 x 1426 mm
Net Weight 43 kg
Protection Class Class I
7

3/ PRODUCT DESCRIPTION
1- Drawers
2- Adjustable feet
3- Hinge
4- Thermostat adjustment knob
5- Door
6- Gasket
4/ BEFORE FIRST USE
TRANSPORTATION INSTRUCTIONS
■This appliance should be transported only in a vertical, upright position. The
packing as supplied must be intact during transportation.
■Do not use the door handles when carrying the appliance.
UNPACKING
1. Unpack all parts.
2. Immediately after unpacking, check for completeness and any damage sustained
during shipping. If your package or the power cable is damaged or incomplete,
do not connect the appliance, keep the packaging material and immediately
contact our After-Sales department or the retailer where you purchased the
appliance.
INSTALLATION
WARNING!
■Make sure the power cable is not caught under the appliance during and after
moving it, to avoid the power cable becoming cut or damaged.
■RISK OF ELECTRIC SHOCK! Protect the appliance from moisture. Do not install
the freezer in a humid place to avoid rust on the metal parts. Do not splash water
on the interior or exterior of the appliance, as this may weaken the insulation and
result in an electric shock or re.
■If the freezer is installed in cold unheated areas, such as a garage, condensation
may form on the outer surfaces. This is quite normal and is not a fault. Wipe o
any condensation with a dry cloth.
■When positioning your appliance take care not to damage your ooring, pipes,
wall coverings, etc.
IMPORTANT!
■It is advisable to wait at least four hours before connecting the appliance. This
allows the uids to balance. For example, the oil ows back into the compressor.
■The appliance must not be located close to radiators or cookers.
■Ensure that the mains plug is accessible after installing the appliance to ensure
the appliance can easily be disconnected at any time.
■Do not attempt to sit or stand on top of the appliance as it is not designed for
such use. You could injure yourself or damage the appliance.
8

Space Requirement
■Keep enough space for the door to open. See Figure 1.
A 0
B 0
C 1420
D min= 0
E min=50
F min=50
G
H
I 135°
1130
960
F F
F
IMPORTANT! Ensure that there is adequate air circulation around the appliance and
at least a 50mm gap on all sides. A lack of air circulation leads to overheating.
Location
■Install the appliance in a location with an ambient temperature corresponding to
the climate class indicated on the rating plate of the appliance:
Climate Class Ambient Temperature Range
Extended temperate SN 10° C to 32° C
Temperate N 16° C to 32° C
Subtropical ST 16° C to 38° C
Tropical T 16° C to 43° C
■This freezer is not intended to be used as a built-in appliance.
■The appliance should be installed far away from sources of heat such as radiators,
boilers and direct sunlight. Ensure that air can circulate freely around the back
of the appliance. Ideally, the appliance should not be positioned below any
overhanging wall units. However, if it is placed under an overhanging wall unit,
make sure there is a clearance distance of at least 50 mm. Do not stack the
appliance with other household appliances.
■Accurate levelling is ensured by one or more adjustable feet at the base of the
appliance.
■This appliance is not intended to be used as a built-in appliance.
Electrical Connection
■Before plugging the appliance in, ensure that the voltage and frequency shown
on the rating plate corresponds with your domestic power supply. The appliance
must be grounded/earthed. The power supply cord plug is provided with a
contact for this purpose. If the domestic power supply socket is not grounded,
connect the appliance to a separate earth in compliance with current regulations.
Consult a qualied electrician.
9

■The manufacturer declines all responsibility if the above safety precautions are
not observed.
■This appliance complies with the E.E.C. Directives.
Levelling the Appliance
■Level the appliance using the two adjustable front feet which can be screwed or
unscrewed to change the height. See Figure 2.
Shorten
NOTE: If the appliance is not level and in rm contact with the oor, the doors and
the magnetic seal alignment will not be covered correctly. An unlevel appliance can
lead to excessive noise and vibration.
REVERSING THE DOOR OPENING DIRECTION
Tools required: Phillips screwdriver, at-bladed screwdriver and an adjustable
wrench or spanner.
Notes:
■Ensure the appliance is unplugged and empty.
■To remove the door, it is necessary to tip the appliance backwards. Rest the
appliance on something solid so that it will not slip during the door reversal
process.
■All parts removed must be saved as they are required to reinstall the door.
■Do not lay the appliance at as this may damage the coolant system.
■This is a two-person task as it takes more than one person to handle the appliance
during assembly.
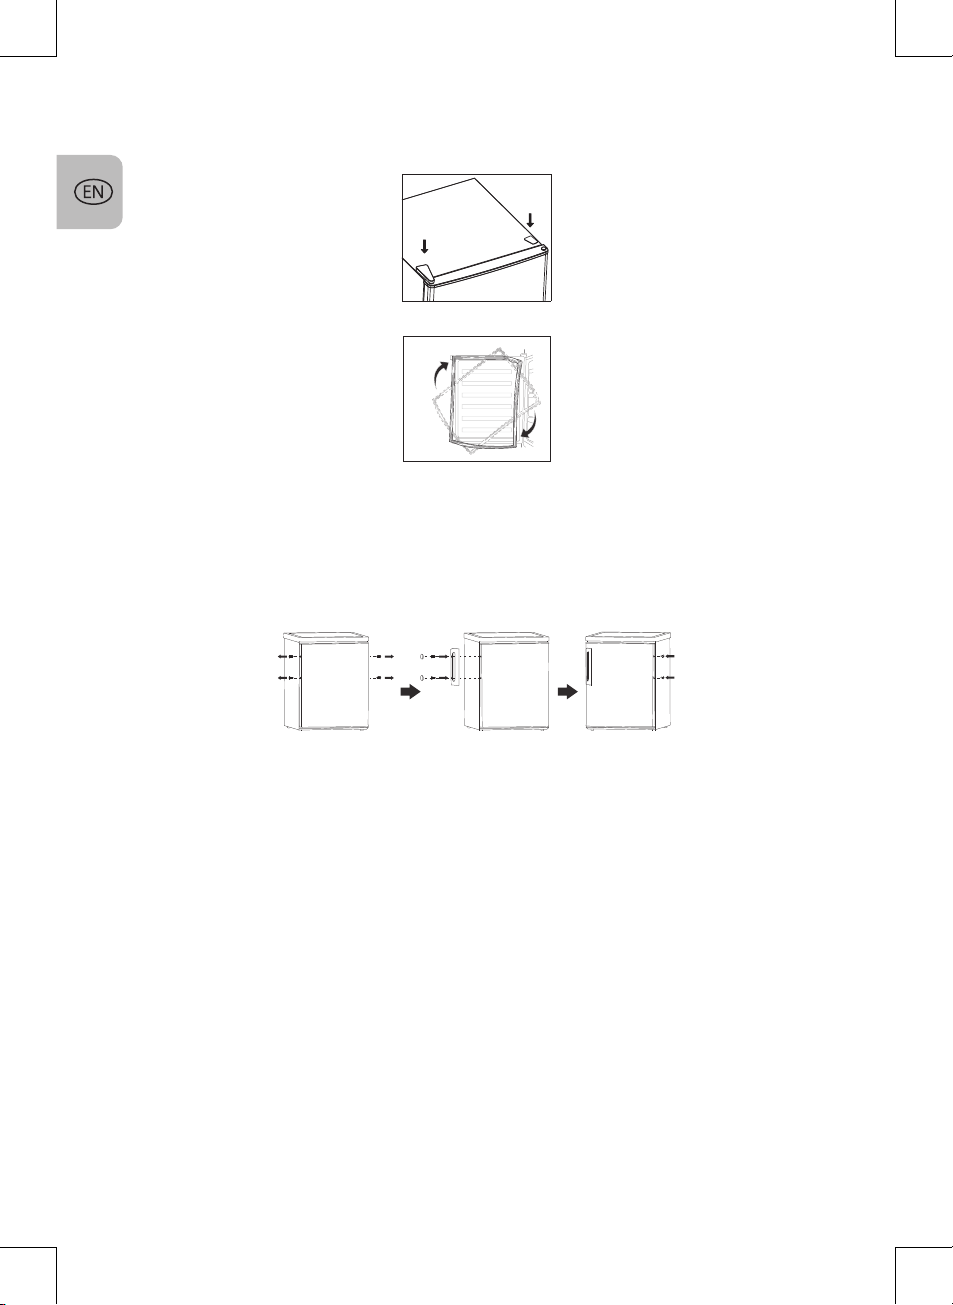
1. Prise up and lift o the top-right hinge cover. See Figure 3.
1.Remove the top right hinge cover.
2.Undo the screws.Then remove the
hinge bracket.
11
2. Unscrew the two bolts and take o the hinge bracket. See Figure 4.
1.Remove the top right hinge cover.
2.Undo the screws.Then remove the
hinge bracket.
11
10

3. Prise up and lift o the top-left hinge cover. See Figure 5.
1.Remove the top right hinge cover.
2.Undo the screws.Then remove the
hinge bracket.
11
4. Move the hole cover from the left to the right side. Then lift o the door and place
it on a soft surface where it will not be scratched. See Figure 6.
1.Remove the top right hinge cover.
2.Undo the screws.Then remove the
hinge bracket.
11
5. Unscrew the bottom hinge and remove the adjustable feet from both sides. Then,
unscrew the hinge pin on the base of the appliance, turn the hinge bracket over
and thread the hinge pin through the hinge bracket and secure with the nut and
locking washer. See Figure 7.
12
12
6. Ret the hinge bracket with the hinge pin on the left side. See Figure 8. Reattach
the adjustable feet.
12
7. Replace the door. Ensure the door is aligned both horizontally and vertically. This
ensures the seals are closed on all sides before you tighten the top hinge.
8. Insert the top-left hinge bracket and secure into place with the two bolts. Make
sure to place the bolts in a diagonal formation as shown. See Figure 9.
11.Put the hinge cover and the screw cover
back.
12.With the doors closed,check that the doors
are aligned horizontally and vertically and
that the seal is closed on all sides before finally
tightening the bottom hinge.Re-adjust the
levelling feet as needed.
10.
8.
9.
13
11
9. Put the two covers back on the top of the freezer making sure the larger hinge
cover goes on the hinge on the left-hand side. See Figure 10.
11.Put the hinge cover and the screw cover
back.
12.With the doors closed,check that the doors
are aligned horizontally and vertically and
that the seal is closed on all sides before finally
tightening the bottom hinge.Re-adjust the
levelling feet as needed.
10.
8.
9.
13
10. Detach the door gasket, rotate 180 degrees and reattach it. See Figure 11.
12
Installing the Door Handle
To attach the door handle to the door edge that opens:
1. Remove the two screws and two screw plugs from the door.
2. Align the holes on the door with those on the handle and insert two screws and
secure into place. Press the two caps over the heads of the screw.
3. Insert the two screw plugs onto the opposite side of the door.
5/ USE
FIRST USE
Cleaning the Interior
Before using the appliance for the rst time, wash the interior and all internal
accessories with lukewarm water and a mild soap. Dry thoroughly. This will clear the
typical smell of a brand-new product.
IMPORTANT! Do not use detergents or abrasive cleaning materials as these will
damage the nish.
Temperature Setting
IMPORTANT! If the appliance has been moved, wait at least four hours for uids
inside to balance before plugging it in and turning it on.
■Plug in your appliance.
■The internal temperature is controlled by a thermostat. There are three settings:
MIN, NORMAL and MAX (see Figure 12). MIN is the warmest temperature and
MAX is the coldest temperature setting.
12

■The appliance may not operate at the correct temperature if it is in a particularly
hot location or if you open the door frequently.
■When starting up your appliance after a period of time when it has not been used,
turn the settings up to MAX and wait approximately two hours before lling the
freezer with food. Then set the thermostat to the setting that suits your current
climate.
IMPORTANT! In the event of accidental defrosting, for example due to a power
failure, if the power has been o for longer than 7.5 hours, the defrosted food must
be eaten quickly, or if raw, cooked and then re-frozen (after cooling).
Recommended Temperature Settings
The freezer’s temperature is controlled by the Thermostat knob. There are seven
settings (1 2 3 4 5 6 7). Set the Thermostat knob according to the required
temperature.
Environment Temperature Thermostat Setting
Summer
Normal
Winter
■Using the recommended settings, the maximum storage time for any food
product is one month.
■The storage time may be less if the recommended setting is not used.
Note:
■You will hear a noise as the compressor starts up. The liquid and gases sealed
within the freezer system may also give rise to noise, whether the compressor is
running or not, which is quite normal.
■If you nd the freezer door dicult to open just after you have closed it, don’t
worry. This is due to the pressure dierence which will equalize and allow the
door to open normally after a few minutes.
13
DAILY FOOD STORAGE
Place dierent foods in dierent compartments according to the recommendations
below.
Freezer Compartment Type of Food
Top shelves Ice-cream, frozen fruit or frozen pre-cooked foods.
Middle shelves Frozen vegetables or chips.
Bottom shelves Raw meat (beef, lamb, pork, poultry and sh).
Freezing Fresh Food
■The freezer is suitable for freezing fresh food and storing frozen and deep-frozen
food for a long time.
■Place fresh food to be frozen in the bottom compartment.
■Check the rating plate for the maximum amount of food that can be frozen in 24
hours.
■The freezing process lasts 24 hours. Do not add other food during this time.
Thawing
■Frozen food can be thawed in the fridge or at room temperature, depending on
the time you have.
■Some smaller foods can be cooked straight from the freezer, but they may require
additional cooking time.
Ice cubes
This appliance may be equipped with one or more trays for making ice cubes.
HELPFUL HINTS AND TIPS
To help you make the most out of your freezer and frozen foods, follow these useful
frozen food and energy saving tips.
Hints for Frozen Food
■Only freeze top quality, fresh and thoroughly cleaned foods.
■Store food in small portions for quick and thorough defrosting and reduce waste.
■Wrap food in aluminium foil or plastic ensuring it is airtight.
■Do not allow fresh, unfrozen food to touch frozen food as this may cause a
temperature rise in the latter.
■Ice or frozen water-based products, if consumed immediately after removal from
the freezer compartment, can cause the skin to be freeze burnt.
■Lean foods store better and for longer than fatty foods.
■Salt reduces the storage life of food.
■Position the frozen food so that the use by date is visible on each packet when
you open the door.
■Transfer purchased frozen goods to your freezer as quickly as possible.
14

■Do not open the door frequently or leave it open for longer than necessary.
■Once defrosted, food deteriorates rapidly and should not be refrozen.
■Do not exceed the storage period indicated by the food manufacturer.
Hints for Energy Saving
■Do not put hot food in the appliance.
■If the electricity goes out, do not open the appliance door.
■Do not open the door frequently or leave it open for extended periods.
■Do not set the thermostat to exceedingly cold temperatures.
6/ CLEANING AND CARE
WARNING! Before performing any maintenance on the appliance, switch o the
appliance and disconnect the mains plug from the mains socket.
IMPORTANT!
■Any electrical work required during the servicing of the appliance should be
carried out by a qualied electrician or competent person.
■This product must be serviced by an authorised Service Centre and only genuine
spare parts may be used.
DEFROSTING AND CLEANING THE FREEZER
CAUTION! Do not clean the appliance while it is connected to the mains.There is the
danger of electrical shock! Before cleaning, switch o the appliance and unplug it
from the mains. Alternatively, switch o the circuit breaker or remove the fuse. Never
clean the appliance with a steam cleaner. Moisture could accumulate in electrical
components presenting a danger of electrical shock! Hot vapours can damage the
plastic components of the appliance. The appliance must be completely dry before
it is used again.
IMPORTANT! Ethereal oils and organic solvents can damage plastic parts. Do not use
additives such as lemon juice or the juice from orange peel, butyric acid, or a cleanser
that contains acetic acid. Do not use any abrasive cleansers.
WARNING! Do not use metal or sharp objects to clean the appliance or remove ice.
Use a plastic scraper.
For hygiene reasons, regularly clean the interior. Over time, ice and frost will build-up
in the freezer. When the build-up is quite thick you should remove it.
1. Remove the food from the appliance, wrap it in newspaper and store it in a cool,
dry place.
2. Switch the appliance o and remove the plug from the mains. Alternatively,
switch o the circuit breaker or unscrew the fuse.
3. Wedge the door open. Place an old towel on the oor and put a shallow container
on top to help catch the icicles and water.
4. When the ice begins to soften, use a plastic scraper to dislodge and remove the
larger pieces of ice.
5. When all the ice has been removed, clean the appliance with a soft cloth and
lukewarm water. After cleaning, wipe down with a clean, dry cloth until the
interior is thoroughly dry.
6. Annually, carefully remove dust from the condenser with a soft brush.
7. After everything is dry, connect the appliance to the mains.
15
STORAGE
If the appliance is left empty for long periods of time, switch it o, defrost, clean, and
dry it. Leave the door open to prevent mould from developing inside the appliance.
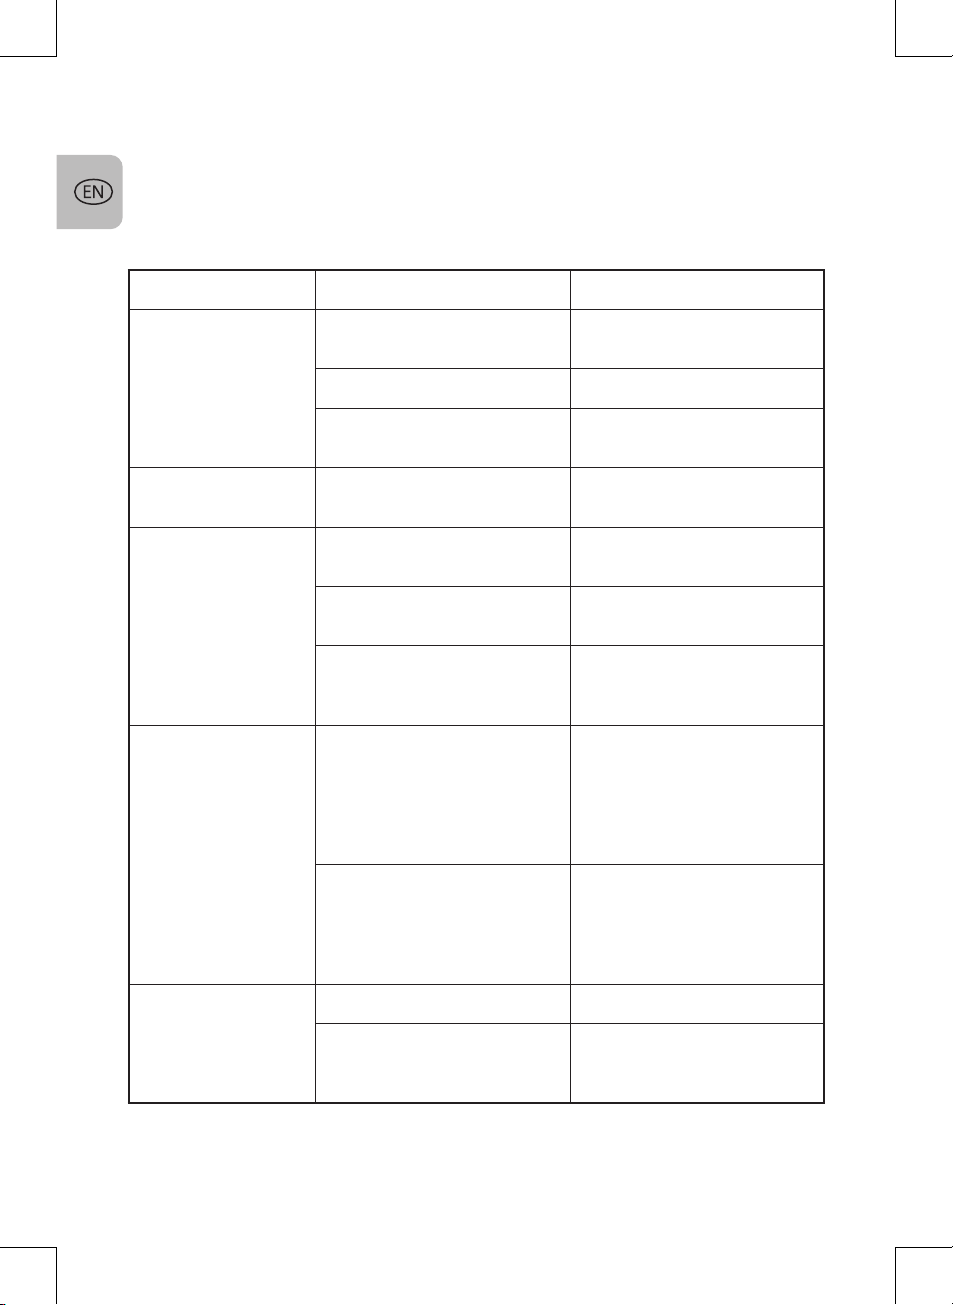
TROUBLESHOOTING
Problem Possible Cause Solution
Appliance does
not work. Mains plug is not plugged
in or it is loose. Insert the plug correctly.
Fuse has blown. Check and replace the fuse.
Socket is defective. Ask an electrician to x the
socket.
Appliance freezes
too much. The temperature setting it
too cold. Turn the temperature to a
warmer setting.
The food is
insuciently
frozen.
Incorrect temperature. Turn the temperature to a
colder setting.
Door left open for an
extended time. Do not leave the door open
unnecessarily.
A large amount of
unfrozen food was inserted
in the last 24 hours.
Temporarily use a colder
temperature.
Heavy build-up of
frost on the door. Door seal is not airtight. Warm the leaking sections
of the seal with a hair dryer
(on a cool setting) and
mould them by hand until
they sit correctly.
The appliance is too near
to a heat source. Check the guidelines
advised in the Installation/
Location section and
move the appliance away
from the heat source.
Unusual noises Appliance is not level. Adjust the feet.
Appliance is touching
the wall, a pipe or other
objects.
Move the appliance or pipe
slightly.
16

7/ WARRANTY AND LIMITATION OF LIABILITY
This product is guaranteed for a period of 12 to 24 months (as dened by local
legislation, with the period as per the till receipt) from the date of purchase, against
any fault resulting from a defect in materials or manufacturing.
This warranty does not cover damages caused by improper use or normal wear and
tear of the product.
Specically, the warranty does not cover:
- Damage or problems caused by improper use, an accident, an alteration or power
supply of unsuitable current or voltage.
- Modied products, or those whose warranty seal or serial number is damaged,
altered, removed or oxidised.
- Replaceable batteries and accessories are guaranteed for a 6-month period.
- Battery failure, caused by excessively lengthy charging or by the failure to observe
the safety precautions explained in the manual.
- Visual damage, including scratches, dents or any other elements.
- Damage caused by any intervention conducted by a non-accredited person.
- Defects caused by normal wear and tear or due to normal ageing of the product.
- Software updates, due to a change in network settings.
- Product failures due to the use of third-party software to modify, change or adapt
the existing software.
- Product failures due to the use of accessories that have not been approved by the
manufacturer.
- Oxidised products.
The manufacturer cannot, under any circumstances, be held responsible for the loss
of data stored on the disc. Likewise, the manufacturer is not obliged to verify that
SIM/SD cards are properly removed from returned products.
Repaired or replaced products may include new and/or reconditioned components
and equipment.
METHODS FOR INVOKING THE WARRANTY
To obtain a warranty service, please bring your product to your point of sale’s
welcome desk along with your proof of purchase (till receipt, bill, etc.), the product
and the accessories provided, along with its original packaging.
It is important to have the following information: date of purchase, model, and serial
or IMEI number (this information generally appears on the product, packaging or
your proof of purchase).
Failing that, you must bring back the product along with the accessories required for
it to operate properly (power supply, adapter, etc.).
In the event that your claim is covered by the warranty, the customer service
department may, within the limits of local legislation, either:
- Repair or replace the defective components.
- Exchange the returned product for a product that has at least the same functions
and that is equivalent in terms of performance.
- Reimburse the product at the price of purchase of the product as indicated on the
proof of purchase.
If one of these 3 solutions is used, this does not entitle the purchaser to an extension
or renewal of the warranty period.
17

1/ CONSIGNES DE SÉCURITÉ
Avant d’utiliser cet appareil électrique, lisez attentivement
les instructions ci-dessous. Gardez-les pour pouvoir vous
y référer ultérieurement et donnez-les à tout propriétaire
ultérieur de ce produit:
1. Cet appareil peut être utilisé par des enfants âgés d'au
moins 8 ans et par des personnes ayant des capacités
physiques, sensorielles ou mentales réduites ou dénuées
d’expérience ou de connaissance, si elles sont correctement
surveillées ou si des instructions relatives à l'utilisation de
l'appareil en toute sécurité leur ont été données et si les
risques encourus ont été appréhendés. Les enfants entre
3 et 8 ans sont autorisés à mettre des aliments dans le
réfrigérateur et à les en ressortir.
2. Les enfants ne doivent pas jouer avec l’appareil.
3. Le nettoyage et l’entretien ne doivent pas être eectués
par des enfants sans surveillance.
4. Gardez tous les matériaux d’emballage à bonne distance
des enfants. Risque d’étouement!
5. AVERTISSEMENT : Veillez à ce que les ouvertures de
ventilation dans l'enceinte de l'appareil ou dans la structure
intégrée restent bien dégagées.
6. AVERTISSEMENT! N'utilisez pas d'appareils mécaniques
ou d'autres moyens pour accélérer le processus de dégivrage
autres que ceux recommandés par le fabricant.
TABLE DES MATIÈRES
1/CONSIGNES DE SÉCURITÉ ___________________________ P. 18
2/SPÉCIFICATIONS TECHNIQUES _______________________ P. 23
3/DESCRIPTION DU PRODUIT __________________________ P. 23
4/ AVANT LA PREMIÈRE UTILISATION ___________________ P. 23
5/UTILISATION _______________________________________ P. 28
6/NETTOYAGE ET ENTRETIEN __________________________ P. 31
7/GARANTIE ET LIMITES DE RESPONSABILITÉ____________ P. 33
18

7. AVERTISSEMENT ! N’endommagez pas le circuit
frigorique.
8. AVERTISSEMENT : Lorsque vous placez l’appareil,
veillez à ce que le câble d’alimentation ne soit pas coincé ni
endommagé.
9. AVERTISSEMENT ! Ne placez pas plusieurs prises de
courant portables ou blocs d’alimentation électriques
portables derrière l’appareil.
10. Ne conservez pas de substances explosives (ex: bombes
aérosols à gaz propulseur inammable) dans cet appareil.
11. Pendant l’installation et le transport de l’appareil, veillez
à ce qu’aucun des composants du circuit frigorique ne soit
endommagé.
– Évitez les ammes nues et les sources d’allumage
– Veillez à ce que la pièce où se trouve l’appareil soit
susamment aérée.
12. Il est dangereux d’essayer de changer les spécications
de l’appareil ou de le modier de quelque manière que ce
soit.
13. AVERTISSEMENT ! Tout dommage du cordon
d’alimentation peut être à l’origine d’un court-circuit, d’un
incendie et/ou d’un choc électrique.
14. Cet appareil est conçu uniquement pour une utilisation
domestique ou similaire, comme dans:
– Espace cuisine du personnel de magasins, bureaux et
autres environnements professionnels;
– Hôtels, motels et autres environnements à caractère
résidentiel;
– Environnements de type chambres d’hôtes.
– Applications de restauration et applications similaires
hors vente au détail.
15. AVERTISSEMENT ! Tous les composants électriques
(cordon, prise mâle et compresseur) doivent être remplacés
par un réparateur certié ou un professionnel dûment
19

qualié.
16. Le cordon ne doit pas être branché via une rallonge.
17. Veillez à ce que la prise mâle ne soit pas endommagée
ou écrasée derrière l’appareil. Une prise mâle écrasée ou
endommagée est susceptible de surchauer et de provoquer
un incendie.
18. La prise doit rester facilement accessible en permanence.
19. Ne tirez pas sur le cordon d’alimentation.
20. Si la prise de courant est décollée, ne l’utilisez pas pour
brancher l’appareil. Risque d’incendie ou de choc électrique!
21. Cet appareil est lourd. Faites attention lorsque vous le
déplacez.
22. N’essayez pas de toucher ou d’enlever des aliments
congelés du congélateur si vos mains sont mouillées ou
moites, vous risqueriez des abrasions cutanées ou des
brûlures de congélation.
23. Cet appareil ne doit pas rester longtemps exposé
directement à la lumière du soleil.
24. Les pièces en plastique de l’appareil ne doivent pas être
exposées à la chaleur.
25. Ne recongelez jamais des aliments décongelés.
26. Stockez les aliments congelés préemballés en respectant
les instructions de leur fabricant.
27. Les recommandations de stockage du fabricant de
l’appareil doivent être scrupuleusement respectées. Référez-
vous aux instructions pertinentes.
28. Ne mettez pas de boissons gazeuses ou pétillantes
dans le congélateur, car elles se dilateraient en congelant et
risqueraient d’éclater et d’endommager l’appareil.
29. Les glaces peuvent provoquer des brûlures dues au froid
si elles sont consommées juste après avoir été sorties de
l’appareil.
30. An d’éviter toute contamination des aliments, respectez
les instructions ci-dessous:
– Ouvrir la porte pendant une durée prolongée peut
20
This manual suits for next models
1
Table of contents
Languages:
Other Selecline Freezer manuals

 User manual")


 User manual")


